Hang Grow Lights: How to Install and Adjust Your Grow Lights for Optimal Coverage and Intensity
Looking to give your plants the VIP treatment they deserve? Hang on tight because we’re about to shed some light on how to install and tweak your grow lights for the ultimate green thumb success story. Did you know that proper lighting can make or break your indoor gardening game?
Whether you’re nurturing herbs, veggies, or a jungle of houseplants, getting the hang of your grow lights is key to ensuring they thrive. In this guide, we’ll walk you through the ins and outs of installation and adjustment, ensuring your plants bask in the perfect glow every time. Get ready to elevate your indoor gardening prowess and watch your greenery flourish like never before!
Table of Contents
Understanding the Importance of Proper Grow Light Installation
Proper grow light installation is a crucial aspect of indoor gardening that should not be overlooked. The importance of this cannot be stressed enough, as it directly affects the growth and development of your plants. By providing the right amount of light, you are essentially giving your plants the energy they need to thrive and produce an abundant harvest.
- Mimicking Natural Sunlight:
- Importance: Proper grow light installation mimics natural sunlight.
- Indoor Environments: In indoor settings where sunlight is limited or unavailable, grow lights act as a substitute.
- Photosynthesis: Grow lights provide the necessary light spectrum for photosynthesis, allowing plants to carry out metabolic processes effectively.
- Maximizing Space Utilization:
- Strategic Positioning: Properly position grow lights to ensure even coverage across all plant parts.
- Preventing Overshadowing: Strategic placement prevents areas from being overshadowed, promoting uniform growth.
- Space Efficiency: Especially crucial in limited spaces to maximize yield and quality.
Remember, well-installed grow lights are essential for healthy plant growth and optimal yields in hydroponic systems! 🌱🪴💡
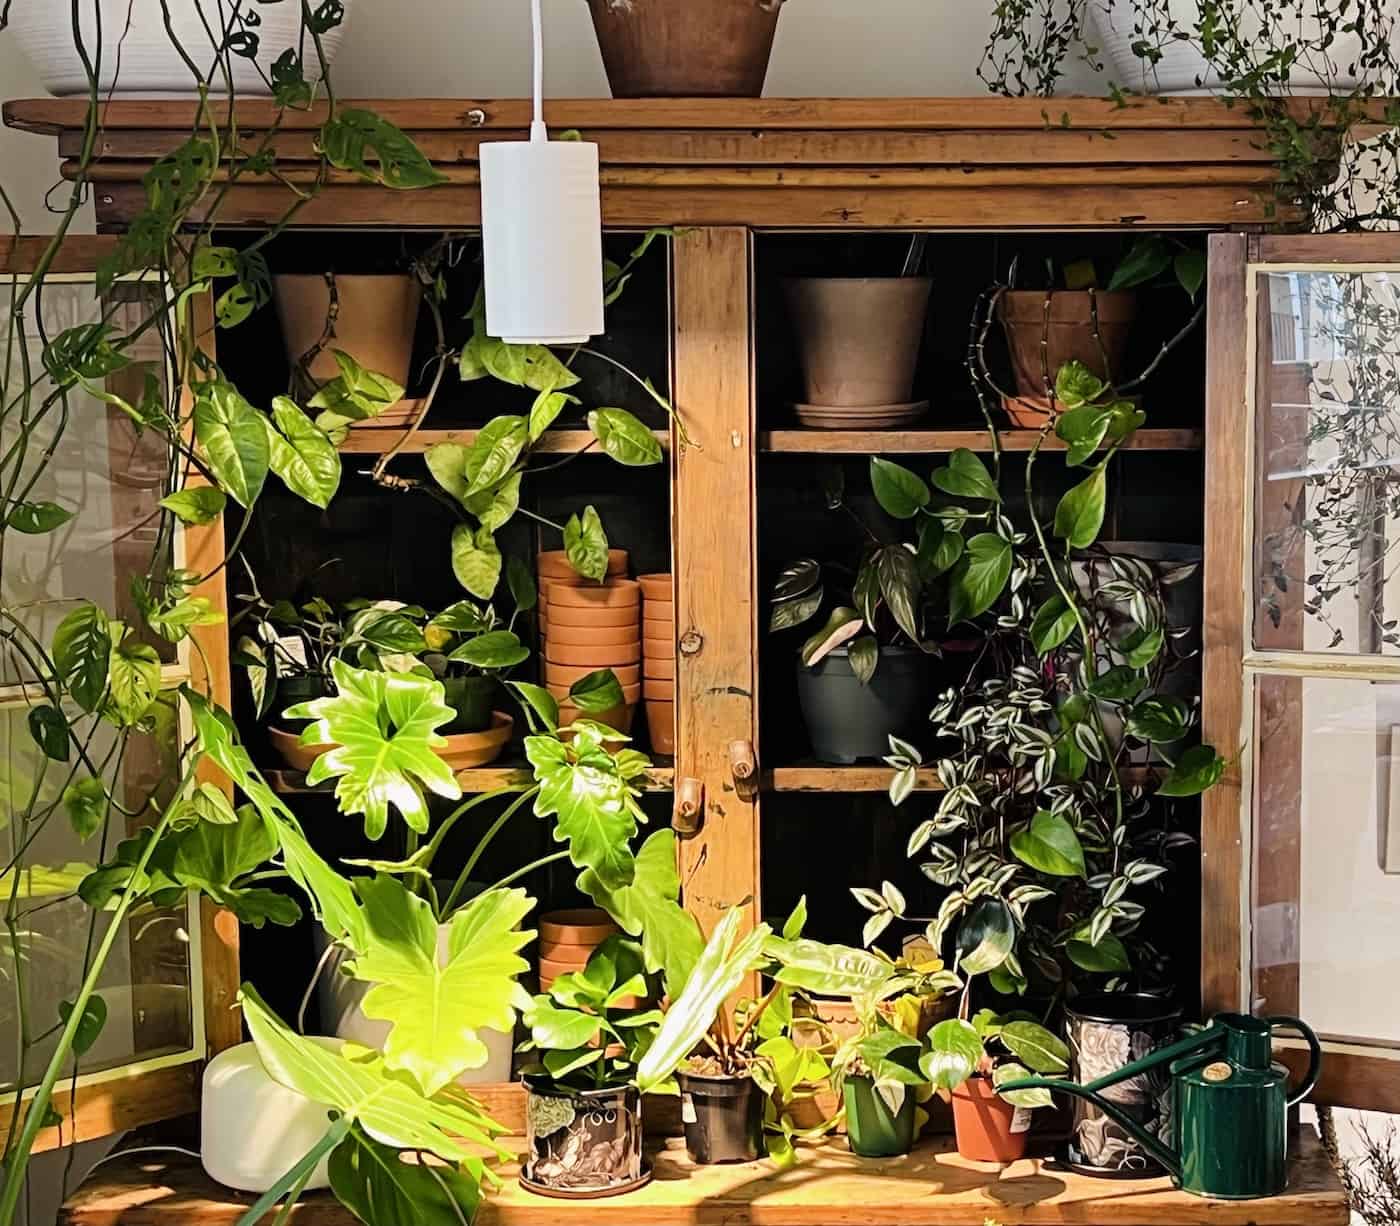
Assessing Your Grow Space: Determining the Ideal Placement for Grow Lights
When it comes to installing grow lights in your indoor garden, assessing your grow space and determining the ideal placement is crucial. Proper placement of grow lights is essential for ensuring optimal light distribution and coverage for your plants.

- Measure the dimensions of your garden area to determine available space.
- Consider the height of your grow space, to ensure proper distance for hanging lights.
- Calculate the number and size of grow lights needed based on garden size.
- Choose between hanging lights directly above the plants or positioning them at an angle for wider coverage.
- Aim for uniform light intensity across all plants in the grow space.
By carefully assessing your grow space and determining the ideal placement for your grow lights, you can create an optimal environment for your plants to thrive.
I used the MARS HYDRO LED grow light for my indoor hydroponic garden, and it exceeded my expectations. The full spectrum light provided excellent coverage and intensity, promoting robust growth in my lettuce and herbs. Its energy efficiency helped keep my electricity bills manageable, and the sturdy build quality ensured reliable performance. The adjustable settings allowed me to tailor the light to different growth stages, resulting in healthy, vibrant plants. Overall, this grow light is a fantastic investment for any indoor gardener looking to maximize their plant yield and quality.

- Full Spectrum Light: The MARS HYDRO TS 1000W LED Grow Light provides a full spectrum of light, mimicking natural sunlight, which is ideal for all stages of plant growth from seedling to flowering.
- High Efficiency: This grow light is energy-efficient, using only 150W while delivering the equivalent output of a 1000W HPS light, resulting in lower electricity bills.
- High PAR Output: The light has a high PAR (Photosynthetically Active Radiation) output, ensuring optimal plant growth and yield.
- Dimmable Feature: The dimmable feature allows for adjustable light intensity, giving you control over the light exposure as your plants grow.
- Quiet Operation: It operates silently, without noisy fans, thanks to its excellent heat dissipation design.
- Easy Installation: The light is easy to set up and comes with all the necessary hanging equipment.
- Heat Generation: While it has good heat dissipation, the light can still produce a significant amount of heat, which might require additional cooling in small or poorly ventilated spaces.
- Coverage Area: The coverage area is somewhat limited, making it more suitable for smaller grow spaces or for use in multiples in larger setups.
- Price: It is relatively expensive compared to some other LED grow lights, which might be a consideration for budget-conscious growers.
- No Built-in Timer: Unlike some other models, it does not come with a built-in timer, so you’ll need to purchase and set up a separate timer for automated light cycles.
Choosing the Right Hanging Method for Your Grow Lights
When it comes to choosing the right hanging method for your grow lights, there are several factors to consider.
- Weight Capacity: Ensure that the hanging method can safely support the weight of your lights. Depending on the size and weight of your grow lights, heavy-duty hooks or a pulley system may be necessary.
- Stability: Choose a method that securely holds the lights in place. You don’t want them accidentally falling or becoming unstable.
- Adjustability: As your plants grow, you’ll need to adjust the height of the lights. Opt for adjustable chains, ropes, or retractable pulley systems to make height changes easy.
By selecting a hanging method that offers adjustability, you can easily adapt to the changing needs of your plants throughout their growth cycle.
Ensuring Safety: Properly Securing Your Grow Lights
Properly securing your grow lights is crucial for maintaining a safe and efficient growing environment. It not only ensures the stability of the lights but also minimizes the risk of accidents or damage to your plants. There are a few key considerations to keep in mind when securing your grow lights.

- Consider factors such as grow light type, grow space size, and light weight when choosing a hanging method.
- Common hanging options include rope ratchets, light hangers, or adjustable pulleys.
- Ensure the chosen method provides a secure and stable attachment point for the lights.
- Use high-quality hardware and materials, such as durable hooks, chains, or cables.
- Regularly inspect components for wear or damage, replacing them as needed to maintain setup integrity.
Remember, the safety of your grow lights is directly tied to the safety of your plants and yourself. By taking the time to properly secure your grow lights, you can create a stable and secure environment for your plants to thrive.
Selecting the Appropriate Distance Between Grow Lights and Plants
When it comes to growing plants indoors, understanding the appropriate distance between grow lights and plants is crucial for their health and development. The distance at which you place your grow lights can have a significant impact on the intensity and coverage of light your plants receive.

- LED Lights: For LED lights, the ideal distance from plants can vary based on their power and light intensity. Generally, it ranges from 12 to 24 inches. Refer to the manufacturer’s guidelines for specific recommendations.
- HID Lights: High-intensity discharge (HID) lights typically need to be placed 18 to 36 inches away from plants, depending on the wattage of the light.
- CFL Lights: Compact fluorescent lights (CFLs) emit less heat and can be positioned closer to plants, usually between 4 to 12 inches.
Remember that these distances are approximate, and factors like plant type, light intensity, and growth stage also influence the optimal placement. Consulting experts or referring to specific guidelines for your setup is advisable! 🌱💡
I recently purchased the SunBlaster CFL Grow Lights for my indoor plants, and I must say, I’m impressed. These compact lights emit a bright and efficient spectrum, perfect for promoting healthy plant growth. The energy-efficient design is a definite plus, as it helps keep my electricity bills in check. However, I did notice that they can get a bit warm after prolonged use, so it’s essential to monitor them closely. Overall, I’m satisfied with their performance and would recommend them to any indoor gardener looking for reliable lighting solutions.
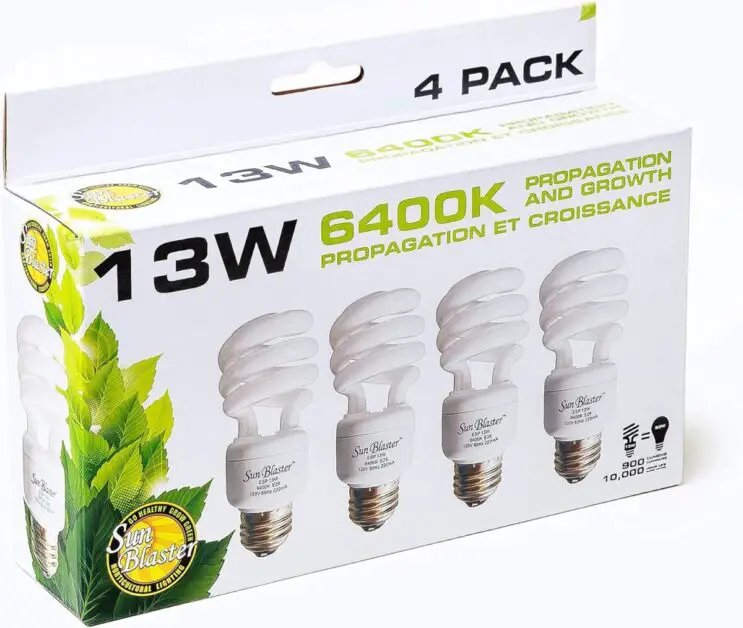
✅ Compact Design: Ideal for small indoor gardens or grow tents.
✅ Full Spectrum Light: Provides the necessary light spectrum for all stages of plant growth.
✅ Affordable: Lower initial cost compared to many LED grow lights.
✅ Easy Installation: Simple to set up with standard sockets.
❌ Shorter Lifespan: CFL bulbs generally have a shorter lifespan compared to LEDs.
❌ Heat Production: Generates more heat than LED lights, which may require additional cooling.
❌ Fragility: CFL bulbs are more prone to breaking compared to more robust LED lights.
❌ Limited Coverage: Best for smaller growing areas, not ideal for extensive setups.
Adjusting the Height of Your Grow Lights for Optimal Coverage
Proper adjustment of the height of your grow lights is crucial for achieving optimal coverage and promoting healthy plant growth. When positioning your lights, it is important to consider both the type of plants you are growing and the specific growth stage they are in.
- Positioning for Seedlings and Young Plants:
- Start by placing the grow lights closer to the seedlings and young plants to ensure they receive sufficient light for photosynthesis and promote strong, compact growth.
- This proximity helps in providing adequate light intensity for optimal development during the early stages.
- Gradual Elevation for Mature Plants:
- As the plants mature, gradually raise the lights to provide ample vertical space.
- This prevents the risk of light burn and allows for proper airflow, supporting healthier growth as the plants develop.
- Consider Manufacturer Recommendations and Plant Needs:
- Refer to the recommended hanging distance provided by the grow lights manufacturer.
- Take into account the specific light requirements of your plant species, as each may have unique needs for optimal growth.
- Adjust Height for Balanced Coverage:
- Utilize a hanging method that allows for easy adjustability, such as chains or retractable pulleys.
- This facilitates fine-tuning of the height and position of the lights to ensure uniform light distribution and minimize shadows.
- Monitor and Make Adjustments:
- Continuously monitor your plants’ response to the light and make adjustments to the height as needed.
- By observing their growth patterns, you can optimize the coverage to support healthy development and maximize yields.
Maximizing Light Distribution: Angling and Positioning Your Grow Lights
To maximize light distribution in your grow space, proper angling and positioning of your grow lights is crucial. By strategically placing your lights, you can ensure that every plant receives an adequate amount of light, leading to optimal growth and production.
Evaluate the specific lighting requirements of the plants you are cultivating.
Differentiate between plants that need direct light versus those thriving in diffused light.
Angle grow lights according to the specific needs of your plants.
For example, leafy greens benefit from lights angled directly overhead, while flowering plants may require lights positioned at a slight angle to penetrate deeper into the canopy.
Take into consideration the height of your plants and adjust light positioning accordingly.
Lower lights as plants grow to maintain consistent light distribution throughout their height.
Lowering lights as plants grow helps prevent stretching and encourages bushier, more compact growth.
This promotes healthier plants with increased flower or fruit production.
Continuously monitor plant growth and adjust light angles and positions as needed.
Regular adjustments ensure that plants receive optimal light for vigorous and healthy growth.
Properly angling and positioning grow lights is crucial for maximizing light distribution in your grow space.
By understanding your plants’ lighting needs and making appropriate adjustments, you can ensure optimal growth and harvest yields.
Stay tuned for more tips on optimizing your grow light installation to achieve the best results in your indoor garden.
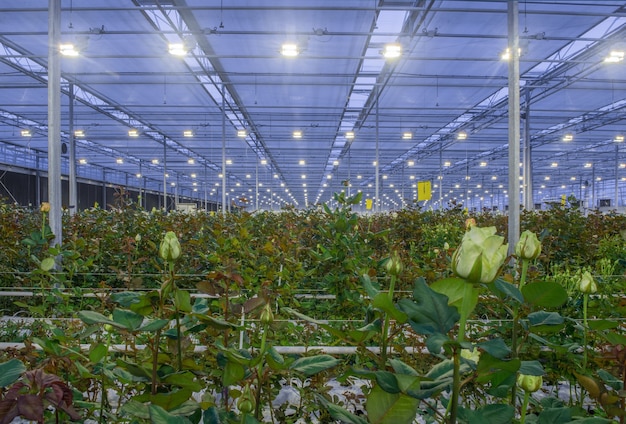
Achieving Uniform Light Intensity: Spacing and Arrangement of Multiple Grow Lights
Spacing and arrangement of multiple grow lights play a crucial role in achieving uniform light intensity for optimal plant growth.
- Consider Plant Types and Light Requirements:
- Evaluate the types of plants being grown and their specific light requirements.
- Different plant species may need varying light intensities for optimal growth.
- Equal Distance Placement:
- Aim to place grow lights at equal distances from each other across the grow space.
- This ensures uniform light distribution and helps minimize shadows or dark spots that could impede plant growth.
- Arrangement for Uniform Light Intensity:
- Choose an arrangement for multiple grow lights that promotes even light distribution.
- Options include arranging lights in a grid pattern or staggered formation.
- Grid Pattern:
- Arrange grow lights in a grid pattern across the grow space.
- This layout ensures that light is evenly distributed and covers the entire area effectively.
- Staggered Formation:
- Alternatively, arrange the lights in a staggered formation to maximize coverage and penetration of light.
- This arrangement helps reduce the likelihood of plants receiving insufficient light, promoting healthier growth and development.
By optimizing the spacing and arrangement of multiple grow lights, gardeners can create an environment that promotes consistent and balanced lighting, enabling their plants to thrive and flourish.
Overcoming Obstacles: Dealing with Shadows and Light Blockage
Shadows and light blockage can pose significant challenges to indoor gardeners. When plants are deprived of essential light, their growth and development can be hindered. To overcome these obstacles, there are several strategies that can be employed.
- Strategically Place Reflective Materials:
- Position mirrors or reflective sheets strategically around the grow area to bounce light back onto the plants.
- This minimizes the impact of shadows and ensures more uniform light distribution.
- Utilize White Surfaces for Diffusion:
- Use white walls or surfaces to help diffuse light and spread it evenly throughout the space.
- White surfaces help prevent light from being absorbed, maximizing its effectiveness for plant growth.
- Supplemental Lighting for Problem Areas:
- Identify areas experiencing shadows or light blockage within the grow space.
- Strategically place additional grow lights in these problem areas to supplement existing lighting.
- Compensate for Shadows with Supplementary Lights:
- Supplemental lighting compensates for shadows or light blockage, ensuring all plants receive adequate light.
- This is especially beneficial for plants near walls or large objects that cast shadows.
- Careful Planning and Consideration:
- Overcoming obstacles like shadows and light blockage requires thoughtful planning.
- By employing reflective materials and supplemental lighting strategically, indoor gardeners can optimize light distribution for healthy plant growth.
By implementing smart strategies, you can overcome these challenges and create an optimal growing environment for your plants.
Understanding Light Intensity and Its Effects on Plant Growth
Light intensity plays a crucial role in the growth and development of plants.

- Photosynthesis and Light Intensity: Plants require a visible spectrum of light ranging from 380 to 700 nanometers for photosynthesis. This range is known as photosynthetically active radiation (PAR). Violet and blue light waves (around 400 to 490nm) are essential for vegetative growth, while red light (between 580 to 700nm) supports reproductive growth.
- Light Intensity Levels:
- High-Light Plants: These need at least 60,000 lux (full-sun conditions).
- Medium-Light Plants: Require at least 35,000 lux (partial sun).
- Low-Light Plants: Need at least 15,000 lux (partial shade).
- Very Low-Light Plants: Thrive with around 1000 to 5000 lux or less (heavy shade) .
- Consult Light Intensity Charts: To determine the ideal light intensity for specific plants, refer to light intensity charts or seek advice from plant specialists. Matching your plants’ needs with the right light level ensures healthy growth and productivity! 🌱💡
In the next section, we will discuss practical ways to adjust light intensity for different stages of plant growth, including seedling, vegetative, and flowering stages. Additionally, we will explore the role of light spectrum in plant growth and the importance of providing the right balance of colors within the visible light range. Understanding and managing light intensity is a key aspect of successful indoor gardening, and with the right knowledge and tools, you can create an optimal environment for your plants to flourish.
Adjusting Light Intensity for Different Stages of Plant Growth
Light intensity is a crucial factor to consider when adjusting grow lights for different stages of plant growth. It is essential to understand that plants have varying light requirements throughout their life cycle, and providing the right intensity at each stage is instrumental in promoting optimal growth and development.
- Low Light Intensity for Germination and Seedlings:
- During germination and the seedling stage, maintain relatively low light intensity.
- This prevents heat stress and ensures young plants receive sufficient light without overwhelming them.
- Aim for a light intensity of around 50-100 micromoles per square meter per second (µmol/m²/s) to support healthy seedling growth.
- Gradual Increase for Vegetative Stage:
- Transition to higher light intensity as plants enter the vegetative stage.
- Gradually increase light intensity to around 200-400 µmol/m²/s to promote lush foliage and sturdy stems.
- This mimics the intensity of summer sunlight, fostering vigorous vegetative growth.
- Optimizing Growth with Adjusted Light Intensity:
- Adjust light intensity according to the specific needs of each growth stage.
- By tailoring light intensity, optimize plant growth, enhance crop yield, and maximize overall plant health and vitality.
- Regular Monitoring and Adjustment:
- Monitor light intensity regularly throughout the growth cycle.
- Make adjustments as necessary to ensure plants receive the optimal amount of light for each stage of their development.
- Achieving Optimal Plant Growth:
- By carefully managing light intensity at different growth stages, gardeners can achieve optimal plant growth and maximize harvest yields.
- Regular monitoring and adjustment are essential to ensure plants receive the right amount of light for healthy and vigorous growth.
Troubleshooting: Common Issues and Solutions with Grow Light Installation
When it comes to installing grow lights, there can be a range of issues that arise.
flickering lights or even electrical hazards
One common issue is improper wiring, which can lead to flickering lights or even electrical hazards. To solve this problem, it is essential to ensure that all wiring connections are secure and done according to the manufacturer’s guidelines. It is also crucial to use the correct type and gauge of wire for the installation.
inadequate light coverage
Another issue that gardeners may face is inadequate light coverage. This can occur if the grow lights are spaced too far apart or placed too high above the plants. To address this problem, it is important to determine the appropriate number and placement of grow lights based on the size of the grow space and the light requirements of the plants being grown. Additionally, adjusting the height and angle of the lights can help ensure uniform light distribution and optimal coverage for the plants.
| Grow Light Installation: Common Issues and Solutions | Common Issues | Solutions |
|---|---|---|
| 1. Insufficient Light Intensity | – Leggy Growth: Plants stretching towards light sources. | – Adjust Light Height: Lower lights for more intensity or add supplementary lighting. |
| – Poor Flowering: Inadequate light for flowering and fruiting. | – Increase Wattage: Consider higher wattage or additional light fixtures. | |
| 2. Uneven Light Distribution | – Uneven Growth: Some plants receiving more light than others. | – Reposition Lights: Adjust light placement to ensure uniform coverage. |
| – Dark Corners: Shadowed areas with limited light penetration. | – Use Reflectors: Install reflectors to redirect light to darker areas. | |
| 3. Overheating Lights | – Burnt or Yellow Leaves: Excessive heat damaging plant foliage. | – Ventilation: Improve air circulation and consider adding fans. |
| – Reduced Lifespan: Overheating shortening the life of bulbs. | – Cooling Systems: Install cooling systems like exhaust fans or heat sinks. | |
| 4. Inadequate Light Spectrum | – Leggy Growth or Pale Leaves: Lack of specific light wavelengths. | – Use Full Spectrum Lights: Choose lights with a balanced spectrum suitable for all growth stages. |
| – Poor Flowering: Insufficient light in the flowering spectrum. | – Supplement with Flowering Lights: Add lights designed for flowering plants. | |
| 5. Incorrect Light Duration (Photoperiod) | – Flowering Issues: Plants not transitioning to the flowering stage. | – Adjust Photoperiod: Ensure the correct duration of light and dark periods for each growth stage. |
| – Bolting or Early Flowering: Incorrect light signals triggering flowering prematurely. | – Control Photoperiod: Maintain consistent light schedules to avoid stress-induced flowering. | |
| 6. Electrical Issues | – Flickering Lights: Lights flickering or not turning on. | – Check Wiring: Inspect wiring connections and power sources. |
| – Uneven Light Output: Parts of the light not functioning. | – Replace Bulbs or Fixtures: Replace malfunctioning components promptly. | |
| 7. Poor Light Penetration | – Sparse Growth in Lower Canopy: Insufficient light reaching lower leaves. | – Use LST (Low-Stress Training): Train plants to optimize light exposure to lower parts. |
| – Sparse Growth in Dense Canopy: Overcrowded plants blocking light to others. | – Pruning and Thinning: Prune and thin out dense foliage to allow light penetration. |
Remember, troubleshooting common issues with grow light installation requires careful attention to detail and adherence to safety guidelines. By addressing wiring concerns and optimizing light coverage, you can ensure that your plants receive the appropriate lighting for healthy growth and productivity.
Maintenance and Upkeep: Cleaning and Replacing Bulbs for Optimal Performance
Regular maintenance and upkeep are crucial for ensuring the optimal performance of grow lights in your indoor garden. Cleaning and replacing bulbs on a regular basis can help maintain the quality and effectiveness of the light source, resulting in healthier and more productive plants.
- Turn Off Power: Before cleaning, turn off the power to the grow lights and allow the bulbs to cool down.
- Gentle Cleaning: Use a soft, lint-free cloth to gently wipe the surface of the bulbs. Remove any dust or dirt that may have accumulated. Avoid harsh chemicals or abrasive materials to prevent damage.
- Inspect for Wear or Damage: Regularly check the bulbs for signs of wear, cracks, or discoloration. If you notice any issues, consider replacing the bulbs promptly.
- Lifespan and Replacement: Most grow light bulbs have a lifespan of 6,000 to 10,000 hours. However, their effectiveness may decrease over time. Replace bulbs every 1-2 years based on manufacturer recommendations and plant needs.
By regularly cleaning and replacing bulbs, you can ensure that your grow lights continue to provide the necessary light spectrum and intensity for your plants’ growth and development. This maintenance routine will contribute to the long-term success of your indoor gardening endeavors.
Watch video for more information:
FAQ
How often should I clean my grow light bulbs?
It is recommended to clean your grow light bulbs every 3-6 months to remove any dust or debris that may accumulate on the surface.
What is the best way to clean grow light bulbs?
To clean grow light bulbs, gently wipe the surface with a soft cloth or sponge dampened with a mild cleaning solution. Avoid using abrasive cleaners or excessive force, as this can damage the bulbs.
Can I use any type of bulb to replace a worn-out grow light bulb?
No, it is important to use the specific type of bulb recommended for your grow light system to ensure optimal performance. Using the wrong type of bulb may result in poor light output and negatively affect plant growth.
How often should I replace my grow light bulbs?
Grow light bulbs have a limited lifespan and should be replaced every 12-24 months, depending on the manufacturer’s recommendations. Regularly replacing bulbs ensures consistent light output for optimal plant growth.
Are there any precautions I should take when replacing grow light bulbs?
Yes, before replacing grow light bulbs, make sure to turn off the power and allow the bulbs to cool down. Wear gloves or use a cloth to handle the bulbs to prevent any oils from your skin from affecting their performance.
What are the signs that indicate a bulb needs to be replaced?
Dim or flickering light output, a significant decrease in plant growth, or a change in the color temperature of the light emitted may indicate that a grow light bulb needs to be replaced.
Can I reuse old grow light bulbs?
Reusing old grow light bulbs is not recommended, as their performance may have significantly degraded over time. It is best to replace them with new bulbs to ensure optimal plant growth.
Is it necessary to clean the reflectors of my grow light system?
Yes, cleaning the reflectors of your grow light system is important to maintain optimal light distribution. Dust and debris on the reflectors can reduce light reflectivity, leading to uneven plant growth.
How do I clean the reflectors of my grow light system?
To clean the reflectors, carefully remove them from the grow light system and wipe them down with a soft cloth or sponge dampened with a mild cleaning solution. Be gentle to avoid scratching or damaging the reflective surface.
Are there any additional maintenance tasks I should perform for my grow light system?
In addition to cleaning and replacing bulbs, it is important to regularly inspect the wiring and connections of your grow light system to ensure they are in good condition. Also, check for any signs of overheating or damage to ensure safety and optimal performance.
Studied Agricultural Engineering-Plant Protection at University of California, Davis.
Head of Content writing team at Southelmontehydroponics.com