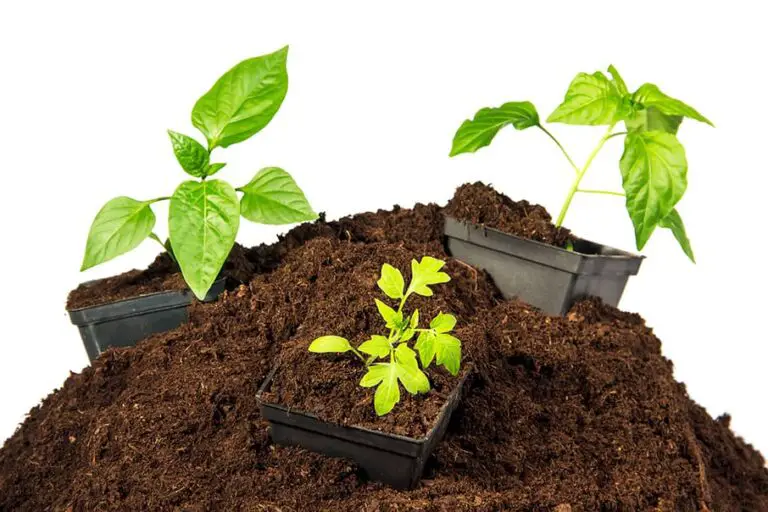
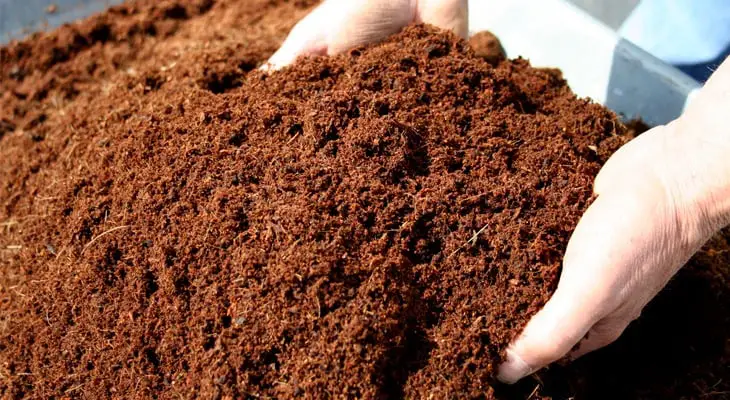
Bell Peppers: A Step-by-Step Guide to Planting and Care
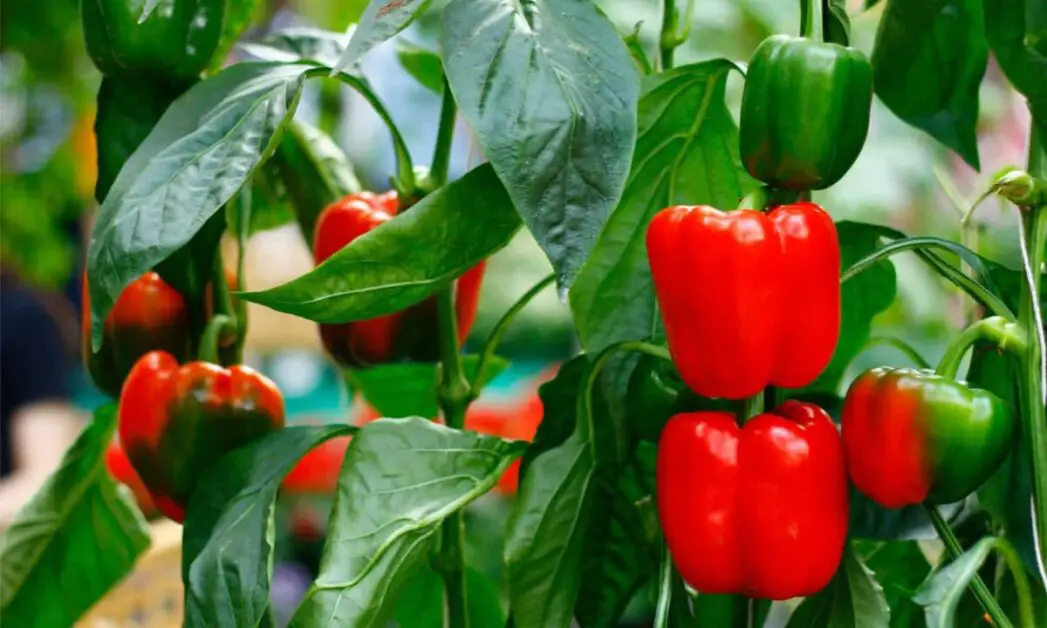
“Bell peppers, with their vibrant colors and sweet taste, are a staple in many American kitchens. These versatile fruits can be enjoyed raw, grilled, or roasted, adding a pop of color and flavor to any dish. Did you know that bell peppers come in a variety of colors, from the common green to the rarest purple and black? In this blog, we unveil the secrets to successfully growing and nurturing these delightful plants.
Our expert advice, backed by the latest horticultural insights, will guide you through the process of cultivating juicy bell peppers with ease. Get ready to transform your garden into a bountiful oasis and enjoy the satisfaction of growing your own food with ease!”
Table of Contents
Understanding the Ideal Growing Conditions for Bell Peppers

- Temperature:
- Bell peppers thrive in warm climates.
- Daytime temperatures should be between 70°F and 85°F.
- Nighttime temperatures should range from 60°F to 70°F.
- Avoid planting during frost or cold weather.
- Sunlight:
- Bell peppers need full sun exposure.
- Aim for 6 to 8 hours of sunlight per day.
- Sunlight promotes growth and fruit production.
- Soil:
- Use well-drained soil.
- Soil should be rich in organic matter.
- Ideal pH level: 6.0 to 7.0.
- Loose and fertile soil allows proper root development and water absorption.
- Soil Preparation:
- Conduct a soil test to identify nutrient deficiencies.
- Adjust soil based on test results.
- Incorporate compost or well-rotted manure to improve soil structure and fertility.
Remember these key points, and your bell pepper plants will thrive! 🌶️🌱
Selecting and Preparing the Right Soil for Planting Bell Peppers
When it comes to selecting and preparing the right soil for planting bell peppers, there are a few key factors to consider.
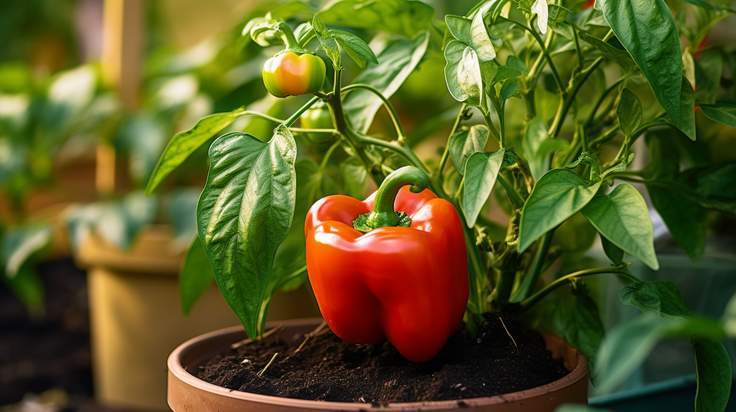
Use soil that drains well and doesn’t get waterlogged.
Rich organic matter is essential for healthy bell pepper growth.
Aim for a slightly acidic to neutral pH (between 6.0 and 7.0).
This range optimizes nutrient absorption by the plants.
Amend the soil with compost or organic matter.
Improves soil structure and water retention.
Provides essential nutrients for bell peppers
If your soil is heavy or clay-like, consider adding sand or perlite.
Enhances drainage and prevents waterlogging.
Remember these steps, and your bell pepper plants will thrive! 🌶️🌱.The following table explain about the soil for planting bell peppers:
| Soil Component | Ideal Range |
|---|---|
| 1. pH Level | 6.0 – 6.8 |
| 2. Organic Matter (%) | 3 – 5% |
| 3. Nitrogen (ppm) | 100 – 200 ppm |
| 4. Phosphorus (ppm) | 50 – 100 ppm |
| 5. Potassium (ppm) | 150 – 250 ppm |
| 6. Calcium (ppm) | 500 – 1000 ppm |
| 7. Magnesium (ppm) | 50 – 100 ppm |
| 8. Electrical Conductivity (dS/m) | < 1.5 dS/m |
| 9. Soil Texture | Loamy or sandy loam |
I recently incorporated Harris Premium Horticultural Perlite into my garden soil, and the results have been impressive. This perlite, with its horticultural grade properties, has significantly improved the drainage and aeration of my soil, promoting healthier root growth for my plants.
Despite some minor dustiness during application, the perlite’s effectiveness in retaining moisture and nutrients while preventing root compaction has led to visibly healthier and more vibrant plants. Its versatility allows me to use it with various planting mediums, making it an essential addition to my gardening toolkit. Overall, I highly recommend Harris Premium Horticultural Perlite for anyone looking to enhance the health and vitality of their garden plants.
- Horticultural Grade: This perlite is pH neutral, non-flammable, odorless, and non-toxic, making it safe for use in gardening without any harm to plants or the environment.
- Promotes Healthy Roots: Adding this perlite to soil in a 25% concentration can improve drainage and promote healthier root growth, leading to stronger and more resilient plants.
- Great for Soil: It helps soil retain moisture and nutrients while also aerating it, preventing root compaction, and ensuring better overall soil health.
- Versatile: This perlite can be used with various planting mediums such as cuttings, bulbs, soil, composted bark, and more, making it suitable for a wide range of gardening needs.
- Long Lasting: The 8-quart size of this perlite can last a long time when used with container plants as recommended, providing value for money and reducing the need for frequent replacements.
- Lightweight and Easy to Use: Customers appreciate its lightweight nature, making it easy to handle and mix into soil without much effort.
- Absorbency: It helps in moisture retention, ensuring that plants have access to water when needed, which is especially beneficial in dry or arid climates.
- Dustiness: Some customers have mentioned that the perlite can be dusty, requiring careful handling during application to avoid respiratory irritation.
- Size Variation: There have been reports of varying sizes of perlite particles in the bag, with some customers finding smaller bits and perlite dust mixed in, which may affect its effectiveness or application.
- Value Concerns: While many customers find the product to be of good value, some have expressed concerns about its price compared to similar products or the quantity received for the price.
- Packaging Issues: A few customers have mentioned issues with the packaging, such as the bag breaking or tearing easily, which could lead to spills or difficulty in storage.
Choosing the Best Varieties of Bell Peppers for Your Garden
One of the exciting aspects of growing bell peppers in your garden is the wide variety of options available. Before selecting the best varieties for your garden, it’s important to consider your personal preferences and the specific growing conditions in your area.
The following table summarizing different bell pepper varieties, along with their advantages, disadvantages, and characteristics:
| Variety | Advantages | Disadvantages | Characteristics |
|---|---|---|---|
| Red Bell Pepper | – High in Vitamin C: Contains 169% of the recommended daily intake (RDI) for vitamin C. | – Higher Cost: Red peppers are usually more expensive than green ones. | – Sweet Flavor: Sweeter taste due to ripeness. – Rich Red Color: High in beta carotene. |
| Yellow Bell Pepper | – Milder Flavor: Less bitter than green peppers. | – Cost: Slightly more expensive than green peppers. | – Bright Yellow Color: Contains beta carotene. – Nutrient-Rich: Good source of vitamins and minerals. |
| Orange Bell Pepper | – Vitamin A: Contains beta carotene for eye health. | – Similar Cost to Red Peppers: Moderately priced. | – Orange Hue: Rich in antioxidants. – Sweet and Tangy Flavor. |
| Green Bell Pepper | – Budget-Friendly: Least expensive variety. | – Bitter Taste: Unripe and less sweet. | – Crunchy Texture: Ideal for cooking. – High Fiber Content. |
Remember that all bell pepper colors have nutritional benefits, but red peppers tend to have higher antioxidant levels due to ripeness. Choose based on your preferences and gardening goals! 🌶️🌱
Starting Bell Pepper Seeds Indoors: A Step-by-Step Guide
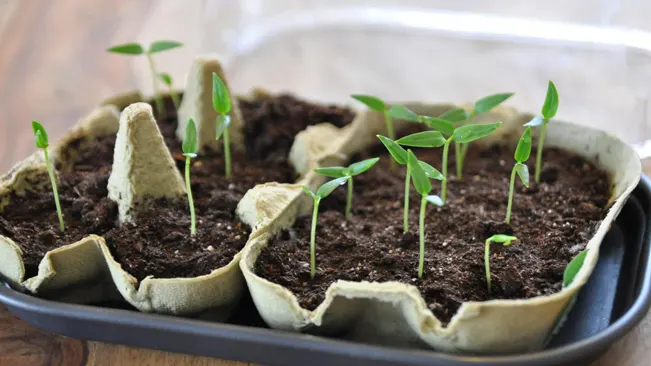
Here’s a step-by-step guide for planting bell pepper seeds indoors to give your plants a head start:
- Container Selection:
- Choose a container with drainage holes. This ensures proper water drainage and prevents waterlogging.
- Opt for a container size that allows enough space for the seeds to grow into seedlings.
- Seed Starting Mix:
- Fill the container with a high-quality seed starting mix.
- Moisten the mix before sowing the seeds. This prevents seeds from floating or shifting.
- Sowing Seeds:
- Place two to three seeds in each container.
- Space them about an inch apart.
- Gently press the seeds into the mix, ensuring they are covered with a thin layer of soil.
- Create a Greenhouse Environment:
- Cover the container with a plastic dome or wrap it in plastic wrap.
- This creates a greenhouse-like environment, retaining moisture and warmth for faster germination.
- Temperature and Light:
- Place the container in a warm area with consistent temperatures of 70-80°F (21-27°C).
- Avoid direct sunlight initially, as it can cause excessive heat and dry out the soil.
- Provide indirect light through a grow light or by placing the container near a bright window.
- Germination and Seedlings:
- As the seeds germinate and seedlings emerge, remove the plastic cover.
- Proper air circulation is essential for healthy growth.
Remember these steps, and your bell pepper seeds will be on their way to becoming thriving plants! 🌱🌶️
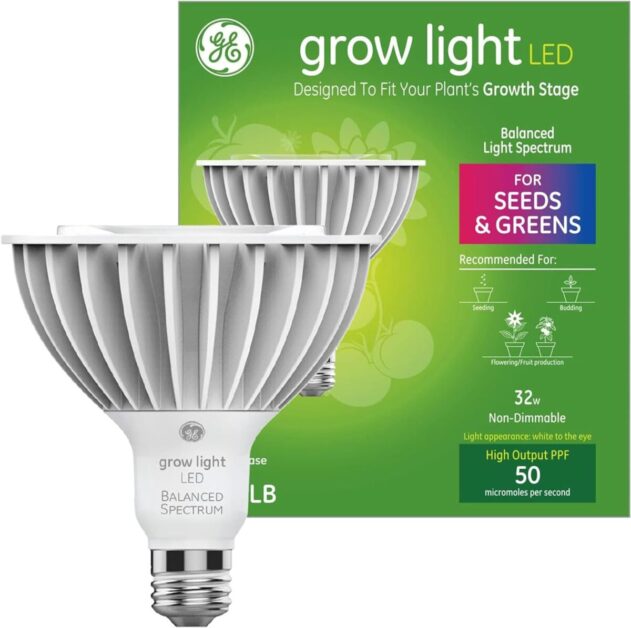
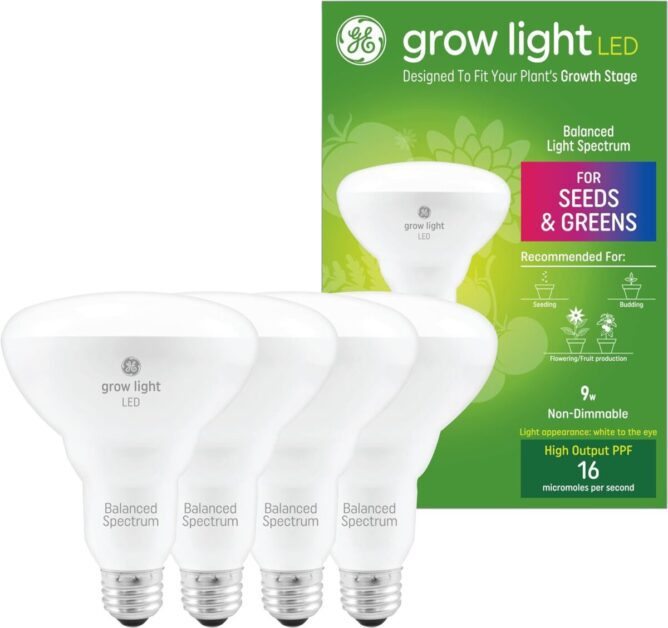
Certainly! Here’s a concise combined review for both GE Grow LED Light Bulbs:
These GE Grow LED light bulbs are a boon for indoor gardeners and plant enthusiasts. Their balanced light spectrum caters to both plant growth and visual aesthetics. Users appreciate their effectiveness in propagating cuttings and enhancing the appearance of furniture and wall art. However, their large and bulky design might pose challenges in certain lamp bases. Despite this, they remain a solid choice for providing light to your cherished green companions. 🌱🌼🌿
✔ Versatility: Suitable for both indoor and outdoor use, this grow light bulb is versatile and can be used in a variety of settings such as balconies, indoor greenhouses, homes, and offices. Its adaptability makes it a convenient option for different gardening setups.
✔ Energy Efficiency: With a wattage of 32 watts, this LED grow light bulb is energy-efficient, providing bright illumination while consuming minimal power. This helps reduce electricity bills and is environmentally friendly.
✔ Quality Construction: Customers praise the quality of materials used in the construction of this bulb, highlighting its durability and sturdiness. It is designed to withstand outdoor conditions and frequent use without compromising on performance.
✔ Effective Growth: Many users report positive results with their plants after using this grow light bulb, citing improved growth rates, healthier foliage, and better flowering and fruit production. It effectively mimics natural sunlight, promoting robust plant development.
❌ Heat Dissipation: A few users have noted concerns regarding heat dissipation, suggesting that the bulb may generate some heat during operation. While not a significant issue for most users, it’s worth considering when planning the placement of the bulb, especially in enclosed spaces.
❌ Size and Weight: There are occasional mentions of the bulb’s size and weight, which may not be suitable for all fixtures or setups. Users with specific lighting fixtures or constraints should verify compatibility before purchasing to ensure a proper fit.
✔ Energy efficiency: Utilizes only 9 watts of energy, resulting in low energy consumption and cost savings.
✔ Long lifespan: With a rated lifespan of up to 25,000 hours, the bulbs are durable and long-lasting.
✔ Versatility: Suitable for a wide range of plants, including low light plants (like lettuce and herbs) and high light plants (like tomatoes and peppers).
✔ Natural light appearance: Provides a pleasing, natural light temperature that integrates well with indoor spaces.
❌ Noise: Some customers have reported noise issues with the bulbs, although this appears to be a minor concern compared to the overall performance.
❌ Durability concerns: While many customers have praised the longevity of the bulbs, a few have expressed dissatisfaction with their durability over time.
Transplanting Bell Pepper Seedlings: Tips for Success
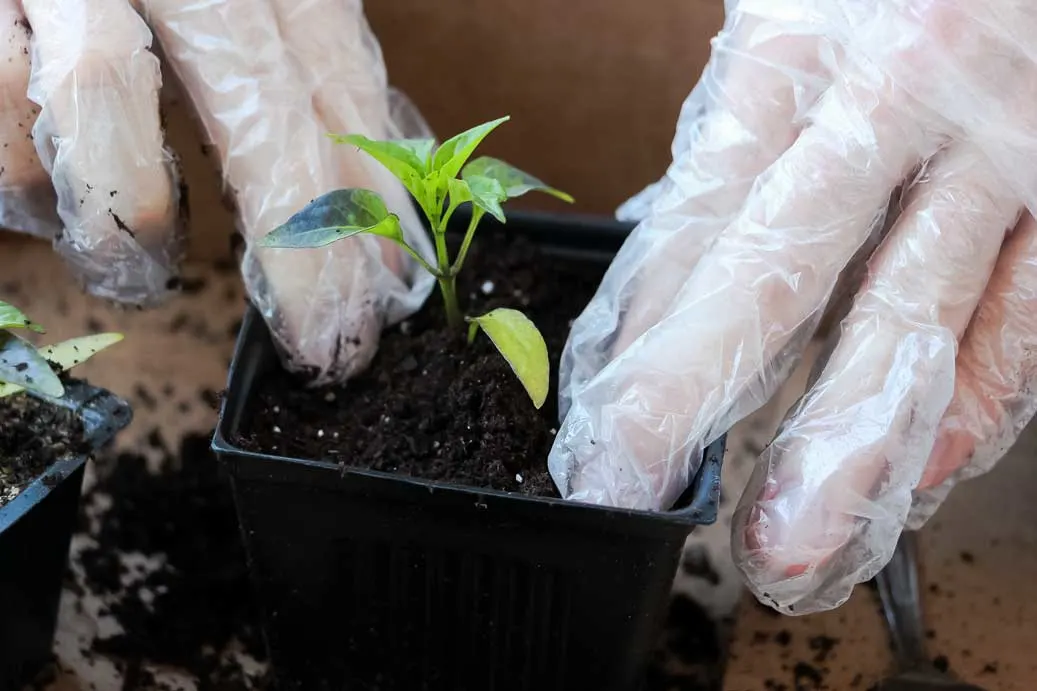
To ensure successful transplanting of bell pepper seedlings, proper preparation and care are key.
Wait until all risk of frost has passed before transplanting.
Bell peppers thrive in warm temperatures, so aim for a time when the weather is consistently mild.
Choose a spot with the following characteristics:Well-Drained Soil: Ensure good drainage to prevent waterlogging.
Ample Sunlight: Bell peppers need full sun exposure.
Protection from Strong Winds: Windy conditions can stress young seedlings.
Bell peppers prefer soil that is:Rich in Organic Matter: Incorporate compost or well-rotted manure.
Slightly Acidic: Aim for a pH level between 6.0 and 6.8.
A balanced, slow-release fertilizer can provide essential nutrients.
Water the seedlings thoroughly before transplanting.
Dig holes in the prepared soil, spacing them according to the variety (usually around 18-24 inches apart).
Gently remove the seedlings from their containers, being careful not to damage the roots.
Place each seedling in a hole and fill with soil, pressing gently to secure them.
Water again after transplanting to settle the soil around the roots.
Apply a layer of organic mulch around the seedlings to retain moisture and suppress weeds.
Consider using stakes or cages to support the plants as they grow.
Keep an eye on the seedlings for signs of stress or pests.
Water consistently, aiming for about 1 inch of water per week.
Enjoy watching your bell pepper plants thrive!
Remember these steps, and your bell pepper seedlings will have a great start in your garden! 🌱🌶️
The Importance of Proper Watering Techniques for Bell Peppers
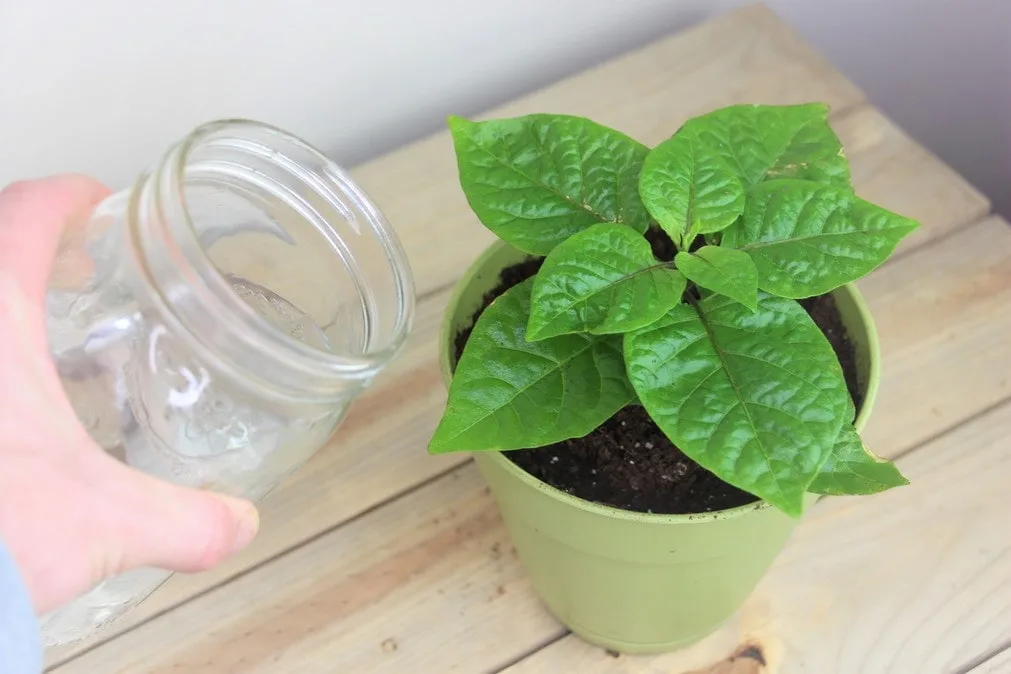
Bell peppers, like most plants, require adequate water to thrive and produce a bountiful harvest.
- Avoid Overwatering:
- Overwatering leads to waterlogged soil and root rot.
- Bell peppers prefer consistent moisture, not excessive water.
- How to Check Moisture:
- Stick your finger about an inch into the soil near the base of the plant.
- If it feels dry, it’s time to water.
- Drainage Matters:
- Adequate drainage prevents water saturation and root diseases.
- Use well-drained soil and avoid waterlogged conditions.
- Mulch Magic:
- Apply a layer of organic mulch around the plants.
- It retains soil moisture and reduces evaporation.
- Water at the Base:
- Avoid overhead watering to minimize foliar diseases.
- Direct water to the plant roots where it’s needed.
Proper watering techniques are crucial for the growth and development of bell peppers. Here are some reasons why:
- Root development: Bell peppers have shallow roots, so they need consistent moisture in the soil to grow properly. Proper watering techniques help to ensure that the roots have access to the water they need for growth.
- Fruit development: Bell peppers require a lot of water for their fruit to develop properly. Insufficient water can lead to small, misshapen fruits or even no fruits at all.
- Prevention of diseases: Overwatering or underwatering can lead to the development of diseases in bell peppers. Proper watering techniques help to prevent these diseases and ensure healthy growth.
- Consistent growth: Bell peppers grow best when they receive consistent watering. This helps to ensure that the plant grows at a steady pace and produces healthy fruits.
- Improved nutrient uptake: Proper watering techniques help to improve the uptake of nutrients by the plant. This means that the bell peppers will be healthier and more nutritious.
In summary, proper watering techniques are essential for the growth and development of bell peppers. They help to ensure that the plant has access to the water it needs for root development, fruit development, disease prevention, consistent growth, and improved nutrient uptake.
Fertilizing Bell Peppers: Essential Nutrients and Application Methods

Fertilizing bell peppers is indeed crucial for their health and productivity. Let’s dive into the details:
- Essential Nutrients:
- Bell peppers require three main nutrients in significant quantities:
- Nitrogen: Supports leaf growth and overall plant vigor.
- Phosphorus: Vital for fruit formation and root development.
- Potassium: Enhances disease resistance and overall plant health.
- Bell peppers require three main nutrients in significant quantities:
- Application Methods:
- Incorporating Balanced Fertilizer:
- Mix a balanced fertilizer into the soil before planting.
- Ensures nutrients are available to the roots as plants grow.
- Top-Dressing:
- Apply a slow-release fertilizer around the base of plants during the growing season.
- Provides a continuous nutrient supply.
- Foliar Feeding:
- Spray a liquid fertilizer directly onto leaves.
- Useful during nutrient deficiency or stress.
- Supplement, not replace, soil applications.
- Incorporating Balanced Fertilizer:
Remember these methods, and your bell pepper plants will thrive! 🌶️🌱
Protecting Bell Pepper Plants from Common Pests and Diseases
Bell pepper plants are susceptible to various pests, including aphids, flea beetles, and spider mites. To prevent infestations, it is essential to regularly inspect your plants for signs of pests and take proactive measures. One effective method is to introduce beneficial insects like ladybugs or predatory mites that feed on pests.
The following table explains about the common pests and diseases:
| Pest/Disease | Preventive Measures | Quantitative Impact |
|---|---|---|
| 1. Aphids | – Use insecticidal soap or neem oil. | – Apply every 7-10 days for 2-3 weeks. |
| 2. Whiteflies | – Introduce natural predators like ladybugs. | – Release 1,000 ladybugs per 2,000 sq ft. |
| 3. Spider Mites | – Spray plants with water to dislodge mites. | – Repeat weekly for 2-3 weeks. |
| 4. Blossom End Rot | – Maintain consistent soil moisture levels. | – Apply calcium nitrate at 1-2 lbs/acre. |
| 5. Fungal Diseases | – Apply fungicides containing copper. | – Use 2-3 applications per growing season. |
| 6. Bacterial Leaf Spot | – Avoid overhead watering. | – Apply copper-based fungicides preventively. |
Pruning and Supporting Bell Pepper Plants: Maximizing Growth and Yield

- Pruning:
- Frequency: Prune every two to three weeks during the growing season.
- Purpose:
- Shape Maintenance: Regular pruning helps maintain the plant’s shape.
- Energy Allocation: Removing suckers and side shoots directs more energy toward fruit production.
- Caution: Avoid excessive pruning to prevent plant stress (limit to one-third of total foliage).
- Support Structures:
- Types: Use stakes, cages, or trellises.
- Benefits:
- Upright Growth: Supports help plants grow vertically, improving air circulation and sunlight exposure.
- Disease Prevention: Proper spacing reduces humidity and minimizes the risk of foliar diseases.
- Fruit Protection: Prevents bending or breaking under the weight of fruit, ensuring a productive harvest.
Remember these practices, and your bell pepper plants will thrive! 🌶️🌱
Recognizing and Addressing Common Nutrient Deficiencies in Bell Peppers
Nutrient deficiencies in bell peppers can lead to stunted growth, yellowing or wilting leaves, and poor fruit development. It is crucial for farmers and gardeners to recognize these deficiencies early on and take appropriate measures to address them. Here are some frequently asked questions about common nutrient deficiencies in bell peppers:
Q: How do I know if my bell peppers are experiencing nutrient deficiencies?
A: Look for visual signs such as yellowing leaves (chlorosis), stunted growth, or necrotic spots on the leaves. Pay attention to the overall vigor and size of the plants, as well as the development of the fruit. Conducting a soil test can also help identify specific deficiencies.
Q: What are the most common nutrient deficiencies in bell peppers?
A: Bell peppers often suffer from deficiencies in essential macronutrients like nitrogen (N), phosphorus (P), potassium (K), and magnesium (Mg). In addition, micronutrients such as iron (Fe), manganese (Mn), and zinc (Zn) can also be lacking. Each deficiency presents distinct symptoms that can help diagnose the problem and guide subsequent treatments.
Harvesting Bell Peppers at the Right Time for Optimal Flavor and Nutrition
When it comes to harvesting bell peppers, timing is everything. Picking them at the right time ensures that you enjoy optimal flavor and nutrition. So, how do you know when exactly to harvest your bell peppers? Here are some frequently asked questions to guide you:

1. How do I determine if my bell peppers are ready for harvest?
To gauge if your bell peppers are ripe and ready to be picked, look for their color and size. Typically, peppers start off green and gradually change color as they mature. Depending on the variety, they may turn yellow, orange, red, or even purple when fully ripe. Additionally, mature bell peppers feel firm to the touch and have a glossy sheen on their skin.
2. Can I harvest bell peppers when they are still green?
Yes, you can harvest bell peppers when they are green if that’s the desired color for your culinary needs. Green bell peppers are slightly less sweet and have a slightly bitter taste compared to their ripe counterparts. If you prefer a milder flavor, go ahead and pick them when they have reached the desired size.
Remember, the timing of harvesting bell peppers varies depending on the growing conditions, variety, and personal preference. By paying attention to color, size, and firmness, you can ensure that your bell peppers are bursting with flavor and nutritional goodness when you’re ready to enjoy them.
Storing and Preserving Bell Peppers: Tips for Longevity and Quality
When it comes to storing and preserving bell peppers, there are several key tips to keep in mind to ensure longevity and maintain the quality of these vibrant and flavorful vegetables. One frequently asked question is whether or not bell peppers should be refrigerated.
:max_bytes(150000):strip_icc()/How-Long-Do-Jarred-Peppers-Last-4x3-67304fd350b34412adf9ccf7dd665b06.jpg)
- Refrigeration: Bell peppers can be stored in the refrigerator to extend their shelf life. Choose firm peppers free from blemishes or soft spots. Place them in a plastic bag with a paper towel to absorb excess moisture and store in the vegetable crisper for up to two weeks.
- Freezing: Bell peppers can be frozen to preserve their flavor and nutritional benefits. Wash and dry the peppers thoroughly, then remove the stem, seeds, and membranes. Dice or slice the peppers as desired.
- Blanching: Blanching the peppers in boiling water for a few minutes helps maintain their vibrant color and texture. Drain and pat dry before transferring to airtight containers or freezer bags.
- Labeling: Label containers with the date to keep track of freshness. Frozen bell peppers can be stored for up to six months and used in various recipes like stir-fries, soups, and casseroles.
Troubleshooting Common Issues in Bell Pepper Cultivation
- Lack of pollination: Insufficient pollination can lead to poor fruit set in bell pepper plants. Hand pollination can be attempted by gently transferring pollen between flowers using a brush or cotton swab to encourage fruit development.
- Nutrient imbalance: Ensure proper nutrient balance by providing sufficient nitrogen, phosphorus, and potassium to the plants. Deficiencies or imbalances in these nutrients can hinder fruit development.
- Temperature extremes: Bell peppers thrive in temperatures between 70°F and 80°F (21°C and 27°C). Extreme heat or cold can disrupt fruit production, so ensure the plants are grown in optimal temperature conditions.
- Overwatering or underwatering: Wilting in bell pepper plants can indicate both overwatering and underwatering. Check the moisture level of the soil by inserting your finger into the soil; if it feels dry at a depth of about an inch, it’s time to water. Ensure proper drainage to prevent waterlogging and root rot caused by overwatering.
- Other factors: Consider other factors such as poor drainage or excessive heat, which can contribute to wilting. Improve soil drainage and provide shade or protection from intense heat to prevent wilting in bell pepper plants.
Sustainable Practices for Growing Bell Peppers
Growing bell peppers in a sustainable manner is not only beneficial for the environment but also for your own health. By adopting sustainable practices, you can ensure a bountiful harvest while minimizing the use of harmful chemicals and reducing waste. One unique frequently asked question is, “Can I use compost in my bell pepper garden?”
Compost
Absolutely! Compost is a fantastic way to enrich the soil with organic matter and nutrients, promoting healthy growth and reducing the need for synthetic fertilizers. It also helps to retain moisture in the soil, reducing water usage and conserving this precious resource. By incorporating compost into your bell pepper garden, you can create a sustainable cycle of nourishment and growth.
Another common question that arises is, “How can I reduce weed growth in my bell pepper garden without using herbicides?” Weed management is an important aspect of sustainable bell pepper cultivation. One effective method is mulching.
mulching
By applying a layer of organic mulch, such as straw or wood chips, around the base of your bell pepper plants, you can block the sunlight and prevent weed seeds from germinating. Additionally, the mulch helps to retain moisture in the soil, reduce erosion, and regulate soil temperature. Hand-weeding can also be a useful strategy to remove any persistent weeds that manage to penetrate the mulch.
By employing these sustainable weed management techniques, you can keep your bell pepper garden weed-free without the need for harmful herbicides.
Exploring Alternative Growing Methods: Hydroponics and Container Gardening
Let’s compare hydroponics and container gardening for growing bell peppers:
| Aspect | Hydroponics | Container Gardening |
|---|---|---|
| Growing Medium | – No soil; uses nutrient-rich water solutions. | – Soil-based; uses traditional potting mix or compost. |
| Water Usage | – Requires about 90% less water than conventional soil-based farming. | – Water usage varies based on container size and climate. |
| Control Over Conditions | – Precise control over pH levels, nutrients, and environment. | – Moderate control; influenced by outdoor conditions. |
| Year-Round Cultivation | – Ideal for year-round indoor growth of greens and lettuces. | – Seasonal; depends on outdoor climate. |
| Initial Setup Cost | – May have higher initial costs for equipment. | – Generally lower setup costs. |
| Suitable Vegetables | – Not all vegetables thrive in hydroponics (e.g., root crops). | – Accommodates a wide range of vegetables. |
| Space Requirement | – Compact; suitable for urban dwellers. | – Requires outdoor space or balcony. |
| Human-Plant Connection | – Less direct interaction due to automated systems. | – More hands-on; nurturing plants in containers. |
Both methods have their merits, so choose based on your space, resources, and gardening preferences! 🌶️🌱
Enhancing Pollination for Improved Bell Pepper Production.
Bell peppers, like many other plants, rely on pollination to produce fruit. Pollination is the transfer of pollen from the male flower parts to the female flower parts, allowing fertilization to occur. While bell peppers can self-pollinate to some extent, enhancing pollination can significantly improve fruit production and quality. Here are some unique FAQs based on information not previously discussed in the article:
Q: Are bell peppers self-pollinating, or do they require cross-pollination?
A: Bell peppers have both male and female flower parts within each flower, which means they have the potential to self-pollinate. However, they can benefit from cross-pollination, where pollen is transferred between different plants, leading to more abundant and robust fruit production.
Q: What are some ways to enhance pollination in bell peppers?
A: To enhance pollination in bell peppers, consider attracting pollinators to your garden. Bees, butterflies, and other insects are natural pollinators and can greatly assist in the process. Planting flowers that attract pollinators such as marigolds, cosmos, and lavender near your pepper plants can help increase pollination rates. Additionally, gently shaking the plants or using a small, soft brush to transfer pollen between flowers can aid in the pollination process.
Watch video for more information:
FAQ
What are the ideal growing conditions for bell peppers?
Bell peppers thrive in warm temperatures between 70-85°F (21-29°C), plenty of sunlight, and well-draining soil with a pH level between 6.0 and 6.8.
How do I select and prepare the right soil for planting bell peppers?
Choose a loamy soil that is rich in organic matter and has good drainage. Before planting, amend the soil with compost or well-rotted manure to improve its fertility and structure.
What are the best varieties of bell peppers for my garden?
Some popular bell pepper varieties include California Wonder, Big Bertha, and Purple Beauty. Consider your climate, flavor preferences, and intended use (fresh, stuffed, or roasted) when selecting the best variety.
How do I start bell pepper seeds indoors?
Start bell pepper seeds indoors 8-10 weeks before the last frost date in your area. Plant the seeds in seed trays filled with a seed starting mix, keep them warm and moist, and provide adequate light for germination.
Any tips for transplanting bell pepper seedlings successfully?
Harden off the seedlings by gradually exposing them to outdoor conditions before transplanting. Dig a hole large enough to accommodate the root ball, gently place the seedling, and water thoroughly after transplanting.
What are the proper watering techniques for bell peppers?
Water bell peppers deeply and consistently, ensuring the soil remains evenly moist but not waterlogged. Avoid overhead watering to prevent leaf diseases, and consider using a drip irrigation system.
How should I fertilize bell peppers?
Apply a balanced fertilizer that is rich in nitrogen, phosphorus, and potassium according to the recommended dosage. Side-dress the plants with compost or organic fertilizer during the growing season.
How can I protect bell pepper plants from common pests and diseases?
Use organic pest control methods such as handpicking pests, applying insecticidal soap, or using beneficial insects. Monitor plants regularly for signs of diseases and promptly remove infected plants.
Is pruning and supporting bell pepper plants necessary?
Pruning is not necessary for bell peppers, but you can pinch off the growing tips to encourage bushier growth. Supporting plants with stakes or cages can help prevent breakage and improve air circulation.
How do I recognize and address common nutrient deficiencies in bell peppers?
Yellowing leaves may indicate nitrogen deficiency, while purple or brown spots can be a sign of phosphorus deficiency. Adjusting fertilizer application or soil amendments can address these deficiencies.
How should I fertilize bell peppers?
Apply a balanced fertilizer that is rich in nitrogen, phosphorus, and potassium according to the recommended dosage. Side-dress the plants with compost or organic fertilizer during the growing season.
When is the right time to harvest bell peppers?
Bell peppers are typically ready to harvest when they have reached their mature color and size. This varies depending on the variety, but most bell peppers are harvested when they are fully ripened.
How can I store and preserve bell peppers for longevity and quality?
Store bell peppers in a cool, dry place or in the refrigerator to extend their shelf life. You can also freeze or can bell peppers to preserve them for later use.
What are some common issues in bell pepper cultivation and how can I troubleshoot them?
Common issues include blossom-end rot, leaf curling, and poor fruit set. These can be caused by inconsistent watering, nutrient deficiencies, or environmental factors. Maintaining proper watering and fertilization, as well as addressing any problems promptly, can help troubleshoot these issues.
What sustainable practices can I adopt for growing bell peppers?
Use organic fertilizers and pest control methods, practice crop rotation, conserve water by utilizing drip irrigation or mulching, and compost plant residues to promote soil health and reduce environmental impact.
Can bell peppers be grown using alternative methods like hydroponics or container gardening?
Yes, bell peppers can be successfully grown using hydroponics or in containers. Hydroponics provides a controlled environment for optimal growth, while container gardening allows flexibility in limited spaces.
How can I enhance pollination for improved bell pepper production?
Encourage pollinators like bees and butterflies to visit your garden by planting flowering plants nearby. You can also manually pollinate bell peppers by gently shaking the plants or using a small brush to transfer pollen between flowers.
Q: Can I transplant my bell pepper seedlings directly into the ground without starting them indoors?
While it is possible to direct sow bell pepper seeds outdoors, starting them indoors is generally recommended. Young seedlings are more vulnerable to unfavorable weather conditions and may have difficulty establishing themselves if directly sown outdoors. By starting seedlings indoors, you can provide them with a controlled environment and give them a head start in growth before transplanting them into your garden.
Should I harden off my bell pepper seedlings before transplanting?
Yes, it is essential to harden off your bell pepper seedlings before transplanting them into the garden. Hardening off is the process of gradually acclimating seedlings to outdoor conditions, which helps prevent shock. Approximately one to two weeks before transplanting, begin by placing your seedlings outdoors for a few hours each day, gradually increasing their exposure to sunlight and outdoor temperature. Be sure to protect them from strong winds and harsh sunlight during this period. Properly hardened off seedlings will have a higher chance of successful transplantation and subsequent growth.
Studied Agricultural Engineering-Plant Protection at University of California, Davis.
Head of Content writing team at Southelmontehydroponics.com

