How To Grow Beans: Ultimate Guide For Success
Table of Contents
Understanding the Different Types of Beans
Beans are an essential staple in many cuisines around the world. From the humble kidney beans to the versatile chickpeas, there is a wide variety of beans to choose from. One popular type is the black bean, also known as the turtle bean. With its rich and earthy flavor, this bean is commonly used in Latin American and Caribbean cuisines. It is a great source of protein and fiber, making it a healthy addition to any diet. Another popular variety is the navy bean, which is small and creamy in texture. It is often used in soups, stews, and baked bean dishes.
With its mild flavor, the navy bean can easily take on the flavors of the ingredients it is cooked with, making it a versatile choice for many recipes.
Apart from these varieties, there are also other types of beans such as pinto beans, garbanzo beans, and lentils, each with its own distinct characteristics and uses in various dishes. Understanding the different types of beans allows you to explore a world of flavors and textures in your cooking. Whether you’re looking to add protein to your vegetarian dishes or simply want to diversify your culinary repertoire, beans offer a wide range of options to suit every taste and preference. So, the next time you’re shopping for groceries, take a closer look at the different types of beans available and get ready to discover a whole new world of culinary possibilities.
Choosing the Right Bean Variety for Your Climate and Soil
Choosing the right bean variety for your climate and soil is crucial to ensure a successful and abundant harvest. Different bean varieties have specific requirements when it comes to temperature, sunlight, and soil conditions. By selecting the right variety, you can maximize the growth potential of your beans and increase your chances of a bountiful yield.
When considering the climate, it is important to choose bean varieties that are well-suited to the temperature and weather patterns of your region. Some bean varieties thrive in cooler climates, while others prefer warmer temperatures. For instance, bush beans are a great choice for cooler climates as they mature faster and are more tolerant of cooler soil temperatures. On the other hand, pole beans, with their longer growing season and heat tolerance, are better suited for regions with warmer climates.
In addition to climate, the type of soil you have plays a crucial role in determining which bean varieties will perform best in your garden. Beans generally prefer well-draining soil with a pH level between 6 and 7. However, certain varieties may have specific soil preferences. For example, kidney beans thrive in sandy soil, while black beans prefer loamy soil. By understanding the needs of different bean varieties and matching them with the characteristics of your soil, you can create an optimal growing environment for your beans.
By carefully selecting the right bean variety for your climate and soil, you can set the stage for a successful bean-growing experience. Understanding the specific requirements of different bean varieties will not only help you achieve optimal growth and yield, but it will also contribute to the overall health and vigor of your plants. So, take the time to research and choose bean varieties that are well-suited to your specific climate and soil conditions – your future harvest will thank you.
Preparing the Soil for Bean Planting
To ensure successful bean growth, it is essential to properly prepare the soil before planting. Soil preparation not only provides an optimal environment for the seeds to germinate and the plants to thrive, but it also helps prevent disease and nutrient deficiencies.
Begin by removing any weeds, rocks, or debris from the planting area. These unwanted elements can impede root growth and compete for nutrients and water. Once the area is cleared, loosen the soil using a garden fork or tiller. This will create a loose and friable soil texture, allowing for better root penetration and nutrient absorption. Be cautious not to over-till the soil, as it can lead to compaction and poor drainage.
Additionally, incorporating organic matter, such as compost or well-rotted manure, into the soil can improve its structure, fertility, and water-holding capacity. This organic amendment enriches the soil with essential nutrients, enhances microbial activity, and promotes healthy root development. Great care should be taken to distribute the organic matter evenly, ensuring that it is thoroughly mixed with the soil to avoid creating nutrient imbalances.
| Soil Preparation Steps | Description |
|---|---|
| Clear the Area | Remove any weeds, rocks, or debris from the planting area to create a clean and clear space for your bean plants. |
| Loosen the Soil | Use a garden fork or tiller to loosen the soil to a depth of 6-8 inches. This improves soil aeration, drainage, and root penetration, creating an ideal environment for bean growth. |
| Amend with Compost | Incorporate well-decomposed compost or aged manure into the soil to enrich it with organic matter and nutrients. Spread a 2-3 inch layer of compost over the planting area and mix thoroughly. |
| Adjust pH if Necessary | Test the soil pH using a soil testing kit. Beans prefer slightly acidic to neutral soil with a pH range of 6.0 to 7.0. If needed, adjust the pH by adding lime to raise it or sulfur to lower it. |
| Fertilize Appropriately | Beans are light feeders, but you can apply a balanced fertilizer or organic fertilizer according to package instructions to provide essential nutrients for healthy growth. |
| Create Raised Beds (Optional) | If your soil is heavy or poorly drained, consider creating raised beds for better drainage and soil structure. Build raised beds using untreated wood or other suitable materials. |
Following these soil preparation steps will create a favorable growing environment for your bean plants, leading to healthier plants and a more abundant harvest.
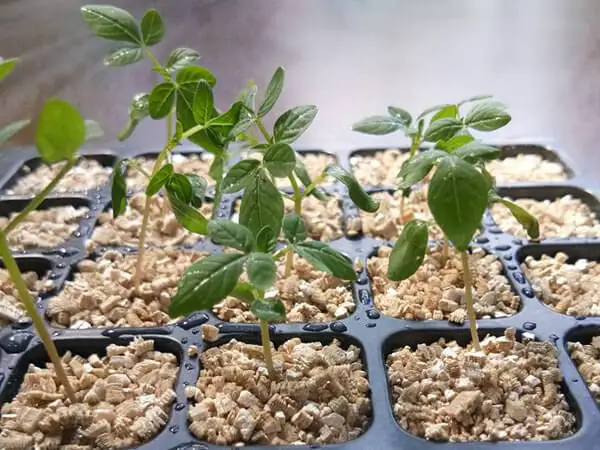
Proper Seed Selection and Germination Techniques
When it comes to growing beans, proper seed selection and germination techniques play a crucial role in determining the success of your garden. Choosing high-quality seeds is essential for ensuring healthy and productive plants. Look for reputable seed suppliers or nurseries that offer a wide variety of bean seeds to suit your preferences and growing conditions. Consider factors such as disease resistance, yield potential, and flavor profile to find the perfect match for your garden.
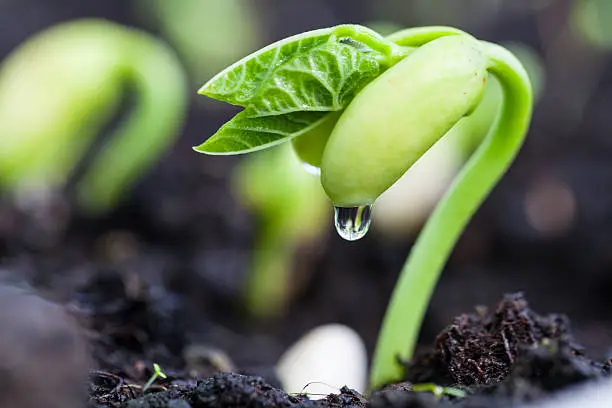
Before planting, it’s important to ensure that your bean seeds are properly germinated. This process involves awakening the dormant seed and encouraging it to sprout. Start by soaking the seeds in water for several hours or overnight. This helps to soften the seed coat and promote quicker germination. After soaking, transfer the seeds to a moist paper towel or seed tray and keep them in a warm and well-lit area. Ensure that the germination environment remains consistently moist, but not waterlogged, to prevent rotting. Within a few days, you’ll start to see tiny roots emerging from the seeds, indicating successful germination.
By carefully selecting high-quality bean seeds and following proper germination techniques, you set the foundation for a successful bean garden. These early stages of the plant’s life are critical for ensuring healthy growth and maximum yield. So take the time to choose the right seeds and provide the optimal conditions for germination, and you’ll soon be rewarded with thriving bean plants ready to flourish in your garden.
| Step | Description |
|---|---|
| Selecting Quality Seeds | Choose high-quality bean seeds from a reputable supplier. Look for seeds that are uniform in size, plump, and free from damage or signs of disease. |
| Determining Planting Time | Beans prefer warm soil temperatures for germination and growth. Plant seeds outdoors after the last frost date in your area, when soil temperatures are consistently above 50°F. |
| Preparing Seeds for Planting | Optionally, soak bean seeds in water for 4-6 hours before planting to help speed up germination. This can be especially beneficial for large seeds or seeds from older packets. |
| Planting Depth and Spacing | Plant bean seeds 1 to 1.5 inches deep in well-drained soil. Space seeds 2 to 4 inches apart in rows that are 18 to 24 inches apart, depending on the variety. |
| Germination Temperature | Ensure soil temperatures are around 70-80°F for optimal germination. Consider using a soil thermometer to monitor temperature levels before planting. |
| Maintaining Moisture | Keep the soil consistently moist but not waterlogged during the germination period. Water gently and avoid washing away seeds. |
| Providing Sunlight | Place seed trays or planted beds in a location with full sun exposure to promote healthy germination and seedling growth. |
| Monitoring Germination Progress | Regularly check seed trays or planted beds for signs of germination, which typically occurs within 7-10 days under optimal conditions. |
| Thin Seedlings | Once seedlings emerge, thin them to ensure proper spacing, leaving the healthiest and strongest plants. |
| Harden Off Seedlings (Optional) | If starting seeds indoors, gradually acclimate seedlings to outdoor conditions over 7-10 days before transplanting to the garden. |
Planting Beans: Timing and Spacing
When it comes to planting beans, timing and spacing are crucial factors that can greatly impact the success of your crop. Choosing the right time to plant ensures that your beans have optimal conditions for growth and development, while proper spacing allows each plant to receive adequate sunlight, water, and nutrients.
The timing for planting beans is determined by two main factors: soil temperature and frost risk. Beans thrive in warm soil, with a minimum temperature of around 50°F (10°C) for most varieties. Planting too early, when the soil is still cool, can lead to poor germination and stunted growth. On the other hand, planting too late in the season can result in reduced yields as the plants may not have enough time to mature before colder temperatures set in.
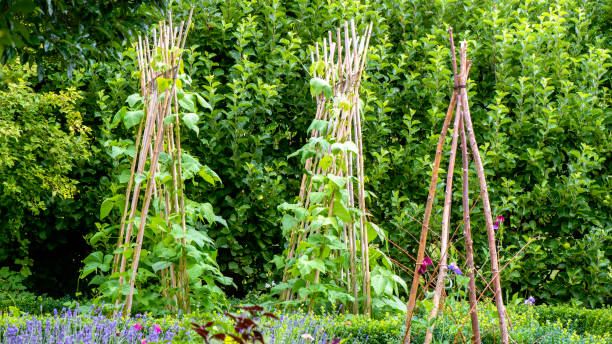
In terms of spacing, providing enough room for each bean plant is essential for maximizing their productivity. The recommended spacing between plants varies depending on the bean variety and the cultivation method used. For bush beans, which grow as compact bushes, a spacing of 3 to 6 inches (7 to 15 cm) between plants is usually sufficient. For pole beans, which require support structures, a wider spacing of 6 to 10 inches (15 to 25 cm) is recommended to provide adequate room for the plants to climb. By ensuring proper timing and spacing, you can set your bean plants up for healthy growth and abundant harvests.
Providing Adequate Water and Sunlight for Bean Growth
Water and sunlight are crucial factors for the healthy growth of bean plants. Without these essential elements, beans may fail to thrive and produce a bountiful harvest. When it comes to water, it is important to strike a balance between providing sufficient moisture and avoiding overwatering, which can lead to root rot and other problems. Beans typically require around 1 inch of water per week, either from rainfall or supplemental irrigation.
However, it is crucial to adjust watering based on factors such as weather conditions, soil type, and plant growth stage. In general, young bean plants need more frequent watering to establish their roots, while established plants may require less frequent watering but with deeper saturation. Regularly checking the soil moisture levels and ensuring that it is evenly moist, but not waterlogged, is key to promoting healthy bean growth.
In addition to water, sunlight plays a vital role in the growth and development of bean plants. As a general rule, beans thrive in full sun, which means they should receive a minimum of six to eight hours of direct sunlight each day. Sunlight is essential for the process of photosynthesis, where plants convert sunlight into energy to support growth. Furthermore, sunlight exposure helps produce sturdy stalks and lush foliage, leading to better bean yields. If your garden has limited sunlight, consider placing your bean plants in the sunniest spots available or opting for varieties that tolerate partial shade.
However, it is important to note that prolonged exposure to scorching afternoon sunlight in hot climates can cause heat stress and sunburn on the plants. Making sure your bean plants receive the optimal amount of sunlight will contribute to their overall health and productivity.
Nurturing Bean Plants: Fertilization and Weed Control
Fertilization and weed control are vital steps in nurturing bean plants to ensure their optimum growth and productivity. Proper fertilization provides the necessary nutrients for the plants to thrive, while effective weed control prevents unwanted competition for resources.
When it comes to fertilizing bean plants, it is important to understand their specific nutrient requirements at different stages of growth. In the early stages, beans benefit from a balanced fertilizer high in phosphorus to promote strong root development. As the plants mature and begin to produce flowers and fruit, a switch to a fertilizer with higher levels of potassium can encourage flowering and enhance fruit set. Additionally, nitrogen fertilizers can be applied sparingly, as excess nitrogen can result in excessive foliage growth at the expense of bean production.
In terms of weed control, it is essential to maintain a weed-free environment around the bean plants. Weeds not only compete with beans for nutrients, water, and sunlight, but they can also harbor pests and diseases that can damage the plants. Manual weed removal can be effective, especially during the early stages of growth when bean plants are more susceptible to weed competition. Mulching the soil can also help reduce weed growth and conserve moisture, while some gardeners opt for chemical herbicides as a last resort.
By carefully nourishing bean plants through appropriate fertilization and diligent weed control, gardeners can ensure healthy and vigorous growth, leading to a bountiful harvest of delicious beans. As with any plant care practice, it is essential to regularly monitor the plants’ progress, make adjustments as needed, and seek guidance from local agricultural extension offices or trusted gardening resources.
Managing Pests and Diseases in Bean Plants
Bean plants are susceptible to a variety of pests and diseases that can severely impact their growth and yield. One common pest that gardeners may encounter is the bean beetle. These small, yellow or red beetles can quickly multiply and devour the leaves and pods of bean plants. To control bean beetles, regular monitoring and inspection of plants is crucial. Handpicking the beetles and removing them from the plants can help prevent infestations from spreading. Additionally, applying organic insecticides or using companion planting techniques, such as intercropping with marigolds or planting aromatic herbs like basil, can help deter bean beetles.
Another pest that poses a threat to bean plants is the aphid. These tiny insects feed on the sap of the plants, causing stunted growth and deformed leaves. Aphids can be controlled by using insecticidal soaps or neem oil, which are safe and effective methods of organic pest control. Introducing natural predators such as ladybugs and lacewings to the garden can also help keep aphid populations in check. Regularly pruning and disposing of infested plant parts can prevent the spread of aphids to healthy plants.
In terms of diseases, bean plants can be susceptible to fungal infections such as powdery mildew and rust. Powdery mildew appears as a white, powdery coating on the leaves, while rust presents as orange or brown pustules on the undersides of leaves. Both diseases thrive in humid conditions, so ensuring adequate air circulation and spacing plants properly can help prevent their development. In severe cases, applying fungicides specifically formulated for these diseases may be necessary.
By implementing proactive pest and disease management strategies, gardeners can safeguard their bean plants and enjoy a bountiful harvest. Regularly inspecting plants, employing organic pest control methods, and practicing good cultural practices are essential for maintaining the health and productivity of bean plants.
Harvesting Beans at the Right Time
Harvesting beans at the right time is crucial to ensure you get the best flavor and texture from your crop. The timing of the harvest depends on the type of bean you are growing and your desired outcome.
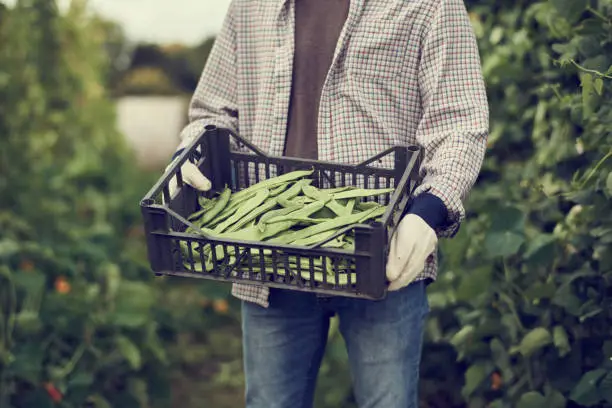
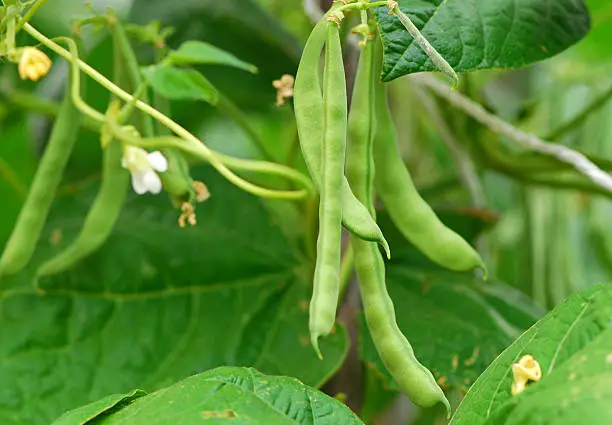
For snap beans, such as green beans or long beans, it is essential to harvest them when the pods are still firm and crisp. Waiting too long can result in tough and stringy pods, diminishing their taste and quality. Look for pods that are about four to six inches long, depending on the variety, and snap easily when bent. Regular harvesting encourages the plant to produce more pods, so be sure to check your plants regularly, ideally every two to three days.
On the other hand, if you are growing dried beans, such as kidney beans or black beans, the ideal time to harvest is when the pods have fully matured and are dry and brittle. This usually occurs when the plants have turned yellow and the pods start to crack open. To prevent any loss of beans, you can either harvest the entire plant or remove the pods carefully. Dry the beans thoroughly in a cool, well-ventilated area before storing them in airtight containers for later use.
Remember, the timing of the harvest greatly impacts the taste and overall quality of your beans. By understanding the specific cues for each bean variety and harvesting them at the right stage, you can enjoy the best possible harvest from your garden. So keep a close eye on your plants and savor the satisfaction of harvesting beans at their peak!
Storing and Preserving Beans for Longevity
When it comes to storing and preserving beans for longevity, there are a few key practices to keep in mind. Proper storage techniques not only help maintain the quality of the beans but also ensure that they stay fresh for an extended period. One important aspect to consider is the moisture content of the beans. Excess moisture can lead to mold and deterioration, while too little moisture can cause the beans to become dry and lose their flavor. Therefore, it is crucial to store beans in a cool and dry place, away from direct sunlight and moisture.
Another tip for prolonging the shelf life of beans is to store them in airtight containers. Airtight containers help prevent moisture and air from seeping in, thereby preserving the beans’ quality and freshness. Additionally, using opaque containers can protect the beans from exposure to light, which can degrade their nutrition and flavor. It’s also essential to label the containers with the date of storage to keep track of the beans’ freshness. Properly stored and preserved beans can last for months, ensuring that you can enjoy their nutritious benefits for an extended period.
As a gardener, hydroponics expert, botanist, and agronomist, these storage techniques have been widely recommended by experts in the field. By following these practices, you can ensure that your beans remain fresh and flavorful, ready for your culinary adventures whenever you need them. Don’t let your hard work in the garden go to waste: store and preserve your beans properly to enjoy their goodness for months to come.
How long can beans be stored for?
Beans can be stored for up to one year if kept in a cool, dry place.
Can I store beans in the refrigerator?
It is not recommended to store beans in the refrigerator as they can become too moist and spoil.
What is the best way to store dried beans?
The best way to store dried beans is in airtight containers such as glass jars or plastic containers with tight-fitting lids.
Should I wash beans before storing them?
It is best not to wash beans before storing them as moisture can promote the growth of bacteria and mold. Instead, wash them right before cooking.
Can I freeze beans for long-term storage?
Yes, beans can be frozen for long-term storage. However, they should be blanched before freezing to help preserve their quality.
How long can frozen beans be stored for?
Frozen beans can be stored for up to six months without a significant loss of quality. After that, they may start to develop freezer burn.
Can I store cooked beans for a long time?
Cooked beans can be stored in the refrigerator for up to five days. If you want to store them for longer, it is best to freeze them.
How should I store canned beans?
Canned beans can be stored in their original cans as long as they remain sealed. Once opened, transfer any unused beans to a covered container and refrigerate for up to five days.
Can I store beans in a vacuum-sealed bag?
Yes, storing beans in a vacuum-sealed bag can help prolong their shelf life by preventing exposure to air and moisture.
How can I tell if stored beans have gone bad?
Check for signs of mold, strange odors, or a slimy texture. If any of these are present, it is best to discard the beans.
Beck Wakeford is a dedicated writer at SouthElMonteHydroponics, with a fervent enthusiasm for agriculture and technological innovation. Armed with a degree in Agricultural Engineering from a leading university, Beck specializes in hydroponic systems design, automation, and optimization. Their passion for merging traditional farming with cutting-edge technology drives them to explore novel solutions for sustainable food production. Beck’s expertise and keen interest in the intersection of engineering and agriculture make them a valuable asset in the quest for efficient and eco-friendly farming practices. Through their writing, Beck aims to inspire others to embrace the potential of hydroponics in shaping a more sustainable future.