How to Germinate Seeds: A Step-by-Step Guide to Sprouting Your Seeds Successfully
“Have you ever wondered how a tiny seed transforms into a thriving plant? Well, get ready to unlock the secrets of seed germination with our step-by-step guide! Whether you’re a seasoned gardener or a curious beginner, mastering the art of sprouting seeds is essential for a bountiful harvest. From selecting the perfect seeds to providing the ideal environment for growth, we’ve got you covered. With our expert tips and tricks, you’ll be amazed at how simple and rewarding the germination process can be. So, roll up your sleeves and join us on this green-fingered adventure! By the end of this guide, you’ll be ready to sow, sprout, and reap the rewards of your labor with confidence.”
Table of Contents
Understanding the Germination Process
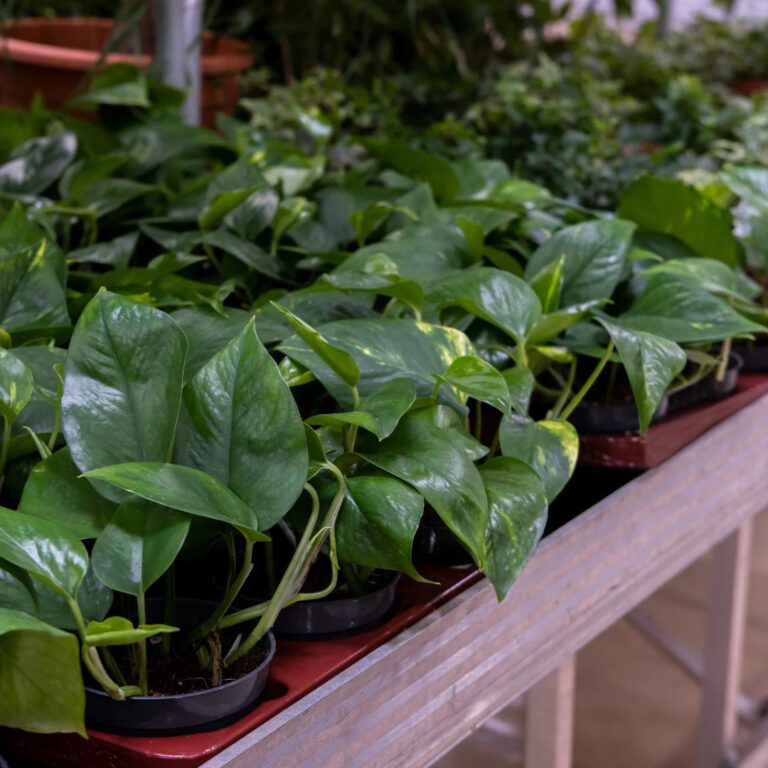
The germination process is a critical stage in the life cycle of plants, where a seed transforms into a young seedling. It is an intricate and fascinating process that involves several factors working together harmoniously. Understanding this process can greatly enhance our success in germinating seeds and ultimately growing healthy plants.
:max_bytes(150000):strip_icc()/seeds-that-need-light-for-good-germination-1403091-02-8aa1971aa5c54573bb42a7b0788fa594.jpg)
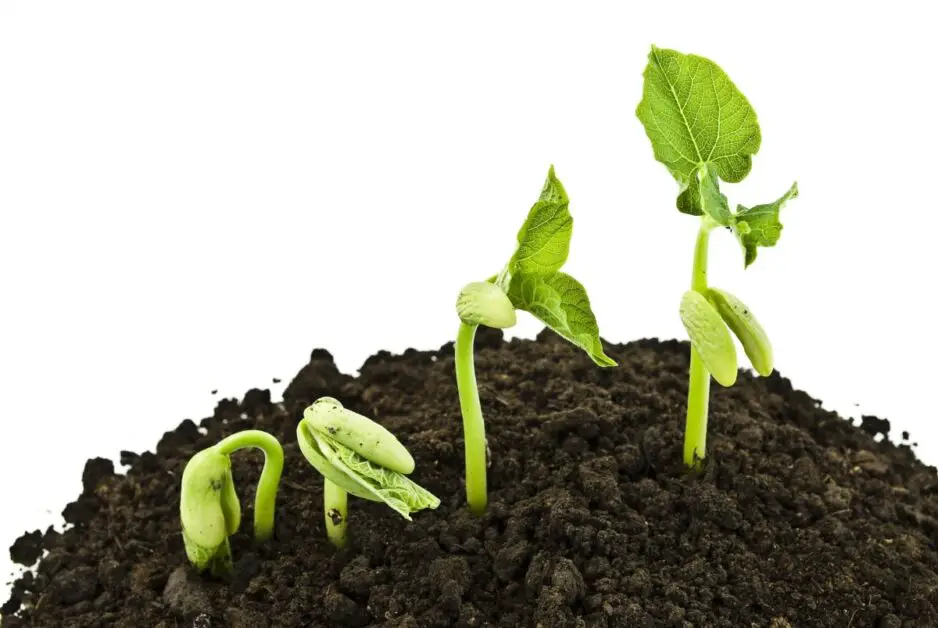
- Germination initiates with water absorption by the seed, prompting biochemical changes.
- Enzymes become active, breaking down stored nutrients to fuel growth.
- Swelling occurs as the seed coat cracks, allowing the root to emerge first, followed by the shoot.
- Oxygen is essential for respiration, vital for the seedling’s survival.
- Temperature is critical; different seeds have specific temperature requirements.
- Some seeds need colder temperatures for winter dormancy, while others thrive in warm, tropical conditions.
- Knowing the preferred temperature range for your seeds ensures successful germination.
- Moisture is crucial, activating enzymes and softening the seed coat for easier sprouting.
By gaining a deeper understanding of the germination process, gardeners and plant enthusiasts can create the ideal conditions for their seeds to sprout and thrive. In the following sections, we will explore the essential steps and factors involved in successful germination, guiding you towards a fruitful and rewarding gardening experience. So, let’s dive into the world of germination and unlock the secrets to cultivating thriving plants from seeds.
Selecting the Right Seeds for Germination
Selecting the right seeds for germination is a crucial step in ensuring a successful gardening experience. With a wide variety of seeds available, it can be overwhelming to choose the best ones for your needs. However, there are a few key factors to consider that can simplify the selection process.
- Climate Considerations:
- Research the ideal temperature range and growing conditions for each type of plant.
- Some plants thrive in warm climates, while others tolerate cooler temperatures.
- Gardening Goals and Preferences:
- Identify your goals:
- Colorful flowers
- Delicious vegetables
- Fragrant herbs
- Consider preferences:
- Heirloom varieties or hybrid seeds
- Identify your goals:
By identifying your goals and preferences, you can narrow down your options and choose seeds that will bring you the most satisfaction in your gardening endeavors. So, before you get your hands dirty, take the time to carefully select the right seeds that will set the foundation for a successful germination process.
Gathering the Necessary Materials for Germination
Gathering the necessary materials for germination is an essential step in ensuring successful seedling development. Before embarking on this process, it is important to have a clear understanding of the requirements for germination and the specific needs of your chosen plant species.
- High-Quality Seeds: Choose fresh, healthy seeds suited to your environment and plant’s needs. Consider factors like growing conditions and germination requirements.
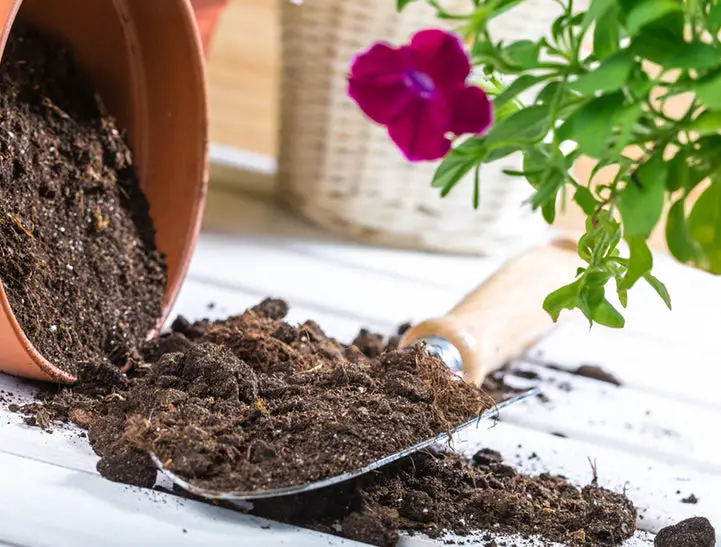
- Germination Medium: Select a suitable medium like soil, peat moss, or coco coir. Ensure it retains moisture, drains well, and provides good aeration for healthy root development. Keep it clean and sterile to prevent diseases.
- Containers or Trays: Use containers with drainage holes, such as plastic pots or seed trays, to sow seeds. Select based on plant needs and personal preference to promote healthy root.
- Water Source: Ensure access to clean, filtered water for optimal germination. Avoid contaminants that may hinder growth, opting for distilled or filtered water when possible.
By gathering all the necessary materials, you will create an optimal environment for seed germination, setting the stage for healthy and vigorous seedling growth. Taking the time to gather these materials ensures that you are well-prepared and ready to embark on the journey of nurturing your seeds into thriving plants.
Preparing the Seed Germination Environment
Preparing the seed germination environment is a crucial step in ensuring successful and healthy germination. The germination environment should provide the optimal conditions for the seeds to sprout and develop into healthy seedlings.
By carefully preparing the seed germination environment, you can set the stage for successful germination and give your seeds the best possible start in their journey towards becoming healthy, thriving plants. Stay tuned for the next step, soaking the seeds for optimal germination, where we will explore the benefits and techniques of pre-soaking seeds before planting.
Soaking the Seeds for Optimal Germination
Soaking seeds before germination is a simple yet effective technique that can significantly improve the success rate of your seedlings. By soaking the seeds, you are essentially providing them with a head start in the germination process. When seeds are soaked, they absorb water, which triggers the activation of enzymes and biochemical processes that promote germination.
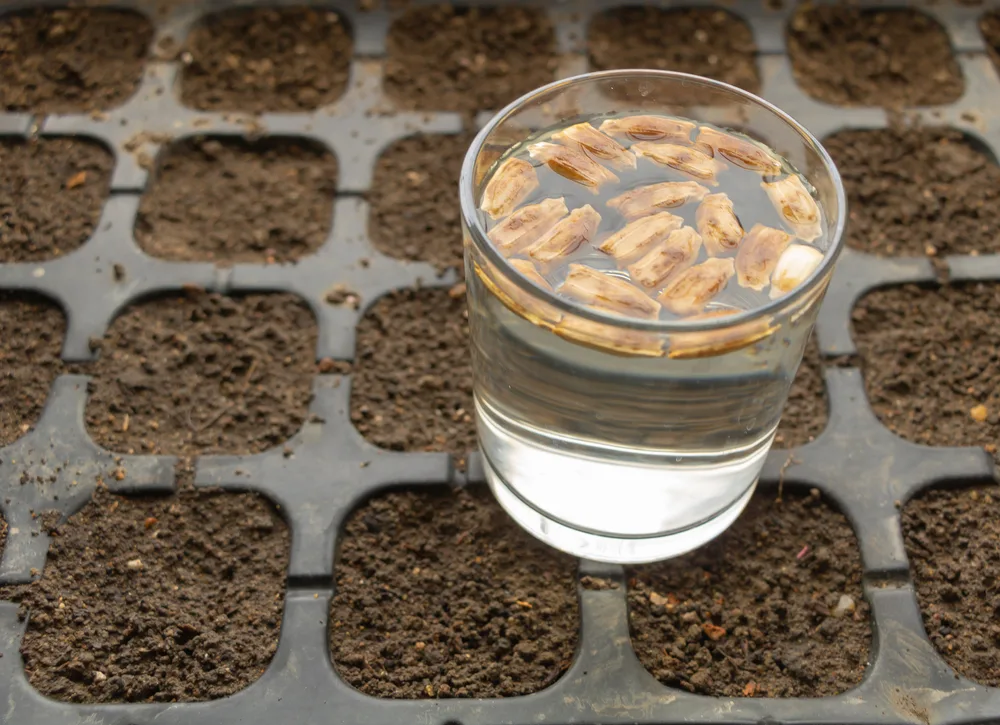
- Seed Type and Size:
- Smaller Seeds: Require less soaking time.
- Larger Seeds: May need a longer soak.
- Not All Seeds Benefit:
- Some seeds, like those of cacti and succulents, have specialized coatings.
- These seeds do not require pre-soaking.
- Research Specific Requirements:
- Investigate the needs of the seeds you’re working with.
- Determine if soaking is necessary based on the seed type.
- Avoid Overhydration:
- Do not soak seeds for an extended period.
- Overhydration can be detrimental to germination.
By following these guidelines, you’ll optimize the germination process for your indoor plant seeds! 🌱🌼🌿
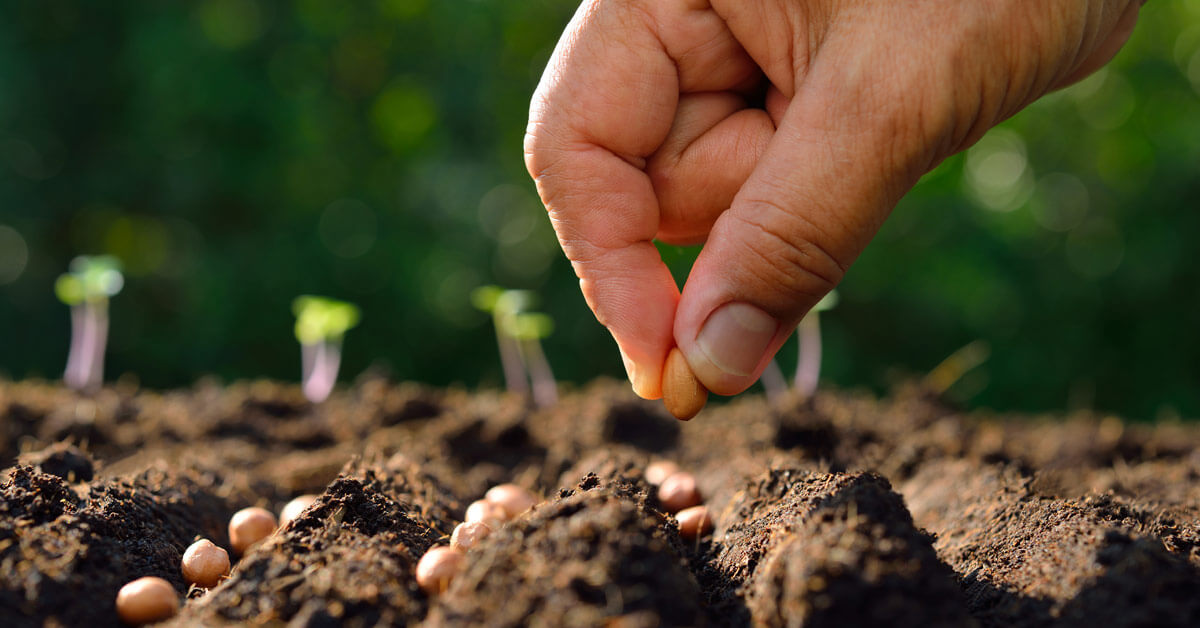
Planting the Seeds in the Germination Medium
When it comes to planting seeds in the germination medium, there are a few key steps to follow for optimal results. First and foremost, it’s important to choose a germination medium that is well-draining and nutrient-rich. This will provide a favorable environment for the seeds to establish healthy root systems.
- Seed Preparation: Some seeds may benefit from scarification or stratification to promote germination.
- Scarification: Breaking or weakening the seed coat.
- Stratification: Mimicking natural winter dormancy.
- Understanding Seed Needs: Ensure the best chance of successful germination by knowing the specific requirements of your chosen seeds.
- Planting Depth: Varies based on seed type; larger seeds should be planted deeper, while smaller seeds can be planted more shallowly.
- Even Spacing: Plant seeds evenly to avoid competition for resources as they grow.
- Setting the Stage: These steps during planting promote healthy seedling development and successful gardening.
Providing Adequate Moisture for Seed Germination
Providing adequate moisture is crucial for successful seed germination. Water is an essential element in the germination process as it activates enzymes that break down stored starches in the seed, allowing the embryo to grow and emerge from the protective seed coat. Without sufficient moisture, seeds may fail to germinate or experience delayed germination, resulting in poor seedling establishment.
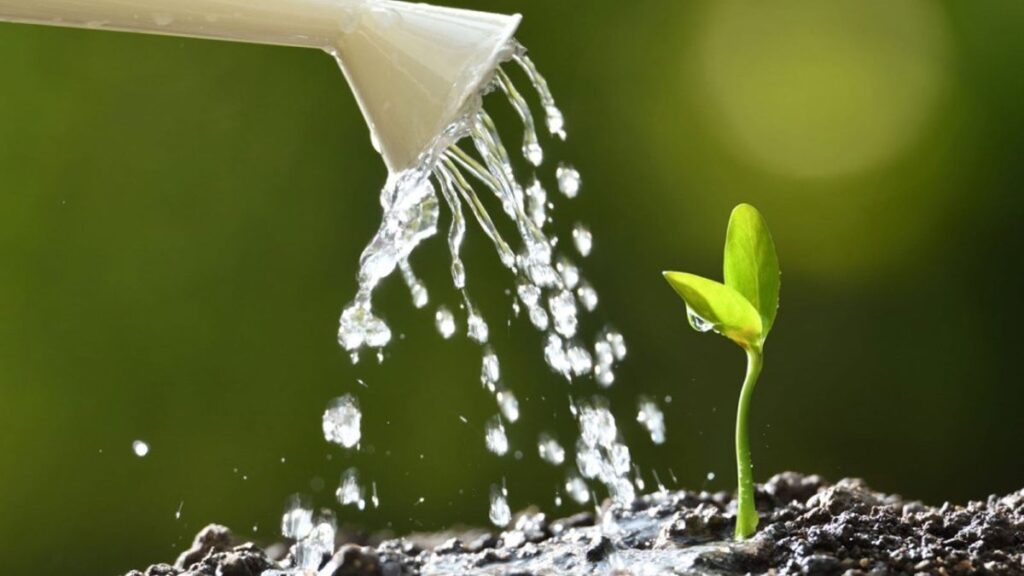
- Balance is Key:
- Overwatering: Excessive watering can lead to waterlogging and harmful pathogens.
- Underwatering: Lack of moisture inhibits germination and harms seedlings.
- “Goldilocks Rule”:
- Maintain consistently moist soil or germination medium.
- Regularly check moisture level by gently pressing the surface.
- Adjust watering based on whether the medium feels dry or overly saturated.
By striking the right balance, you can create optimal conditions for seed germination and increase your chances of success.🌱💧🌼
Ensuring Proper Temperature for Successful Germination
Maintaining the proper temperature is crucial for successful seed germination. Different plant species have specific temperature requirements for the germination process to occur optimally. It is important to note that temperatures that are too high or too low can impede or even inhibit germination.
Using the VIVOSUN Digital Thermostat for seed germination has been a game-changer in my gardening endeavors. Its precise temperature control has created the perfect environment for my seeds to sprout and thrive. I’ve noticed a significant improvement in the germination rate and overall health of my seedlings since incorporating this thermostat into my setup.
The thermostat’s user-friendly interface made it easy to set and maintain the ideal temperature for seed germination, ensuring consistent results with each batch of seeds. Its durability and reliability have given me peace of mind, knowing that my seeds are in good hands. Overall, the VIVOSUN Digital Thermostat has become an indispensable tool for ensuring successful seed germination, making my gardening journey smoother and more enjoyable.

- Precise Temperature Control: The VIVOSUN Digital Thermostat offers precise temperature regulation, allowing users to maintain optimal conditions for germination, fermentation, or other temperature-sensitive processes.
- User-Friendly Interface: With its digital display and intuitive controls, this thermostat is easy to program and adjust, even for beginners.
- Versatile Applications: It can be used for various purposes, including seed germination, homebrewing, reptile terrariums, and fermentation projects.
- Wide Temperature Range: The thermostat supports a wide temperature range, catering to different temperature requirements for various applications.
- Temperature Memory Function: It retains temperature settings even after power outages, ensuring continuity and consistency in temperature control.
- Built-in Safety Features: The thermostat includes built-in safety features to prevent overheating or temperature fluctuations, safeguarding sensitive projects.
- Durable Construction: Constructed with high-quality materials, the VIVOSUN Digital Thermostat is durable and built to last, providing reliable performance over time.
- Limited Compatibility: Some users may find that this thermostat is only compatible with specific heating or cooling devices, limiting its versatility in certain setups.
- External Temperature Probe: The external temperature probe may be susceptible to interference or inaccuracies if not positioned correctly, requiring careful placement for precise temperature readings.
- Small Display: The digital display screen may be relatively small, making it challenging to read temperature readings from a distance or in low-light conditions.
- Power Source Requirement: It requires a constant power source to operate, which may not be convenient for certain outdoor or off-grid applications.
- Price: Compared to basic thermostats, the VIVOSUN Digital Thermostat may have a higher price point, potentially impacting budget-conscious consumers.
- Limited Warranty: The warranty period provided by the manufacturer may be limited, leaving users with fewer options for repairs or replacements in case of malfunctions.
- Learning Curve: While user-friendly, some users may experience a learning curve when initially setting up and programming the thermostat, requiring patience and experimentation to achieve desired results.
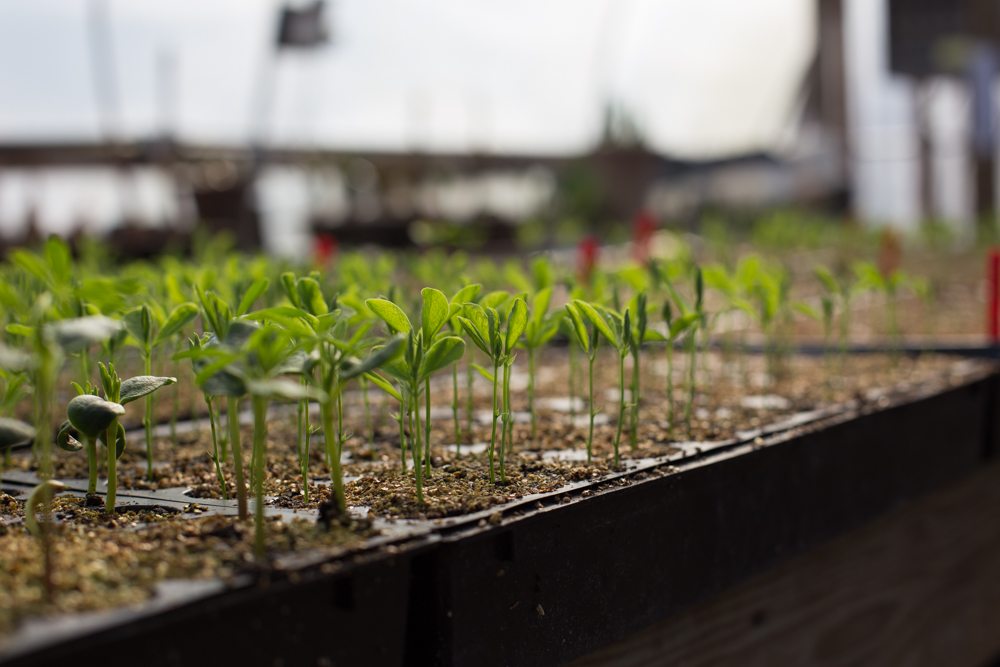
Providing Sufficient Light for Seedling Development
Providing sufficient light is crucial for the healthy development of seedlings. Light plays a vital role in the process of photosynthesis, where plants convert light energy into chemical energy, fueling their growth. Without adequate light, seedlings may become weak, leggy, and prone to disease.
:max_bytes(150000):strip_icc()/growing-seeds-indoors-common-mistakes-847800-05-db13b15adbbb4d3a9097230c5bb97cc4.jpg)
- Understanding Light Needs: Different plants have varying light requirements; some need more light (e.g., tomatoes, peppers) while others can tolerate lower levels (e.g., lettuce, herbs).
- Optimal Light Duration: Most seedlings require 14 to 16 hours of light daily for optimal growth.
- Lighting Options: Gardeners can use natural sunlight or artificial lighting if sunlight is limited or inconsistent.
- Artificial Lighting: Options include fluorescent, LED, or HID lights, which provide the necessary spectrum and intensity.
- Proper Positioning: Keep lights positioned close to seedlings (4 to 6 inches) to ensure adequate light exposure.
- Monitoring and Adjustment: Regularly monitor light intensity and adjust light height to prevent seedlings from stretching or becoming leggy.
In conclusion, providing sufficient light is essential for seedling development. Understanding the light requirements of different plants and utilizing natural sunlight or artificial lighting options will help ensure the healthy growth of seedlings. By meeting their light needs, gardeners can set their seedlings up for success, promoting strong and vigorous plants.
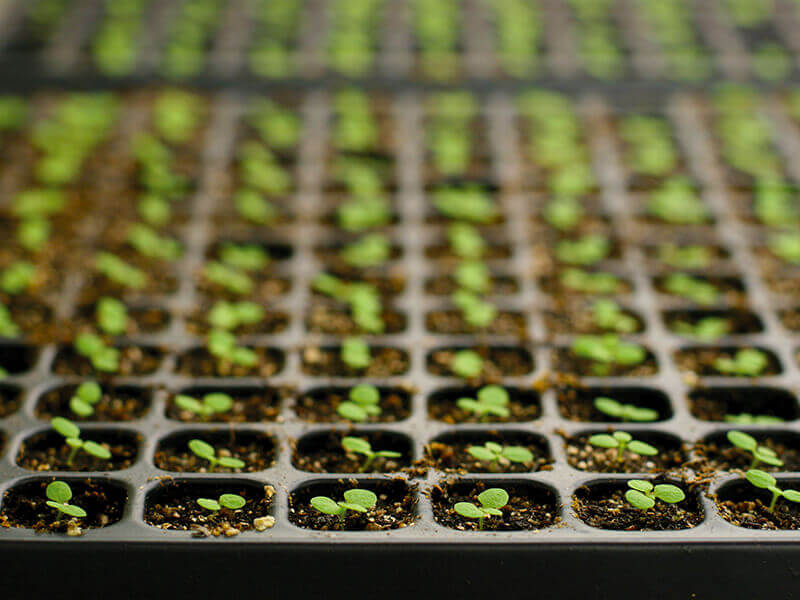
Monitoring Seed Germination Progress
Monitoring seed germination progress is a crucial step in ensuring successful plant growth. By closely observing and recording the changes in the seeds, gardeners can make necessary adjustments to optimize conditions for germination.
- Visual Inspection:
- Examine seeds daily for signs of sprouting:
- Look for the emergence of a radicle (the embryonic root).
- Observe the unfolding of cotyledons (seed leaves).
- Document the number and percentage of germinated seeds.
- Examine seeds daily for signs of sprouting:
- Measuring Germination Rate:
- Count germinated seeds over a set time period (typically every 24 hours).
- Calculate the germination rate to assess vitality.
- Identify any issues (e.g., insufficient moisture, improper temperature).
- Data-Driven Approach:
- Use insights from visual inspection and quantitative analysis.
- Make targeted adjustments to optimize the germination environment.
- Increase overall success for healthy plant growth.
By combining these methods, you’ll effectively monitor seed germination and nurture your indoor plants! 🌱🌿🌼
Transplanting Germinated Seeds into Containers or Garden Beds
Transplanting germinated seeds into containers or garden beds is a crucial step in the journey of cultivating healthy and thriving plants.
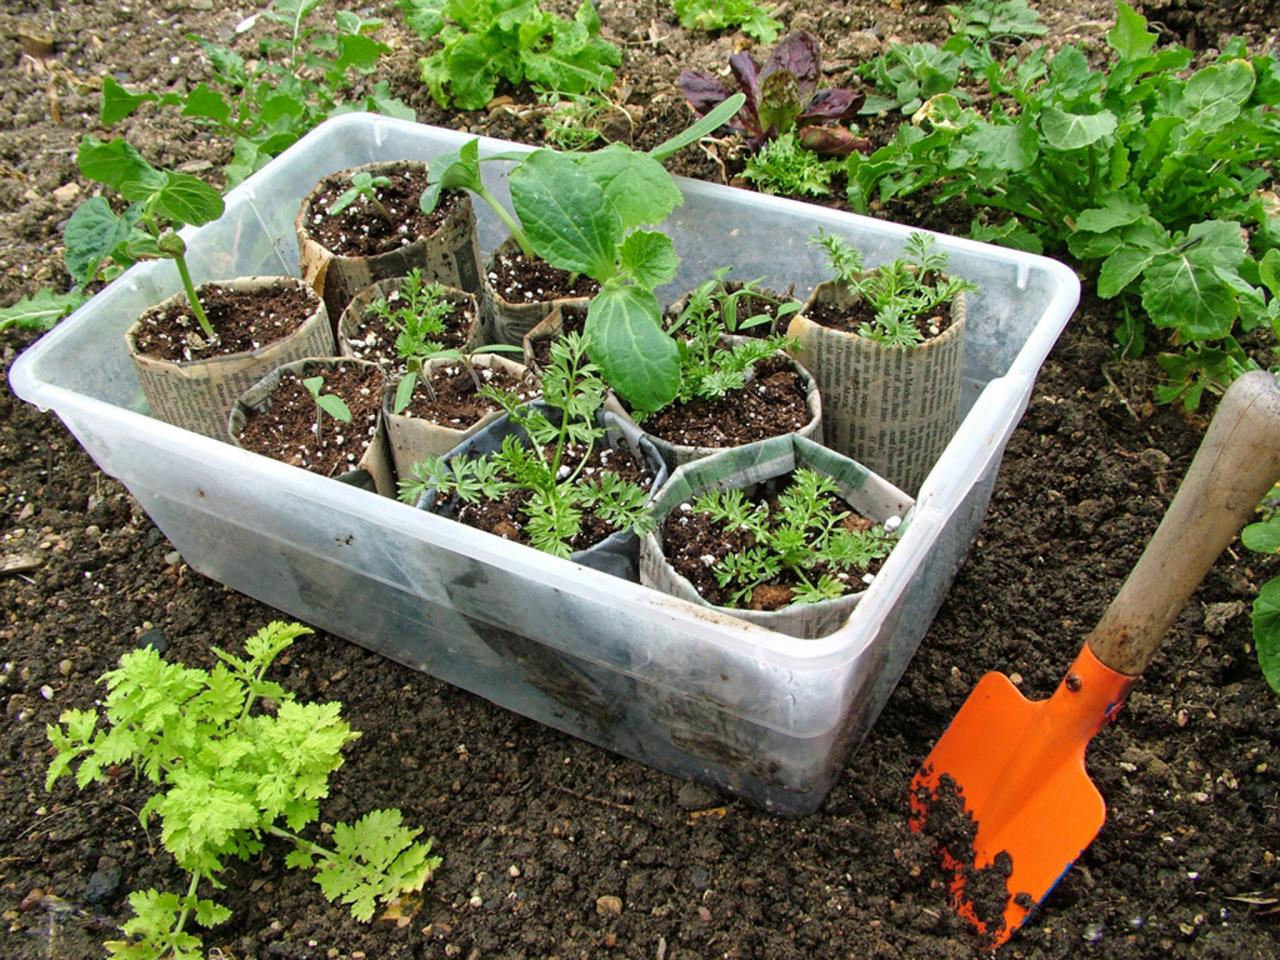
- Prepare the Growing Medium:
- Use a well-draining medium such as potting soil or a mix of compost, perlite, and vermiculite.
- Ensure proper aeration and moisture retention for the seedlings.
- Remove Seedlings Carefully:
- Gently remove the seedlings from their germination medium.
- Be cautious not to damage their delicate roots.
- Dig Holes and Plant Seedlings:
- Dig holes in your prepared containers or garden beds.
- Place the seedlings in the holes, burying them up to their first set of true leaves.
- Secure Seedlings in Place:
- Firmly but gently press the soil around the base of the seedlings.
- This helps secure them in their new location.
- Timing Matters:
- The timing for transplanting depends on the type of plant.
- Cool-season crops like spinach should be planted before outdoor temperatures get too warm, while warm-season crops like tomatoes and peppers should wait until nighttime temperatures consistently remain above 60°F (15°C).
- Check your local frost dates to determine the best time for each vegetable.
- Harden Off Seedlings:
- If you’re moving seedlings from indoors to outdoors, gradually acclimate them to the change.
- Set the seedlings outdoors in dappled shade (protected from wind) for a few hours each day, 7 to 10 days before transplanting.
- This helps prevent shock and prepares them for the outdoor environment.
- Choose a Protected Spot:
- When transplanting, pick a spot in your garden that provides some protection from strong winds and direct sunlight.
- This will help the seedlings adjust more smoothly to their new surroundings.
- Keep Seedlings Watered:
- Proper hydration is essential during transplanting.
- Water the seedlings thoroughly before moving them, and continue to water them after transplanting.
- Adequate moisture helps prevent stress and encourages root establishment.
- Gradual Exposure:
- Slowly increase the seedlings’ exposure to garden conditions.
- Start with a few hours outdoors, then gradually extend the time.
- This gradual transition helps prevent shock and allows the plants to adapt to the outdoor climate.
- Choose the Right Day:
- Transplant on a calm, overcast day if possible.
- Extreme heat or strong winds can stress the seedlings, so aim for favorable weather conditions.
- Watch the Weather:
- Keep an eye on local weather forecasts.
- If a cold snap is imminent, wait until temperatures are more agreeable for transplanting.
- Sudden temperature drops can harm delicate seedlings.
Remember, proper care during and after transplanting will help your seedlings thrive and grow into healthy, productive plants.
(article continues)
Incorporating Burpee Natural Grade Vermiculite into my gardening routine has notably improved the health and vitality of my plants. Its lightweight nature and moisture retention properties have created an optimal environment for my soil, promoting healthy root growth and overall plant development. I’ve observed that my soil stays consistently moist without becoming waterlogged, which has helped to prevent issues like root rot and overwatering.
Additionally, using Burpee Vermiculite in my seed starting mixes has resulted in higher germination rates and stronger seedlings. Its ability to improve soil aeration and drainage has created a loose and airy medium for seeds to thrive, setting the stage for successful plant growth from the very beginning. While there may be some concerns about its dusty nature and cost, the benefits of using Burpee Natural Grade Vermiculite outweigh these drawbacks, making it an essential component of my gardening arsenal.
✅ Moisture Retention: Vermiculite has excellent moisture retention properties, helping to keep soil evenly moist and promoting healthy plant growth.
✅ Aeration: It improves soil aeration and drainage, preventing soil compaction and waterlogging, which can lead to root rot and other issues.
✅ Nutrient Retention: Vermiculite can hold onto nutrients, making them more available to plant roots over time.
✅ Seed Starting: It’s ideal for seed starting mixes, providing a loose and airy medium for seeds to germinate and grow.
✅ pH Neutral: Burpee Natural Grade Vermiculite is pH neutral, meaning it won’t alter the acidity or alkalinity of the soil.
✅ Organic: This vermiculite is natural and organic, suitable for environmentally conscious gardeners.
❌ Dusty: Vermiculite can be dusty, which may cause irritation to the respiratory system if inhaled, so it’s essential to handle it with care and wear a mask if necessary.
❌ Cost: Compared to other soil amendments, vermiculite may be relatively expensive, impacting the overall cost of gardening projects.
❌ Environmental Concerns: The mining and processing of vermiculite can have environmental impacts, including habitat disruption and energy consumption.
❌ Limited Availability: Availability of Burpee Natural Grade Vermiculite may vary depending on location, requiring special ordering or alternative options for some users.
❌ Non-Renewable Resource: Vermiculite is a non-renewable resource, meaning its extraction can deplete natural deposits over time.
❌ Limited Use: While beneficial for improving soil structure and moisture retention, vermiculite may not be suitable for all gardening applications, such as heavy clay soils or water-sensitive plants.
Caring for Germinated Seedlings
Once the seedlings have germinated, proper care is crucial to ensure their healthy growth and development. Here are some important steps to consider when caring for germinated seedlings:
1. Watering: Seedlings require consistent moisture to thrive, but overwatering can lead to root rot and other issues. Water the seedlings gently, ensuring the soil is evenly moist, but not waterlogged. It is best to water from the bottom by placing the container in a tray of water and allowing the soil to soak up the moisture. This method helps encourage proper root development.
2. Light: Providing sufficient light is essential for seedling growth. Place the seedlings in a location where they can receive bright, indirect light for 12-16 hours a day. If natural sunlight is limited, you can use fluorescent grow lights positioned a few inches above the seedlings to provide the necessary light spectrum for photosynthesis.
Caring for Germinated Seedlings: Essential Steps
| Care Aspect | Description |
|---|---|
| 1. Light Exposure | – Provide Adequate Light: Place seedlings in a location with sufficient natural light or under grow lights. Adjust the light duration to 12-16 hours daily. |
| – Maintain Optimal Distance: Adjust the height of grow lights to prevent leggy growth and ensure even light distribution. | |
| 2. Watering | – Keep Soil Moist: Maintain consistently moist but not waterlogged soil. Use a spray bottle or watering can with a fine spray to avoid disturbing delicate seedlings. |
| – Bottom Watering: Water from the bottom to encourage strong root development and prevent fungal issues on the soil surface. | |
| – Monitor Soil Moisture: Check the soil regularly and adjust watering frequency based on the moisture level. | |
| 3. Temperature Control | – Maintain Optimal Temperature: Keep the environment within the recommended temperature range for the specific seedlings. Use heating mats if necessary. |
| – Avoid Temperature Fluctuations: Minimize temperature fluctuations, especially during the nighttime, to promote steady growth. | |
| 4. Humidity Regulation | – Provide Humidity Dome: Use a humidity dome or cover to maintain high humidity levels, especially during the germination phase. Gradually remove it as seedlings grow. |
| – Good Air Circulation: Ensure proper ventilation to prevent excessive humidity and reduce the risk of fungal diseases. | |
| 5. Soil Nutrition | – Start Fertilizing Gradually: Begin fertilizing with a diluted, balanced fertilizer when seedlings develop their first true leaves. Follow recommended application rates. |
| – Choose a Gentle Fertilizer: Use a fertilizer specifically formulated for seedlings to prevent over-fertilization. | |
| – Transition to Full Strength: Gradually transition to full-strength fertilizer as seedlings grow and mature. | |
| 6. Transplanting | – Monitor Seedling Size: Transplant seedlings into larger containers when they outgrow their initial pots, ensuring adequate space for root development. |
| – Handle with Care: Gently lift seedlings from the soil, holding them by the leaves to avoid damaging the delicate stems. | |
| – Adjust to New Environment: Gradually expose transplanted seedlings to their final growing environment to acclimate them. | |
| 7. Disease Prevention | – Maintain Cleanliness: Keep the growing area clean to prevent the buildup of pathogens. Disinfect containers and tools regularly. |
| – Isolate Affected Seedlings: If any seedlings show signs of disease, isolate them promptly to prevent the spread to healthy ones. | |
| – Provide Adequate Airflow: Ensure good air circulation to discourage the development of fungal issues. |
Note: Tailor care practices to the specific requirements of each plant species, as different seedlings may have unique needs during their early growth stages. Regular monitoring and adjustments are key to successful seedling care.
Remember, each plant species may have specific care requirements, so it is crucial to research and understand the specific needs of the seedlings you are growing. These general care tips will help provide a solid foundation for successful seedling development.
Troubleshooting Common Issues in Seed Germination
Troubleshooting common issues in seed germination is an important aspect of the gardening process, as it can help resolve any problems that may arise and ensure successful plant growth.
- Poor Germination Causes: Factors include improper seed storage, inadequate moisture, and unsuitable temperature conditions.
- Starting with High-Quality Seeds: Ensure seeds are of good quality and stored correctly.
- Consistent Moisture Levels: Regularly check and adjust moisture in the germination medium as needed.
- Appropriate Temperature Conditions: Use heating mats or maintain ideal room temperature for improved germination.
- Lack of Seedling Growth or Weak Seedlings: Can result from insufficient light or poor soil conditions.
- Adequate Lighting: Provide enough natural sunlight or use grow lights positioned at the correct distance and duration.
- Nutrient-Rich Soil Mixture: Ensure seedlings are planted in soil with proper nutrients and drainage.
- Fertilization and Watering: Adjust fertilization and watering practices to promote healthy growth and prevent issues like over or under watering.
- Troubleshooting Steps: Addressing these common issues can improve seed germination and promote healthy plant growth.
Watch video for more information:
FAQ
Why are my seeds not germinating?
There could be several reasons why your seeds are not germinating, such as improper temperature, insufficient moisture, or poor seed quality. Review the article sections on temperature and moisture requirements, as well as selecting high-quality seeds for germination.
How long does it take for seeds to germinate?
The germination time varies depending on the type of seed. Some seeds may germinate within a few days, while others may take several weeks. Refer to the seed packet or consult a gardening resource for specific information on the germination time for the seeds you are working with.
What should I do if my seedlings are too weak or leggy?
Weak or leggy seedlings are often a result of insufficient light. Make sure your seedlings are receiving adequate light by placing them under grow lights or near a sunny window. Additionally, ensure that the seedlings are not overcrowded, as this can also lead to weak and leggy growth.
How do I prevent mold or fungal growth on my germinating seeds?
To prevent mold or fungal growth, it’s important to provide proper air circulation and avoid overwatering. Make sure the germination environment is well-ventilated, and only water the seeds when the germination medium feels slightly dry to the touch. If mold or fungus does appear, gently remove the affected seeds or seedlings and adjust the moisture levels accordingly.
What can I do if my seeds are germinating too slowly?
If your seeds are germinating slowly, check the temperature and moisture levels in the germination environment. Ensure that the temperature is within the optimal range for the specific seeds you are working with, and adjust the moisture levels if necessary. If the seeds still show no signs of germination after a reasonable amount of time, it’s possible that the seeds are not viable and may need to be replaced.
How can I protect my germinating seeds from pests?
Pests can pose a threat to germinating seeds. To protect your seeds, consider covering the germination container with a fine mesh or using organic pest control methods such as neem oil. Keep the germination area clean and free from debris, which can attract pests.
Can I use any type of soil for seed germination?
Not all soils are suitable for seed germination. It’s recommended to use a sterile seed-starting mix or a well-draining soil mix specifically designed for germination. Regular garden soil may contain pathogens or be too heavy, which can hinder seed germination.
Should I water my seeds from the top or bottom?
It is generally recommended to water seeds from the bottom to avoid disturbing the seeds or causing uneven moisture distribution. Place the germination container in a tray or saucer filled with water and allow the soil to absorb moisture from the bottom. This method promotes healthy root development.
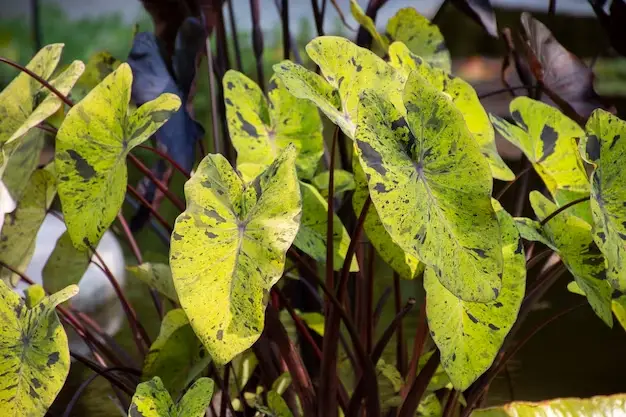
What should I do if my seedlings are turning yellow?
Yellowing seedlings can indicate a nutrient deficiency or overwatering. Check the moisture levels in the germination medium and adjust watering accordingly. If the yellowing persists, consider providing a balanced liquid fertilizer to provide the necessary nutrients for the seedlings.
Can I reuse the germination medium for future seedlings?
Reusing the germination medium is not recommended as it may harbor pathogens or become depleted of nutrients. It’s best to start with fresh, sterile germination medium for each batch of seeds you plan to germinate.
Studied Agricultural Engineering-Plant Protection at University of California, Davis.
Head of Content writing team at Southelmontehydroponics.com