How to Plant, Grow, Care For, and Harvest growing Dill
Table of Contents
Understanding the Ideal Growing Conditions for Dill
Dill, known for its delicate feathery leaves and fragrant aroma, is an herb that thrives under specific growing conditions. Understanding these ideal conditions is essential for successfully cultivating dill in your garden or indoor space. By providing the right environment, you can ensure that your dill plants grow vigorously, producing abundant foliage and seeds.
One of the key factors to consider is the temperature. Dill prefers a cool climate, with an optimal temperature range of 60 to 70 degrees Fahrenheit (15 to 21 degrees Celsius). It can tolerate some heat, but prolonged exposure to high temperatures can cause the plants to bolt, resulting in decreased leaf production. Therefore, it’s advisable to plant dill in early spring or fall, when temperatures are milder, to maximize its growth potential.
Another vital aspect is sunlight. Dill is a sun-loving herb that craves at least six hours of direct sunlight daily. Adequate sunlight promotes proper photosynthesis, enabling the plants to generate energy and essential nutrients for growth. If you’re growing dill indoors, make sure to place it near a south or west-facing window to provide sufficient light. Additionally, consider using artificial grow lights to supplement natural sunlight if needed.
To create the best growing conditions for dill, we also need to address soil requirements. Dill thrives in well-draining, fertile soil with a pH level between 5.8 and 6.5. Incorporating organic matter, such as compost or well-rotted manure, into the soil before planting can enhance its fertility and improve drainage. This will prevent waterlogging, which can lead to root rot and other diseases. Conducting a soil test to determine the pH level and making necessary adjustments is advisable. Aim for a loose texture that allows the roots to penetrate easily, fostering optimal nutrient uptake and growth.
By understanding and meeting the ideal growing conditions for dill, you can set the stage for a thriving herb garden. Proper temperature, sunlight, and soil conditions will ensure that your dill plants grow vigorously, providing you with ample fresh leaves and seeds to enhance your culinary creations.
Selecting the Right Location for Planting Dill
When selecting the right location for planting dill, it is crucial to consider a few key factors. Firstly, dill thrives in full sun, so it is best to choose a spot in your garden that receives at least 6 to 8 hours of direct sunlight each day. This will ensure optimal growth and productivity of your dill plants.
In addition to sunlight, dill also requires well-draining soil. It is important to choose a location where water does not accumulate and cause the roots to rot. Sandy or loamy soil types are ideal for dill, as they provide good drainage and allow the plants to access the nutrients they need. Before planting, it is recommended to improve the soil structure by incorporating organic matter, such as compost or well-rotted manure, to enhance nutrient availability and water retention.
By carefully selecting a sunny spot with well-draining soil, you are setting the foundation for successful dill cultivation. However, it is important to note that different varieties of dill may have specific site requirements, so be sure to choose the variety that is best suited for your specific location.
Preparing the Soil for Dill Planting
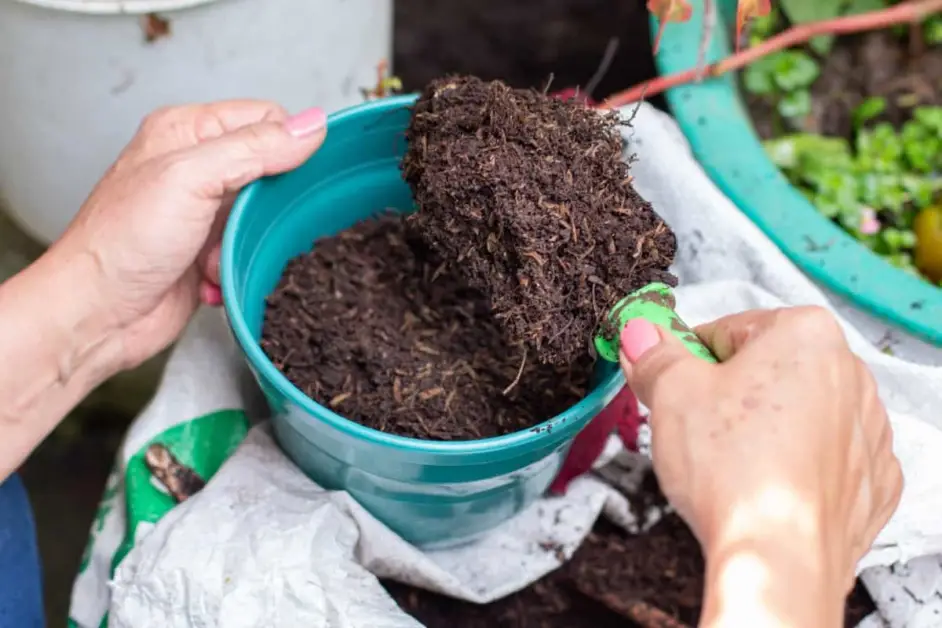
To ensure successful dill cultivation, it is essential to properly prepare the soil before planting. This step plays a crucial role in providing the ideal environment for the growth and development of dill plants. The first consideration when preparing the soil for dill planting is to choose a location that receives full sun for most of the day. Dill thrives in warm conditions, so selecting a spot with good exposure to sunlight is vital.
Next, it is important to assess the soil’s composition and make any necessary amendments. Dill prefers well-draining soil that is rich in organic matter. Conduct a soil test to determine the pH level and nutrient content of the soil. Dill plants prefer a slightly acidic to neutral pH range of 6.0 to 7.0. If the soil pH is outside this range, appropriate measures, such as adding lime to raise the pH or sulfur to lower it, should be taken. Additionally, enrich the soil with organic matter, such as compost or well-rotted manure, to improve its texture, fertility, and water-holding capacity.
After testing and amending the soil, ensure that it is properly loosened and aerated. This can be achieved by tilling or digging the soil to a depth of 8-10 inches. Remove any weeds, rocks, or debris that may impede the growth of dill plants. While preparing the soil, it is recommended to work in an ample amount of organic matter to further enhance its quality.
In summary, preparing the soil for dill planting involves selecting a sunny location, testing the soil’s pH and nutrient levels, making necessary amendments, and properly loosening and aerating the soil. By following these steps, gardeners can lay the foundation for healthy and productive dill plants. Stay tuned for the next section, where we will discuss the best dill varieties to choose for your garden.
Choosing the Best Dill Varieties for Your Garden
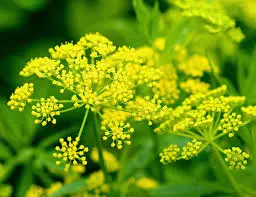
Dill, with its delicate feathery leaves and distinct flavor, is a versatile herb that can enhance a variety of culinary dishes. When it comes to choosing the best dill varieties for your garden, there are several factors to consider. Each variety has unique characteristics that can influence its growth, flavor, and suitability for different growing conditions.
One popular variety is the ‘Bouquet’ dill, known for its vigorous growth and abundant foliage. This variety is highly aromatic, making it a favorite among chefs and home cooks alike. Another option is the ‘Fernleaf’ dill, a compact variety that is perfect for small garden spaces or container gardening. Its shorter stature doesn’t compromise its flavor, as it still offers that classic dill taste. For those looking to add a touch of color to their herb garden, ‘Dukat’ dill is an excellent choice with its striking blue-green foliage.
When selecting dill varieties, it’s important to consider your climate and growing conditions. Some varieties, such as ‘Mammoth’ dill, thrive in cooler regions, while others, like ‘Hercules’ dill, are more tolerant of higher temperatures. Be sure to consult local gardening resources or talk to experienced gardeners to determine which dill varieties are best suited for your specific area. By choosing the right dill varieties for your garden, you’ll be on your way to a bountiful harvest and a flavorful addition to your culinary creations.
When selecting the best dill varieties for your garden, several factors below are to consider
| Factor | Considerations |
| Growing Conditions | Dill prefers full sunlight, so choose a location with at least six hours of direct light per day. Ensure the soil is well-draining and amended with compost. Ideal soil temperatures for dill are around 70°F. |
| Variety Selection | Fernleaf: A compact variety suitable for small growing areas. Germinates in approximately 2 to 3 weeks. Delikat: Great for container gardening due to its low-growing habits and spicier flavor notes. Explore other popular varieties like Mammoth, Bouquet, Elephant, and Eneldo based on your climate, space and intention. |
Remember that the right dill variety depends on your specific needs, available space, and local climate.
Sowing Dill Seeds and Proper Seed Depth
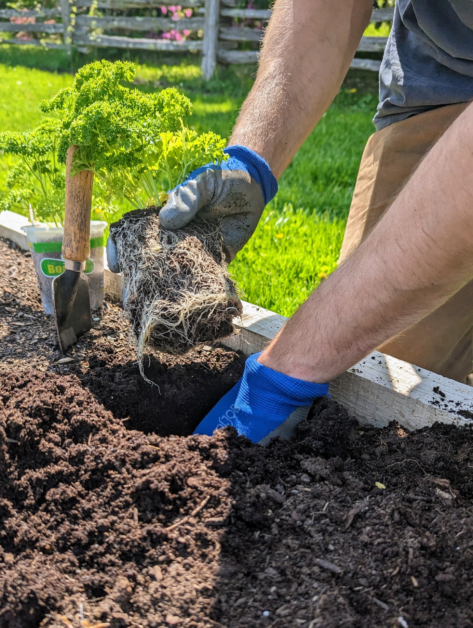
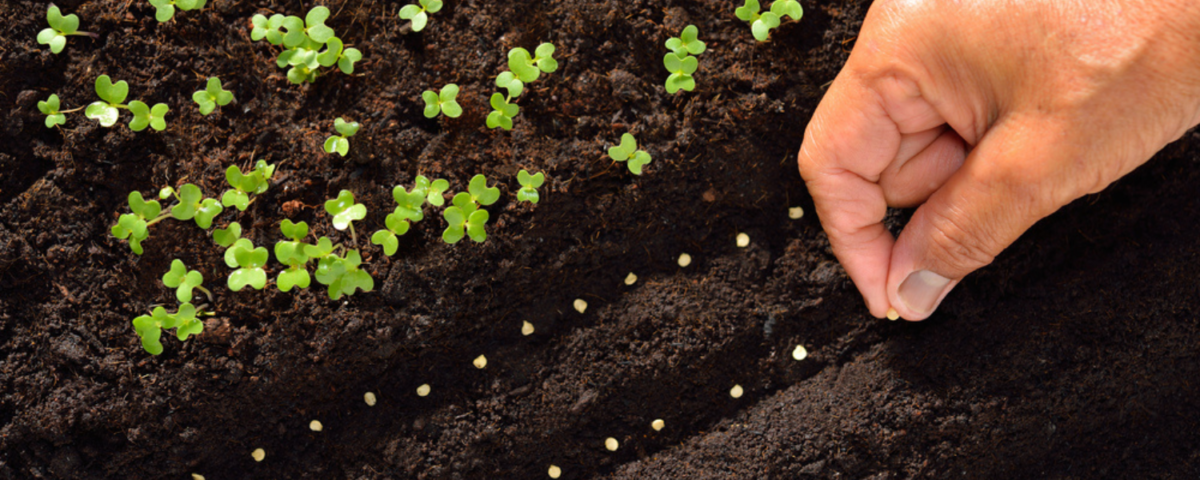
When sowing dill seeds, it is important to consider not only the timing but also the proper seed depth. Dill seeds should be sown directly into the soil as they do not transplant well. The ideal time for sowing dill seeds is in the spring, when the soil has warmed up and the danger of frost has passed.
To ensure successful germination, dill seeds should be sown at a depth of about ¼ to ½ inch (0.6 to 1.3 cm) in the soil. This depth allows for proper moisture absorption and provides adequate darkness for the seeds to sprout. It is essential to sow the seeds evenly, with a spacing of about 12 to 18 inches (30 to 46 cm) between each seed. This spacing allows enough room for the dill plants to grow and ensures proper air circulation.
By following these guidelines for sowing dill seeds and proper seed depth, you can increase your chances of a successful dill harvest. The next steps in the dill planting process include essential watering and fertilizing techniques to promote healthy growth and managing common pests and diseases that may affect dill plants. Stay tuned to learn more about these important aspects of cultivating dill in your garden.
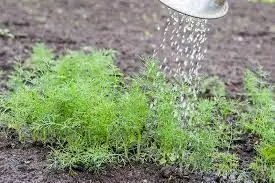
Essential Watering and Fertilizing Techniques for Dill
Proper watering and fertilizing techniques are essential for the healthy growth and development of dill plants. When it comes to watering, it is important to strike a balance between providing enough moisture to the plants and avoiding over-watering, which can lead to root rot and other complications. Dill plants prefer a consistently moist but not waterlogged soil. To achieve this, it is advisable to water deeply and thoroughly, allowing the water to penetrate the root zone.
In terms of fertilizing, dill plants have modest nutritional needs. Too much fertilizer can result in excessive foliage growth and diminished flavor. It is recommended to apply a balanced, slow-release fertilizer at the time of planting and then follow up with a light application of fertilizer every few weeks during the growing season. This will provide the plants with a steady supply of nutrients without overwhelming them. Additionally, incorporating organic matter, such as compost or well-rotted manure, into the soil prior to planting can further enrich the dill’s nutrient supply. By adhering to these watering and fertilizing techniques, you can ensure healthy and robust dill plants in your garden.
Managing Common Pests and Diseases in Dill Plants
One of the challenges that gardeners may face when growing dill plants is managing common pests and diseases. These unwanted visitors can cause significant damage to the plants if left unchecked. It is important to identify and address these issues promptly to ensure the health and productivity of your dill crop.
One common pest that affects dill plants is aphids. These small, soft-bodied insects feed on the sap of the plants, causing them to wilt and stunt in growth. To combat aphids, you can introduce natural predators like ladybugs or use organic insecticidal soaps. Regularly inspect the plants and remove any infested leaves or stems to prevent the spread of these pests. Another potential problem is powdery mildew, a fungal disease characterized by a white, powdery coating on the leaves. To prevent powdery mildew, ensure proper air circulation and avoid overcrowding the plants. Applying a fungicide recommended for dill and regularly monitoring the plants for any signs of infection can help in tackling this issue effectively.
Here’s a tabular summary of managing common pests and diseases in dill plants:
| Pest/Disease | Description | Treatment |
| Aphids | Small insects that feed on sap, found on new growth and leaf undersides. | Control with a mixture of water and dish soap or neem oil. |
| Spider Mites | Tiny arachnids causing leaf discoloration and stippling. | Spray with water, insecticidal soap, or neem oil. |
| Whiteflies | Small sap-feeding insects causing yellowing and wilting. | Use sticky traps or insecticidal soap. Neem oil is effective. |
| Cutworms | Soil-dwelling caterpillars that cut stems at ground level. | Use collars around plant base or soil spray with insecticidal soap. |
| Slugs and Snails | Mollusks feeding on leaves, creating irregular holes. | Copper tape or handpick them off at night. |
| Prevention Tips | Plant disease-resistant seeds. Keep the garden clean and weed-free Rotate crops. Use well-draining soil. Water at the base to avoid wet foliage | Companion planting can also attract beneficial insects that prey on pests. |
Pruning and Supporting Dill Plants for Optimal Growth
To ensure optimal growth and productivity, it is essential to properly prune and support dill plants throughout their growing season. Pruning helps promote air circulation, reduce the risk of disease, and stimulate the growth of new foliage. When the dill plants reach a height of about 12 inches, use clean gardening shears to trim off the top one-third of the plant. This will encourage the development of lateral branches and result in a bushier growth habit.
Supporting dill plants is crucial to prevent them from collapsing under their own weight as they mature and become top-heavy. A popular method for supporting dill is to use stakes or small bamboo dowels. Place the stakes around the base of the plant, making sure they are inserted deep enough to provide adequate support. Gently tie the dill stalks to the stakes using soft twine or plant ties, being careful not to constrict the stems. Regularly check the ties and adjust them as the plant grows to accommodate its increasing size.
Recognizing the Signs of Dill Readiness for Harvest
Recognizing the Signs of Dill Readiness for Harvest
As a gardener, understanding when your dill is ready for harvest is crucial to ensure you enjoy its fresh and vibrant flavor. Fortunately, there are several key signs that can help you determine if your dill plants are ripe and ready to be picked.
Firstly, examine the appearance of the dill plant. Mature dill plants typically reach a height of 2 to 3 feet, with feathery, light-green leaves. When the plant is ready for harvest, you may notice that the leaves become fuller and the stems become thicker. Additionally, check for any signs of bolting, which is when the dill produces a tall flowering stem. While the flowers can be harvested for culinary purposes, it usually indicates that the plant is reaching the end of its lifecycle. Harvesting the dill before it bolts ensures the leaves are at their peak flavor and quality.
Secondly, consider the aroma of the dill leaves. The fragrance of a ripe dill plant is unmistakable, with a strong, sweet, and fresh scent. Gently rub a couple of leaves between your fingers and inhale deeply. If the aroma is intense and fragrant, it is a good indication that the dill is ready to be harvested. However, if there is a lack of aroma or a slight bitterness, the plant may need more time to mature.
By observing the appearance of the plant and considering its aroma, you can confidently determine when your dill is ripe for harvest. Remember, harvesting dill at the peak of its flavor ensures a delightful addition to your culinary creations. In the next section, we will explore the best practices for harvesting and storing dill to maintain its freshness and enhance its flavor.
Here’s a concise table summarizing the signs to look for when harvesting dill:
| Signs of Dill Readiness for Harvest | Description |
| Leaves | Harvest dill leaves just before the plant starts to flower. The oil in the leaves is most potent at this stage, providing the best flavor. Pick on a dry day in the morning. |
| Timing | Dill leaves are ready for use 6 to 8 weeks after planting. Start harvesting when the plant has at least four to five leaves. Avoid taking more than a third of the plant at once. |
| Seeds | To collect dill seeds, wait until the flowers have set seeds and the seeds start to turn brown. These seeds are around 4 to 5mm long. Place a paper bag over the flower heads to catch the seeds. |
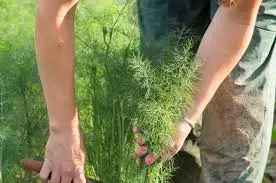
Harvesting and Storing Dill to Maximize Freshness and Flavor
Harvesting and storing dill properly is crucial for maximizing its freshness and flavor. When it comes to harvesting dill, timing is key. The best time to harvest dill leaves is in the early morning, just as the dew has dried. This is when the essential oils responsible for dill’s distinct aroma and taste are at their peak concentration. Simply snip the leaves from the plant using sharp, clean scissors or pruning shears, taking care to avoid damaging the surrounding foliage.
After harvesting, it’s essential to store dill correctly to maintain its freshness and flavor for as long as possible. The first step is to rinse the harvested leaves thoroughly to remove any dirt or debris. Gently pat them dry with a paper towel or allow them to air dry. Next, you have a few options for storage. One popular method is to place the stems in a glass of water and cover them loosely with a plastic bag. Store this arrangement in the refrigerator, changing the water every few days to keep the dill fresh. Alternatively, you can wrap the dill leaves loosely in a damp paper towel, place them in a plastic bag, and store them in the refrigerator. Just be sure to use the dill within a week for optimal flavor. By following these harvesting and storing techniques, you can enjoy the vibrant taste of freshly harvested dill in your culinary creations.
To Know More About Growing Dill, Watch This Video.
What are the ideal growing conditions for dill?
Dill thrives in full sun and well-drained soil. It prefers a moderate climate with temperatures between 60°F and 70°F.
How do I select the right location for planting dill?
Choose a location that receives at least 6 hours of direct sunlight per day. Ensure it is protected from strong winds.
How should I prepare the soil for dill planting?
Before planting, amend the soil with organic matter like compost or well-rotted manure. This will improve drainage and provide essential nutrients.
What are the best dill varieties for my garden?
Some popular dill varieties include Bouquet, Fernleaf, and Mammoth. Choose a variety based on your intended use, such as fresh consumption or seed production.
How deep should I sow dill seeds?
Sow dill seeds about ¼ to ½ inch deep in well-prepared soil. Space the seeds 12 to 18 inches apart to allow for proper growth.
What are the essential watering and fertilizing techniques for dill?
Water dill consistently, keeping the soil evenly moist but not waterlogged. Fertilize with a balanced organic fertilizer once a month to provide necessary nutrients.
How can I manage common pests and diseases in dill plants?
Common pests include aphids, caterpillars, and spider mites. Use organic pest control methods such as handpicking, spraying with neem oil, or introducing beneficial insects. Diseases like powdery mildew can be prevented by providing good air circulation and avoiding overhead watering.
Should I prune and support dill plants?
Pruning is generally not necessary for dill. However, if the plant becomes top-heavy, you can provide support with stakes or cages to prevent bending or breaking.
How can I recognize the signs of dill readiness for harvest?
Dill is ready for harvest when the leaves are fully developed and have a strong aroma. The flower heads should be fully formed but not yet open.
How do I harvest and store dill to maximize freshness and flavor?
Harvest dill by snipping the leaves and stems just above ground level. To store, wrap the harvested dill in a damp paper towel and place it in a plastic bag in the refrigerator. It can stay fresh for up to a week. Alternatively, you can freeze dill by chopping it and placing it in an airtight container or freezing it in ice cube trays with water or oil for longer storage.