Celery Planting, Growing, and Caring
Did you know that celery is one of the most nutritious vegetables you can grow? It’s packed with vitamins and minerals, and it’s a great addition to any garden. But growing celery can be a bit tricky. It requires specific conditions to thrive, and it needs a lot of care and attention.
If you’re thinking about planting celery in your garden, you’ve come to the right place. In this blog, we’ll cover everything you need to know about celery planting, growing, and caring. From choosing the right celery variety to harvesting your crop, we’ll give you all the tips and tricks you need to grow healthy and delicious celery.
Our team of experts has years of experience growing celery and other vegetables, and we’re passionate about sharing our knowledge with our readers. We’ll provide you with authoritative and trustworthy information, so you can feel confident in your celery-growing abilities.
So, are you ready to start growing your own celery? Let’s get started!
Table of Contents
Selecting the Right Celery Variety for Your Garden
Selecting the right celery variety for your garden is an important decision that can greatly impact your growing experience and the overall success of your harvest. With a wide range of celery varieties available, it’s crucial to choose one that suits your specific needs and preferences.

- Conquistador:
- Maturity: Matures in approximately 80 days in warmer areas (115 days in cooler zones).
- Features: Slow to bolt, heat-resistant, and produces crisp, tasty upright stalks.
- Blanching: Not self-blanching; blanching required for pale, almost-white stalks.
- Ideal for: Impatient gardeners seeking early stalks.
- Giant Red:
- Heritage: An heirloom cultivar dating back to the 19th century.
- Stalk Color: Reddish-purple stalks turn delicate pink when cooked.
- Flavor: Hearty and slightly stronger than green varieties.
- Perfect for: Adding both color and flavor to your cooking.
- Golden Pascal:
- Heritage: An heirloom from France, also known as ‘Winter King’ or ‘Pascal Giant.’
- Attributes: Cold-hardy and versatile.
- Stalks: Yellowish-green.
- Great choice for: Those who appreciate a classic celery flavor.
By selecting the right celery variety for your garden, you can ensure optimal growth and the harvest of flavorful and nutrient-rich produce. Take the time to research and consider the various options available and choose a variety that aligns with your climate, growing season, and intended use. With careful selection, you’ll be well on your way to a successful and bountiful celery harvest in your garden.
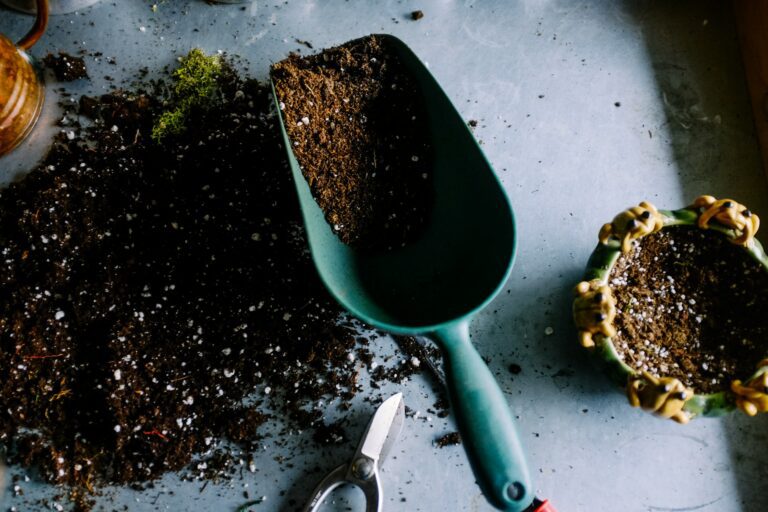
Understanding the Optimal Soil Conditions for Celery
Celery, known for its crunchy texture and distinct flavor, is a versatile vegetable that can be enjoyed in various dishes. To ensure successful growth, it is crucial to understand the optimal soil conditions that celery requires.

- pH Level:
- Aim for a pH range of 6.0 to 6.5. This slightly acidic to neutral pH provides an ideal environment for celery roots to absorb nutrients efficiently.
- Soil Moisture:
- Maintain soil moisture levels between 60% and 70%. Celery appreciates consistent moisture without becoming waterlogged.
- Soil Temperature:
- Keep the soil temperature within the range of 60°F to 70°F (15°C to 21°C). Celery thrives in cool conditions.
- Soil Texture:
- Opt for sandy loam soil. This type of soil strikes a balance between drainage and water retention.
- Organic Matter:
- Ensure your soil contains 3% to 5% organic matter. Compost or well-rotted manure enriches the soil, providing essential nutrients for celery growth.
Remember, healthy soil sets the stage for robust celery plants and a bountiful harvest! 🌱🥗
Preparing the Soil for Celery Planting
Preparing the soil for celery planting is a critical step that sets the foundation for healthy growth and a bountiful harvest. Celery thrives in well-draining soil with adequate fertility and a pH level between 6.0 and 6.8. Before planting, it is essential to assess the soil quality and make necessary amendments to create optimal conditions for the celery plants to thrive.
- Start by testing the soil for its nutrient composition and pH level.
- This will provide valuable insights into any deficiencies or imbalances that may exist.
- Conduct a soil test using a reputable laboratory to determine the soil’s current nutrient status.
- Based on the test results, you can then make informed decisions about the type and amount of amendments needed.
- Common amendments for improving soil fertility include organic matter such as compost or well-rotted manure, as well as mineral fertilizers like nitrogen, phosphorus, and potassium.
- By addressing any nutrient deficiencies or imbalances, you can ensure that your celery plants have access to the essential elements they need to grow strong and healthy.
After using Dramm Drammatic® Organic™ Fertilizer with Kelp for my harvest, I must say I am impressed with the results. The application process was straightforward, as I followed the instructions provided, measuring the desired amount and mixing it with water before applying it to the root zone of my plants. The fertilizer’s versatility allowed me to also spray it directly onto the leaf surfaces, providing comprehensive nourishment to my crops.
Over the growing season, I noticed a significant improvement in the overall health and vigor of my vegetables, flowers, and fruits. Not only did they exhibit robust growth, but they also seemed more resilient to environmental stresses. The nutrient-rich blend, enhanced with ocean kelp, seemed to have provided the essential elements necessary for optimal plant development.
Additionally, knowing that the fertilizer is made from recycled fish scraps and is OMRI listed for organic production added to my satisfaction, as I value environmentally friendly and sustainable practices in gardening. Overall, my experience with Dramm Drammatic® Organic™ Fertilizer with Kelp has been positive, and I would recommend it to fellow gardeners looking for an effective and eco-friendly fertilizer for their outdoor plants.
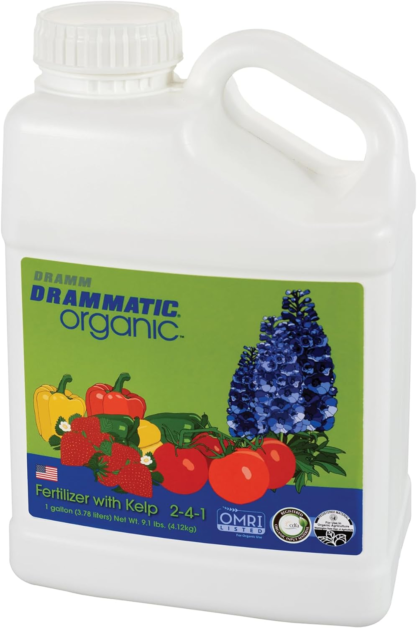
- Organic and Sustainable: Dramm Drammatic® Organic™ Fertilizer with Kelp is made from recycled fish scraps, contributing to environmental sustainability by repurposing waste materials.
- Nutrient-Rich: The fertilizer is enriched with kelp, providing essential nutrients, proteins, and minerals specific to ocean kelp. These nutrients support optimal plant growth and increase resistance to environmental stresses.
- Versatile Application: It can be applied to the root zone of plants or sprayed directly onto leaf surfaces, offering flexibility in application methods.
- Professional Grade: The exact formulation used by professional growers worldwide in organic crop production indicates its effectiveness and reliability.
- OMRI Listed: Being OMRI (Organic Materials Review Institute) listed for organic, sustainable, or conventional crops ensures that it meets stringent organic standards.
- Ease of Use: To apply, simply measure the desired amount and pour into a watering can with the appropriate amount of water. It is best applied early morning or evening throughout the growing season.
- Price: The initial cost may be higher compared to synthetic fertilizers, which could deter some buyers, especially those on a tight budget.
- Potential Harm: The product may be harmful if swallowed and should be kept out of reach of children. Contact with eyes, open cuts, and sores should be avoided.
- Application Caution: Users need to be cautious during application to avoid contact with eyes, open cuts, and sores, and should wash hands after use to prevent any adverse effects.
Providing Adequate Sunlight for Healthy Celery Growth
Proper sunlight exposure is crucial for the healthy growth of celery plants. Adequate sunlight ensures that the plants receive sufficient energy for photosynthesis, promoting robust foliage development and optimal yield. Celery thrives in full sun conditions, where it can receive at least 6-8 hours of direct sunlight per day.
- Maximize Sunlight:
- Prioritize areas that receive maximum sunlight throughout the day.
- Avoid shaded or partially shaded spots, as they can hinder growth and weaken overall plant health.
- Tolerance for Light Shade:
- While celery can tolerate some light shade during the hottest parts of the day, prolonged periods without direct sunlight may lead to stunted growth and reduced harvest.
- Observe Nearby Structures and Trees:
- Consider potential shade caused by nearby structures or trees.
- A well-thought-out positioning can significantly impact the success of your celery cultivation.
- Monitor Sunlight Patterns:
- Regularly observe sunlight patterns during different seasons.
- Adjust the celery’s exposure as needed to optimize growth.
By ensuring ample sunlight for your celery garden, you’re on your way to a thriving harvest! 🌞🌱
Watering Techniques to Keep Your Celery Hydrated
Proper hydration is crucial for the health and growth of your celery plants. Ensuring that your celery receives adequate water will help prevent wilting, maximize yield, and maintain the desired quality of the stalks. So, what are the best watering techniques to keep your celery hydrated?
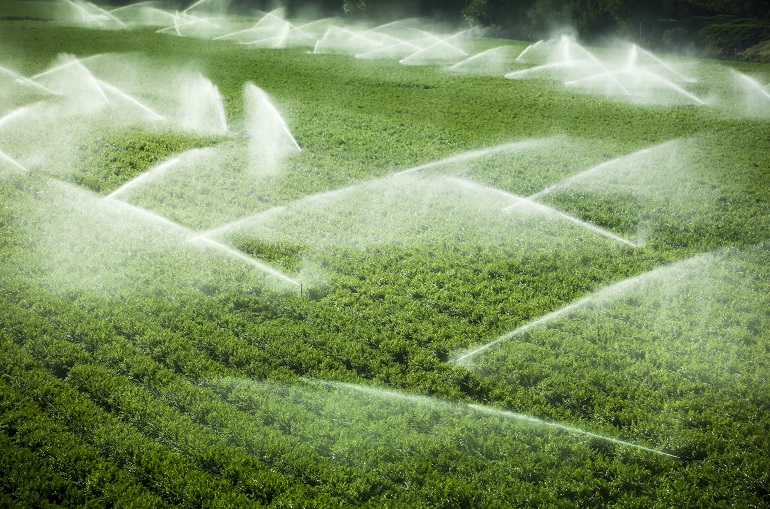
Celery requires consistent moisture throughout its growing season.
Aim for about 1-1.5 inches of water per week, supplementing natural rainfall as needed.
Consider using a soaker hose or drip irrigation system.
These methods deliver water directly to the soil, minimizing evaporation and ensuring it reaches the roots where it’s needed most.
Prevents disease issues from wet foliage.
Water your celery plants early in the morning.
This allows leaves to dry before evening, reducing the risk of fungal diseases.
Check soil moisture by inserting your finger up to the second knuckle.
If it feels dry, it’s time to water; if wet or waterlogged, hold off.
Balance is crucial—overwatering can harm celery plants as much as underwatering.
By implementing these watering techniques, you can ensure that your celery plants stay properly hydrated throughout their growth cycle, promoting healthy and vibrant stalks.
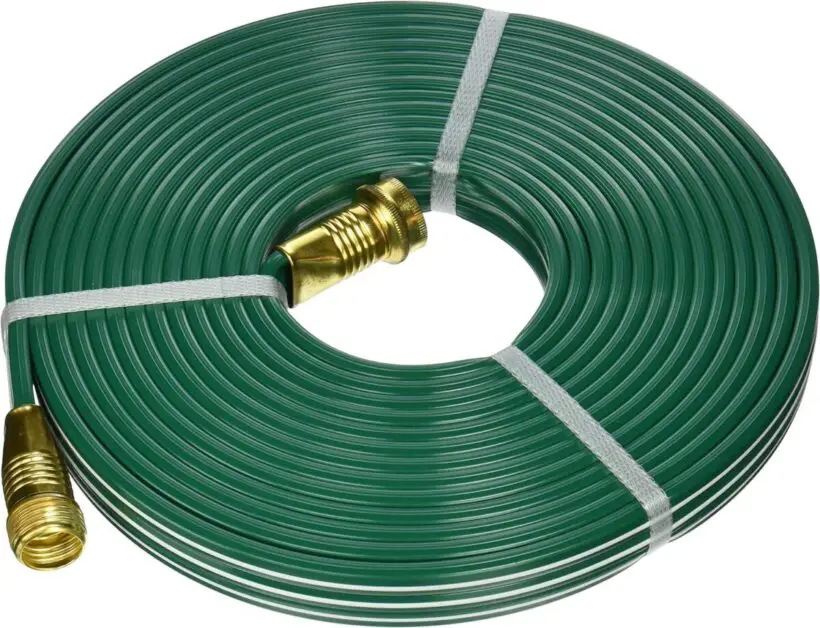
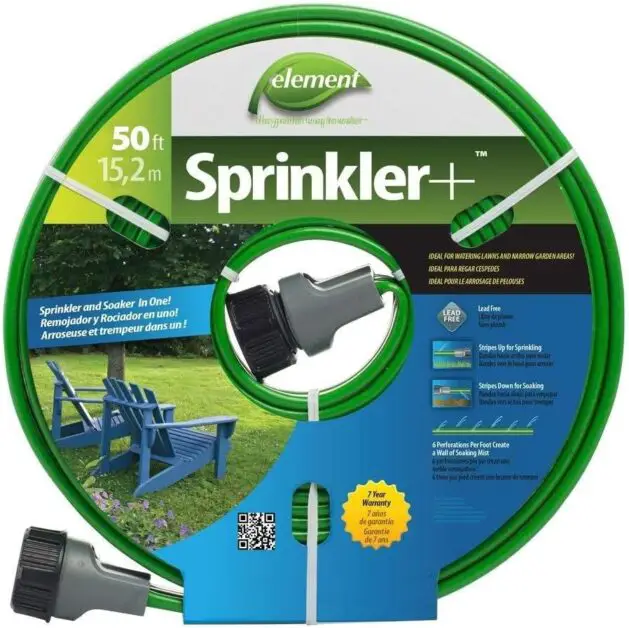
I have used both the Swan Products Element Sprinkler Soaker Hose 50′ and the Flexon 25-Foot Three Tube Sprinkler Hose. The Swan Products soaker hose is an excellent choice for eco-conscious gardeners, providing efficient and consistent watering that promotes healthy plant growth while conserving water resources. Its durable construction and easy installation make it a convenient solution for maintaining vibrant gardens.
On the other hand, the Flexon sprinkler hose offers versatility with its three-tube design, allowing for customizable watering options. It is ideal for covering larger areas and providing adequate hydration to a variety of plants. Both hoses have proven to be reliable and effective tools for garden irrigation, enhancing the overall health and growth of my plants.
✅ Adjustability: It comes with a removable cap that can be used for adding length to the hose or flushing out mineral particles, enhancing its usability and maintenance.
✅ Guarantee: The product comes with a 7-year guarantee, offering assurance of its quality and durability over an extended period.
✅ Material: Made from a combination of vinyl and rubber, the hose is durable and resilient, capable of withstanding various outdoor conditions.
❌ Durability: There are concerns regarding the durability of the hose, with reports of leaking end connections and splitting after a relatively short period of use.
❌ Maneuverability: While it is described as lightweight, maneuverability seems to be an issue for some users, potentially impacting its ease of use during operation.
❌ Sprinkler Hole Placement: A common complaint is that the sprinkler holes do not start at the desired distance from the faucet, leading to inconvenience during setup and usage.
✅ 2. Easy to use: This soaker hose is easy to install and use, requiring no special skills or tools. It can be connected directly to an outdoor water spigot and will start working as soon as you turn on the faucet.
✅ 3. Durable: The hose is made of UV-resistant rubber, which makes it durable and long-lasting. It is designed to withstand environmental exposure and can handle larger flow rates from the water spigot, further increasing the speed and quantity of water delivery.
✅ 4. Versatile: The hose is suitable for all types of crops and can be adapted to nearly all irrigable soils since sprinklers are available with a variety of discharge capacities.
✅ 5. Conserves water: The hose uses 70 percent less water than sprinkler systems, making it an efficient and cost-effective watering solution.
✅ 6.Provides consistent watering: The hose is designed to deliver water directly to the root zone of plants, ensuring they receive the hydration they need while minimizing water wastage.
❌ 2. Limited spray options: The hose only sprays water along one side, which may not provide adequate coverage for plants that are bunched together or located in odd placements and shapes.
❌ 3. Requires proper placement: The hose must be placed properly to ensure even watering, which may require more effort and attention than other watering systems.
❌ 4. May clog with sediment or debris: Sprinkler systems can easily clog with the presence of sediment or debris, which may require regular maintenance and cleaning to ensure optimal performance.
❌ 5. May not be suitable for all soil types: Sprinklers are not suitable for soils that easily form a crust or in case of risk of salinisation.
❌ 6. May not be suitable for all climates: The hose may not be suitable for hot and dry climates, where more frequent watering may be required.
Fertilizing Celery: Tips for Optimal Nutrient Supply
To ensure optimal growth and development, proper fertilization is essential for your celery plants. By providing the right nutrients in the right quantities, you can promote healthy foliage, robust stalks, and abundant harvests. In this section, we will explore some tips for fertilizing celery and maximizing the nutrient supply for your plants.
- Nutritional Requirements of Celery:
- Celery is a heavy feeder and requires ample nutrients, especially nitrogen, phosphorus, and potassium.
- Nitrogen is crucial for foliage growth, phosphorus supports root development and plant vigor, while potassium enhances disease resistance and overall plant health.
- Fertilization Strategy:
- Pre-Planting: Incorporate a slow-release, balanced fertilizer into the soil before planting to provide a consistent nutrient supply.
- Supplemental Feeding: Apply a liquid fertilizer high in nitrogen every two to three weeks during active growth for an additional nutrient boost.
- Timing and Rates: Follow the manufacturer’s instructions for application rates and timing to ensure optimal nutrient uptake by the plants.
The folllowing table explains about the fertilizing celery:
| Nutrient | Quantity (ppm) |
|---|---|
| Nitrogen (N) | 150-200 |
| Phosphorus (P) | 75-100 |
| Potassium (K) | 200-250 |
| Calcium (Ca) | 150-200 |
| Magnesium (Mg) | 30-50 |
| Sulfur (S) | 20-40 |
| Iron (Fe) | 2-4 |
By following these tips for fertilizing celery, you can optimize the nutrient supply and promote healthy growth in your plants. With a well-balanced fertilizer regimen, you’ll be on your way to vibrant, productive celery plants that thrive throughout the growing season. Stay tuned for more useful tips and techniques to help you succeed in growing celery year after year.
Starting Celery Seeds Indoors: A Step-by-Step Guide
Starting celery seeds indoors is a great way to get a head start on your gardening season and ensure successful and healthy plants. By providing the right conditions and following a step-by-step guide, you can enjoy a bountiful harvest of crisp and flavorful celery stalks.
- Gather Materials:
- Collect seed trays or pots, high-quality seed starting mix, celery seeds, a spray bottle for watering, and clear plastic covers or plastic wrap (for a mini greenhouse effect).
- Prepare Seed Trays:
- Fill seed trays with the seed starting mix, lightly moistening it.
- Sow celery seeds about 1/8 inch deep, spacing them approximately 1 inch apart.
- Create a Mini Greenhouse:
- Cover the trays with plastic wrap or clear plastic covers to create a humid environment for germination.
- Choose a Warm Location:
- Place trays in a warm spot, ideally between 70°F to 75°F.
- Ensure they receive indirect sunlight.
- Keep Soil Moist:
- Mist the soil with water from the spray bottle whenever it feels dry.
- Within 2 to 3 weeks, tiny celery seedlings should emerge.
- Transition to Bright Light:
- Remove the plastic cover or wrap.
- Place trays under bright, direct sunlight or use grow lights.
- Rotate trays to promote uniform growth.
- Regular Watering:
- Keep soil evenly moist but not waterlogged.
- Water celery seedlings regularly.
Stay tuned for the next section of this guide, where we will explore the essential steps for transplanting celery seedlings and caring for them in your garden.
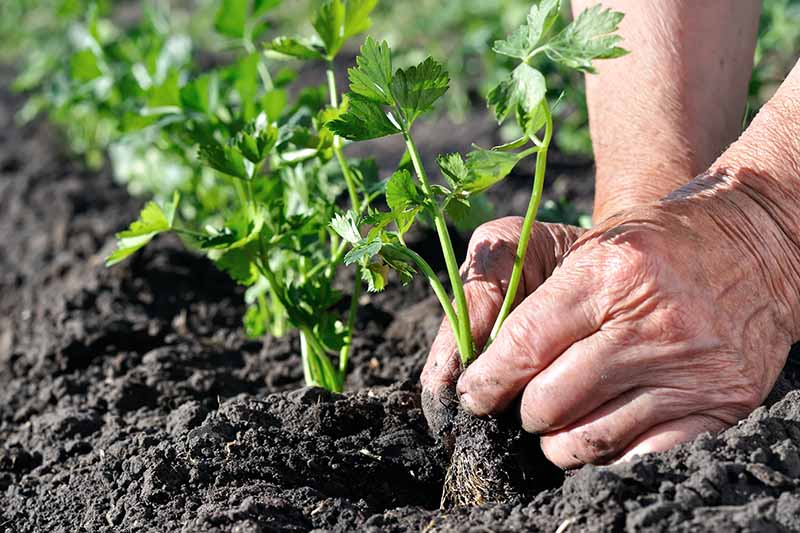
Transplanting Celery Seedlings into Your Garden

- Transplanting Celery Seedlings:
- Transplant celery seedlings once they have reached a suitable size and developed a strong root system to provide ample space for growth and development.
- Choose a sunny location in the garden with at least six hours of direct sunlight daily for optimal photosynthesis and energy production.
- Ensure the selected area has well-draining soil rich in organic matter, as celery thrives in slightly acidic soil with a pH level between 6.0 and 6.8.
- Conduct a soil test to determine the pH level and make necessary amendments to create the ideal growing conditions for your celery plants.
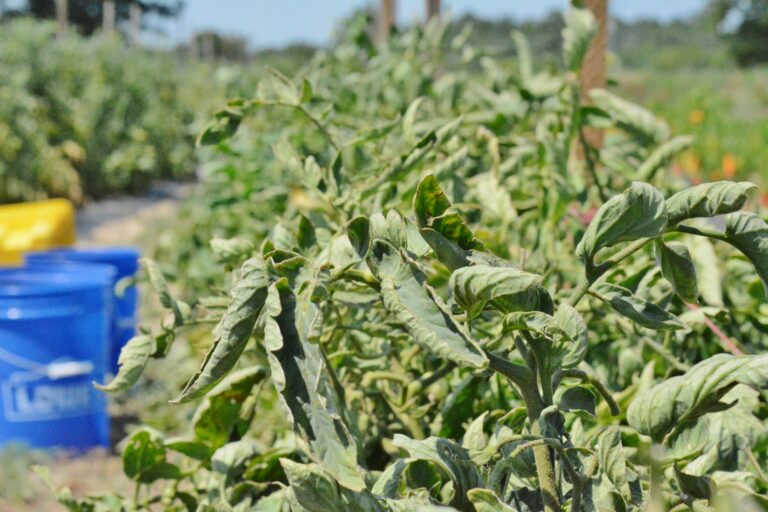
Managing Pests and Diseases in Your Celery Patch
Pests and diseases can wreak havoc on your celery patch if not managed properly. It is crucial to identify and address these issues early on to ensure the health and productivity of your plants.
| Issue | Pest/Disease | Symptoms | Treatment | Effects on Plants |
|---|---|---|---|---|
| Pest | Celery Leaf Miner | – Tiny yellow or white larvae on the underside of leaves | – Remove and destroy affected leaves. – Use floating row covers to prevent egg-laying by adult flies. | – Damaged leaves, reduced photosynthesis, weakened plant vigor. |
| Disease | Late Blight | – Yellowing, wilting, and brown lesions on leaves. | – Fungicides (copper-based) as a preventive measure. – Proper spacing to improve air circulation. | – Reduced yield, plant decline, eventual death if left untreated. |
| Disease | Bacterial Soft Rot | – Soft, water-soaked areas on stems and leaves. Foul odor. | – Remove and discard infected plant parts. – Avoid overwatering. – Sanitize tools and equipment. | – Rapid decay, plant collapse, rotting tissue. |
Regularly inspect your plants for any signs of yellowing, wilting, or rotting, and promptly remove any infected plant parts to prevent the spread of pathogens. Applying a copper-based fungicide as a preventive measure can also help protect your celery from these diseases. Remember to always follow the instructions on the label and use any fungicides or pesticides responsibly to minimize environmental impact.
Pruning and Thinning Celery for Better Yield and Quality
Pruning and thinning celery plants is essential for optimizing their yield and maintaining high-quality stalks. Regular pruning helps redirect the plant’s energy toward stalk growth, while thinning allows adequate air circulation, preventing diseases and promoting healthy development.
Pruning Celery Plants:
- Remove yellow or damaged leaves during pruning to redirect the plant’s energy towards stalk growth.
- Trim back side shoots and suckers to enhance the development of the main stalks.
- Prune celery plants when they reach a height of 8 to 10 inches by cutting outer stalks at ground level to stimulate new growth from the center.
- Avoid cutting too close to the center to facilitate regrowth.
Thinning Celery Plants:
- Maintain a distance of 8 to 10 inches between celery plants to allow proper air circulation and reduce the risk of fungal diseases.
- Thin seedlings when they are 4 to 6 inches tall by gently removing excess seedlings, leaving only the healthiest ones in place.
- Be gentle during thinning to avoid disturbing the root systems of the remaining plants.
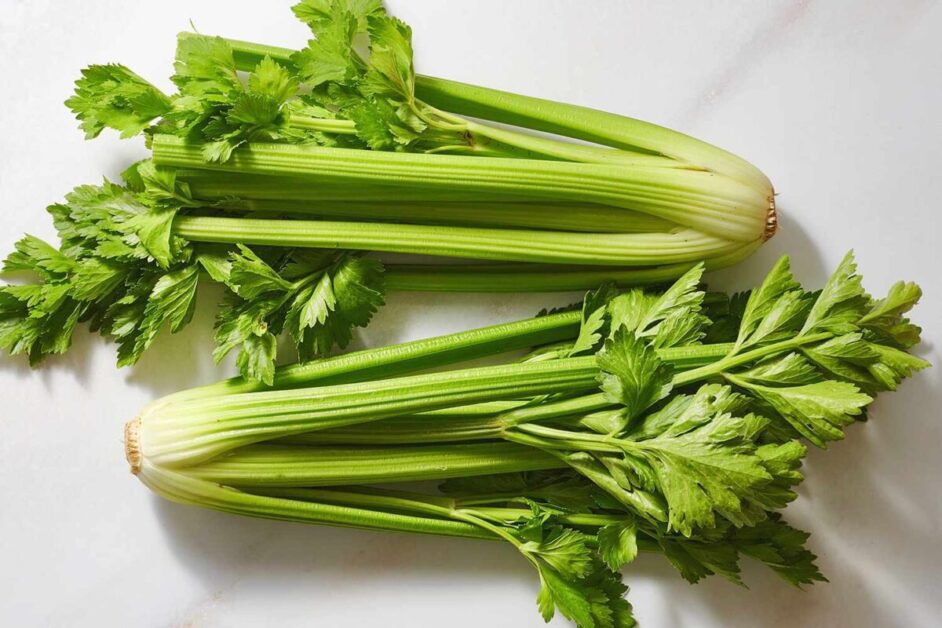
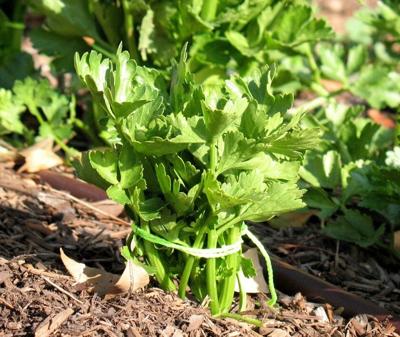
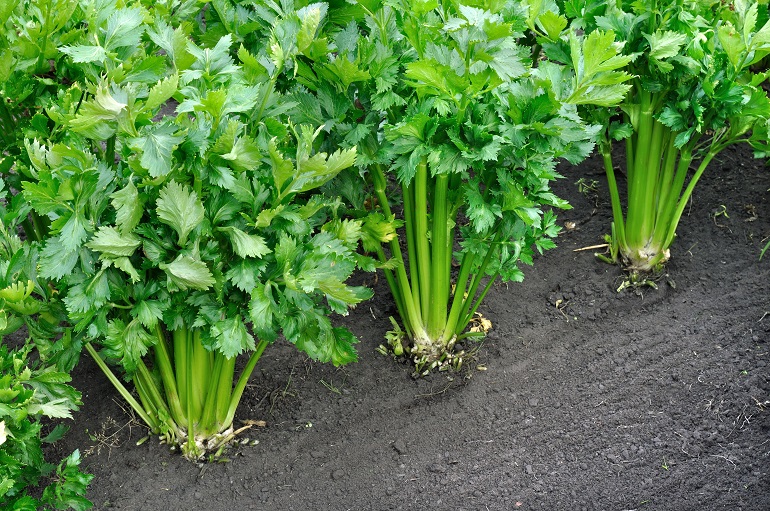
Harvesting Celery: Recognizing the Right Time to Pick
Harvesting celery at the right time is crucial to ensure good flavor, texture, and nutritional value. Celery is typically ready to be harvested around 80 to 100 days after planting, but the exact timing can vary depending on the variety and growing conditions.
Harvesting Celery:
- Size and Diameter: Celery is ready to be picked when the stalks are at least 12 to 16 inches long and about 1 inch in diameter.
- Color: The stalks should have a rich green color. If they are pale or yellowish, it may indicate that the celery is not yet mature enough to be harvested.
- Taste: As celery matures, it develops a stronger and more pronounced flavor. Taste a small piece of the stalk to determine if it has the desired flavor. If the taste is too mild or lacks the characteristic celery flavor, it may be a sign that the celery needs more time to mature.
- Harvesting Technique: Harvest celery by removing the outer stalks first, allowing the inner stalks to continue growing and reaching their full potential. Celery can continue to grow and develop even after it is harvested, so you can adjust the harvest time based on your preference for milder or stronger flavor.
- Storage: After harvesting, celery can be stored in a glass of water on the counter, in the crisper drawer of your fridge, or in ventilated bags for several weeks. It also makes a great powder when dehydrated, ground, and stored in an airtight container.
- Harvest Window: Try to get the best harvest window possible by marking planting dates on your calendar and counting forward based on the variety’s days to maturity. Harvesting celery that is exposed to too much heat or water stress can cause a woody, bitter texture. On the other hand, celery that has been exposed to cold temperatures may be rubbery, less flavorful, or prone to bolting.
Celery Allergy: Some people are sensitive to celery leaves and can develop contact dermatitis, an eczema-like rash, or other allergic reactions. If you are allergic to parsley, mugwort, or birch pollen, you may also have an allergy to celery. Wear gloves when harvesting or avoid touching the plant if you have a known allergy.
Keep in mind that celery can continue to grow and develop even after it is harvested. So, if you prefer a milder flavor, you can harvest the celery a bit earlier. On the other hand, if you prefer a stronger flavor, you can leave it in the ground for a little longer. Remember to harvest the outer stalks first, allowing the inner stalks to continue growing and reaching their full potential.
Storing Celery Properly to Extend Its Shelf Life
Properly storing celery is essential if you want to extend its shelf life and enjoy its crispness and flavor for longer.

- Wrap in Aluminum Foil or Plastic Wrap:
- Take your celery bunch and wrap it tightly in aluminum foil or plastic wrap.
- Place the wrapped celery in the refrigerator.
- This method helps maintain moisture content and prevents wilting.
- Remove Rubber Bands or Ties:
- Before storing, remove any rubber bands or ties from the celery.
- Allowing the celery to breathe helps keep it fresh.
- Use the Vegetable Crisper Drawer:
- Store the wrapped celery in the vegetable crisper drawer of your refrigerator.
- The crisper maintains optimal humidity levels for prolonging freshness.
- Alternative Method: Submerge in Water:
- Trim the ends of the celery stalks.
- Place the celery in a container or glass of water, similar to how you’d keep fresh flowers.
- Cover the top with a loose plastic bag to create a mini greenhouse effect.
- Change the water every few days to prevent bacterial growth.
By employing these simple storage methods, you can ensure that your celery stays fresh and crisp for an extended period, allowing you to enjoy its health benefits and versatile use in various recipes. Whether you wrap it in foil or keep it in water, these techniques are practical and effective for preserving the quality of your celery for as long as possible. So, the next time you harvest or buy this green vegetable, remember to store it properly and savor its flavors for an extended duration.
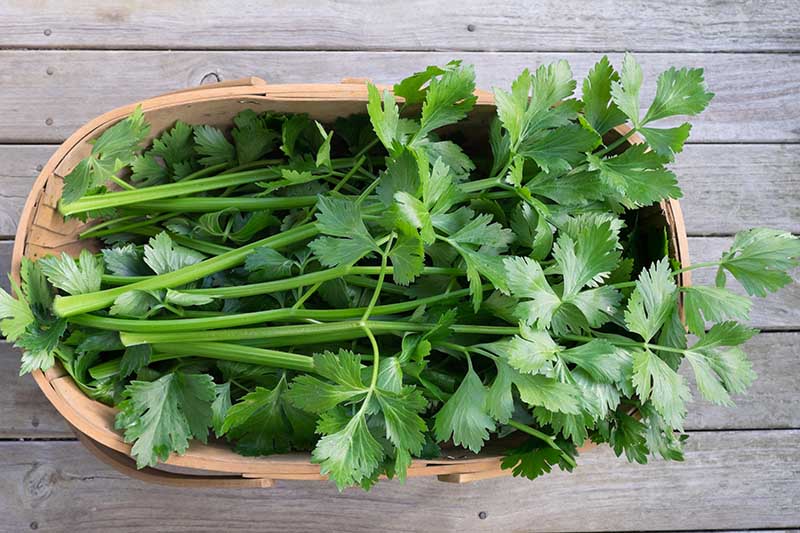
Utilizing Celery Leaves and Stalks in Various Recipes
Celery is a versatile vegetable that not only adds crunch and flavor to dishes but also offers a range of health benefits. When it comes to utilizing celery leaves and stalks in various recipes, you’ll be pleasantly surprised by the multitude of culinary possibilities.

Celery Leaves:
- Often underutilized but packed with flavor, celery leaves can enhance soups, stews, and salads.
- Chop and sprinkle celery leaves over dishes like tomato soup for a fresh, herbal note.
- Mix celery leaves with greens for a unique salad or use them as a seasoning for roasted vegetables.
- Experiment with celery leaves as a garnish for grilled meats to add a vibrant touch to your dishes.
Celery Stalks:
- Known for their crisp texture and mild taste, celery stalks are perfect as a snack or for dipping into dips.
- Slice celery stalks thinly and add them to stir-fries or sautés for a subtle celery flavor.
- Incorporate celery stalks into salads to provide a refreshing and crunchy element.
- From soups to snacks, celery leaves and stalks offer versatility in the kitchen, allowing for the exploration of new flavors and textures in various culinary creations.
Additionally, celery stalks are a great addition to salads, lending their crunchy texture to create a refreshing and filling side dish. From soups to stir-fries, salads to snacks, celery leaves and stalks offer a world of possibilities in the kitchen, allowing you to explore new flavors and dimensions in your culinary adventures.
Companion Planting: Ideal Vegetables and Herbs to Grow with Celery
Companion planting is a tried and tested method of cultivating a diverse and harmonious garden. By strategically pairing certain plants together, gardeners can promote healthier growth, deter pests, and improve overall crop yield. When it comes to growing celery, there are several ideal vegetables and herbs that can be great companions.
| Companion Plant | Benefits for Celery |
|---|---|
| Beans | – Nitrogen Fixation: Beans enrich the soil by fixing nitrogen, benefiting celery’s nutrient uptake. – Shade and Protection: Bean plants provide shade and protect delicate celery stalks from harsh sunlight and wind. |
| Tomatoes | – Natural Pest Control: Tomatoes repel certain pests harmful to celery. – Mutual Growth Enhancement: Both benefit from each other’s presence. |
| Cabbage | – Disease Suppression: Cabbage releases compounds that inhibit celery diseases. – Complementary Growth: Their root systems don’t compete significantly. |
| Onions | – Repel Pests: Onions deter pests like aphids and carrot flies. – Beneficial Interaction: Celery and onions grow well together. |
| Dill | – Beneficial Insects: Dill attracts ladybugs and lacewings, natural predators of celery pests. |
| Chamomile | – Natural Fungicide: Chamomile helps prevent damping-off disease in young celery seedlings. |
By incorporating these herbs into your celery patch, you can create a healthier and more robust environment for your plants to thrive.
Troubleshooting Common Issues in Celery Cultivation
Celery cultivation, like any other gardening endeavor, can be susceptible to a range of common issues that can impede growth and affect overall plant health. Understanding and addressing these issues promptly is vital for successful celery cultivation. Here are some common problems you may encounter and tips for troubleshooting them.
1. Fungal Diseases: Celery plants are prone to fungal infections such as leaf blight, early and late blight, and root rot. These diseases thrive in moist environments, so it is crucial to provide proper airflow and avoid over-watering. Additionally, practicing crop rotation and applying fungicides labeled for celery can help prevent and control fungal diseases.
2. Pest Infestations: Celery can attract various pests, including aphids, celery leaf-tier, and carrot rust fly. To combat these pests, consider introducing beneficial insects like ladybugs and lacewings, which naturally control aphids. Insecticidal soaps and organic botanical insecticides can also be effective against pests. Regular inspection and prompt action when signs of infestation appear are essential to mitigate damage.
Remember, early detection and proper intervention are key to managing these common issues. By adopting preventive measures and taking timely action, you can ensure a healthy and productive celery crop for your garden. Stay tuned for more tips on growing celery successfully in our upcoming articles.
Tips for Success in Growing Celery Year after Year
When it comes to growing celery year after year, there are a few key tips to keep in mind for a successful harvest.
Variety Selection:
- Choose the right celery variety that suits your local climate and soil conditions for optimal growth.
Soil Conditions:
- Plant celery in well-draining soil rich in organic matter by incorporating compost or well-decomposed manure before planting.
Sunlight Requirements:
- Ensure celery receives at least 6-8 hours of direct sunlight per day, either by selecting a sunny garden location or using artificial lighting indoors.
Watering Techniques:
- Water celery consistently and evenly to keep the soil moist but not waterlogged, especially since celery has shallow roots.
Fertilization:
- Use a balanced organic fertilizer before planting and a nitrogen-rich fertilizer every 2-3 weeks once the plants are established.
Starting Seeds Indoors:
- Begin celery seeds indoors in well-draining seed-starting mix, then transplant seedlings into the garden after they develop true leaves.
Pest and Disease Management:
- Monitor for pests like aphids and diseases such as blight, using organic pest control methods and proper sanitation.
Pruning and Thinning:
- Remove damaged leaves for air circulation and thin overcrowded seedlings to promote larger stalk growth.
Harvesting:
- Harvest celery when stalks reach 8-10 inches in length, cutting at the base in the early morning for crispness.
Storage:
- Store harvested celery in the refrigerator, wrapped in a damp paper towel or plastic wrap to retain moisture and prevent wilting.
Watch video for more information:
FAQ
How do I choose the right celery variety for my garden?
When selecting a celery variety for your garden, consider factors such as climate, taste preference, and disease resistance. Some popular celery varieties include ‘Golden Self-Blanching’, ‘Giant Red’, and ‘Tall Utah’.
What are the optimal soil conditions for growing celery?
Celery thrives in well-draining soil rich in organic matter. The pH level should ideally be between 6.0 and 6.8. It is best to avoid heavy clay soil as it can hinder root development.
How should I prepare the soil for planting celery?
Prior to planting celery, amend the soil with compost or well-rotted manure to improve its fertility and drainage. Remove any rocks or debris and till the soil to a depth of about 12 inches.
How much sunlight does celery need?
Celery requires at least 6-8 hours of direct sunlight daily for optimal growth. Choose a location in your garden that receives ample sunlight.
What is the best watering technique for celery?
Celery needs consistent moisture to prevent it from becoming bitter or tough. Water deeply and regularly, ensuring the soil remains consistently moist but not waterlogged. Avoid overhead watering to prevent fungal diseases.
How often should I fertilize celery?
Celery is a heavy feeder and benefits from regular fertilization. Apply a balanced, slow-release fertilizer at planting and side-dress with nitrogen-rich fertilizers every 3-4 weeks during the growing season.
Can I start celery seeds indoors?
Yes, starting celery seeds indoors can give you a head start. Sow the seeds in seed trays or containers about 8-10 weeks before the last frost date. Keep the seedlings under grow lights or in a sunny window until they are ready for transplanting.
What are some common pests and diseases that affect celery?
Common pests that may affect celery include aphids, celery leaf miners, and slugs. Diseases such as leaf blight, early blight, and bacterial soft rot can also be problematic. Proper sanitation, regular inspection, and organic pest control methods can help manage these issues.
How do I know when to harvest celery?
Celery is typically ready for harvest in 85-120 days from planting, depending on the variety. Look for stalks that are firm, crisp, and have a rich green color. Harvest from the outside in, cutting the stalks at the base.
How can I store celery to prolong its shelf life?
To store celery, wrap it tightly in aluminum foil or place it in a plastic bag and store it in the refrigerator’s crisper drawer. This helps retain moisture and keep the celery fresh for up to two weeks.
Can I use celery leaves and stalks in cooking?
Absolutely! Celery leaves can be used as a garnish, added to soups, or used in salads for a burst of flavor. The stalks are commonly used in various recipes, including stir-fries, stews, and as a crunchy addition to salads.
What vegetables and herbs are ideal companions for celery?
Celery benefits from companion planting with vegetables like cabbage, cauliflower, and tomatoes, as well as herbs like dill, thyme, and sage. These plants can help deter pests and enhance the growth of celery.
What are some common issues I may encounter when growing celery?
Common issues when growing celery include bolting (premature flowering), hollow stalks, and celery root rot. Providing consistent moisture, avoiding extreme temperature fluctuations, and practicing proper crop rotation can help mitigate these problems.

Studied Agricultural Engineering-Plant Protection at University of California, Davis.
Head of Content writing team at Southelmontehydroponics.com