Growing Okra: A Southern Summer Delight
Ever wondered about a vegetable that thrives in the heat of a Southern summer, adding a touch of tradition and flavor to your table? Enter okra, the unsung hero of Southern cuisine. From gumbo to fried okra, this versatile veggie has been a staple in Southern cooking for generations.
As the sun beats down, okra plants shoot up, offering a bountiful harvest that embodies the essence of summer in the South. Join us on a journey through the ins and outs of growing okra, from planting tips to harvesting tricks. Discover the joy of cultivating this Southern summer delight in your own backyard!
Table of Contents
The History of Okra in Southern Cuisine
Let’s explore the fascinating history of okra in Southern cuisine and its significance as a versatile ingredient:

- African Roots:
- Origins: Okra, also known as “lady’s fingers” or “gumbo,” has ancient roots in Africa. It flourished and grew wild across the continent for thousands of years.
- Transatlantic Slave Trade: During the transatlantic slave trade, African slaves brought okra to the United States. It arrived in the South, where it thrived in the warm climate and spread as far north as Philadelphia.
- Direct Ties to West Africa: Unlike other parts of the African diaspora, Gullah Geechee people (descendants of enslaved Africans along the lower Atlantic coast) maintained direct ties to West Africa. They used similar words, ingredients, and spiritual traditions.
- Okra in Southern Cuisine:
- Staple Ingredient: Okra quickly became a staple in Southern cooking. Its unique flavor and versatility made it a beloved vegetable.
- Dishes: Okra featured prominently in various dishes:
- Gumbo: While not necessarily the thick Louisiana-style gumbo, okra soup is a simple and wholesome dish. It emphasizes freshness and uses smoked turkey as a base for fragrant broth.
- Jambalaya: Okra adds depth and richness to this flavorful rice dish.
- Fried Okra: A crispy and popular side dish.
- Okra and Tomatoes: A classic summer side that pairs okra with tomatoes.
- Shrimp and Okra Gumbo: Slow-cooked okra helps alleviate its slimy texture in this one-pot meal.
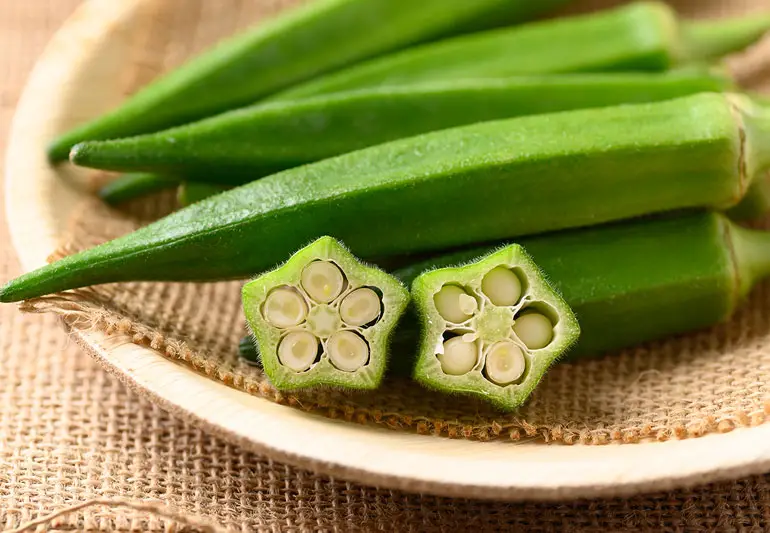
- Slimy Texture and Natural Thickening:
- Mucilaginous Property: When cooked, okra releases a gooey texture due to its mucilage content. Mucilage is a soluble fiber that dissolves in water, creating the slimy sensation.
- Thickening Agent: Okra’s mucilage acts as a natural thickener in stews and soups. It adds body and flavor.
- Cooking Tips:
- Soak in Vinegar: Soaking okra in vinegar for 30 minutes before cooking can reduce sliminess.
- High-Heat Cooking: Quick high-heat methods like frying, stir-frying, and grilling prevent mucilage from overdeveloping.
- Serve with Acid: Adding lemon juice or vinegar balances flavors and enhances texture.
In summary, okra’s journey from Africa to the Southern kitchen reflects cultural exchange, resilience, and the evolution of food traditions. Whether in gumbo or fried, okra remains a cherished part of Southern cuisine, celebrating its rich history and unique qualities.
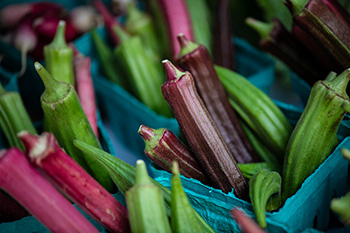
Choosing the Right Variety of Okra for Southern Gardens
When it comes to choosing the right variety of okra for your Southern garden, there are several factors to consider. It’s important to select a variety that is well-suited to the local climate and growing conditions in your area.
| Variety | Characteristics | Advantages | Disadvantages |
|---|---|---|---|
| Blondy | – Dwarf variety, doesn’t grow too tall. | – Ideal for small garden plots or containers. | – Limited yield due to smaller size. |
| Baby Bubba Hybrid | – Small-sized okra, perfect for compact spaces. | – Well-suited for container gardening. | – May not produce as abundantly as larger varieties. |
| Burgundy | – Deep red pods, ornamental and edible. | – Adds visual interest to the garden. | – Flavor may differ from green okra. |
| Clemson Spineless | – Classic variety, widely grown. | – Reliable and consistent yield. | – Requires gloves for handling due to spines. |
| Bowling Red | – Red pods, unique color. | – Adds variety to your harvest. | – May have a slightly different taste. |
| Cajun Delight | – Tender and flavorful pods. | – Well-suited for Southern climates. | – May not tolerate colder temperatures. |
| Jing Orange | – Bright orange pods. | – Eye-catching and unique. | – Flavor may vary from green okra. |
| Go Big | – Produces large pods. | – High yield for larger okra. | – Requires ample space in the garden. |
| Cow Horn | – Distinctive curved pods. | – Excellent for frying and grilling. | – May be less common in seed catalogs. |
| Emerald | – Classic green okra. | – Widely adaptable and versatile. | – Prone to sliminess when cooked. |
| Star of David | – Star-shaped pods. | – Unique appearance. | – May not yield as heavily as some other varieties. |
| Jambalaya Okra | – Good for gumbo and stews. | – Adds flavor and thickening properties to dishes. | – Requires longer growing season. |
| Burmese | – Heat-tolerant and disease-resistant. | – Suitable for hot climates. | – May not be as widely available. |
| Alabama Red | – Red pods with green tips. | – Adds color contrast to the garden. | – Flavor profile may differ from green okra. |
| Perkins Long Pod | – Long, slender pods. | – Great for slicing and frying. | – May need staking to support tall plants. |
| Silver Queen | – Pale green pods. | – Mild flavor, good for various dishes. | – May not be as productive as some other varieties. |
| Red Velvet | – Deep red pods. | – Aesthetically pleasing. | – May have a different texture when cooked. |
| Louisiana Green Velvet | – Classic green okra. | – Well-suited for Southern climates. | – Requires proper spacing to prevent overcrowding. |
| Hill Country Red | – Red pods with green tips. | – Adds visual interest to the garden. | – Flavor may differ from green okra. |
Ultimately, the best variety of okra for your Southern garden will depend on your personal preferences and the specific conditions in your area. It’s always a good idea to consult with local gardening experts or extension services for recommendations tailored to your region. By selecting the right variety, you can ensure a successful and rewarding okra harvest in your own backyard.
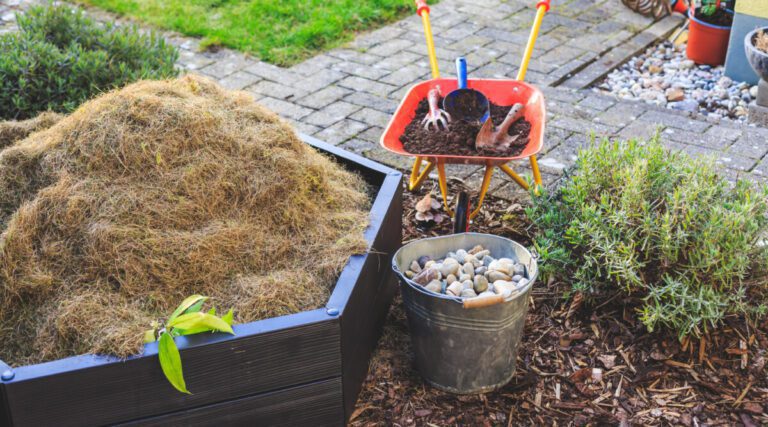
Essential Soil Preparation Techniques for Growing Okra
Proper soil preparation is essential for successful okra cultivation, as it sets the foundation for healthy plant growth and optimal yields. Before planting okra seeds, it is important to ensure that the soil is well-drained and fertile. Okra thrives in loose, loamy soil that is rich in organic matter, as it allows for good root development and nutrient uptake.
- To prepare the soil for growing okra, begin by removing any weeds or grass from the planting area.
- This can be done manually or with the help of a garden tiller.
- Once the area is cleared, loosen the soil to a depth of at least 8 inches, breaking up any clumps and removing rocks or debris.
- This will create a loose and friable bed that promotes root penetration and aeration.
- Next, incorporate organic matter such as compost or well-rotted manure into the soil.
- This not only improves the soil structure and fertility but also enhances moisture retention.
- Aim to add a layer of organic matter that is about 2 to 3 inches thick and mix it thoroughly into the soil.
- This will provide the necessary nutrients for the okra plants to flourish and yield bountiful harvests.
- In addition to organic matter, it is important to ensure that the soil has a balanced pH level.
- Okra prefers a slightly acidic to neutral pH range between 6.0 and 7.0.
- Conduct a soil test to determine the pH level and make any necessary adjustments by adding lime to raise the pH or sulfur to lower it.
By following these essential soil preparation techniques, aspiring okra growers can create an ideal growing environment that promotes robust plant development and ensures a successful harvest.
After reviewing the Earthwise TC70025 7.5-Inch 2.5-Amp Corded Electric Tiller/Cultivator, I must say it exceeded my expectations. Its compact size and lightweight design make it incredibly easy to maneuver, especially in small garden areas. The powerful 2.5-Amp motor effortlessly plows through soil, effectively tilling and cultivating with its durable steel tines. Despite its electric operation, it delivers impressive performance without the hassle of gas or oil. The soft ergonomic grip ensures comfortable handling during operation.
However, it’s worth noting that the corded design may limit mobility, and it may struggle with tougher soil conditions. Overall, it’s a great investment for small to mid-size garden and flower bed owners seeking an eco-friendly and efficient tiller solution.

- Powerful 2.5-Amp motor for efficient tilling and cultivating.
- Durable steel tines that can cultivate up to 7.5 inches wide and 6 inches deep.
- Lightweight design makes it easy to operate and store.
- Eco-friendly alternative to gas-powered tillers, emitting no harmful fuel emissions.
- Soft ergonomic grip for comfortable operation.
- Ideal for small to mid-size gardens and flower beds, also works well as a weed control tool.
- Easy to start with a single lever switch.
- Corded electric power source eliminates the need for oil or gas.
- Limited by the length of the power cord, may require an extension cord for larger areas.
- Corded design may restrict mobility compared to cordless alternatives.
- May struggle with tougher soil conditions or larger areas due to its compact size and power.
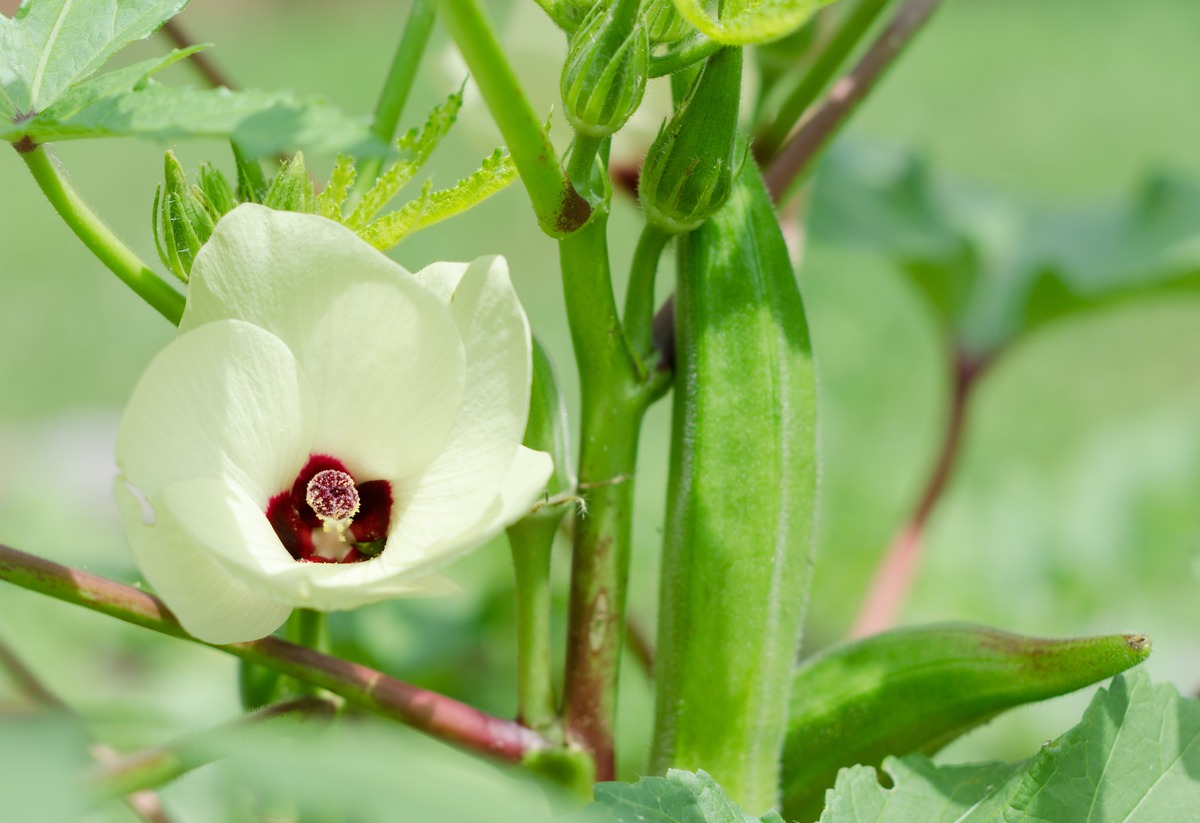
Understanding the Optimal Climate and Growing Season for Okra
Okra is a warm-season vegetable that thrives in regions with high temperatures and long growing seasons. Understanding the optimal climate and growing season for okra is vital for a successful harvest. In general, okra requires ample heat and sunlight to grow and develop into healthy plants with abundant pods.
- Temperature:
- Range: Okra thrives in regions where temperatures consistently range between 75 to 95°F (24 to 35°C).
- Promotes Growth: High temperatures promote rapid growth and development, resulting in a bountiful harvest.
- Frost Sensitivity: Okra is sensitive to frost, so it should only be planted when the risk of freezing temperatures has passed.
- Sunlight Exposure:
- Okra requires full sunlight exposure for optimal growth and fruit production.
- A minimum of six to eight hours of direct sunlight per day is necessary.
- Planting in partial shade may weaken the plants and reduce pod production.
- Growing Season Length:
- Okra plants take approximately 50 to 65 days to reach maturity and produce harvestable pods.
- Consider the length of the growing season when planting okra seeds.
- Plant after the last frost date to ensure sufficient time for plants to reach their full potential.
By selecting the right location and carefully timing the planting to coincide with the optimal climate and growing season, gardeners can maximize their chances of a successful okra harvest. Stay tuned for the next section, where we will delve into the step-by-step guide for planting okra seeds for a successful and rewarding experience.
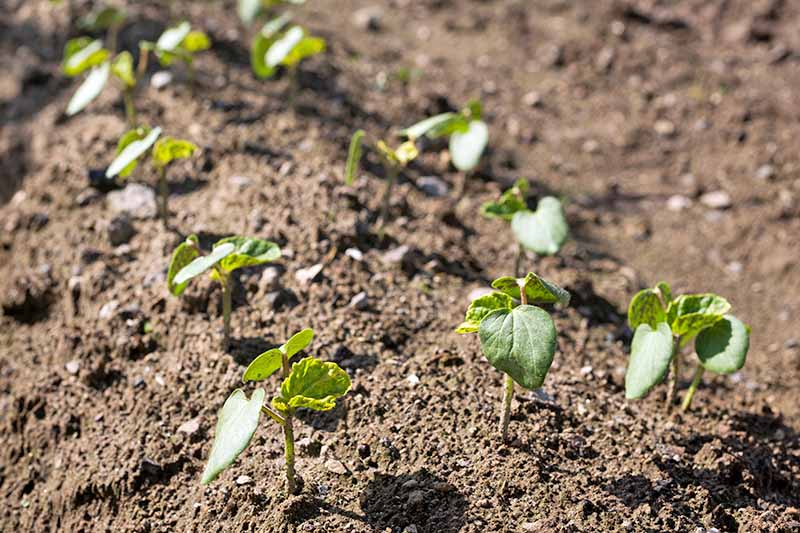
Step-by-Step Guide to Planting Okra Seeds
Planting okra seeds is an exciting endeavor that promises a bountiful harvest of this versatile and delicious vegetable. Whether you’re a seasoned gardener or a beginner, follow these steps to ensure successful okra cultivation in your Southern garden:
1. Choose the Right Spot:
- Sunlight: Select a sunny spot in your garden that receives full sunlight. Okra thrives in warm weather and requires ample sunlight for optimal growth.
- Well-Draining Soil: Ensure that the soil is well-draining. Okra dislikes waterlogged conditions, so avoid areas prone to standing water.
2. Soil Preparation:
- Loosen the Soil: Use a garden fork or tiller to loosen the soil to a depth of 8 to 10 inches (20 to 25 cm). This allows the roots to penetrate easily.
- Weed Removal: Clear the area of weeds and debris. Weeds compete with okra for nutrients and space.
- Amend with Organic Matter: Improve soil fertility and drainage by adding organic matter such as compost or well-rotted manure. Mix it thoroughly into the soil.
3. Create Furrows:
- Dig furrows in the soil, approximately 1 inch (2.5 cm) deep.
- Space the furrows about 3 feet (0.9 meters) apart to give the okra plants room to grow.
4. Sow Okra Seeds:
- Place the okra seeds within the furrows, spacing them about 2 inches (5 cm) apart.
- Cover the seeds with a thin layer of soil to protect them.
5. Moisten the Soil:
- Gently water the area to ensure that the seeds are moist but not saturated.
- Avoid overwatering, as excessive moisture can lead to rot.
6. Germination and Thinning:
- As the seeds germinate, thin the seedlings.
- Leave 12 to 18 inches (30 to 45 cm) of space between each okra plant to allow for proper growth and development.
7. Care and Maintenance:
- Regular Watering: Water the okra plants consistently. Aim for 1 to 1.5 inches (2.5 to 3.8 cm) of water per week.
- Sun Exposure: Ensure the plants receive at least 6 to 8 hours of direct sunlight daily.
- Weed Control: Keep the area around the okra plants weed-free.
- Fertilization: Apply a balanced fertilizer during the growing season.
Remember, patience and care are key to a successful okra crop. Stay tuned for more tips on watering, fertilizing, and harvesting your homegrown okra! 🌱🌿🌞 .
Watering and Irrigation Tips for a Successful Okra Crop
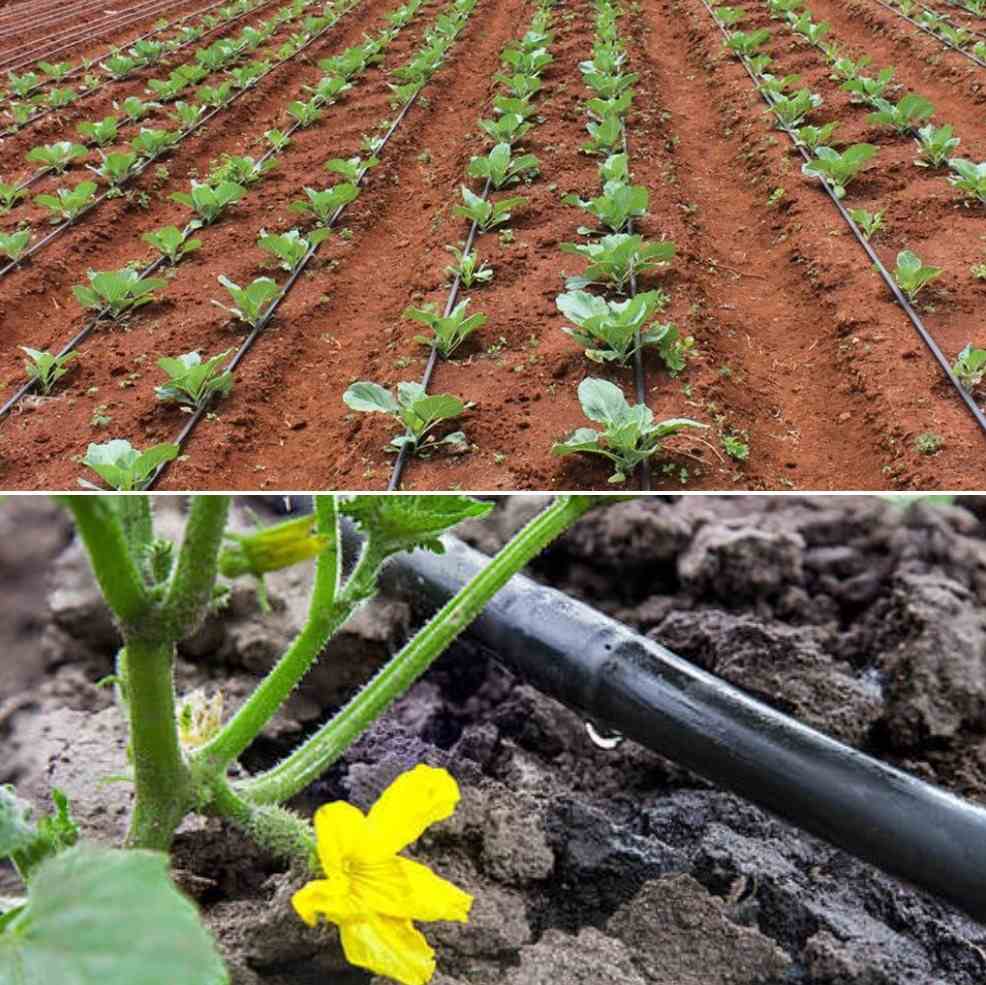
- Proper Watering Techniques: Ensure the soil remains consistently moist for optimal okra growth and yield.
- Balanced Watering: Find the right balance between providing adequate water without overwatering to prevent root rot.
- Deep Watering: Water deeply around the root zone to encourage strong root development.
- Watering Amount: Aim for 1-1.5 inches of water per week, including rainfall and irrigation.
- Monitoring Soil Moisture: Regularly check soil moisture levels using a moisture meter or by digging into the soil.
- Environmental Factors: Consider temperature and humidity when adjusting watering frequency.
- Root Health: Healthy roots lead to healthier plants, so ensure proper watering to support root growth.
- Optimal Growth: Consistent and appropriate watering is key to a successful okra crop.
Fertilizing Okra Plants to Ensure Healthy Growth and High Yields
To ensure healthy growth and maximize yields in your okra plants, proper fertilization is vital. Okra is a heavy feeder, meaning it requires a steady supply of nutrients to thrive. By understanding the nutritional needs of okra and using the right fertilizers, you can promote vigorous growth, enhance fruit production, and prevent nutrient deficiencies.
- Primary Nutrients: Okra plants require nitrogen (N), phosphorus (P), and potassium (K) in significant amounts for optimal growth.
- N-P-K Ratio: Opt for a balanced fertilizer with an N-P-K ratio of around 10-10-10 or 14-14-14 to provide essential nutrients without excess nitrogen.
- Secondary Nutrients: Incorporate secondary nutrients like calcium, magnesium, and sulfur, along with trace elements such as iron, manganese, and zinc, to support overall plant health.
- Organic Matter: Enhance soil fertility by adding organic matter like compost or aged manure before planting to supply micronutrients and improve soil structure.
- Application Rates: Follow a fertilization schedule, applying nitrogen every 3-4 weeks, phosphorus at planting, and potassium every 4-6 weeks at specified rates per 100 square feet.
- Micronutrients: Address potential deficiencies by using micronutrient-rich fertilizers or foliar sprays as needed throughout the growing season.
- Caution Against Over-Fertilization: Avoid overloading plants with excessive nutrients, as it can lead to lush foliage but reduced fruit production. Consult with experts for specific fertilization guidance tailored to your growing conditions.
The following table explains about the fertilizing okra plants:
| Nutrient | Timing | Application Rate |
|---|---|---|
| Nitrogen (N) | Every 3-4 weeks | 1.5-2.5 lbs per 100 square feet |
| Phosphorus (P) | At planting | 1-1.5 lbs per 100 square feet |
| Potassium (K) | Every 4-6 weeks | 1-1.5 lbs per 100 square feet |
| Calcium (Ca) | At planting | 0.5-1 lb per 100 square feet |
| Magnesium (Mg) | Every 3-4 weeks | 0.25-0.5 lbs per 100 square feet |
| Sulfur (S) | At planting | 0.25-0.5 lbs per 100 square feet |
| Iron (Fe) | As needed | Foliar spray as per label instructions |
| Zinc (Zn) | As needed | Foliar spray as per label instructions |
By providing the right balance of nutrients through proper fertilization, you can ensure healthy growth and high yields in your okra crop.
Managing Pests and Diseases in Okra Plants
Pests and diseases can pose a significant threat to the health and productivity of okra plants.
common pests
One of the most common pests that gardeners encounter is the aphid, a tiny insect that feeds on the sap of the plant and can cause stunted growth and yellowing leaves. Other pests to watch out for include spider mites, which can create webbing and suck the life out of the foliage, and the okra pod borer, which can damage the fruit and reduce yields.

implement integrated pest management
To manage these pests, it is essential to implement integrated pest management strategies. This approach involves a combination of cultural, mechanical, and biological control methods to minimize the use of chemical pesticides. One effective method is to encourage beneficial insects, such as ladybugs and lacewings, which feed on aphids and other pests.
companion flowers
Planting companion flowers like marigolds can attract these beneficial insects, creating a natural balance in the garden. Regularly inspecting plants for signs of pests and promptly removing any infested leaves or fruits can also help prevent the spread of pests. Additionally, practicing good hygiene by cleaning up garden debris and rotating crops can reduce the likelihood of pests and diseases recurring in subsequent seasons.
fungal infections
As for diseases, fungal infections like powdery mildew and Fusarium wilt can affect okra plants, leading to leaf discoloration, blight, and even plant death. Proper sanitation practices, such as removing and destroying infected plant parts, can help prevent the spread of fungal spores. Avoiding overhead watering and promoting good air circulation by spacing plants adequately can also minimize the conditions favorable for fungal growth.
Applying organic fungicides like neem oil or copper-based sprays can provide some control for severe infections, but it is crucial to follow the product instructions carefully. Overall, diligent observation, timely action, and a proactive approach to pest and disease management are key to ensuring the success and longevity of your okra plants.
Pruning and Training Techniques for Okra Plants
One important aspect of growing okra is to implement proper pruning and training techniques. Pruning helps to encourage bushier and more productive plants while training techniques ensure proper support and structure for the plants to grow.

- Prune okra plants in late winter or early spring before growth begins
- Use scissor-style hand pruning shears for clean cuts
- Wear long sleeves and thin leather gloves to protect from okra’s tiny spines
- Pinch or cut off okra shoots when plants reach 24 inches to encourage branching and increase production
- Cut back one-third of the tops of okra plants in late summer in warm climates to stimulate a secondary crop
- Prune lower branches to improve air circulation and prevent disease spread
- Stakes or trellises provide support for okra plants, preventing bending or breaking under fruit weight
- Stake early for straight, upright growth and easier maintenance and harvesting
- Gently tie plants to stakes or trellises as they grow taller to guide growth and keep them stable
- Excessive pruning can stunt plant growth, so only remove what is necessary for optimal health and productivity.
This not only promotes better airflow but also makes it easier to inspect the plants and harvest the okra pods. By implementing these pruning and training techniques, gardeners can maximize the yield and health of their okra plants.
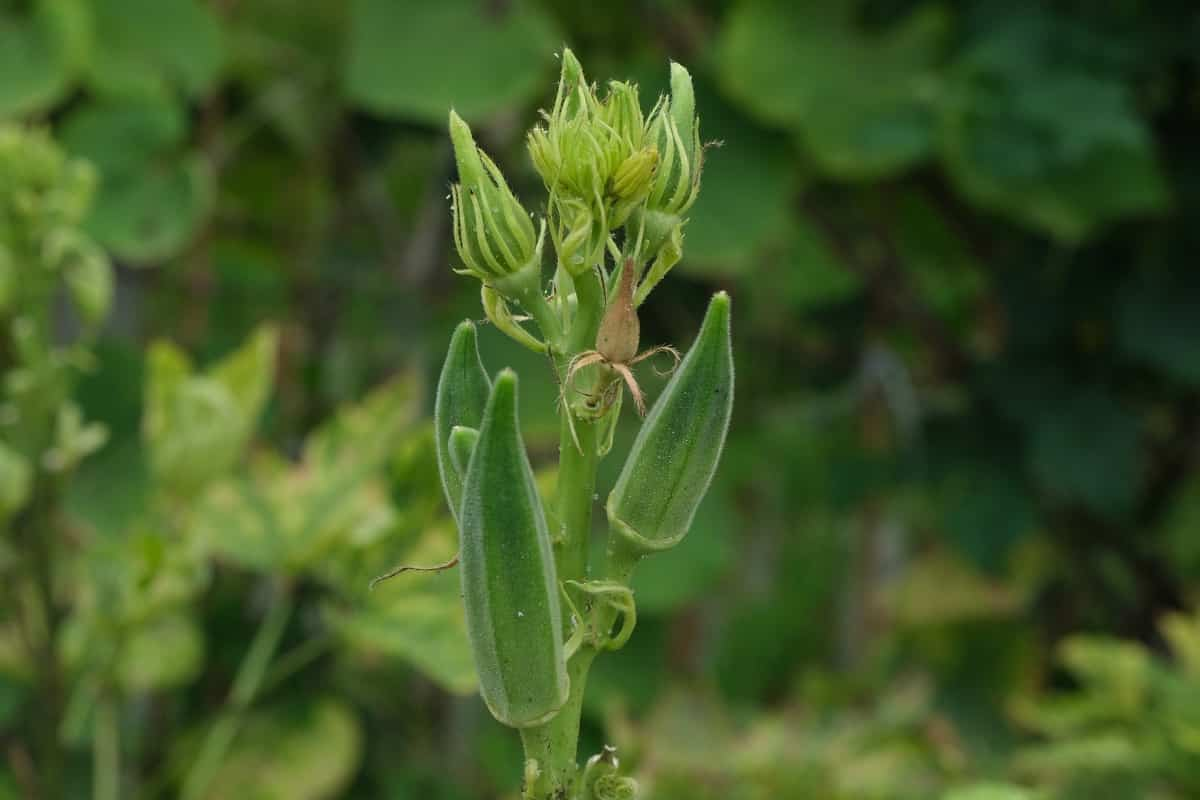
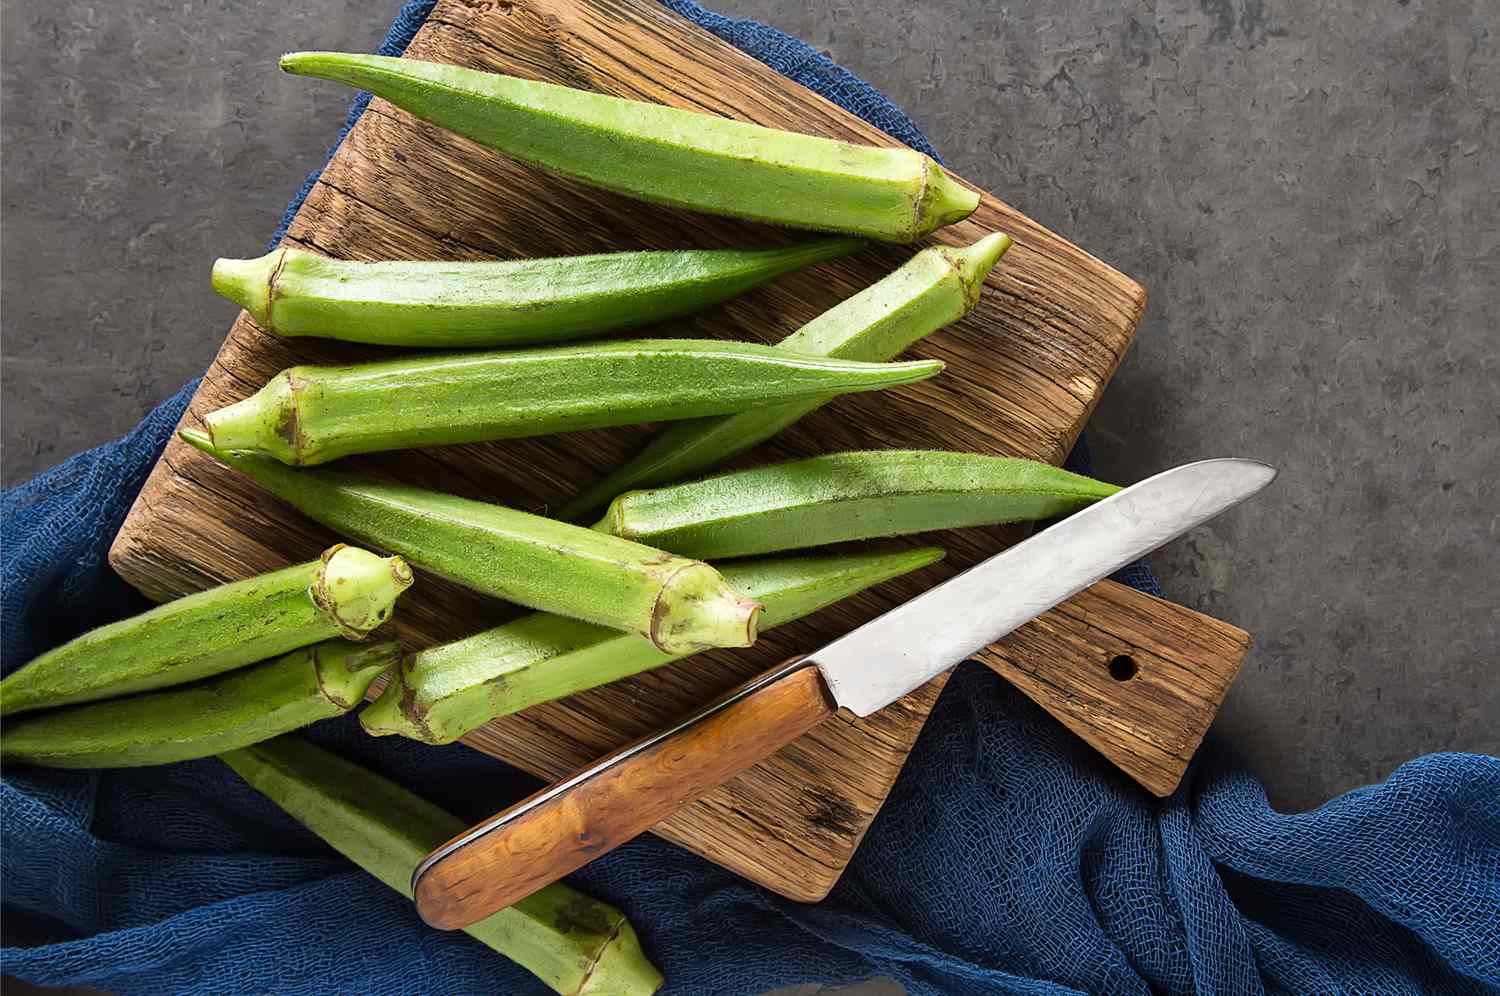
Harvesting Okra at the Right Time for Optimal Flavor and Texture
Harvesting okra at the right time is crucial to ensure optimal flavor and texture in your dishes.

By harvesting okra at the right time, you can enjoy its tender texture and delicate flavor in a variety of dishes, from soups and stews to sautés and pickles. So, keep a close eye on your okra plants and indulge in the delicious rewards of a well-timed harvest.
After using the West County 054R/M Gauntlet Rose Gloves for harvesting, I must say they exceeded my expectations. These gloves provided exceptional protection against thorns and abrasive materials, allowing me to work with ease and confidence. The reinforced fingers, palm, and thumb areas ensured maximum durability and shielded my hands from cuts and scratches.
Despite the rugged construction, they maintained a comfortable fit, thanks to the elastic wrist design. What impressed me the most was their versatility – not only were they perfect for harvesting, but they also proved handy for various other gardening tasks. Overall, I highly recommend these gloves for anyone seeking reliable hand protection during harvesting or gardening activities.

✔ Durable Construction: Made of 70% nylon and 30% PU, these gloves offer a combination of durability and flexibility. They feature double-reinforced finger pads, palms, and thumb web areas, providing maximum protection against abrasion, cuts, scratches, and thorns.
✔ Functional Design: The gloves come with a full elbow-length gauntlet cuff that shields the forearms from potential hazards during work. The elastic wrist ensures a firm fit and prevents dirt and debris from falling inside the gloves.
✔ User Comfort: Despite their rugged construction, these gloves are designed for user comfort. They are easy to clean and machine washable, allowing for convenient maintenance. Additionally, they maintain their quality protection over time, ensuring long-term usability.
✔ Versatility: These gloves are not limited to gardening tasks but can also be used for activities such as handling lumber and working with abrasive materials, adding to their versatility and value.
❌ Limited Availability: Depending on the vendor, there may be variations in delivery quality and availability. Some users have reported delays or discrepancies in their orders, indicating potential issues with supply chain management.
❌ Size Options: While the gloves come in different sizes, finding the right fit can be crucial for user comfort and effectiveness. It’s essential to ensure proper sizing to avoid issues such as discomfort or reduced dexterity during use.
❌ Water Resistance: These gloves are not explicitly advertised as water-resistant, which may limit their effectiveness in wet conditions. Users working in damp or rainy environments may need to take extra precautions to keep their hands dry.
❌ Potential Stiffness: Like leather gloves, these synthetic gloves may stiffen after getting wet and drying. While they soften with wear, some users may find initial stiffness uncomfortable, especially during prolonged use. Regular maintenance and proper drying techniques can help mitigate this issue.
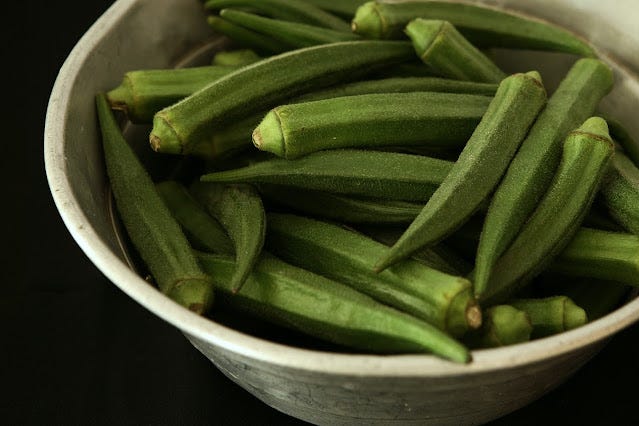
Tips for Properly Storing and Preserving Fresh Okra
Properly storing and preserving fresh okra is essential to maintaining its quality and flavor for an extended period. Here are some tips to help you keep your okra in optimal condition:
1. Refrigerate promptly: Okra is highly perishable and should be refrigerated as soon as possible after harvesting or purchasing. Store fresh okra in a perforated plastic bag or airtight container to maintain its moisture levels and prevent it from drying out.
2. Handle with care: Avoid any bruising or damage to the okra pods during handling, as this can accelerate spoilage. Gently place the okra in the refrigerator and avoid storing it alongside other fruits or vegetables that release ethylene gas, as this can speed up the ripening process and cause the okra to deteriorate more quickly.
Preserving fresh okra is another great way to enjoy its unique taste and texture throughout the year. Here’s a method for freezing okra that will help retain its quality:
1. Wash and prepare: Start by washing the okra pods thoroughly and patting them dry. Trim the ends, then either slice the pods or leave them whole, based on your preference.
2. Blanching: Blanching helps to preserve the color, texture, and flavor of the okra. Submerge the okra in boiling water for 3 minutes, then transfer it immediately to an ice bath to cool rapidly and halt the cooking process. Drain the okra thoroughly after blanching.
Remember, proper storage and preservation techniques will help you enjoy the freshness and taste of okra for an extended time. Stay tuned for more tips and tricks to enhance your okra-growing and culinary experiences.
Delicious Southern Recipes Featuring Okra as the Star Ingredient
Southern cuisine is known for its delicious and flavorful dishes, and one ingredient that often takes center stage is okra. With its unique texture and versatile flavor, okra lends itself well to a variety of Southern recipes. Whether you prefer it fried, stewed, or pickled, there is no shortage of mouthwatering dishes to explore.

- Gumbo: A beloved Southern stew that stars okra. Here’s how to make it:
- Combine okra with a medley of vegetables (think bell peppers, onions, and celery).
- Add your choice of meat (chicken, sausage, or seafood) for heartiness.
- Flavor it up with spices like cayenne pepper, paprika, and thyme.
- The okra not only thickens the broth but also contributes its unique texture.
- Serve gumbo over a bed of rice for a soul-warming meal.
- Fried Okra: Crispy, golden, and oh-so-addictive! Here’s the scoop:
- Slice fresh okra pods into bite-sized pieces.
- Dip them in a seasoned cornmeal or flour coating.
- Fry until they’re beautifully crispy on the outside.
- The result? A delightful appetizer or side dish that balances okra’s natural sweetness with savory crunch.
Whether you’re savoring gumbo or munching on fried okra, Southern cuisine knows how to make the most of this versatile veggie. 🌽🍛🍴
The following recipe is one of the delicious recipe that you should give it a try Southern Fried Okra with Cajun Remoulade Sauce:
Servings: 4-6
Ingredients:
For the Southern Fried Okra:
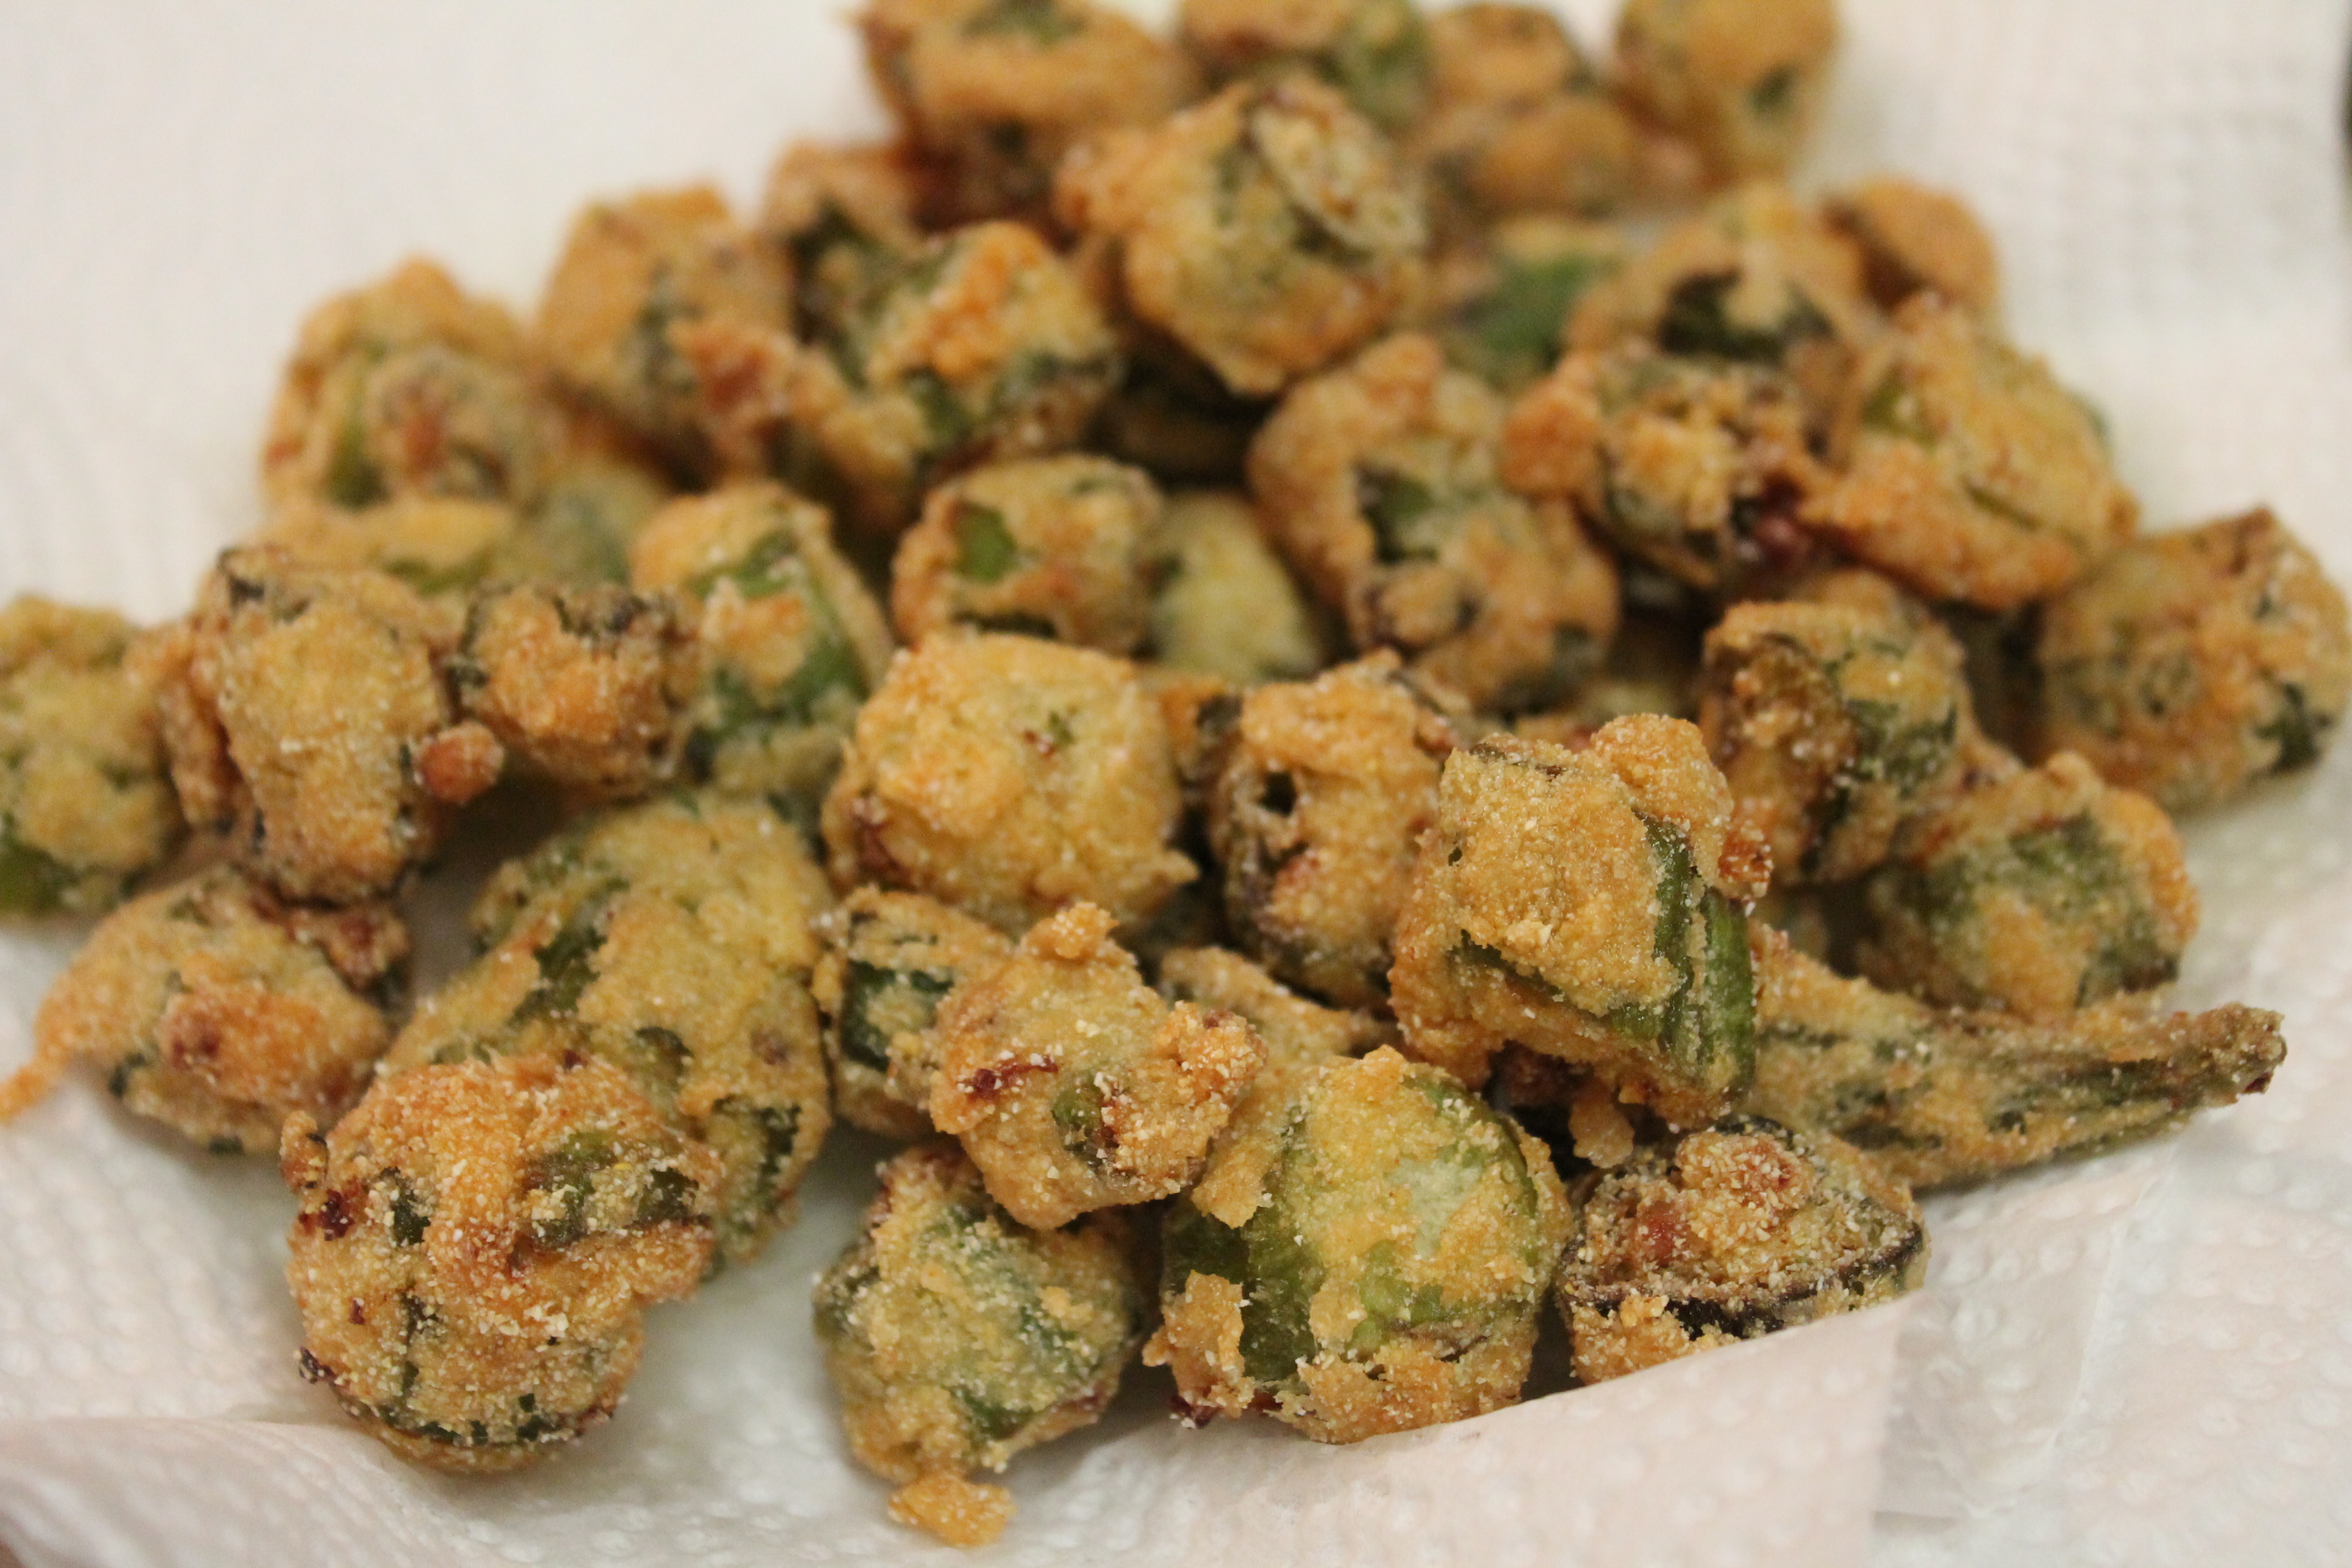
- 1 pound fresh okra, sliced into 1/2-inch rounds
- 1 cup buttermilk
- 1 cup cornmeal
- 1/2 cup all-purpose flour
- 1 teaspoon paprika
- 1 teaspoon garlic powder
- 1 teaspoon onion powder
- 1 teaspoon kosher salt
- 1/2 teaspoon freshly ground black pepper
- Vegetable oil, for frying
For the Cajun Remoulade Sauce:
- 1 cup mayonnaise
- 2 tablespoons ketchup
- 2 tablespoons prepared yellow mustard
- 1 tablespoon horseradish sauce
- 1 tablespoon hot sauce (such as Crystal or Tabasco)
- 1 tablespoon Worcestershire sauce
- 1 tablespoon fresh lemon juice
- 1/2 teaspoon Cajun seasoning
- 1/2 teaspoon garlic powder
- 1/2 teaspoon onion powder
- 1/2 teaspoon kosher salt
Instructions:
For the Southern Fried Okra:
- In a large bowl, soak the sliced okra in buttermilk for at least 30 minutes, up to 1 hour.
- In a separate large bowl, combine cornmeal, flour, paprika, garlic powder, onion powder, salt, and black pepper.
- Heat about 2 inches of vegetable oil in a large, deep skillet or Dutch oven to 350°F (175°C).
- Remove the okra from the buttermilk, allowing any excess to drip off.
- Toss the okra in the cornmeal mixture, ensuring each piece is well-coated.
- Working in batches, carefully add the okra to the hot oil and fry for 3-4 minutes, or until golden brown and crispy.
- Using a slotted spoon, transfer the fried okra to a paper towel-lined plate to drain excess oil.
- Serve hot with Cajun Remoulade Sauce.
For the Cajun Remoulade Sauce:
- In a medium bowl, whisk together mayonnaise, ketchup, mustard, horseradish sauce, hot sauce, Worcestershire sauce, lemon juice, Cajun seasoning, garlic powder, onion powder, and salt.
- Cover and refrigerate for at least 1 hour before serving to allow the flavors to meld.
Enjoy this delicious Southern recipe featuring okra as a tasty appetizer or side dish!
Exploring the Health Benefits of Consuming Okra
Okra, also known as lady’s finger, is not only a staple in Southern cuisine but also packs a punch when it comes to health benefits. With its rich nutrient profile and medicinal properties, consuming okra can contribute to overall well-being.
- Okra is rich in fiber, with a single cup of cooked okra containing approximately 8 grams of fiber, aiding in digestion and promoting a healthy gut.
- The soluble fiber in okra forms a gel-like substance in the digestive tract, preventing constipation and providing relief from digestive discomfort.
- The fiber content in okra helps manage blood sugar levels by slowing down sugar absorption into the bloodstream, making it suitable for individuals with diabetes or those aiming for stable blood sugar levels.
- Okra is a great source of essential vitamins and minerals, including vitamin C, which boosts the immune system and acts as an antioxidant, protecting against free radicals.
- It also contains vitamin A for healthy vision and cell growth, as well as folate, crucial for DNA synthesis and red blood cell production.
- Various cooking methods like steaming or sautéing can help retain more nutrients in okra compared to deep-frying, making it a versatile and nutritious addition to meals.
- Incorporating okra into soups, stews, or stir-fries can enhance the nutritional value of dishes and provide a range of health benefits.
- Consuming okra in moderation alongside a balanced diet is essential to fully benefit from its nutritional value and support overall health.
Fun Facts and Trivia about Okra’s Cultural Significance in the South
Okra, also known as lady’s fingers, holds a fascinating cultural significance in the South that goes beyond its culinary uses. Used in traditional Southern dishes like gumbo and fried okra, this versatile vegetable has become a staple in Southern cooking. But did you know that okra has a rich history rooted in African, Indian, and Middle Eastern cultures?
- Cultural Journey: Okra’s journey to the United States is steeped in history. African slaves brought this versatile vegetable during the era of the slave trade. Its introduction to Southern cuisine not only enriched flavors but also contributed to the cultural tapestry of the region. Today, okra remains a cherished ingredient, bridging African-American, Creole, and Southern cooking styles.
- Natural Thickener: Okra’s seeds hold a secret: mucilage. This viscous substance acts as a natural thickening agent. When added to sauces, stews, or soups, it transforms them into velvety, flavorful delights. Okra’s unique texture and taste make it indispensable in signature Southern dishes.
Remember, every bite of gumbo or crispy fried okra carries a piece of history—a testament to the shared influences and cultural significance of this humble vegetable. 🌽🍛🌿
Success Stories and Tips from Experienced Okra Growers
As an expert gardener and agronomist, I have had the privilege of hearing numerous success stories and gathering tips from experienced okra growers. These individuals have honed their skills over the years and have achieved impressive results in cultivating this beloved southern crop. Many of them attribute their success to careful planning and preparation.
- Choose the right variety: Selecting a variety that is well-suited to your climate and soil conditions can significantly impact the success of your crop. Popular varieties for southern gardens include ‘Clemson Spineless,’ ‘Annie Oakley II,’ and ‘Emerald.
- Prepare the soil: Okra thrives in well-drained, loamy soil with a pH level between 6.0 and 6.5. Enrich the soil with organic matter, such as compost or well-rotted manure, to improve its fertility and water-retaining capacity. Conducting a soil test to assess nutrient levels and pH can guide gardeners in making any necessary amendments.
- Plant at the right time: Okra is a warm-weather crop and benefits from a long, warm growing season. Plant seeds a half-inch deep, 12-18 inches apart, after the soil has warmed in mid-spring. Provide water as needed and keep the weeds under control until the okra plants are established.
- Proper care and maintenance: Okra needs a minimum of 8 hours of full sun and temperatures above 80 degrees Fahrenheit for the best plant development. Water consistently, aiming for an inch of water per week, and mulch heavily at the base of the plant to retain moisture and reduce weed growth. Fertilize with a nitrogen slow-release fertilizer when the plant reaches 8 inches in height and again a few weeks later.
- Harvest at the right time: Harvest okra when the pods are 2.5 to 4 inches long. Regular harvesting encourages additional production. Use a knife or pruners to cut the pods from the stem connecting them to the plant. Protect your hands or wear gloves during harvesting if the variety has small spines protruding from the leaves and stems.
- Save seeds for next year: Let a few okra pods mature and dry on the plant at the end of the season before frost. Store the seeds in a sealed glass jar for next season.
By incorporating the advice and lessons learned from experienced okra growers, aspiring gardeners can increase their chances of achieving a bountiful and successful harvest. From selecting the right variety to implementing proper soil preparation techniques, these tips serve as a valuable resource for those aspiring to add okra to their southern gardens.
Resources and References for Further Learning about Growing Okra
When it comes to learning more about growing okra, there are several resources and references available for gardening enthusiasts. These materials can provide valuable insights and practical advice for successfully cultivating this versatile vegetable.
- “The Vegetable Gardener’s Bible” by Edward C. Smith:
- This comprehensive guide covers various aspects of vegetable gardening, including okra cultivation.
- Topics include soil preparation, planting techniques, pest management, and harvesting tips.
- Specific recommendations for growing okra in different regions are provided.
- A must-read for southern gardeners seeking practical advice.
- Cooperative Extension System Website:
- This nationwide network of agriculture experts offers research-based information.
- Explore their website for fact sheets, articles, and videos on growing okra.
- Benefit from localized advice tailored to specific regions.
- State Agriculture Departments and University Extension Programs:
- Visit their websites for dedicated sections on okra cultivation.
- Find region-specific recommendations and insights.
- Consider the credibility and expertise of the authors or organizations.
Remember, a well-informed approach using these resources will lead to a bountiful okra harvest! 🌱🌿🌻
Watch video for more information:
FAQ
How long does it take for okra seeds to germinate?
Okra seeds generally take around 7 to 14 days to germinate, depending on the specific variety and growing conditions.
Can I grow okra in containers or pots?
Yes, okra can be successfully grown in containers or pots as long as they are at least 12 inches deep and have good drainage.
What are some common pests that can affect okra plants?
Some common pests that can affect okra plants include aphids, flea beetles, and stink bugs. Regular inspection and early intervention can help manage these pests.
Can I save okra seeds for future planting?
Yes, you can save okra seeds for future planting. Simply let the pods fully mature and dry on the plant, then collect the seeds for storage in a cool, dry place.
How should I store fresh okra to keep it fresh for longer?
Fresh okra should be stored in a paper bag or perforated plastic bag in the refrigerator. Avoid washing it until you’re ready to use it, as excess moisture can cause spoilage.
What are some traditional Southern recipes that feature okra?
Some traditional Southern recipes that feature okra as the star ingredient include gumbo, fried okra, and okra and tomatoes.
What are the health benefits of consuming okra?
Okra is a nutritious vegetable that is low in calories and rich in fiber, vitamins, and minerals. It can support digestive health, contribute to heart health, and help regulate blood sugar levels.
What is the cultural significance of okra in the South?
Okra has deep cultural roots in the South and is often associated with traditional Southern cuisine. It has been a staple ingredient in dishes brought to the region by African and West Indian immigrants.
Are there any success stories or tips from experienced okra growers?
Yes, experienced okra growers often have valuable insights and tips. Some may share their success stories and techniques for maximizing yields and overcoming challenges in growing okra.
Where can I find more resources and references to learn about growing okra?
You can find more resources and references to learn about growing okra through agricultural extension offices, gardening books and magazines, online gardening forums, and reputable websites dedicated to vegetable gardening.

Studied Agricultural Engineering-Plant Protection at University of California, Davis.
Head of Content writing team at Southelmontehydroponics.com