White Sage Plant: How to Grow, Smudge, and Save Seeds
Welcome to the fascinating world of white sage! Did you know that Native American tribes have used this aromatic herb for centuries in purification ceremonies? In our modern times, white sage has gained popularity not just for its ceremonial use but also for its culinary and medicinal benefits. In this comprehensive guide, we’ll delve into the art of growing white sage, the ancient practice of smudging, and how you can save seeds for future harvests.
Whether you’re a seasoned gardener or just starting out, you’ll find valuable tips and techniques to cultivate your own supply of this sacred plant. Get ready to embark on a journey of discovery and wellness with white sage!
Table of Contents
Understanding the White Sage Plant: An Overview
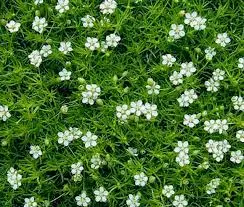
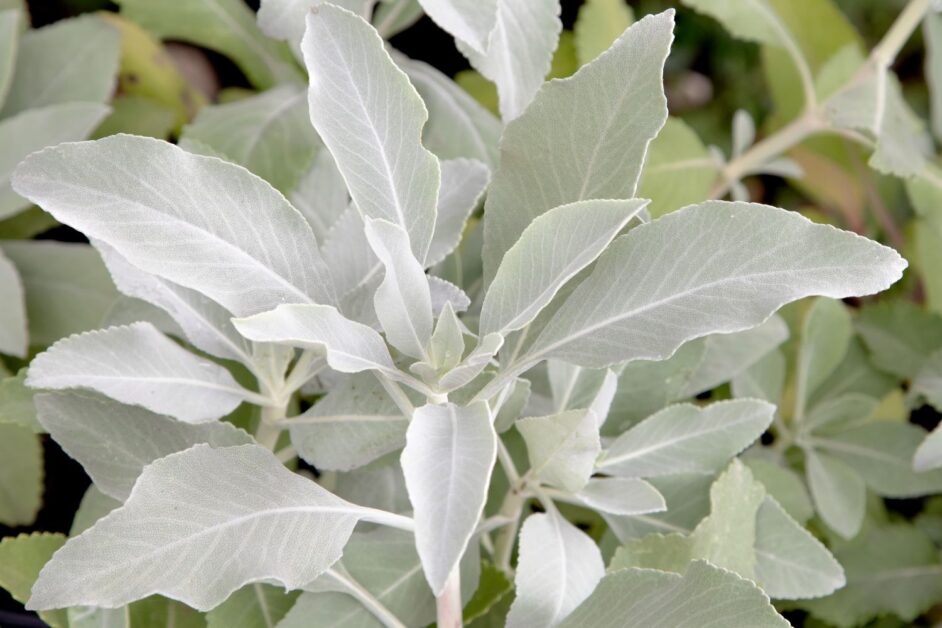
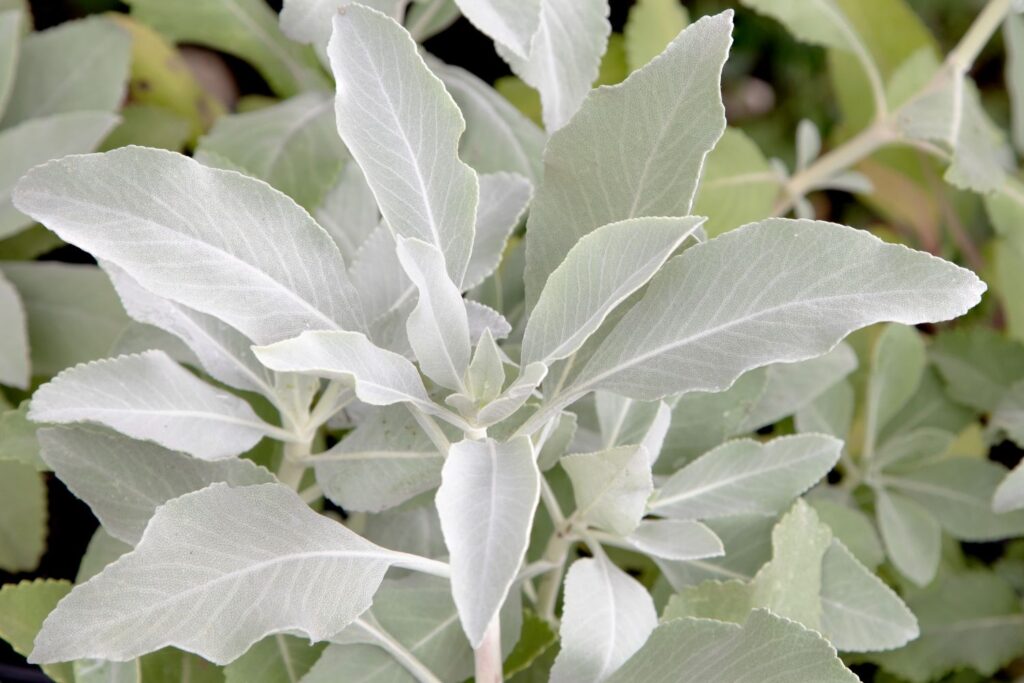
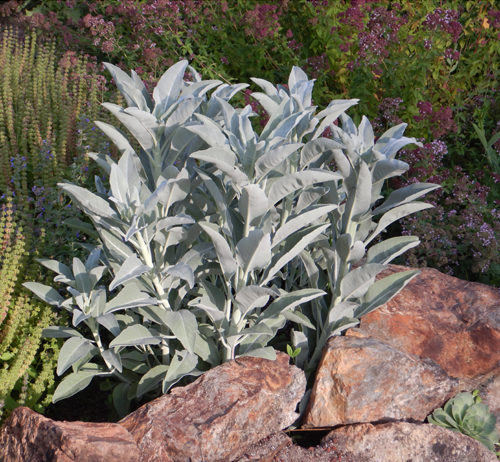
White sage, also known as Salvia apiana, is a fascinating plant that has been revered for centuries for its spiritual and medicinal properties. Native to the southwestern United States and northwestern Mexico, this perennial herb belongs to the mint family, Lamiaceae. Its distinctive gray-green leaves and fragrant white flowers make it a standout in any garden.
Key Characteristics of White Sage:
- Aromatic Scent: When crushed or burned, white sage leaves emit a strong and fragrant smoke, a defining trait revered by Native American cultures.
- Spiritual Significance: Used in sacred rituals like smudging, white sage smoke is believed to cleanse spaces and promote healing and spiritual clarity.
- Practical Uses: Beyond spirituality, white sage offers practical benefits. Its leaves can be brewed into tea, known for aiding digestion and soothing sore throats.
- Ecosystem Support: White sage serves as a vital habitat and food source for pollinators such as bees and butterflies, contributing to local ecosystem health.
Understanding these diverse aspects of white sage is essential for those seeking to appreciate its cultural significance and harness its practical benefits.
The Ideal Growing Conditions for White Sage Plants
White sage plants thrive in specific growing conditions that mimic their native habitat. These conditions play a significant role in the plant’s overall health and productivity. To ensure successful cultivation of white sage, it is essential to provide the ideal growing environment.
- Sunlight:
- White sage requires at least six to eight hours of direct sunlight daily to flourish.
- Insufficient sunlight can lead to weak growth and reduce the plant’s ability to produce aromatic leaves.
- Soil:
- White sage requires well-draining soil to prevent waterlogging and root rot.
- The ideal soil texture is sandy or loamy, with a slightly acidic to neutral pH level of 6.5 to 7.5.
- Temperature:
- White sage thrives in temperatures ranging from 60°F to 85°F (15°C to 29°C).
- They are generally not frost-tolerant, so protection from freezing temperatures is crucial.
- Climate:
- White sage prefers a warm climate, making it essential to protect them from cold temperatures if you live in a region with cooler climates.
- Consider growing white sage in containers and bringing them indoors during the colder months if necessary.
By providing the ideal growing conditions for white sage plants, you are setting the stage for a successful and productive cultivation journey. In the next section, we will delve into selecting the right location for planting white sage, exploring factors such as air circulation and proximity to other plants. Stay tuned!
Selecting the Right Location for Planting White Sage
Selecting the right location for planting white sage is crucial to ensure the healthy growth and abundant harvest of this aromatic herb. White sage thrives in warm and dry climates, making it an excellent choice for gardens in arid regions. When choosing a location, consider the following factors:

By carefully considering these factors, you can create an ideal environment for white sage to flourish. Once the perfect location has been selected, you can move on to preparing the soil and planting the seeds, taking the necessary steps to ensure successful cultivation.
Review of Organic Sphagnum Peat Moss by Perfect Plants
I recently used the Organic Sphagnum Peat Moss by Perfect Plants for my gardening projects, and I am quite satisfied with its performance. This peat moss is of high quality, made from premium organic sphagnum, which greatly enhances soil structure by improving aeration and drainage. Its excellent moisture retention properties have helped keep my plants hydrated for longer periods, reducing the need for frequent watering.
One of the key advantages is its versatility, as it works well with various plants, both indoor and outdoor. Additionally, it serves as a natural pH adjuster, helping to balance the soil’s acidity levels, which is crucial for plant health. The peat moss is easy to use, as it can be mixed directly with soil, providing immediate benefits.
However, there are a few drawbacks to consider. The bags are quite heavy, making them a bit challenging to handle and transport. When dry, the peat moss can produce a significant amount of dust, which can be messy to work with. It is also relatively more expensive than some other soil amendments. Environmental concerns regarding peat moss harvesting and its impact on ecosystems are also worth noting. Lastly, it requires specific storage conditions, as it needs to be kept dry to prevent mold growth.
Overall, despite these minor drawbacks, the Organic Sphagnum Peat Moss by Perfect Plants has been a valuable addition to my gardening toolkit, significantly improving the health and growth of my plants.

✅ Improves Soil Structure: Enhances soil aeration and drainage.
✅ Moisture Retention: Excellent for retaining moisture in soil.
✅ Versatile Use: Suitable for various plants, including indoor and outdoor.
✅ Natural pH Adjuster: Helps to balance soil pH levels.
✅ Easy to Use: Simple to mix with soil for immediate benefits.
❌ Dusty: May produce dust when dry, which can be messy.
❌ Cost: More expensive compared to some other soil amendments.
❌ Environmental Concerns: Peat moss harvesting can impact ecosystems.
❌ Specific Storage: Requires dry storage to prevent mold growth.
Preparing the Soil for White Sage Planting
Preparing the soil is a crucial step in ensuring successful growth and development of white sage plants. The right soil conditions provide the necessary nutrients and moisture retention that promote healthy root development and overall plant vigor. When preparing the soil for white sage planting, it is important to consider factors such as soil composition, drainage, and fertility.
- Soil Composition:
- White sage plants thrive in well-draining soils with good porosity, which includes a mix of sandy or loamy soil.
- The ideal soil composition allows for proper aeration and prevents waterlogging, which is essential for the plant’s shallow root system.
- Drainage:
- Ensuring proper drainage is crucial for white sage plants’ successful growth. Poorly drained soils can lead to waterlogged conditions, causing root rot and other diseases.
- Adding organic matter such as compost or well-rotted manure can improve soil structure and enhance its drainage capabilities.
- Fertility:
- White sage plants require nutrient-rich soil for optimal growth and vitality.
- Conducting a soil analysis can provide valuable insights into the soil’s nutrient content and help determine the need for amendments.
- Organic fertilizers or slow-release fertilizers can be incorporated into the soil to provide a balanced and sustained nutrient supply throughout the growing season.
By considering the soil composition, drainage, and fertility, gardeners can ensure the optimal conditions for white sage plants. This preparation sets the stage for healthy root development and overall plant vigor, leading to successful cultivation and enjoyment of this beloved herb.
Step-by-Step Guide for Planting White Sage Seeds
To successfully plant white sage seeds, follow this step-by-step guide to ensure optimal growth and a thriving plant.
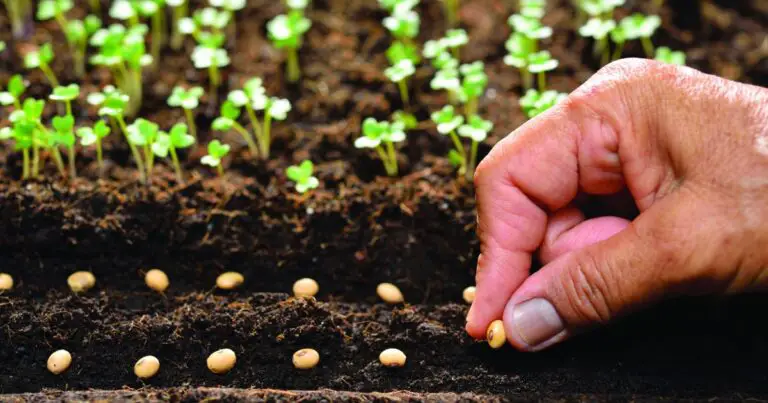
- Soil Preparation: Loosen soil with a garden fork, removing rocks and debris. Opt for sandy or loamy soil with a pH of 6.5 to 7.5.
- Sowing Seeds: Plant seeds in shallow furrows, 1/8 inch deep, spaced 12 to 18 inches apart. Cover lightly with soil and press gently.
- Watering: Carefully water seeds to keep soil moist but not waterlogged. Use a spray bottle or fine mist to ensure even moisture.
- Placement: Position seeds in a warm, sunny location with temperatures between 65 to 85°F (18 to 29°C).
- Germination: Be patient as seeds may take 2 to 6 weeks to germinate. Maintain regular watering during this period.
By following these steps and providing the right growing conditions, you can successfully cultivate white sage from seeds and embark on a fulfilling journey of expanding your herb garden with this aromatic and sacred plant.
The following table shows the step-by-step Guide for planting white sage seeds
| Step | Description |
| Soil Preparation | Loosen soil with a garden fork. Remove rocks and debris. Create well-draining environment. |
| Seed Sowing | Sow seeds in shallow furrows (1/8 inch deep). Space seeds 12 to 18 inches apart for mature plant spreading. Cover with a thin layer of soil and press down lightly |
| Watering | Water carefully, avoiding overwatering. Keep soil consistently moist without waterlogging |
| Location and Sunlight | Place in a warm and sunny location. White sage thrives in full sun. Ideal temperature: 65 to 85°F (18 to 29°C) |
| Germination Period | Seeds may take 2 to 6 weeks to germinate. Be patient and maintain regular watering during this period |
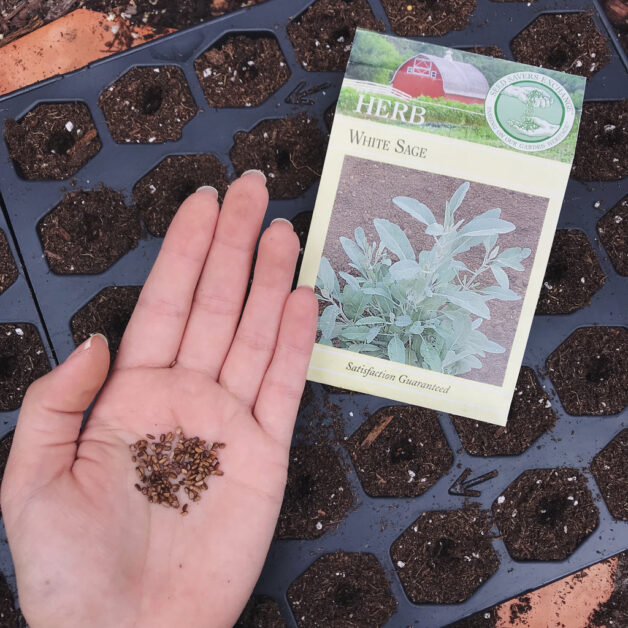
Review of Sow Right Seeds – White Sage Seeds
I recently planted the Sow Right Seeds white sage in my garden, and the experience has been quite positive. The seeds have a high germination rate, which means most of them sprouted successfully, giving me a good number of healthy seedlings. The package includes detailed instructions that were easy to follow, making the planting process straightforward even for a beginner like me.
One of the key benefits is that these seeds are non-GMO, which aligns with my preference for organic gardening. The packaging is also sustainable, which is a nice touch for environmentally conscious gardeners. White sage is not only beautiful and aromatic but also has various herbal benefits, including use in smudging and traditional medicine.
However, growing white sage does come with some challenges. The seeds require specific conditions, such as warm temperatures and well-drained soil, to thrive. The growth process is relatively slow, so patience is necessary. Additionally, the plants are sensitive to overwatering, which means careful attention is needed to avoid water-related issues. The initial setup and care during planting can be somewhat labor-intensive, and it’s important to plant them during the right season for the best results.
Overall, I’m pleased with the quality and performance of the Sow Right Seeds white sage seeds and look forward to seeing my plants flourish.

- High Germination Rate: Ensures a better chance of successful planting.
- Detailed Instructions: Comes with easy-to-follow planting and care instructions.
- Non-GMO: Seeds are non-genetically modified, ideal for organic gardening.
- Sustainable Packaging: Environmentally friendly packaging materials.
- Herbal Benefits: White sage is great for smudging and medicinal purposes.
- Beautiful Plants: Produces aromatic and visually appealing sage plants.
- Specific Conditions Required: Needs warm temperatures and well-drained soil.
- Slow Growth: Takes time to germinate and grow to full size.
- Water Sensitivity: Overwatering can easily harm the plants.
- Initial Setup Effort: Requires careful attention during the initial planting stage.
- Seasonal Plant: Best planted during specific seasons for optimal growth.
Essential Care and Maintenance Tips for White Sage Plants
White sage plants require regular care and maintenance to thrive and reach their full potential. Here are some essential tips to ensure the health and vibrancy of your white sage plants:
1. Watering: White sage plants are drought-tolerant but still require regular watering, especially during the hot summer months. It is important to establish a watering routine that allows the soil to dry out slightly between watering sessions. Aim to water deeply, ensuring that the water reaches the plant’s root system. Avoid overwatering, as excessive moisture can lead to root rot and other problems.
2. Soil Conditions: White sage plants prefer well-draining soil with a pH level between 6.5 and 8.5. Before planting, it is crucial to prepare the soil by incorporating organic matter such as compost or aged manure. This will enrich the soil, ensuring proper nutrient availability and moisture retention. Regularly monitor the soil’s moisture and adjust watering accordingly to maintain optimal conditions.
By following these care and maintenance tips, you can provide the ideal environment for your white sage plants, allowing them to thrive and flourish. In the next section, we will delve into the best practices for pruning and harvesting white sage, ensuring you can enjoy its aromatic benefits for years to come.
Pruning and Harvesting White Sage: Best Practices
When it comes to pruning and harvesting white sage, there are a few best practices to keep in mind.
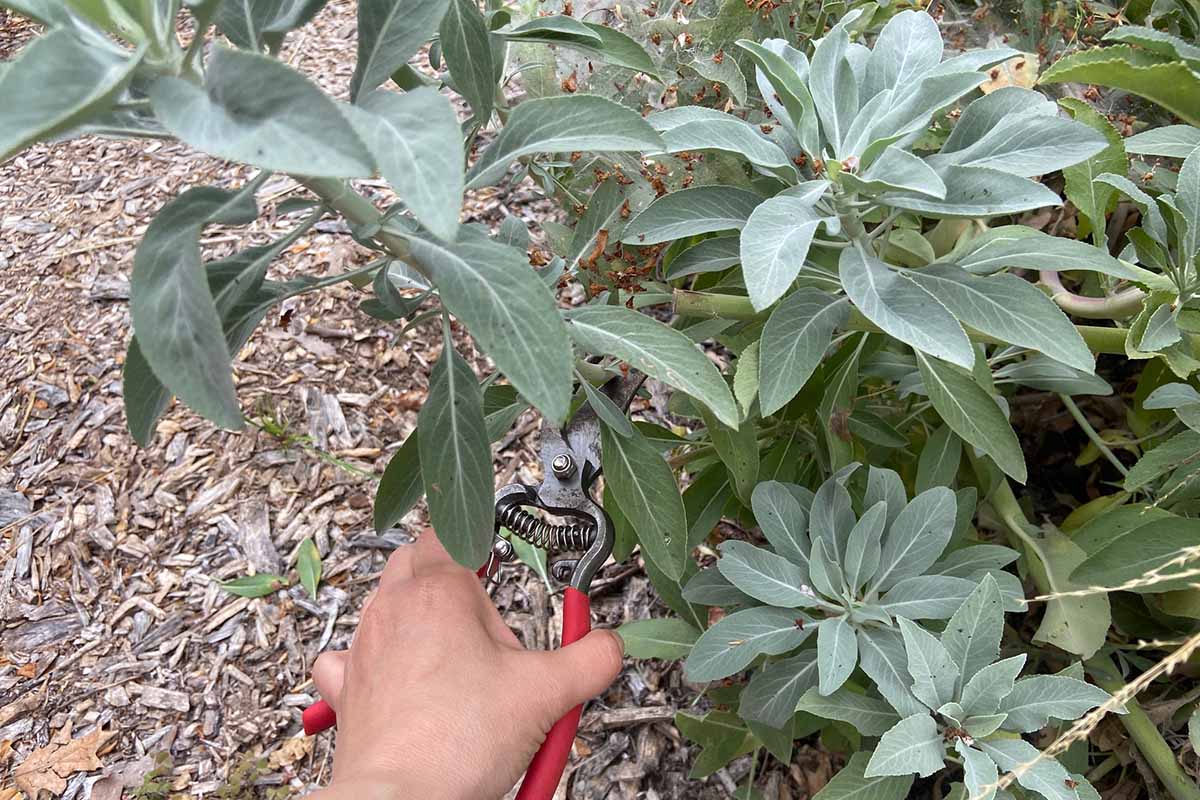
Pruning White Sage Plants:
- Identify and Remove Dead or Diseased Branches: Use sharp, clean pruning shears to cut dead, damaged, or diseased branches just above a leaf node or lateral branch.
- Promote Bushier Growth: Pruning encourages bushier growth and improves air circulation, which helps prevent diseases.
- Avoid Cutting Too Close to the Main Stem: Make clean cuts to avoid damaging the plant. Cutting too close to the main stem can hinder healing.
Harvesting White Sage Leaves:
- Timing is Key: Harvest leaves in late summer or early fall when the plant is in its prime. Look for healthy, vibrant, fully developed leaves.
- Gentle Removal: Pinch leaves at the stem and carefully remove them from the plant to avoid damage.
- Mindful Harvesting: Avoid over-harvesting to prevent weakening the plant. Balance harvesting with the plant’s ability to regrow.
- Drying or Storage: Dry harvested leaves for smudging or store them fresh in a cool, dry place for culinary use.
Remember, always practice sustainable harvesting techniques to ensure the long-term health of your white sage plants.
How to Properly Dry White Sage for Smudging
White sage is a sacred plant that has been used for centuries by indigenous cultures in spiritual rituals and smudging ceremonies. Properly drying the white sage leaves is crucial to ensure their potency and effectiveness in smudging. Here are some guidelines to help you properly dry white sage for smudging.
Harvesting White Sage Leaves:
- Timing for Optimal Potency: Harvest in the morning after dew evaporates and before peak sunlight, when essential oils are most concentrated.
- Preparation: Brush off dirt and insects, discard damaged leaves, and gather bunches of leaves (4-6 inches diameter) secured with rubber bands or twine, allowing air circulation.
Drying White Sage Leaves:
- Hanging Method: Hang bunches upside down in a well-ventilated, dark area away from direct sunlight to preserve color and potency.
- Duration: Dry for 1-2 weeks or until stems are completely dry and brittle to the touch.
Storing Dried White Sage Leaves:
- Preparation: Once thoroughly dried, remove leaves from stems and crumble if desired.
- Storage: Store in a tightly sealed jar or container in a cool, dry place away from light and moisture to maintain freshness and effectiveness.
With these steps, you can confidently dry white sage for smudging, honoring its sacredness in your spiritual practices.
The following table explain how to properly dry white sage for smudging:
| Steps | Description |
| Harvesting Time | Harvest leaves in the morning after dew has evaporated and before peak sun hours for concentrated essential oils. |
| Preparation | Gently brush off dirt, insects, and discard damaged leaves. Form small bunches (4-6 inches in diameter) and secure with rubber bands or twine. |
| Hanging | Hang bunches upside down in a well-ventilated, dark area to avoid direct sunlight exposure. Allow for air circulation between leaves. |
| Drying Time | Dry for 1-2 weeks or until stems are completely dry and brittle to the touch. |
| Avoiding Sunlight | Prevent exposure to direct sunlight to maintain color and potency of the leaves. |
| Storage | Once dried, remove leaves from stems, crumble if desired, and store in a sealed jar or container. Keep in a cool, dry place away from light and moisture. |
The Art of Smudging with White Sage: Techniques and Rituals
Smudging with white sage is a sacred practice that has been used for centuries in various cultures to cleanse and purify spaces, objects, and individuals. The process involves burning dried white sage bundles, also known as smudge sticks, and using the smoke to cleanse the energy of a person or a physical area.

- Prepare Yourself and the Space:
- Set your intentions and create a peaceful atmosphere.
- Ground yourself and focus on your purpose for smudging.
- Open windows and doors to allow for proper airflow and ensure the smoke can dissipate easily.
- Gather Necessary Items:
- Use a heat-resistant container, such as an abalone shell or a ceramic bowl, to catch any ashes that may fall.
- Have a feather or your hand ready to waft the smoke.
- Light the Smudge Stick:
- Light the smudge stick and let the flame burn for a few seconds before gently blowing it out.
- Allow the sage to smolder and release its aromatic smoke.
- Waft the Smoke:
- Move clockwise around the room or person you are smudging.
- Use a feather or your hand to waft the smoke throughout the space, paying special attention to corners, doorways, and areas where negative energy may accumulate.
- Maintain a mindful and reverent attitude, focusing on the positive energy you wish to invite.
- Extinguish the Smudge Stick:
- Be careful not to inhale the smoke directly, as it may cause irritation.
- Ensure that the smudge stick is fully extinguished after the ritual.
Remember, smudging is a deeply personal practice, and there is no right or wrong way to perform it. Allow yourself to connect with the energy and intentions behind the ritual, and adapt the techniques to suit your own beliefs and preferences. With regular smudging, you can create an environment that is energetically clear, harmonious, and conducive to overall well-being.
Saving White Sage Seeds: Why and How
White sage (Salvia apiana) is a popular plant for its aromatic leaves and sacred spiritual uses. As a gardener or herbal enthusiast, you may want to save the seeds of your white sage plants to grow more in the future. There are several reasons why saving white sage seeds is beneficial.
Importance of Saving White Sage Seeds:
- Preservation of a Sacred Plant: White sage is sacred to many Native American tribes and native to California. Saving its seeds contributes to the conservation of this culturally significant plant and maintains its genetic diversity.
- Conservation Efforts: By saving seeds, you actively participate in conserving white sage, ensuring its survival for future generations.
Benefits of Saving White Sage Seeds:
- Cost Savings: Propagate new plants without purchasing seeds or plants externally, saving money in the process.
- Quality Control: Select seeds from healthy, robust plants, ensuring the quality and vigor of future plants.
By saving white sage seeds, you not only contribute to conservation efforts but also gain control over the propagation process, ensuring the continued growth of this valuable plant species.
Harvesting White Sage Seeds: When and How to Do It
When and how to harvest white sage seeds is an important consideration for anyone looking to propagate this plant.
- Timing:
- Harvest white sage seeds when the flower spikes have turned brown and dried out.
- Catch the seeds before the seed heads turn down, as they will easily fall out once dried.
- Harvesting:
- Gently shake the dried flower spikes over a clean surface or container to allow the small, dark seeds to fall out.
- Handle the seeds with care, as they are delicate and can easily be damaged.
- Storage:
- Place the collected seeds in a sealed container, such as a small glass jar or resealable plastic bag.
- Store the seeds in a cool, dark, and dry location to maintain their longevity and viability.
- For prolonged shelf life, store the seeds in a refrigerator or freezer.
- Label the container with the seed variety and harvest date for easy identification.
By following these guidelines for harvesting and storing white sage seeds, you can ensure a healthy and abundant supply for future planting, promoting successful germination and growth of this valuable herb.
Storing White Sage Seeds: Tips for Longevity and Viability
When it comes to storing white sage seeds for longevity and viability, there are a few key tips to keep in mind. Proper storage techniques will ensure that your seeds remain viable and ready for planting when the time comes. Here are some guidelines to help you store your white sage seeds effectively:
1. Dry thoroughly: Before storing your white sage seeds, it is crucial to make sure they are completely dry. Moisture can lead to mold and other issues that can compromise the seeds’ viability. Allow the seeds to air dry in a cool, dry place for several weeks until they are fully dry.
2. Choose the right container: Select a container that is airtight and moisture-proof. This will help to prevent any moisture from seeping in and damaging the seeds. Consider using glass jars or plastic bags with zip seals to store your seeds securely.
By following these simple tips, you can ensure that your white sage seeds remain viable and ready for planting when you need them. Taking the time to store your seeds properly will increase the chances of successful germination and healthy plant growth.
Propagating White Sage from Seeds: A Step-by-Step Guide
White sage (Salvia apiana) is a popular plant known for its aromatic leaves and medicinal properties. If you’ve successfully grown white sage plants from seeds and want to propagate more, you’re in luck. Propagating white sage from seeds is an effective way to multiply your plants and continue to enjoy their benefits. Here is a step-by-step guide to help you navigate the propagation process.
Step 1: Harvesting the seeds
When your white sage plant starts to flower, allow the flowers to fully bloom before harvesting the seeds. The flowers will eventually turn into seed pods that contain the seeds. Carefully collect the seed pods when they appear dry and begin to split open. Place the seed pods in a container and store them in a cool, dry place until you’re ready to propagate.
Step 2: Preparing the germination medium
To ensure successful germination, prepare a well-draining germination medium. A mix of peat moss and perlite or vermiculite works well for white sage seeds. Moisten the medium slightly to create a damp environment for the seeds to begin their growth.
Step 3: Sowing the seeds
Gently sprinkle the white sage seeds onto the moist germination medium. Avoid overcrowding by maintaining a sufficient distance between the seeds. Lightly press the seeds into the medium, ensuring they come into contact with the dampness without burying them too deep.
Step 4: Providing optimal conditions
White sage seeds require consistent moisture and warmth for germination. Cover the container with a clear plastic wrap or place it inside a clear plastic bag to create a mini greenhouse effect. Keep the seeds in a warm location, maintaining a temperature between 70-85°F (21-29°C). Ensure that the germination medium remains consistently moist (not wet) until the seeds sprout.
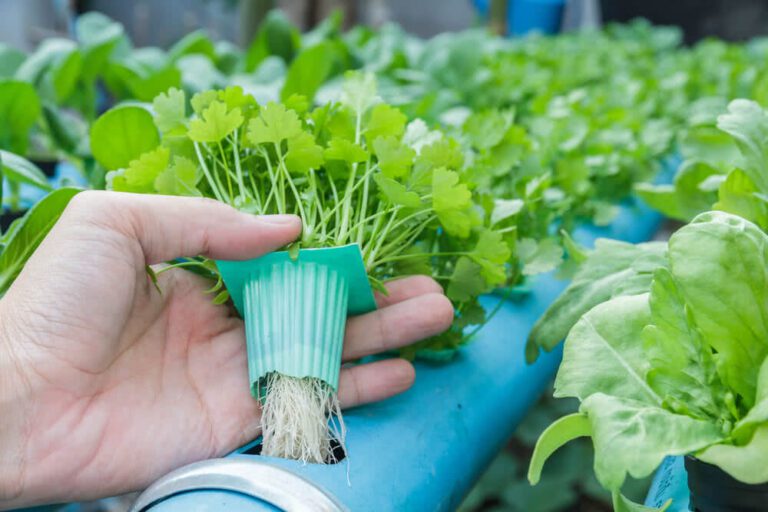
Step 5: Transplanting the seedlings
Once the seedlings have sprouted and developed a few sets of true leaves, they are ready for transplantation. Carefully lift the seedlings from the germination medium and transfer them into individual pots filled with a well-draining potting mix. Provide adequate sunlight, water, and ventilation to promote healthy growth.
By following these simple steps, you can successfully propagate white sage from seeds and enjoy an abundance of these beautiful and beneficial plants. With proper care and cultivation, you’ll have a continuous supply of white sage to use in smudging rituals, culinary endeavors, and for its medicinal properties.
Troubleshooting Common Issues in Growing White Sage Plants
White sage plants are generally low-maintenance and hardy, but they can still encounter some common issues during the growing process.
root rot
One issue that gardeners may come across is root rot, which is caused by overwatering or poorly draining soil. It is important to ensure that the soil has good drainage, as white sage plants do not tolerate standing water well. If root rot is suspected, it is crucial to act quickly by adjusting the watering schedule and improving the soil drainage.
powdery mildew
Another problem that can arise is powdery mildew, a common fungal disease that affects a variety of plants, including white sage. Powdery mildew appears as a white, powdery substance on the leaves and stems of the plant. To prevent powdery mildew, ensure that the plants are adequately spaced to allow for proper air circulation. If powdery mildew is already present, it may be necessary to treat the plants with an appropriate fungicide. Additionally, regularly inspecting the leaves and taking immediate action at the first signs of infection can help prevent the spread of the disease.
By understanding and addressing these common issues, gardeners can ensure the successful growth and health of their white sage plants. Stay tuned for more troubleshooting tips and expert advice on nurturing vibrant and thriving white sage gardens.
Learn more about in the following video: White Sage Plant: How to Grow, Smudge, and Save Seeds
FAQ
Why are the leaves of my white sage plant turning yellow?
Yellow leaves on white sage plants can indicate a few different issues. It could be a sign of overwatering, poor drainage, nutrient deficiency, or pests. Check the soil moisture levels, ensure proper drainage, and consider applying a balanced fertilizer to address any nutrient deficiencies.
How often should I water my white sage plant?
White sage plants are drought-tolerant and prefer well-drained soil. Water them deeply once a week during the growing season, allowing the soil to dry out between waterings. Reduce watering during the dormant period in winter.
What are some common pests that affect white sage plants?
White sage plants can be susceptible to aphids, spider mites, and whiteflies. Keep an eye out for these pests and take appropriate measures, such as using insecticidal soap or introducing beneficial insects, to control their populations.
How do I prevent powdery mildew on my white sage plant?
Powdery mildew can occur when there is high humidity and poor air circulation around the plant. To prevent this fungal disease, ensure proper spacing between plants, provide good air circulation, and avoid overhead watering. If powdery mildew appears, treat it with a fungicidal spray.
My white sage plant is not flowering. What could be the reason?
White sage plants typically flower in their second or third year of growth. If your plant is not flowering, it may still be too young. Ensure it is receiving enough sunlight, proper nutrients, and appropriate water levels to encourage flowering. Patience is key, as some plants may take longer to bloom.
Can white sage plants be grown indoors?
While white sage plants are primarily suited for outdoor cultivation, they can be grown indoors if provided with sufficient light, preferably six to eight hours of direct sunlight per day. Additionally, ensure good air circulation and be mindful of indoor humidity levels to prevent issues such as powdery mildew.
How do I know when to harvest the leaves of my white sage plant?
You can start harvesting the leaves of your white sage plant once it has reached a height of about 8 inches. It’s best to harvest in the morning after the dew has dried but before the heat of the day. Snip off the leaves near the base of the stem, leaving some growth for the plant to continue thriving.
Can I use fresh white sage leaves for smudging, or do I need to dry them first?
White sage leaves are traditionally dried before being used for smudging. Drying helps to concentrate the aromatic compounds and ensures a slow and steady burn. Fresh leaves can be used, but they may not produce the same quality of smoke and scent as dried leaves.
How long do white sage seeds remain viable for planting?
White sage seeds can remain viable for up to five years if stored properly. To maximize their longevity, store the seeds in a cool, dark, and dry place in an airtight container. Consider labeling the container with the date of collection or purchase for easier tracking.
Can I propagate white sage plants from cuttings instead of seeds?
Yes, white sage plants can be propagated from cuttings. Take 4-6 inch stem cuttings from the plant, remove the lower leaves, and place them in well-draining soil. Keep the soil moist and provide indirect light until roots develop, usually within a few weeks.

Studied Agricultural Engineering-Plant Protection at University of California, Davis.
Head of Content writing team at Southelmontehydroponics.com