Growing Winter Squash: Fall’s Favorite Food
Table of Contents
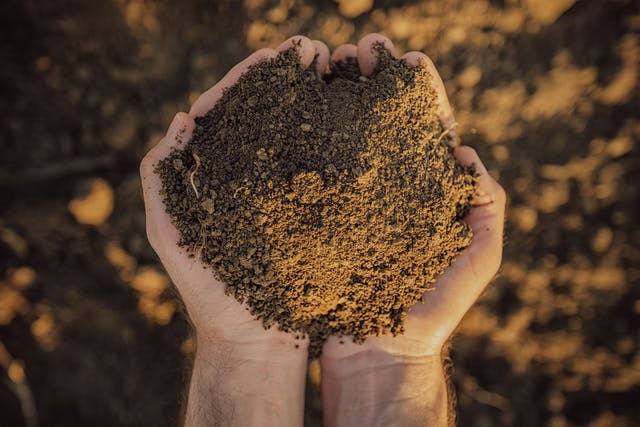
Soil Preparation: Discover the necessary steps to prepare the soil for winter squash cultivation, including testing, amending, and enriching the soil.
Preparing the soil is a crucial step in cultivating winter squash, as it sets the foundation for healthy plant growth and bountiful harvests. Before embarking on this journey, it is essential to test the soil’s composition and pH levels. Conducting a soil test provides valuable information on the nutrient content, organic matter, and any potential deficiencies or imbalances that need to be addressed. Armed with these insights, gardeners can make informed decisions when it comes to amending the soil.
Once the soil test results are in, it’s time to amend and enrich the soil to create the optimal environment for winter squash growth. Incorporating organic matter, such as compost or well-rotted manure, can improve soil structure, moisture retention, and nutrient availability. These amendments not only nourish the plants throughout their growing cycle but also enhance microbial activity and create a thriving ecosystem underground. As a result, the roots can penetrate easily, ensuring efficient nutrient uptake and water absorption. Enriching the soil with organic amendments not only benefits the winter squash plants but also promotes long-term soil health and sustainability.
Planting Techniques: Learn the proper techniques for planting winter squash seeds or seedlings, ensuring optimal growth and yield.
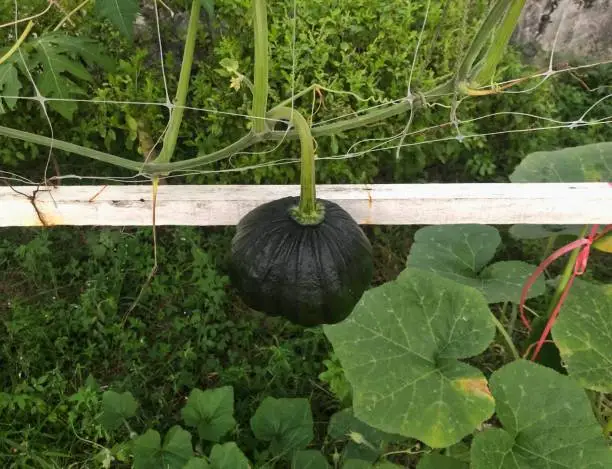
When it comes to planting winter squash, using the proper techniques is crucial for ensuring optimal growth and yield. Whether you’re starting with seeds or seedlings, following these guidelines will help you set your plants up for success.
First, it’s important to choose a site that receives full sun and has well-draining soil. Winter squash plants thrive in warm and fertile soil, so testing the soil before planting is essential. Conduct a soil test to determine its pH level and nutrient content. This information will help you make any necessary amendments to create the ideal growing conditions.
When it comes to planting seeds, you’ll want to sow them directly into the ground after the last frost date in your area. Before planting, loosen the soil to a depth of 8-12 inches and mix in organic matter such as compost or well-rotted manure. Create mounds or raised beds to improve drainage, and space the seeds according to the specific variety’s recommendations. Planting depth will vary, but a general guideline is about one inch deep.
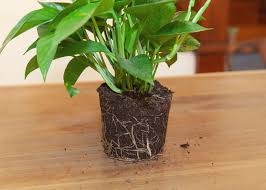
If you prefer to start with seedlings, you can either grow them yourself from seeds or purchase them from a reputable nursery or garden center. When transplanting, make sure to handle the seedlings carefully to avoid damaging their fragile roots. Dig a hole deep enough to accommodate the root ball, place the seedling in the hole, and gently firm the soil around it. Proper spacing between seedlings is crucial to allow for adequate air circulation and prevent disease. Water the newly planted seedlings thoroughly and maintain regular watering throughout their growth.
Watering Needs: Understand the specific watering requirements of winter squash plants and how to maintain proper moisture levels throughout the growing season.
Watering is one of the essential tasks in maintaining healthy winter squash plants. These plants have specific watering requirements that must be met to ensure optimal growth and yield. As a general rule, winter squash plants require about 1-2 inches of water per week. However, this may vary depending on factors such as soil type, temperature, and rainfall.
To maintain proper moisture levels throughout the growing season, it is crucial to water deeply and infrequently. This means providing a thorough soaking to the root zone rather than light and frequent watering. Deep watering encourages the roots to grow deeper into the soil, resulting in stronger and more resilient plants. Additionally, it helps prevent shallow root development, which can make plants more susceptible to stress and disease.
Timing is also crucial when it comes to watering winter squash plants. It is best to water early in the morning, allowing the foliage and soil to dry before evening. This helps prevent the development of fungal diseases, such as powdery mildew. Additionally, using drip irrigation or soaker hoses can help deliver water directly to the root zone, minimizing water waste through evaporation and runoff.
By understanding and fulfilling the specific watering requirements of winter squash plants, you can ensure healthy and productive plants throughout the growing season. Proper watering techniques, combined with other essential practices like soil preparation, nutrient management, and pest control, will contribute to a successful winter squash harvest.
Nutrient Management: Explore the essential nutrients needed for healthy winter squash plants and how to provide them through organic fertilizers or amendments.
As a gardener, it is crucial to understand the essential nutrients needed for healthy winter squash plants and how to provide them through organic fertilizers or amendments. Winter squash plants have specific nutrient requirements that must be met in order to ensure their optimal growth and productivity.
One of the key nutrients that winter squash plants require is nitrogen. Nitrogen is vital for promoting leafy growth and overall plant vigor. Organic fertilizers rich in nitrogen, such as blood meal or fish emulsion, can be applied to the soil before planting or as a side dressing during the growing season. These organic fertilizers gradually release nitrogen, providing a steady supply of this essential nutrient to the plants.
In addition to nitrogen, winter squash plants also benefit from phosphorus for root development and potassium for fruit production. Phosphorus-rich organic amendments like bone meal or rock phosphate can be incorporated into the soil prior to planting to ensure an adequate supply of this nutrient. Potassium can be provided through organic fertilizers such as wood ash or potassium sulfate.
While these are the primary macro-nutrients required by winter squash plants, it is also important to consider the micronutrient needs. Micronutrients like iron, zinc, and manganese are crucial for various plant functions, including photosynthesis and enzyme activity. Organic amendments like compost or worm castings can help provide a range of micronutrients to the soil, ensuring that the plants have access to these essential elements.
Here’s a table summarizing the role of different nutrients and organic fertilizers for green onion growth:
| Nutrient | Role | Organic Fertilizers |
|---|---|---|
| Nitrogen (N) | Promotes leafy growth and overall plant vigor | Blood meal, fish emulsion, compost |
| Phosphorus (P) | Important for root development | Bone meal, rock phosphate, compost |
| Potassium (K) | Promotes fruit production | Wood ash, potassium sulfate, compost |
| Micronutrients | Essential for various plant functions | Compost, worm castings, seaweed extract, kelp meal |
By incorporating these organic fertilizers into the soil, green onions can receive a balanced supply of nutrients essential for healthy growth and development.
Weed Control: Discover effective methods for controlling weeds in your winter squash garden to prevent competition for nutrients and space.
Weed control is a crucial aspect of maintaining a healthy winter squash garden. Weeds compete with the squash plants for nutrients, water, and space, hindering their growth and reducing yields. To effectively control weeds, there are several methods you can employ.
One common method is hand-weeding. This involves manually removing weeds by pulling them out from the root. Although it can be time-consuming, hand-weeding allows for precision and minimizes damage to nearby squash plants. It is recommended to do hand-weeding when the soil is damp, as it makes it easier to uproot the weeds.
Another effective weed control method is mulching. Applying a layer of organic mulch, such as straw or wood chips, around the squash plants helps suppress weed growth by blocking sunlight and preventing weed seeds from germinating. Mulching also aids in retaining soil moisture and regulating soil temperature. However, it is important to ensure that the mulch is not directly touching the plant stems to prevent rot and disease.
In addition to these methods, some gardeners opt for chemical weed control. Herbicides specifically designed for use in vegetable gardens can help combat stubborn and persistent weeds. However, it is essential to carefully follow the instructions provided by the manufacturer and use these products responsibly to minimize any negative effects on the environment and the squash plants themselves.
By employing these weed control methods, you can create an environment that fosters the healthy growth of your winter squash plants, allowing them to thrive and produce abundant yields.

Pest and Disease Management: Identify common pests and diseases that affect winter squash plants and learn preventive measures and organic treatment options
Common Pests and Diseases in Winter Squash Plants
Winter squash plants are susceptible to a range of pests and diseases that can hinder their growth and productivity. One common pest is the squash bug (Anasa tristis), which feeds on the leaves and stems of the plant, causing wilting and stunted growth. These pests can be identified by their brown or gray body and characteristic triangular shape. To control squash bugs, regular monitoring is crucial. Handpicking and disposing of eggs and adult bugs can help prevent infestations. Applying organic insecticidal soap or neem oil can also be effective in managing these pests.
Another common pest that affects winter squash plants is the striped cucumber beetle (Acalymma vittatum). These beetles feed on the leaves, flowers, and fruits of the plant, causing yellowing and deformation. To prevent damage from striped cucumber beetles, row covers can be used to physically exclude them from the plants during the early growth stages. Additionally, applying a layer of organic mulch around the base of the plants can deter these pests. If infestations occur, spraying with an organic insecticide, such as pyrethrin, can help control the population.
In terms of diseases, powdery mildew (Podosphaera xanthii) is a common fungal infection that affects winter squash plants. This disease appears as a white or gray powdery growth on the leaves, causing them to yellow and wither. Powdery mildew thrives in warm and humid conditions, so providing adequate airflow and spacing between plants can help prevent its spread. Applying sulfur or copper-based fungicides as a preventive measure can also be effective. However, it’s important to note that early detection and timely treatment are key to managing powdery mildew.
By being aware of the common pests and diseases that affect winter squash plants, as well as the preventive measures and organic treatment options available, gardeners can ensure healthier and more productive crops. Regular monitoring, proper sanitation practices, and prompt action can help maintain the vitality of these plants and maximize their yield. Stay vigilant and proactive in protecting your winter squash crop to enjoy a bountiful harvest.
How can I prevent pests from affecting my winter squash plants?
To prevent pests, you can implement various organic pest control measures such as using row covers, companion planting with pest-repellent plants, practicing crop rotation, and regularly inspecting your plants for signs of infestation.
What are some common pests that affect winter squash plants?
Common pests that can affect winter squash plants include squash bugs, cucumber beetles, aphids, and vine borers.
How can I identify if my winter squash plants are affected by diseases?
Look for symptoms such as wilting, yellowing leaves, spots or lesions on the leaves or fruits, stunted growth, or any unusual discoloration. Proper identification can be done through consulting gardening resources or seeking advice from local agricultural extension services.
What are some preventive measures against diseases in winter squash plants?
To prevent diseases, ensure proper spacing between plants for good air circulation, avoid overhead watering to reduce leaf moisture, practice proper crop rotation, and remove and destroy any infected plant material.
Are there organic treatment options for pests and diseases on winter squash plants?
Yes, there are organic treatment options available. For pests, you can use insecticidal soaps, neem oil, or introduce beneficial insects like ladybugs or lacewings. For diseases, organic fungicides containing copper or sulfur can be used, and there are also biocontrol agents like Trichoderma that can help suppress certain diseases.
How often should I water my winter squash plants?
Winter squash plants generally require 1-2 inches of water per week. However, this can vary depending on factors such as weather conditions, soil type, and plant growth stage. It’s important to monitor soil moisture and adjust watering accordingly.
Can I use chemical fertilizers instead of organic ones for winter squash plants?
While chemical fertilizers can provide essential nutrients to plants, organic fertilizers are recommended for sustainable and environmentally-friendly practices. Organic fertilizers improve soil health, promote beneficial microbial activity, and minimize the risk of nutrient imbalance or over-fertilization.
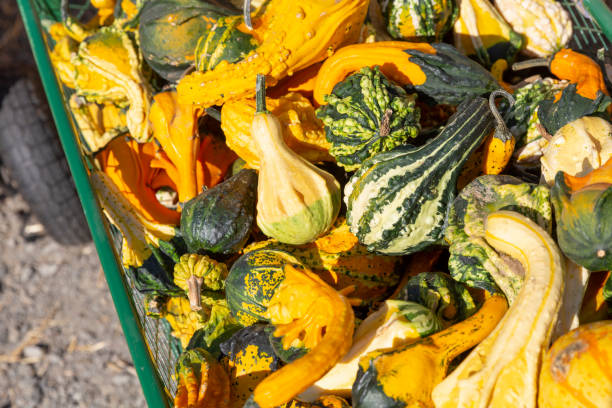
What is the best time to harvest winter squash?
Winter squash is typically harvested when the fruits have reached full maturity and their rinds have hardened. This is usually indicated by a deep, solid color and a hard skin that resists puncture with a fingernail. Harvesting is generally done in late summer or early fall before the first frost.
Beck Wakeford is a dedicated writer at SouthElMonteHydroponics, with a fervent enthusiasm for agriculture and technological innovation. Armed with a degree in Agricultural Engineering from a leading university, Beck specializes in hydroponic systems design, automation, and optimization. Their passion for merging traditional farming with cutting-edge technology drives them to explore novel solutions for sustainable food production. Beck’s expertise and keen interest in the intersection of engineering and agriculture make them a valuable asset in the quest for efficient and eco-friendly farming practices. Through their writing, Beck aims to inspire others to embrace the potential of hydroponics in shaping a more sustainable future.