Rosemary Propagation: Easy Cuttings Technique
Table of Contents
Rosemary Propagation Materials Needed
To successfully propagate Rosemary Propagation plants, you will need a few essential materials. Firstly, ensure you have a sharp pair of pruning shears or scissors to take clean and precise cuttings from the parent plant. This will help promote healthy root development in the new cuttings. Additionally, having a rooting hormone on hand can expedite the rooting process and increase the chances of successful propagation. Lastly, make sure you have a suitable potting mix or medium that provides good drainage while retaining enough moisture for the cuttings to establish roots.
In addition to the tools mentioned above, it is beneficial to have small pots or trays to plant the rosemary cuttings in. These containers should be clean and have drainage holes to prevent waterlogging, which can lead to root rot. Moreover, having access to a spray bottle for misting the cuttings will help maintain the right level of humidity essential for their growth. Lastly, a clear plastic bag or a small greenhouse can be used to create a humid environment that encourages root development in the cuttings.
Selecting Healthy Rosemary Propagation Plants
When selecting healthy rosemary plants for propagation, it is essential to choose specimens that exhibit robust growth and vibrant green foliage. Look for plants that have sturdy stems, without any signs of wilting or discoloration in the leaves. Healthy rosemary plants should also be free from pests or diseases, as these issues can hinder successful propagation efforts.
Additionally, inspect the roots of the rosemary plants to ensure they are well-established and not overcrowded in their containers. Avoid selecting plants with root-bound systems, as this can impede the development of new roots when propagating. Opt for specimens that show balanced growth above and below the soil line, indicating their overall health and vigor.
Choosing the Right Time for Rosemary Propagation
When determining the ideal timing for propagating rosemary, it’s crucial to consider the plant’s natural growth cycle. Rosemary is best propagated during the spring or early summer months when it is actively growing, as this is when the plant is most likely to root successfully. Avoid propagating in extreme temperatures, such as during the peak of summer or in the depths of winter, as these conditions can stress the plant and hinder root development.
Furthermore, it is recommended to propagate rosemary when daylight hours are increasing, mimicking its natural growth patterns. Longer days and increasing sunlight provide the necessary energy for the plant to establish roots and grow vigorously. By selecting the right time for propagation, you can optimize the chances of success and ensure that your rosemary cuttings have the best start in their journey to becoming healthy, thriving plants.
Preparing the Cutting Tools for Rosemary Propagation
Before taking rosemary cuttings for propagation, it’s crucial to ensure that your cutting tools are clean and sharp. Pruning shears or a sharp knife are commonly used for taking cuttings, and it’s important to disinfect them with rubbing alcohol or a bleach solution to prevent the spread of diseases between plants. Sharp tools make clean cuts, reducing the risk of damage to the plant tissue and promoting faster healing.
When selecting your cutting tools, opt for a tool that comfortably fits your hand and can make precise cuts. Make sure the blades are sharp to prevent crushing or tearing the plant stems, which can impede the plant’s ability to callus and root. Having clean and sharp cutting tools not only benefits the plant but also makes the propagation process easier and more successful overall.
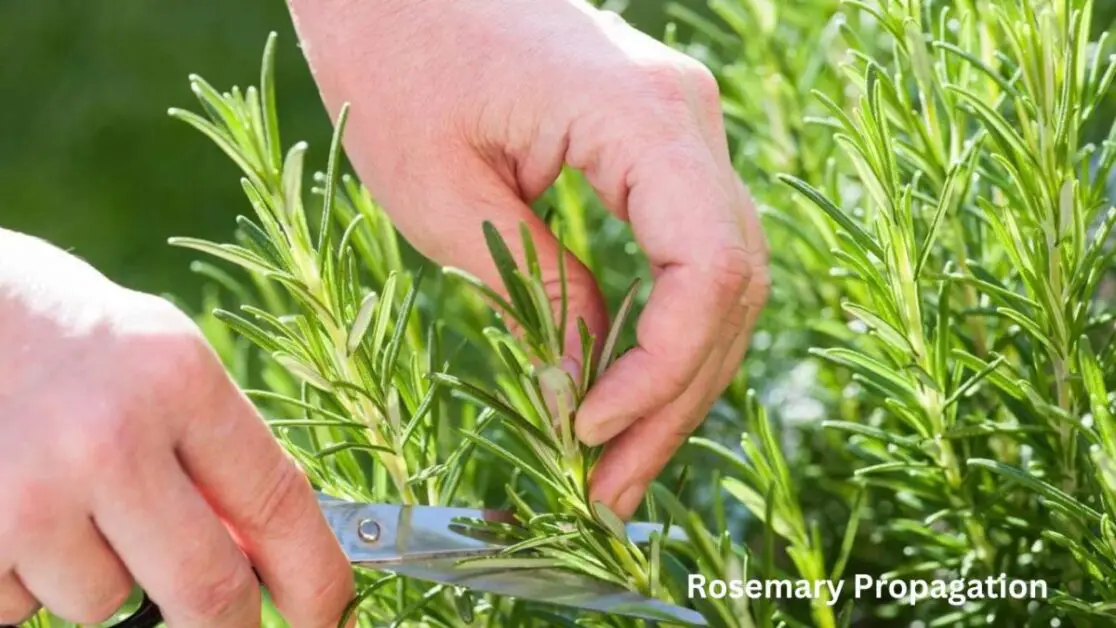
Taking Rosemary Propagation Cuttings
To successfully take rosemary cuttings, it is essential to choose mature, healthy plants with no signs of diseases or pests. Selecting strong, non-flowering stems for propagation increases the chances of successful rooting. These stems should be around 4-6 inches long and ideally taken from the current season’s growth to ensure vigor and vitality in the cutting.
Carefully remove the lower leaves from the bottom of the cutting, leaving only a few leaves at the top to promote efficient photosynthesis while the cutting establishes roots. This process not only reduces the chances of rot but also encourages the cutting to focus its energy on root development. Cleanly trimmed cuttings with minimal foliage will help the plant transition from being a cutting to a rooted plant successfully.
Removing Lower Leaves of Rosemary Propagation

After taking rosemary cuttings for propagation, the next step is removing the lower leaves. This process involves carefully pinching or cutting off the leaves on the lower portion of the cutting. By removing these lower leaves, energy is directed towards root development rather than sustaining unnecessary foliage. This practice not only encourages the cutting to focus on establishing roots but also helps prevent excess moisture loss through transpiration.
When removing the lower leaves, it is important to approach this task with precision to avoid causing damage to the cutting. Gently hold the stem and carefully remove the leaves by pinching them off or using sterilized pruning shears. Ensure that no leaves are left submerged in the soil to prevent rotting and potential fungal problems. By effectively removing the lower leaves, you promote the optimal conditions for successful root development and the overall health of the propagated rosemary plant.
Rooting Rosemary Propagation Hormone Application
Once you have prepared your rosemary cuttings, the next step in the propagation process is applying rooting hormone. Rooting hormone is a valuable tool in encouraging the development of roots on your cuttings. It contains growth hormones that stimulate root growth, increasing the chances of successful propagation. When applying rooting hormone, ensure you dip the cut end of each cutting into the powder or gel form of the hormone, following the manufacturer’s instructions for the appropriate amount to use.
After applying the rooting hormone to your rosemary cuttings, gently shake off any excess powder or gel. Be cautious not to rub off the hormone from the cut end, as this could reduce its effectiveness. Once all cuttings have been treated, proceed to plant them in the prepared soil mix. Rooting hormone application is a critical step in the propagation process that can significantly improve the success rate of your cuttings developing into healthy, rooted plants.
Planting Cuttings Rosemary Propagation in Soil
When planting rosemary cuttings in soil, it is crucial to choose a well-draining potting mix to prevent waterlogging, which can lead to root rot. Ensure the soil is moist but not soggy to provide an ideal environment for the cuttings to establish roots. Gently press the soil around the base of the cutting to secure it in place while allowing ample airflow around the leaves.
Maintain consistent moisture levels by watering the soil whenever the top layer feels dry to the touch. Avoid overwatering as this can hinder root development and cause fungal issues. Placing the planted cuttings in a warm, sunny location with indirect sunlight will promote growth. Monitor the soil moisture regularly and adjust watering frequency as needed to support the healthy development of the young plants.
Watering and Humidity on Rosemary Propagation for Optimal Growth
To ensure optimal growth of your propagated rosemary plants, proper watering and humidity levels are crucial factors to consider. Rosemary plants prefer well-draining soil that is kept moderately moist but not waterlogged. Water the cuttings when the top inch of the soil feels dry to the touch, ensuring that excess water can freely drain from the container to prevent waterlogged roots which can lead to rot. Maintaining a consistent level of humidity around the cuttings can also aid in their growth. You can achieve this by using a humidity dome or placing the cuttings in a greenhouse or enclosed area to trap moisture in the air.
When it comes to watering, it is essential to strike a balance to avoid overwatering or underwatering your rosemary cuttings. Overwatering can lead to root rot, while underwatering can cause the plants to wilt and eventually die. Monitoring the soil moisture level regularly and adjusting your watering routine accordingly can help maintain optimal growth conditions for your rosemary cuttings. Additionally, providing a consistent level of humidity around the plants can promote healthy root development and overall growth. By paying attention to these key aspects of watering and humidity, you can help your propagated rosemary plants thrive and flourish.
Light and Temperature Requirements for Rosemary Propagation
To thrive and flourish, rosemary plants require a good balance of light and temperature. These factors play a crucial role in the growth and development of your propagated rosemary cuttings. When it comes to light, rosemary prefers bright, direct sunlight for at least 6-8 hours a day. If growing indoors, placing the plants near a south-facing window can provide the adequate light they need. Insufficient light can result in leggy, weak plants with poor flavor and aroma. On the other hand, too much direct sunlight can lead to sunburn and scorching of the leaves, so finding the right balance is key to optimal growth.
In terms of temperature, rosemary plants thrive in warm conditions and are sensitive to cold temperatures. Ideally, the temperature for propagated rosemary cuttings should be between 65-85°F (18-29°C) during the day and no lower than 55°F (13°C) at night. Sudden drops in temperature can stress the plants and hinder their growth. It’s vital to protect your rosemary cuttings from frost and cold drafts, especially during the winter months. By providing the right amount of light and maintaining suitable temperatures, you can ensure that your propagated rosemary plants grow healthy and robust.
Transplanting Rooted Cuttings of Rosemary Propagation
Once your rosemary cuttings have developed strong roots, it is time to transplant them into individual pots for continued growth. Select pots that are slightly larger than the current container to allow for root expansion and proper development. Fill the pots with well-draining soil mix and create a small hole in the center for the transplant. Gently remove the cutting from its original container, being careful not to damage the delicate roots. Place the cutting in the prepared hole and lightly pack the soil around it to secure the plant in place. Water the newly transplanted cutting thoroughly to help it settle into its new home.
After transplanting, place the pots in a location with bright, indirect sunlight to promote further growth. Keep the soil consistently moist but not waterlogged to prevent root rot. Monitor the plants regularly for any signs of stress or wilting, adjusting care as needed. As the transplanted cuttings continue to establish themselves, you will notice new growth and increased vitality. This stage is crucial in the development of healthy and robust rosemary plants for future harvests.
Monitoring Growth and Rosemary Propagation
After propagating rosemary cuttings, it is crucial to closely monitor the growth and development of your new plants. Keep a watchful eye on the overall health of the cuttings, ensuring they remain hydrated but not waterlogged. The growth of roots is a promising sign of successful propagation, so check for signs of root development by gently tugging on the cutting after a few weeks to feel for resistance, indicating roots have taken hold.
Observing the appearance of new growth, such as fresh foliage emerging from the cuttings, is another positive indication that your propagated rosemary plants are thriving. Keep track of any changes in size, color, and texture of the leaves, as this can reflect the plant’s health and vigor. Regularly inspect your propagated rosemary plants for any signs of stress, disease, or pest infestation, addressing any issues promptly to ensure continued growth and development.
Rosemary Propagation Common Issues and Troubleshooting
When propagating rosemary, common issues may arise that can affect the success of your plantings. One issue to watch out for is overwatering, which can lead to root rot and hinder the development of healthy roots. To prevent this, ensure the soil is well-draining and only water when the top inch of soil feels dry to the touch. Additionally, inadequate light can cause leggy growth and weaken the plant overall. Place your cuttings in a location that receives plenty of sunlight or use grow lights to provide the necessary light levels for optimal growth.
Another common problem when propagating rosemary is fungal diseases such as powdery mildew or root rot. To prevent fungal issues, avoid overcrowding your cuttings and ensure good airflow around the plants. If you notice any signs of fungal growth, such as white powdery residue on the leaves or a foul odor coming from the roots, take action immediately. Trim away affected areas and consider using a fungicidal treatment to control the spread of the disease. By staying vigilant and addressing these common issues promptly, you can help your propagated rosemary plants thrive and flourish.
Pruning and Maintenance Tips for Rosemary Propagation

Proper pruning and maintenance are crucial for keeping your rosemary plants healthy and thriving. Regularly trimming your rosemary plant will encourage new growth, maintain its shape, and prevent it from becoming woody and unmanageable. Use sharp, clean pruning shears to make precise cuts, and always trim back to just above a set of leaves or node to promote branching and fullness.
When it comes to maintenance, ensure your rosemary plant is receiving adequate sunlight, water, and nutrients. Rosemary thrives in well-draining soil and prefers to dry out slightly between watering sessions. Fertilize sparingly with a balanced fertilizer to avoid overwhelming the plant with nutrients. Additionally, monitor your rosemary for any signs of pests or diseases, and address any issues promptly to prevent them from spreading and causing harm to the plant. Regular inspection and care will keep your rosemary plants in top condition for continued enjoyment and harvest.
here’s a simple table outlining different methods of propagating rosemary:
| Propagation Method | Description |
|---|---|
| Stem Cuttings | Cut a 4-6 inch stem from a healthy rosemary plant, remove the lower leaves, dip the cut end in rooting hormone, and plant it in well-draining soil or a rooting medium. Keep the soil moist and the cutting in a warm, bright location until roots develop. |
| Layering | Bend a low-growing stem of a mature rosemary plant down to the ground, nick the underside of the stem where it touches the soil, and cover it lightly with soil. Keep the area moist until roots develop, then sever the new plant from the parent. |
| Division | Divide a mature rosemary plant by carefully separating the root ball into smaller sections, ensuring each section has roots and foliage. Replant the divisions in pots or the garden, and water thoroughly. |
| Seed Propagation | Collect rosemary seeds from mature plants, sow them in a seed tray filled with well-draining soil, and cover lightly. Keep the soil consistently moist and provide warmth and light until seedlings emerge. Transplant seedlings into individual pots once they have several true leaves. |
These methods can be used to propagate rosemary successfully and produce new plants for your garden or indoor collection.
Harvesting Rosemary from Propagated Plants
After patiently nurturing your rosemary cuttings to thriving plants, it’s time to reap the rewards of your labor by harvesting fresh rosemary from your propagated plants. Harvesting rosemary is a simple process that can be done as needed based on your culinary requirements. To harvest rosemary, simply snip the stems with sharp scissors or pruners, making sure to cut just above a leaf node to encourage new growth.
When harvesting, it’s best to avoid stripping all the leaves from a single stem as this can hinder the plant’s ability to photosynthesize effectively. Instead, opt for selective harvesting, taking a few sprigs from each plant to promote continued growth and vitality. Fresh rosemary can be used immediately in cooking or preserved by drying for later use. Remember to always harvest responsibly, ensuring the plant has enough foliage to sustain itself and continue flourishing in your garden.
Can I use water propagation for propagating rosemary?
No, rosemary cuttings should be propagated in soil rather than water for better success.
How often should I water the rosemary cuttings during the propagation process?
It is important to keep the soil consistently moist but not waterlogged. Water the cuttings when the top inch of soil feels dry.
What is the ideal temperature for rooting rosemary cuttings?
Rosemary cuttings root best in temperatures between 65-75°F (18-24°C).
How long does it typically take for rosemary cuttings to root?
Rosemary cuttings may take 2-3 weeks to develop roots, but it can vary depending on environmental conditions.
Can I fertilize the rosemary cuttings during the propagation process?
It is best to avoid fertilizing the cuttings until they have established roots to prevent burning the delicate new growth.