A Gardening Guide to Crinum Lily
Table of Contents
Planting Crinum Lily
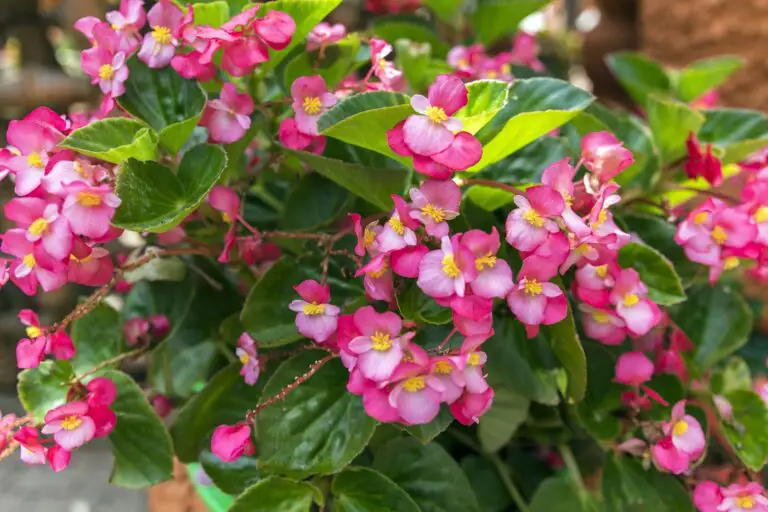
Crinum lilies, with their stunning blooms and elegant foliage, are a popular choice for many gardeners looking to add beauty to their outdoor spaces. When it comes to planting these magnificent bulbs, it is important to ensure the right conditions for their growth and success.
Choosing the ideal location for your Crinum lilies is crucial. These plants thrive in areas that receive full sun or partial shade. It is also important to consider the soil quality, as Crinum lilies prefer well-draining soil that is enriched with organic matter. Before planting, it is recommended to prepare the soil by removing any weeds or debris and loosening it with a garden fork or tiller.
Once the soil is prepared, it is time to plant the Crinum lily bulbs. Bury the bulbs about six inches deep, ensuring they are positioned with the pointed end facing upwards. Spacing the bulbs about two to three feet apart will allow enough room for the plants to grow and spread. After planting, gently water the area to settle the soil and provide moisture for the bulbs’ initial growth. With proper planting techniques and attention to the plant’s needs, you will be rewarded with a stunning display of Crinum lily blooms in your garden.
Growing Conditions for Crinum Lily
Crinum lilies are exquisite flowering plants that can add a touch of elegance to any garden. To ensure that your Crinum lilies thrive and bloom abundantly, it is crucial to provide them with the right growing conditions. By understanding their needs and meeting them effectively, you can enjoy the beauty and fragrance of these stunning flowers throughout the growing season.
Firstly, Crinum lilies require a location that offers plenty of sunlight. These plants thrive in full sun or partial shade, but they need at least six hours of direct sunlight each day to grow and flourish. Therefore, when selecting a spot for your Crinum lilies, choose an area that receives ample sunlight and has well-drained soil. This will ensure that these plants have enough energy to produce vibrant blooms and healthy foliage.
In addition to sunlight, Crinum lilies prefer a soil that is rich in organic matter and well-draining. They thrive in slightly acidic to neutral soil with a pH range of 6.0 to 7.0. It is recommended to amend the soil with compost or well-rotted organic matter before planting your Crinum lilies to improve its fertility and drainage. This will provide the plants with the necessary nutrients and prevent waterlogging, which can lead to root rot. Moreover, maintaining proper moisture levels in the soil is essential. Crinum lilies prefer moist soil, but they do not tolerate excessive wetness. Therefore, it is crucial to strike a balance between watering adequately and avoiding waterlogged conditions, which can be achieved through regular monitoring and proper irrigation practices.
Now that you have a good understanding of the growing conditions required for Crinum lilies, you can confidently prepare your garden to accommodate these magnificent plants. Remember, ensuring optimal sunlight exposure and providing well-drained, nutrient-rich soil are key factors in the successful growth and blooming of Crinum lilies.
Choosing the Right Location for Crinum Lily
When choosing the right location for your Crinum Lily, it is important to consider several factors that will contribute to its overall growth and health. Firstly, Crinum Lily thrives in full sun to partial shade, so locate it in an area of your garden that receives at least six hours of direct sunlight each day. If your climate tends to be extremely hot, however, providing some shade during the peak hours of the day can help protect the plant from scorching.
Secondly, Crinum Lily prefers well-draining soil that is rich in organic matter. This plant is not particularly picky about soil pH, but it does best in slightly acidic to neutral conditions. Before planting, test the soil in your chosen location to ensure it meets the ideal pH range of 6.0 to 7.0. If necessary, you can amend the soil with organic matter, such as compost or well-rotted manure, to improve its structure and fertility.
In addition to sunlight and soil conditions, it is also important to consider the spacing requirements of Crinum Lily. This plant can spread and grow quite large, so make sure to provide enough room for it to reach its full potential. As a general guideline, space the bulbs or plants at least 3 feet apart to allow for adequate air circulation and prevent overcrowding.
By carefully selecting the right location for your Crinum Lily, you can provide it with the optimal growing conditions that will support its development and yield beautiful blooms. Remember to consider sunlight exposure, soil requirements, and proper spacing to give your Crinum Lily the best start possible in your garden.

Preparing the Soil for Crinum Lily
Preparing the soil is an essential step in ensuring the successful growth of Crinum lilies. The right soil conditions provide a solid foundation for the bulbs to establish and thrive. Before planting, it is crucial to assess the existing soil and make necessary amendments to create an optimal environment.
Crinum lilies prefer well-draining soil that is rich in organic matter. This can be achieved by amending the soil with compost or well-rotted manure. Organic matter improves soil structure, enhances drainage, and provides essential nutrients for healthy plant growth. Incorporating these materials into the soil will not only add fertility but also improve moisture retention, which is particularly beneficial during dry spells.
In addition to organic amendments, it is essential to ensure that the soil pH is within the ideal range for Crinum lilies. These plants thrive in slightly acidic to neutral soil with a pH range of 6.0 to 7.0. Conduct a simple soil test to determine the pH level and make adjustments if necessary. This can be done by adding lime to increase pH or sulfur to lower pH, depending on the initial reading. Taking these steps will create a favorable growing environment and set the stage for healthy Crinum lilies.
Planting Crinum Lily Bulbs
When it comes to planting crinum lily bulbs, proper preparation and attention to detail are essential for ensuring successful growth and blooming. Start by selecting healthy and sturdy bulbs, as these will have a better chance of thriving in your garden. It is recommended to plant crinum lily bulbs in the spring, once the threat of frost has passed and the soil has warmed up.
Before planting, choose a location that receives at least six hours of direct sunlight daily. Crinum lilies prefer well-draining soil, so make sure the area is not prone to waterlogging. To prepare the soil, loosen it with a garden fork or tiller, removing any weeds or rocks in the process. Adding organic matter, such as compost or well-rotted manure, can help improve the soil’s fertility and drainage.
Dig a hole large enough to accommodate the entire bulb, ensuring that it sits at a depth of two to three times its diameter. Place the bulb in the hole with the pointed end facing upwards, and gently backfill with soil, lightly tamping it down to remove any air pockets. Water the planted bulb thoroughly and continue to keep the soil moist, but not saturated, throughout the growing season.
These initial steps will provide a solid foundation for your crinum lily bulbs to establish themselves in your garden. In the upcoming sections, we will delve deeper into watering, fertilizing, and proper maintenance techniques to maximize the beauty and longevity of these stunning flowering plants. Stay tuned for expert tips and advice on caring for your crinum lilies to ensure a vibrant and thriving garden display.

Watering and Fertilizing Crinum Lily
Proper watering and fertilizing are essential for the healthy growth and blooming of Crinum lilies. These stunning flowers require a delicate balance of moisture and nutrients to thrive. Let’s take a closer look at the best practices for watering and fertilizing Crinum lily plants.
When it comes to watering Crinum lilies, precision is key. These plants prefer a consistent moisture level, but they can’t tolerate soggy soil. It’s crucial to strike a balance to avoid both under-watering and over-watering. A good rule of thumb is to water deeply but infrequently. Aim to provide about 1 inch of water per week, either through rainfall or manual irrigation. To prevent waterlogged roots, ensure good drainage by using well-draining soil or adding amendments like perlite or compost. Regularly check the soil moisture levels and adjust watering frequency accordingly.
In terms of fertilization, Crinum lilies benefit from a nutrient-rich soil. Before planting, it’s recommended to amend the soil with organic matter such as compost or aged manure to improve its fertility. As the growing season begins, a slow-release fertilizer with a balanced N-P-K ratio (nitrogen, phosphorus, potassium) can be applied around the base of the plant. Follow the packaging instructions for the appropriate amount and frequency of application. Additionally, using a liquid fertilizer with a high phosphorus content during the flowering period can promote robust blooming. Always remember to water the plants before and after fertilizing to prevent any potential root burn.
By understanding the specific watering needs and fertilization requirements of Crinum lily plants, you can provide them with the optimal growing conditions. With consistent care, these magnificent flowers will reward you with their captivating blooms, enhancing the beauty of your garden.
| Aspect | Watering | Fertilizing |
|---|---|---|
| Watering | – Keep soil consistently moist, not soggy | – Apply a balanced fertilizer (10-10-10) every 4-6 weeks during the growing season (spring and summer). |
| – Water deeply, allowing the soil to drain well to prevent waterlogging. | – Dilute the fertilizer according to package instructions to avoid burning the plant’s roots. | |
| – Water more sparingly during the winter months, allowing the soil to dry out slightly between watering. | – Cease fertilization during the plant’s dormant period in fall and winter. | |
| Frequency | – Water when the top inch of soil feels dry. | – Fertilize regularly during the active growing season. |
| – Frequency may vary depending on climate and soil conditions. | – Adjust fertilization frequency based on the plant’s response and growth rate. | |
| Indicators | – Drooping or yellowing leaves may indicate underwatering. | – Excessive foliage growth without blooms may indicate the need for more phosphorus in the fertilizer. |
| – Wilting or yellowing can also be a sign of overwatering or poor drainage. | – Monitor for signs of nutrient deficiencies or excesses and adjust fertilization accordingly. | |
| – Healthy, green foliage and occasional blooms indicate proper watering and fertilization. | – Flush the soil occasionally to prevent salt buildup from fertilizer. |
Pruning and Maintaining Crinum Lily
Proper pruning and maintenance are essential for promoting the health and vitality of your Crinum lilies. By following these guidelines, you can ensure that your plants thrive and continue to beautify your garden.
When it comes to pruning Crinum lilies, it’s important to know that these plants require minimal intervention. In general, you should only remove dead or damaged leaves and spent flower stalks. This will help maintain the overall aesthetics of the plant and prevent the spread of diseases. Use clean, sharp pruning shears to make clean cuts, ensuring that no stubs are left behind.
Regular maintenance tasks such as removing yellowing leaves or controlling weeds around the base of the plant will also contribute to the overall health of your Crinum lilies. Checking for signs of pests or diseases is another crucial step in maintaining these beautiful flowers. Inspect the foliage regularly for any signs of chewed leaves, discoloration, or unusual growth patterns. Early detection is key in preventing any potential infestations or diseases from spreading.
Remember, Crinum lilies tend to be low-maintenance plants, and excessive pruning or overzealous maintenance can actually do more harm than good. By taking a cautious and minimalistic approach, you can ensure that your Crinum lilies continue to flourish and bring joy to your garden for years to come.
Dealing with Common Pests and Diseases in Crinum Lily
When it comes to growing Crinum lilies, one of the challenges that gardeners may face is dealing with common pests and diseases. These can hinder the growth and overall health of your Crinum lilies if not properly addressed. One of the most common pests that can affect these plants is aphids. These small, soft-bodied insects feed on the sap of the Crinum lily leaves, causing them to become distorted and stunted. To control aphids, you can use insecticidal soap or a neem oil solution, applying it directly to the affected plants. Regular inspection of your Crinum lilies can help detect aphid infestations early on, allowing for quick intervention and preventing further damage.
In addition to aphids, Crinum lilies can also fall victim to diseases such as leaf spot and bulb rot. Leaf spot is a fungal disease that appears as brown or black spots on the foliage of the plant. To prevent leaf spot, ensure that your Crinum lilies have adequate spacing between them and good air circulation. If you notice any infected leaves, remove them promptly to prevent the spread of the disease. Bulb rot, on the other hand, is often caused by overwatering or poor drainage. To prevent bulb rot, it is important to plant Crinum lilies in well-draining soil and water them sparingly, allowing the soil to dry out between waterings. Applying a fungicide can also help in preventing or treating bulb rot in Crinum lilies.
| Pests/Diseases | Description | Management/Treatment |
|---|---|---|
| Aphids | Small, soft-bodied insects that cluster on new growth | Spray with insecticidal soap or neem oil; prune affected parts |
| Mealybugs | White, cottony insects found in leaf axils and on stems | Remove with a cotton swab dipped in alcohol; use insecticidal soap |
| Spider Mites | Tiny pests that suck sap, causing stippling and webbing | Rinse plant with water; apply insecticidal soap or neem oil |
| Thrips | Tiny, slender insects that cause silvering and distorted growth | Use insecticidal soap or neem oil; prune affected areas |
| Scale Insects | Small, round, or oval pests that attach to stems and leaves | Remove with a soft brush or cloth dipped in alcohol; apply horticultural oil |
| Fungal Leaf Spot | Circular brown spots on leaves caused by fungal infection | Remove affected leaves; improve air circulation; fungicide spray |
| Botrytis Blight | Grayish-brown mold on leaves and flowers, causing rot | Remove affected parts; improve air circulation; fungicide spray |
| Root Rot | Fungal infection causing root decay and plant wilting | Improve soil drainage; reduce watering; fungicide treatment |
| Bulb Rot | Soft, mushy bulbs caused by fungal or bacterial infection | Remove affected bulbs; dust with fungicide before replanting |
Propagation Methods for Crinum Lily
Crinum lilies are not only beautiful additions to any garden, but they can also be propagated to create more of these stunning flowers. There are several methods you can use to propagate Crinum lilies, each with its own advantages and challenges. One commonly used method is through bulb division. This involves carefully digging up the mature bulbs and separating them into smaller sections, ensuring that each section has enough roots to support its growth. The divided bulbs can then be replanted in a moist and well-draining soil mixture, with each section being placed about a foot apart.
Another popular method of propagating Crinum lilies is through offsets. Offsets are small bulbils that form on the base of the main bulb and can be easily detached and replanted. These bulbils usually develop into mature bulbs within a couple of years, resulting in new Crinum lily plants. To propagate using offsets, gently remove them from the parent bulb using a clean and sharp knife, taking care not to damage them. Plant the offsets in a similar manner to full-sized bulbs, ensuring proper spacing and adequate soil conditions.
Propagation of Crinum lilies can also be achieved through seeds, although this method requires more time and patience. Collect mature seeds from the plants and sow them in a well-prepared seedbed or individual containers. It’s important to note that Crinum lily seeds have a thick outer coating, which may require scarification to improve germination. This can be done by nicking or filing the seed coat before sowing. Patience is key with this method, as it can take several years for the seeds to grow into flowering plants.
By utilizing these propagation methods, you can expand your collection of Crinum lilies and enjoy even more of their remarkable beauty in your garden. Whether you choose bulb division, offsets, or seeds, each method offers unique opportunities to propagate and cultivate these breathtaking flowers. Stay tuned for our next section, where we will cover the important topic of overwintering Crinum lilies.
Overwintering Crinum Lily
Crinum lilies, known for their stunning blooms and resilience, can thrive in a range of climates. However, providing proper care during the winter months is crucial to ensure their survival and promote healthy growth in the following seasons. When it comes to overwintering Crinum lily bulbs, a few key steps can make all the difference.
Firstly, it is important to note that Crinum lilies are not frost-tolerant, so if you live in an area with harsh winters, it is advisable to dig up the bulbs before the first frost. Carefully dig around the bulb, taking care not to damage any roots, and gently lift it from the ground. At this stage, it is beneficial to trim back any foliage, leaving only about 3 to 4 inches remaining above the bulb.
Next, it is essential to choose appropriate storage conditions for your Crinum lily bulbs. An ideal environment for overwintering these bulbs should be cool, dark, and dry. A temperature range of 45 to 55°F (7 to 13°C) is generally recommended for successful dormancy. Place the bulbs in a well-ventilated area, like a paper bag or a wooden box filled with dry peat moss or vermiculite. This will help to maintain adequate moisture levels while preventing excessive humidity and rot.
Remember, proper winter care is key to the long-term health and vigor of your Crinum lilies. By following these guidelines and providing the right conditions for overwintering, you can ensure the survival of your bulbs and enjoy their vibrant blooms year after year.
When is the best time to plant Crinum Lily?
The best time to plant Crinum Lily is in the spring, after the danger of frost has passed.
What are the ideal growing conditions for Crinum Lily?
Crinum Lily thrives in full sun to partial shade and well-drained soil. It prefers warm and humid climates.
How do I choose the right location for planting Crinum Lily?
Choose a location that receives at least 6 hours of sunlight daily and has good airflow. Avoid planting in low-lying areas prone to waterlogging.
How should I prepare the soil for planting Crinum Lily?
Prepare the soil by removing any weeds or grass and loosening it with a garden fork. Incorporate organic matter like compost or well-rotted manure to improve drainage and fertility.
How deep should I plant Crinum Lily bulbs?
Plant Crinum Lily bulbs about 8-10 inches deep, with the pointed end facing up. Space them at least 12-18 inches apart to allow for proper growth.
How often should I water and fertilize Crinum Lily?
Water Crinum Lily deeply once a week, especially during dry spells. Fertilize with a balanced slow-release fertilizer in early spring and again in mid-summer.
Do Crinum Lily plants require pruning?
While not necessary, you can remove dead or damaged leaves to maintain the overall appearance of the plant. Trim off spent flower stalks to redirect energy for bulb development.
What are some common pests and diseases that affect Crinum Lily?
Crinum Lily may be susceptible to spider mites, aphids, and mealybugs. Diseases like leaf spot and bulb rot can also occur. Monitor your plants regularly and take appropriate measures if any issues arise.
How can I propagate Crinum Lily?
Crinum Lily can be propagated by division. Dig up the bulbs in late winter or early spring, separate the offsets, and replant them in well-prepared soil.
How do I overwinter Crinum Lily?
In colder regions, where winter temperatures drop below freezing, it is necessary to dig up the bulbs and store them in a cool, dry place until spring. Clean and dry the bulbs before storing them in a well-ventilated container.

Ankit Garg is a seasoned writer at South El Monte Hydroponics, blending his passion for agriculture with a penchant for storytelling. With a degree in Agricultural Sciences from a prestigious institution, Ankit’s expertise lies in hydroponics, sustainable farming, and innovative cultivation techniques. His keen interest in exploring the intersection of technology and agriculture has led him to delve deep into the realm of hydroponic farming, where he thrives in uncovering the latest advancements and sharing insights through his engaging prose. Ankit’s dedication to promoting eco-friendly and efficient farming practices through his writing has earned him recognition within the agricultural community and beyond.