Harvesting Dill and Storing It for Later
Table of Contents
Understanding the Optimal Time for Harvesting Dill
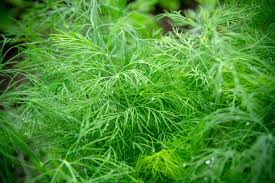
Choosing the right time to harvest dill is crucial for ensuring the best flavor and aroma. While dill leaves can be harvested throughout the plant’s growth cycle, there are optimal stages when the herb is at its peak. Generally, dill leaves should be harvested when they are fully developed but before the plant starts flowering. At this stage, the leaves contain the highest concentration of essential oils, which contribute to the herb’s distinctive flavor and fragrance.
To determine if your dill is ready for harvest, examine the plant closely. Look for fully developed leaves that are vibrant green and have a firm texture. Avoid harvesting dill leaves that show signs of wilting or yellowing, as they may have lost some of their flavor. Additionally, take note of any flower buds forming on the plant. Harvesting before the flowers bloom will help redirect the plant’s energy towards leaf production, resulting in a more robust harvest. By timing your harvest right, you can enjoy the freshest and most flavorful dill in your culinary creations.
Selecting the Right Tools for Harvesting Dill
When it comes to harvesting dill, selecting the right tools is crucial to ensure a smooth and efficient process. The right tools not only make harvesting easier but also minimize damage to the plant and maximize the quality of the harvested dill. So, what tools should you consider using?
First and foremost, a pair of sharp pruning shears or scissors is essential for harvesting dill. Avoid using dull tools as they can crush the plant’s delicate stems, leading to unnecessary damage. Pruning shears or scissors with a clean and precise blade will make clean cuts, reducing the risk of infection or disease.
Additionally, a pair of gardening gloves is recommended to protect your hands and prevent the transfer of oils or potential pests from one plant to another. Opt for gloves that provide a good grip and dexterity, allowing you to handle the dill with precision. This is especially important if you have sensitive skin or are prone to allergies. Remember to clean and dry your gloves after each use to maintain hygiene and prevent the spread of any potential diseases.

Proper Techniques for Harvesting Dill Leaves
Proper Techniques for Harvesting Dill Leaves
When it comes to harvesting dill leaves, timing is crucial. To ensure the best flavor and aroma, it is important to harvest dill leaves at the optimal time. The ideal harvesting period for dill leaves is when the plants have reached a height of approximately 12 to 18 inches and the foliage is lush and green. At this stage, the dill leaves are at their peak in terms of flavor and freshness.
To harvest the dill leaves, start by identifying the main stem of the plant. Using a sharp, clean pair of garden shears or scissors, cut the stem about 1 inch above the soil level. Be sure to select the larger outer leaves, as they tend to contain more essential oils and therefore offer a more robust flavor. Avoid harvesting the small inner leaves, as these are still developing and may not have fully developed their flavor profile.
It is important to note that dill leaves are most flavorful when harvested in the morning, as the essential oils are at their peak concentration during this time of day. Additionally, avoid harvesting dill leaves after the plant has started to flower, as the leaves become bitter and less aromatic at this stage.
As a gardening enthusiast, it is important to have the right tools and techniques to ensure a successful harvest. By following these proper techniques for harvesting dill leaves, you can enjoy the fresh and vibrant flavor of this herb in your culinary creations. Stay tuned for more tips on utilizing your harvested dill leaves for long-term storage and cooking.
Harvesting Dill Seeds: When and How to Do It
Dill, with its delicate feathery foliage and distinctive flavor, is a versatile herb that can be harvested not only for its leaves but also for its seeds. While both parts of the plant offer unique culinary and medicinal properties, knowing when and how to harvest dill seeds can ensure maximum flavor and quality.
When it comes to harvesting dill seeds, timing is crucial. The seeds should be harvested when they are fully mature and have turned a golden brown color. This typically occurs around 70 to 90 days after planting, depending on the variety. To check if the seeds are ready for harvest, gently shake the seed heads. If the seeds fall easily, it’s a sign that they are ripe and ready to be collected. However, if the seeds are still firmly attached, give them a little more time to fully mature. It’s important to note that if the seed heads are left on the plant for too long, the seeds may begin to disperse naturally, resulting in self-seeding and potential weed problems in the garden.
To harvest dill seeds, use a pair of sharp scissors or pruning shears to cut the seed heads from the plant. Hold the stems over a clean, dry container and gently crush or rub the seed heads with your hands. This will help to release the seeds and separate them from the chaff. Afterward, use a fine-mesh sieve or strainer to remove any remaining debris. Once the seeds are collected, store them in an airtight container in a cool, dark place to preserve their freshness and flavor. Harvesting dill seeds at the right time and employing proper techniques ensures a bountiful supply of seeds for culinary endeavors and future gardening endeavors.
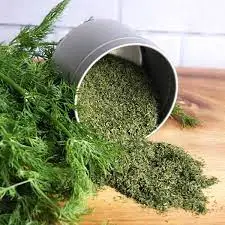
Drying Dill Leaves for Long-Term Storage
Dill leaves are a versatile and aromatic herb that can add a burst of flavor to a variety of dishes. If you find yourself with an excess of dill in your garden and are looking to preserve its freshness for future use, drying the leaves is an excellent option. Not only does this method allow for long-term storage, but it also concentrates the flavor of the herb, making it a convenient and potent ingredient for your culinary creations.
To begin the drying process, start by harvesting the dill leaves at their peak freshness, usually before the plant begins to flower. Gently cut the stems near the base, taking care not to damage the surrounding foliage. Next, remove any damaged or discolored leaves from the stems, as these can affect the overall quality of the dried herb. Once you have a collection of healthy leaves, rinse them under cold water to remove any dirt or debris. Pat them dry with a clean towel, and then lay them out on a paper towel or a baking sheet lined with parchment paper.
Utilizing Freezing as a Method for Storing Dill
Freezing is a convenient method for storing dill, allowing you to preserve the herb’s vibrant flavors and aromas for use throughout the year. By taking the time to properly prepare and freeze your dill, you can ensure it retains its quality and freshness, making it a valuable addition to your culinary endeavors.
To freeze dill, begin by washing the herb thoroughly to remove any dirt or debris. Carefully pat the dill dry with paper towels or use a salad spinner to remove excess moisture. Next, remove the dill leaves from the stems, discarding any discolored or wilted portions. It’s important to note that freezing dill stems is not recommended as they can become tough and unpleasant in texture.
Once the leaves are separated, you can choose to freeze them as whole sprigs or chop them into smaller pieces for ease of use. If you prefer whole sprigs, place them in freezer-safe bags or containers, ensuring they are arranged in a single layer to prevent clumping together. For chopped dill, you can either spread it out on a baking sheet and freeze it before transferring to storage containers or directly pack it into bags or containers. Be sure to label your containers with the date to keep track of freshness.
Preserving Dill in Oil: An Alternative Storage Method
Preserving dill in oil is a wonderful alternative storage method that allows you to enjoy the herb’s distinct flavor and aroma long after the harvest season. By infusing dill in oil, you not only preserve its freshness but also create a versatile ingredient that can be used in a variety of culinary delights. The process is simple and easy, requiring only a few steps and minimal ingredients.
To begin, gather fresh dill sprigs from your garden or local market. It’s important to select high-quality dill, as the flavor and aroma of the herb will greatly impact the final result. Wash the dill thoroughly and pat it dry to remove any excess moisture. This step is crucial to prevent the growth of bacteria or mold during the preservation process.
Next, place the dill sprigs in a clean glass jar and cover them completely with a high-quality oil of your choice. Olive oil, with its mild taste and long shelf life, is a popular option for preserving dill. However, you can also experiment with other oils such as sunflower or grapeseed for different flavor profiles. Make sure the oil covers the dill completely and there are no air pockets.
Once the jar is filled, seal it tightly and store it in a cool, dark place for about a week. This allows the flavors of the dill to infuse into the oil, creating a harmonious blend. After the infusing period, strain the oil to remove the dill sprigs and any other botanical particles. You can use a fine-mesh sieve or cheesecloth for this purpose. Transfer the infused oil into a clean, airtight container, and store it in the refrigerator to maintain its freshness.
Preserving dill in oil not only extends its shelf life but also allows you to enjoy its delicate flavor throughout the year. From salad dressings and marinades to drizzling over roasted vegetables or dipping fresh bread, this infused oil adds a burst of dill goodness to your culinary creations. It also makes for an elegant and thoughtful homemade gift for fellow food enthusiasts. So, why not give this alternative storage method a try and elevate your dishes with the delightful flavor of preserved dill?
Creating Dill-infused Vinegar for Extended Shelf Life
When it comes to extending the shelf life of dill, creating dill-infused vinegar is an excellent method to consider. Not only does this process preserve the vibrant flavor of dill, but it also adds a unique twist to your culinary creations. To make dill-infused vinegar, start by gathering fresh dill sprigs that are free from any signs of wilting or discoloration. Rinse the sprigs thoroughly and pat them dry to remove excess moisture. Next, place the dill sprigs into a sterilized glass jar, ensuring that they fit snugly inside. Then, heat white vinegar in a saucepan, making sure not to boil it. Once heated, carefully pour the vinegar over the dill sprigs, ensuring that they are completely submerged. Seal the jar tightly and store it in a cool, dark place for at least two weeks to allow the flavors to infuse. Once the desired strength has been achieved, strain the vinegar to remove the dill sprigs, and transfer the infused vinegar to a clean bottle. Label the bottle with the date of creation for future reference.
Making Dill-flavored Salt for Convenient Seasoning
Making dill-flavored salt is a simple yet effective way to enhance the taste of your dishes with the unique flavor of dill. This method of seasoning not only adds a burst of aromatic freshness to your meals but also extends the shelf life of dill, allowing you to enjoy its flavors for a longer period. To create dill-flavored salt, start by harvesting fresh dill leaves from your garden. Make sure to choose leaves that are vibrant green in color and free from any signs of wilting or disease.
Once you have gathered an ample amount of dill leaves, thoroughly wash them to remove any dirt or debris. Pat them dry using a clean kitchen towel or paper towels, ensuring that they are completely moisture-free. It is crucial to eliminate any moisture as it can lead to bacterial growth and spoil the final product. Once dry, finely chop the dill leaves using a sharp knife or a pair of kitchen shears. The smaller the pieces, the more evenly distributed the dill flavor will be in the salt. Mix the chopped dill leaves with coarse sea salt in a ratio of approximately one part dill to four parts salt. Stir well to ensure the dill is evenly dispersed throughout the mixture. And there you have it – your homemade dill-flavored salt, ready to sprinkle on your favorite meals for a burst of herbaceous goodness.
Here’s a simple recipe for making Dill Pickle Flavored Salt that you can use to season various dishes. This flavorful salt adds a tangy dill pickle twist to your favorite foods.
| Ingredients | Amount |
| Kosher salt | 1/2 cup |
| Pickle brine (from a pickle jar) | 2 teaspoons |
| Dried dill weed | 1 teaspoon |
Instructions:
- Put the kosher salt, pickle brine, and dried dill weed in a food processor.
- Pulse a few times until everything is incorporated. The salt will be slightly wet from the brine.
- Spread the salt out on a baking sheet and let it dry either in a warm oven or overnight.
- It might stick together a little, but you can easily break it up with your hands when it’s dried.
- Pour the flavored salt into a container for storing. The flavors will continue to develop over time.
- To prevent caking and absorb moisture, you can place a pinch of dry, uncooked rice in the container.
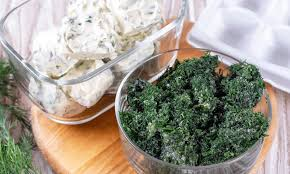
Exploring the Benefits of Dehydrating Dill
Dehydrating dill offers numerous benefits when it comes to preserving this flavorful herb. By removing the moisture from the leaves, dill can be stored for an extended period of time while still retaining its vibrant taste and aroma. This method of preservation is particularly advantageous for those who have an abundance of dill from their gardens and want to enjoy its unique flavor throughout the year.
One significant advantage of dehydrating dill is the convenience it offers. Once dehydrated, the leaves can be easily stored in airtight containers or jars without taking up much space. This makes it a practical option for those with limited storage space or who simply prefer to keep their herbs organized. Additionally, dehydrated dill is lightweight, which makes it ideal for traveling or camping trips where fresh herbs may not be readily available. Whether you are looking to add a dash of dill to your homemade dressings, soups, or grilled dishes, having dehydrated dill on hand ensures you never have to compromise on the flavor of your culinary creations.
The table below shows the benefits of dehydrating dill:
| Advantage | Description |
| Extended Shelf Life | Dehydrated dill has a significantly longer shelf life compared to fresh dill, lasting up to a year when stored properly. It remains potent and flavorful. |
| Concentrated Flavor | The consistent heat and airflow in a food dehydrator result in concentrated dill flavor, ideal for bold culinary creations. |
| Versatility | Dehydrated dill can be used as is or rehydrated, adding depth and complexity to soups, stews, sauces, and spice blends. |
Storing Dill in the Refrigerator: Tips and Tricks
Storing dill in the refrigerator is a great way to preserve its freshness and flavor for an extended period. However, to ensure optimal storage and prevent the dill from spoiling prematurely, there are a few tips and tricks to keep in mind.
First and foremost, it’s important to clean the dill thoroughly before storing it. Remove any dirt or debris by gently rinsing the leaves and stems under cool running water. Pat them dry with a clean towel or use a salad spinner to remove excess moisture. This step is crucial in preventing the growth of bacteria or mold during storage.
Once the dill is clean and dry, wrap it loosely in a slightly damp paper towel. The moisture from the towel will help maintain the dill’s crispness while preventing it from drying out. Place the wrapped dill in a plastic bag or an airtight container and store it in the refrigerator’s vegetable drawer. The cool temperature will help slow down the degradation process, allowing the dill to stay fresh for up to a week. Be sure to check the dill periodically and replace the paper towel if it becomes too dry.
By following these simple tips and tricks, you can prolong the freshness of your dill and ensure that it remains flavorful and ready to enhance your culinary creations. In our next section, we will explore the importance of properly cleaning dill before storage and how it contributes to its longevity.
The Importance of Properly Cleaning Dill Before Storage
Properly cleaning dill before storage is a critical step in preserving its freshness and flavor. When harvesting dill, it is essential to remove any dirt, debris, or insects that may have adhered to the leaves and stems. This not only ensures that the dill remains safe for consumption but also extends its shelf life.
To clean dill, start by gently rinsing it under cool running water. Avoid using excessive force as dill leaves can be fragile and easily damaged. Gently shake off any excess water and pat dry with a clean towel or paper towel. Inspect the dill carefully, removing any yellowed or wilted leaves as they can contribute to the spoilage of the entire bunch. By taking the time to clean dill properly, you are minimizing the risk of bacterial contamination and preserving its vibrant color and aroma.
In addition to removing dirt and debris, cleaning dill also helps to enhance its flavor. By eliminating any unwanted substances, you allow the natural flavors of dill to shine through. Whether you plan on using fresh dill immediately or storing it for later use, a thorough cleaning is essential for maximizing the culinary experience. So remember, never overlook the importance of properly cleaning dill before storing it – your taste buds will thank you!
Packaging and Labeling Dill for Easy Identification
When it comes to packaging and labeling dill for easy identification, there are a few key considerations to keep in mind. First and foremost, it is important to choose the appropriate packaging materials that will preserve the freshness and flavor of dill. Dill leaves are delicate and can easily lose their potency if exposed to air or moisture, so it is crucial to use airtight containers or bags. Glass jars or resealable plastic bags are excellent options for storing dill, as they provide a barrier against moisture and can help extend its shelf life.
In addition to selecting the right packaging materials, labeling is also essential for easy identification of dill. Clearly label your containers with the date of harvest and the variety of dill, if applicable. This information will not only help you keep track of the freshness of your dill, but it will also come in handy when you need to differentiate between different types of dill in your collection. Consider using waterproof labels or a permanent marker to ensure that the labels don’t smudge or fade over time. By properly packaging and labeling your dill, you will be able to easily locate and utilize it in your culinary endeavors, while retaining its optimal flavor and freshness.
Avoiding Common Mistakes When Storing Dill
When it comes to storing dill, there are some common mistakes that can lead to a loss of freshness and flavor. One such mistake is not properly cleaning the dill before storage. It is important to remove any dirt or debris from the leaves and stems, as this can cause the dill to spoil more quickly. To clean dill, simply rinse it under cool water and gently pat it dry with a paper towel.
Another mistake to avoid is storing dill in a damp environment. Dill is a delicate herb that can easily wilt and become slimy when exposed to excess moisture. It is best to store dill in a dry environment, such as a paper towel-lined container or a perforated plastic bag. This will help to prolong the freshness of the herb and prevent it from spoiling prematurely. By following these simple tips, you can avoid common mistakes and ensure that your stored dill remains fresh and flavorful for longer periods of time.
Tips for Maximizing the Freshness and Flavor of Stored Dill
To maximize the freshness and flavor of stored dill, it is important to follow a few simple tips. First and foremost, ensure that the dill is fresh and of high quality before storing it. Look for vibrant green leaves and a strong aroma, as these are indicators of freshness. Additionally, choose dill that has been properly harvested, as this can greatly impact its flavor. Harvesting dill at its peak, when the leaves are mature but not yet yellowing, will result in the best flavor.
Once you have procured fresh dill, it is crucial to store it properly to maintain its freshness and flavor. One effective method is to wrap the dill loosely in a damp paper towel and place it in a plastic bag with a few holes punched in it. This will help retain moisture without causing the dill to become soggy. Alternatively, you can trim the stems and place the dill in a glass jar filled with water, similar to a bouquet of flowers. Cover the jar loosely with a plastic bag and refrigerate. Remember to change the water every few days to prevent spoilage.
Below are some tips for maximizing the freshness and flavor of stored Dill:
- Do not wash dill prior to storing: Dill is particularly susceptible to spoilage due to excessive moisture. Avoid washing it unless absolutely necessary. If you do wash it, pat it dry thoroughly with paper towels before storing it.
- Refrigerate properly: If your dill is clean and free from dirt or insects, place it on a damp paper towel and roll it up. Then, store it in a resealable plastic bag in the crisper drawer of your refrigerator. Alternatively, place the dill in a jar with water and cover it with a plastic bag, using a paper towel to absorb any condensation. Regular water changes can keep dill fresh for up to two weeks.
- Freezing dill: For long-term storage, freeze dill whole. After ensuring it’s clean, spread it on a baking sheet and freeze for about thirty minutes. Then, transfer it to labeled freezer bags. This method prevents the dill from freezing together in a single mass, allowing you to use exactly what you need. You can also cut the dill into smaller pieces and freeze it in ice-cube trays with water. Frozen dill remains usable for up to a year.
- Drying dill: You have several drying options, including using a food dehydrator, an oven, or air drying. In a food dehydrator, lay the leaves in a single layer on each tray and follow the manufacturer’s instructions for herbs. The drying process should take less than a day. Alternatively, dry it in the oven by preheating it to the lowest possible temperature, spreading the dill on a baking sheet, and checking it every 30 minutes. The drying time varies based on humidity.
Remember, well-preserved dill enhances your culinary creations and adds delightful flavor to your dishes.
Creative Ways to Use Stored Dill in Culinary Delights
Dill is a versatile herb that can add a burst of flavor to a wide range of culinary delights. Whether you have dried or frozen dill on hand, there are countless creative ways to incorporate this herb into your dishes. One popular way to use stored dill is by infusing it into oils. Simply heat up your preferred oil, add a handful of fresh or dried dill, and let it steep for several hours. The result is a aromatic dill-infused oil that can be drizzled over salads, vegetables, or used as a marinade for grilled meats.
Another delightful way to use stored dill is by making dill-flavored salt. Mix together finely chopped dried dill with sea salt, and you have a seasoning that can elevate the flavors of roasted potatoes, fish, or even popcorn. The combination of the herbaceous dill and the savory salt creates a unique flavor profile that will surely delight your taste buds. So, the next time you’re looking to add a burst of flavor to your dishes, consider reaching for your stored dill and exploring these creative culinary uses.
To Know About Harvesting And Storing Dill For Later Use, Watch This Video!
How long can dill be stored for?
Dill can be stored for up to one year if properly dried and stored in an airtight container.
Can dill be stored in the freezer without losing its flavor?
Yes, freezing dill can help retain its flavor, especially if it is stored in an airtight container or bag.
Can dill be stored in the refrigerator?
Yes, dill can be stored in the refrigerator for a short period of time, typically up to one week. However, it is recommended to use other storage methods for longer-term storage.
Can dill be stored in oil?
Yes, dill can be preserved in oil as a storage method. This can help enhance the flavor of the oil while keeping the dill fresh.
Can dill be dehydrated?
Yes, dehydrating dill is a great way to store it for a longer period of time. The dehydrated dill can be used in various culinary dishes.
Can dill be used in vinegar?
Yes, dill can be infused in vinegar to extend its shelf life and add a unique flavor to dishes.
How should dill be cleaned before storage?
It is important to properly clean dill before storage. Rinse it under cold water and gently pat it dry with a paper towel to remove any dirt or moisture.
Can dill be labeled for easy identification?
Yes, labeling dill with the date of harvest or storage can help identify its freshness and ensure it is used before it loses its flavor.
What are common mistakes to avoid when storing dill?
Common mistakes to avoid when storing dill include storing it in a damp environment, not properly drying it before storage, and using containers that are not airtight.
How can the freshness and flavor of stored dill be maximized?
To maximize the freshness and flavor of stored dill, it is important to use proper storage methods such as drying or freezing, and to ensure it is stored in a cool, dry place away from direct sunlight.