Sunflowers: The Best No.1 Way to Plant, Grow, and Care For Sunflowers
Did you know that sunflowers are not only beautiful to look at but also have many practical uses, from dyes to food? If you’re looking to add some sunshine to your garden, then sunflowers are the way to go!But how do you plant, grow, and care for these stunning flowers? As a professional writer with extensive experience in gardening, I’m here to help you get started on the right foot.
First, let’s talk about the best time to plant sunflowers. In the US, the ideal time is after the last frost, usually between April and June. Choose a location with full sun and well-draining soil, and plant the seeds directly into the ground about 1 inch deep and 6 inches apart.
Once your sunflowers start growing, make sure to water them consistently and stake the taller varieties to prevent them from falling over. With the right care, you’ll have a vibrant and healthy sunflower garden in no time!
In this blog, we’ll dive deeper into the best practices for planting, growing, and caring for sunflowers, so you can enjoy their beauty and benefits all season long.
Table of Contents
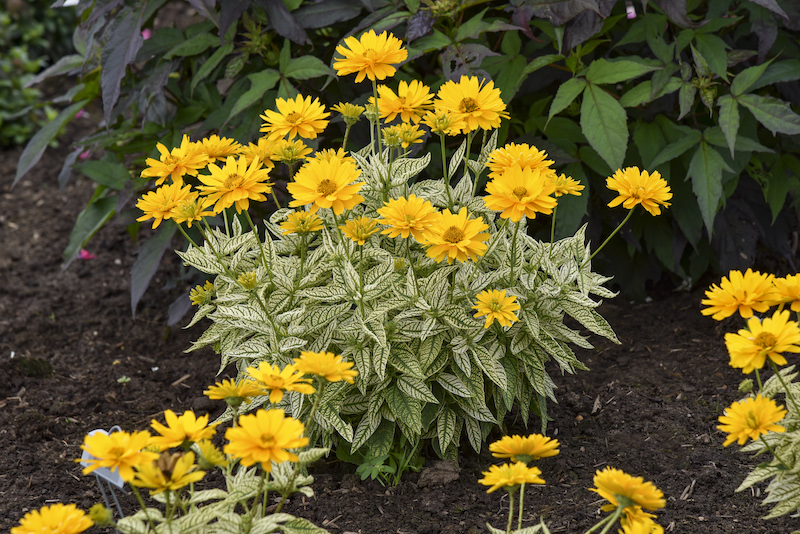
Care For Sunflowers: Sunflowers Selecting the Right Variety for Your Garden
Sunflowers are a delightful addition to any garden, adding vibrant color and a touch of whimsy. However, with so many varieties to choose from, it can be overwhelming to select the right sunflower variety for your garden. The key is to consider your space, climate, and desired aesthetic to ensure the best fit.

Determine the available space in your garden.
Consider the potential height and spread of sunflower varieties.
Choose compact varieties for containers or small beds, or towering giants for larger areas.
Evaluate your climate conditions, including temperature and sunlight exposure.
Select varieties based on heat tolerance and cold hardiness.
Choose shorter growing season varieties for cooler climates and heat-resistant varieties for warmer climates.
Research the specific growing requirements of each sunflower variety.
Look for information on sunlight, soil, and water needs to ensure compatibility with your garden environment.
Consider the desired aesthetic of your garden.
Choose sunflower varieties based on color preferences.
Explore a range of colors, including classic yellow, vibrant reds, oranges, and bi-color options.
Select sunflowers that complement the overall color scheme and design of your garden.
By carefully considering your garden space, climate, and desired aesthetic, you can select the right sunflower variety that will thrive in your garden and bring joy and beauty to your outdoor space. So go ahead, choose your sunflowers wisely and watch as they brighten your days with their cheerful blooms.
Understanding Sunflower Growth Requirements
Sunflowers, scientifically known as Helianthus annuus, are beautiful and vibrant plants that add a touch of sunshine to any garden.

Sunlight Requirements:
- Sunflowers thrive in areas with full sun exposure.
- Ensure they receive at least six to eight hours of direct sunlight daily.
- Ample sunlight provides energy for photosynthesis, promoting healthy growth and blooming.
Soil Preparation:
- Sunflowers require well-drained soil rich in organic matter.
- Ideal soil pH ranges between 6.0 and 7.5, slightly leaning towards neutral.
- Prepare the soil before planting by removing weeds, rocks, and debris.
- Loosen the soil using a garden fork or tiller to facilitate root growth.
Incorporate Organic Matter:
- Enhance soil fertility and drainage by incorporating compost or well-rotted manure.
- This provides a favorable environment for sunflower roots to spread and absorb nutrients.
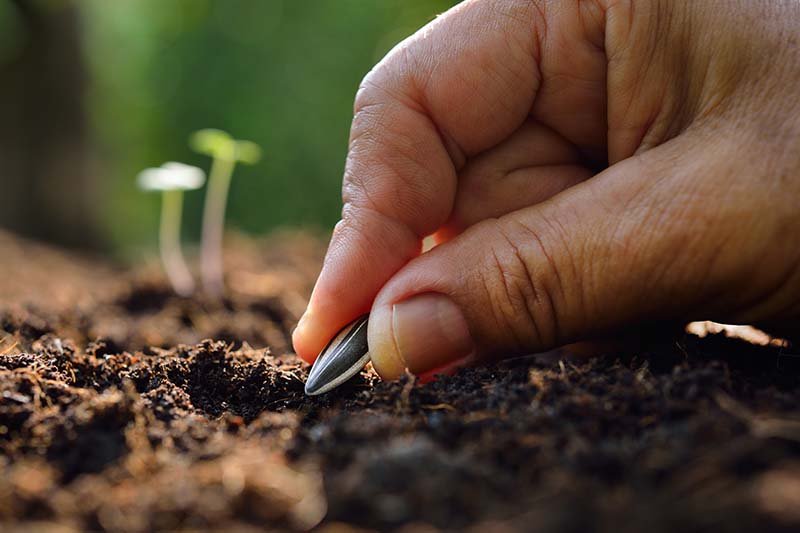
Planting Sunflower Seeds:
- Choose a location with optimal sunlight and well-drained soil.
- Plant sunflower seeds directly into the prepared soil, following seed packet instructions for depth and spacing.
- Water the seeds thoroughly after planting to ensure proper hydration.
Maintenance and Care:
- Water sunflowers regularly, especially during dry periods, to keep the soil consistently moist but not waterlogged.
- Mulch around the base of the plants to retain soil moisture and suppress weed growth.
- Monitor for pests and diseases, and take appropriate measures to control them if necessary.
- Support tall sunflower varieties with stakes or trellises to prevent them from bending or breaking in strong winds.
By following these steps and providing optimal growing conditions, sunflowers can reach their full potential, producing vibrant blooms that add beauty to any garden or landscape.
Preparing the Soil for Sunflower Planting
Preparing the soil is a crucial step in ensuring the successful growth of sunflowers. Before planting, it is important to assess the condition of your soil and make any necessary amendments.

- Ensure well-drained soil with a pH between 6 and 7 by conducting a soil test to determine specific amendments needed.
- Enrich the soil with organic matter such as compost, well-rotted manure, or leaf mold, mixing it thoroughly into the top 6 to 8 inches of soil several weeks before planting.
- Sunflowers prefer loose, well-drained, somewhat alkaline soil with a pH of 6.0, allowing their long taproots to grow several feet into the ground.
- Plant sunflower seeds 1-1 ½ inches deep and 6 inches apart in rows or clumps, thinning seedlings to 18 inches apart once 4 leaves have formed.
- Direct-sowing is recommended for sunflowers, as it allows them to develop their taproot with ease and leads to faster growth.
- Sunflowers grow best on fertile, well-drained soils high in organic matter, but they are tolerant of a range of conditions, including sandy and clay soils.
- Mulch around sunflowers with a 2- to 4-inch layer of straw or bark mulch once they are established to preserve soil moisture and prevent weed growth.
- Most sunflowers do not require staking, but if needed, use wood or metal stakes placed close to the stalk and attach the stalk to the stake with twine or ties.
- Sunflowers are not just yellow, they come in a variety of colors from pale white to deep red.
- Sunflowers are simple to start from seed and can be planted in succession to have season-long color.
By taking the time to properly prepare your soil, you are setting the foundation for healthy and thriving sunflowers.
I recently purchased the BTSD Home and Garden Stakes for my garden, and I am very impressed with their quality and durability. These stakes are made of sturdy metal with a protective plastic coating, making them both strong and rust-resistant. I used them to support my tomatoes, trees, and vines, and they held up very well, even in windy conditions. The green color of the stakes blends in nicely with the garden, and they are also reusable, making them a cost-effective solution for supporting plants. I would highly recommend these stakes to anyone looking for a reliable and durable plant support solution.
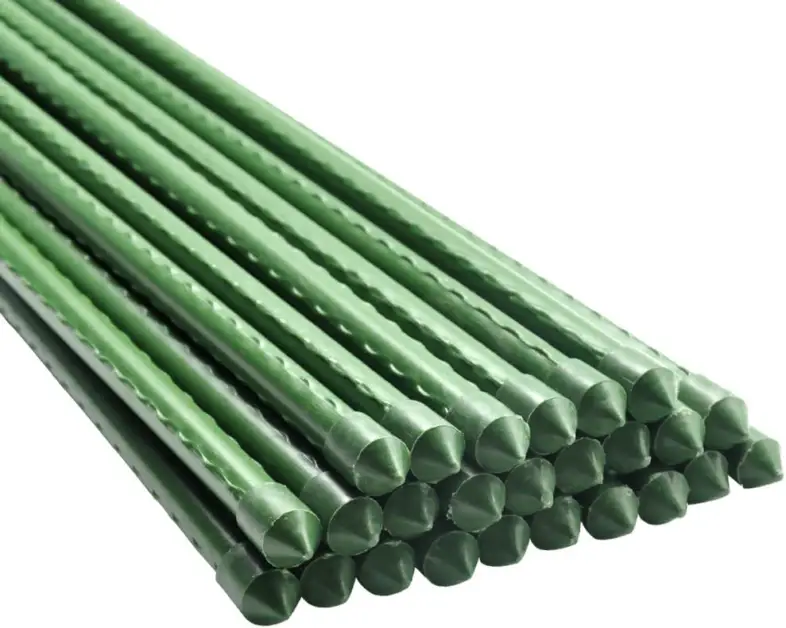
- Durability: Metal stakes are typically more durable and long-lasting compared to other materials like wood or plastic.
- Stability: Metal stakes provide strong support for plants, especially tall or heavy ones, keeping them upright and preventing them from bending or breaking.
- Weather Resistance: Metal stakes are resistant to weather conditions such as rain, wind, and sun exposure, ensuring they maintain their integrity over time.
- Versatility: Metal stakes can be used for a variety of garden applications, including supporting plants, creating trellises, and marking boundaries.
- Pest Resistance: Metal stakes are less susceptible to damage from pests like insects or rodents compared to organic materials.
- Cost: Metal stakes can be more expensive upfront compared to other stake materials like wood or plastic.
- Conductivity: Metal stakes can conduct heat, which may affect plants in extreme temperatures, potentially causing damage.
- Corrosion: Depending on the type of metal used, there is a risk of corrosion over time, especially in environments with high moisture or acidic soil.
- Weight: Metal stakes are heavier than alternatives like plastic, which can make them more challenging to transport and install.
- Aesthetics: Some gardeners may prefer the natural look of wooden stakes over the industrial appearance of metal stakes, impacting the overall visual appeal of the garden.
Sowing Sunflower Seeds: Tips and Techniques
When it comes to sowing sunflower seeds, there are a few key tips and techniques to consider that can greatly increase your chances of success.
Choose the Right Time for Sowing:
- Wait until the danger of frost has passed and the soil has warmed up (above 50°F or 10°C).
- Sunflowers thrive in warm-season conditions.
Prepare the Soil:
- Ensure the soil is well-draining with a pH level between 6.0 and 7.5.
- Loosen the soil and remove debris or weeds to create a clean, fertile bed.
Consider Soil Amendments:
- Conduct a soil test to determine if amendments are needed.
- Add organic matter or adjust the pH level as necessary to optimize soil conditions.
Sowing Techniques:
- Direct Sowing: Plant seeds directly into the soil, spacing them 6 to 12 inches (15 to 30 cm) apart, depending on the variety.
- Indoor Start: Start seeds indoors in biodegradable pots or seed trays.
- Transplant seedlings outdoors once they have developed a few sets of true leaves.
Planting Depth and Coverage:
- Plant seeds at a depth of about 1 inch (2.5 cm) in the soil.
- Cover seeds with soil and gently pat it down to ensure good seed-to-soil contact.
By following these tips and techniques for sowing sunflower seeds, you’ll be well on your way to growing healthy and vibrant sunflower plants in your garden. Whether you’re a gardening novice or a seasoned green thumb, these simple guidelines can help you achieve a successful sunflower-growing experience.
Watering Sunflowers: Proper Techniques and Frequency
Watering sunflowers is a crucial aspect of their care and growth. Proper watering techniques and frequency contribute to healthy and vibrant sunflower plants. Sunflowers have deep taproots that allow them to access water from deeper soil layers, making them relatively drought-tolerant. However, they still require regular watering, especially during periods of dry spells or high temperatures.

To ensure proper hydration for sunflowers, follow these steps:
- Strike a balance: Avoid overwatering and underwatering by providing about an inch of water per week, adjusting based on factors like soil type, weather conditions, and growth stage.
- Water deeply and infrequently: Encourage deep root growth by watering deeply and infrequently, promoting drought resistance.
- Choose the right time: Water in the morning or early evening, allowing plants to absorb moisture before the heat of the day.
- Avoid overhead watering: Direct water at the base of the plant, near the root zone, using a soaker hose or drip irrigation system to prevent the spread of diseases.
- Monitor soil moisture: Regularly check soil moisture levels and adjust watering frequency accordingly to meet the specific needs of your sunflowers.
Providing Adequate Sunlight for Sunflower Plants
Sunflowers are sun-loving plants that thrive in full sunlight. In order to provide adequate sunlight for sunflower plants, it is crucial to select an appropriate location in your garden. Look for an area that receives at least 6 to 8 hours of direct sunlight per day. This will ensure that your sunflowers receive the necessary energy to grow and flourish.

Understanding Heliotropism:
- Sunflowers exhibit heliotropism, meaning they naturally follow the path of the sun.
- They face east in the morning and gradually turn west as the day progresses.
Planting Arrangement:
- Arrange sunflowers in rows with the tallest plants at the back and shorter ones in the front.
- This ensures each sunflower receives adequate sunlight without shading its neighbors.
Maximizing Sun Exposure:
- Choose an open and spacious area for planting sunflowers.
- Avoid planting near tall structures or trees that may cast shadows and obstruct sunlight.
- Ensure sunlight can reach the plants from all angles throughout the day.
By providing your sunflowers with adequate sunlight, you can ensure robust growth, vibrant blooms, and an abundant harvest of seeds.
Fertilizing Sunflowers: Best Practices and Recommendations
Fertilizing sunflowers is an essential aspect of their overall growth and development. Properly nourished sunflowers are not only more vibrant and beautiful but also produce larger and healthier seeds. For optimal results, it is crucial to understand the best practices and recommendations for fertilizing sunflowers.
- Sunflowers are heavy feeders and require nutrient-rich soil.
- Prepare the soil by incorporating organic matter like compost or well-rotted manure.
- This enriches the soil with essential nutrients and improves fertility.
- Conduct a soil test to determine nutrient content and pH level for tailored fertilization.
- Choose a high-quality, balanced fertilizer with equal parts nitrogen (N), phosphorus (P), and potassium (K).
- The balanced NPK ratio promotes healthy vegetative growth, flowering, and seed development.
- Opt for slow-release or organic fertilizers for steady nutrient supply throughout the growing season.
- Mix fertilizer evenly into the soil at a depth of 6-8 inches before planting.
- Ensure roots can access nutrients effectively for optimal growth.
- Once sunflowers reach 6-8 inches in height, apply a side dressing of fertilizer.
- Distribute fertilizer in a band around the base of the plants, avoiding direct contact with stems or leaves.
- Water thoroughly after fertilization to aid nutrient absorption.
- Be cautious of over-fertilization, which can lead to tall plants prone to lodging and reduced vigor.
- Follow manufacturer’s instructions for application rates to avoid excess nitrogen.
- Monitor plant health and adjust fertilization practices as needed based on signs of nutrient deficiencies or excesses.
The following table explains about the fertilizing sunflowers:
| Fertilizer Type | Application Rate (per Acre) | Frequency | Timing |
|---|---|---|---|
| Nitrogen (N) | 50-100 lbs | Once | At planting, then mid-season |
| Phosphorus (P) | 30-60 lbs | Once | At planting |
| Potassium (K) | 40-80 lbs | Once | At planting, then mid-season |
| Micronutrients | As needed | As needed | As needed |
In conclusion, fertilizing sunflowers with the right practices and recommendations is vital for their optimal growth and seed production. By selecting a balanced fertilizer, preparing the soil adequately, and applying the fertilizer correctly, gardening enthusiasts can enjoy the beauty and productivity of healthy sunflowers in their gardens.
Managing Common Pests and Diseases in Sunflowers
Pests and diseases can pose significant challenges for sunflower growers, as these plants are susceptible to a range of common issues. The following table explain aboout the different pests and diseases in sunflowers:
| Pest/Disease | Symptoms | Treatment | Effect |
|---|---|---|---|
| Downy Mildew | Death of seedlings, chlorotic leaves, thickened leaves, white cottony growth on leaf undersides, stunted plant growth, reduced seed production | Plant sunflower varieties resistant to downy mildew, treat seeds with an appropriate fungicide prior to planting, rotate crop to a non-host for 4 years | Reduced stand in field, chlorotic leaves, stunted plant growth, reduced seed production |
| Alternaria Leaf Blight | Dark brown lesions on leaves surrounded by a yellow halo, lesions coalesce and become irregularly shaped, causing leaves to become blighted and plant to become defoliated and die | Prune out infected leaves, use adequate plant spacing to reduce humidity around plants and promote good air circulation, apply appropriate foliar fungicide | Defoliation, reduced plant health, reduced yield |
| Phoma Blight | Large black lesions on stem, coalesce to form large blackened areas, dark colored irregularly shaped lesions on leaves and flowers, early infections can cause flowers to die, infected plants die prematurely and produce little seed | Rotate crop to a non-host (e.g. small grains) for 4 years, plant hybrids which are more tolerant of the disease, control stem weevil populations in sunflower fields | Premature plant death, reduced seed production |
| Powdery Mildew | White powdery growth on leaves and stems, reduced plant growth and yield | Apply appropriate foliar fungicide | Reduced plant growth and yield |
| Sclerotinia Head Rot/Wilt | White cottony growth on leaf undersides, stunted plant growth, reduced seed production | Plant sunflower varieties resistant to Sclerotinia head rot, apply appropriate foliar fungicide, rotate crop to a non-host for 4 years | Reduced plant growth and seed production |
| Rust (Puccinia helianthi) | Reddish-brown to orange-brown pustules on the undersides of leaves, chlorotic spots on the upper surfaces of leaves, reduced plant growth and yield | Plant sunflower varieties resistant to rust, apply appropriate foliar fungicide, rotate crop to a non-host for 4 years | Reduced plant growth and yield |
| Charcoal Rot | Irregularly shaped, dark brown to black lesions on stems, leaves turn yellow and wilt, plant death | Rotate crop to a non-host for 4 years, plant sunflower varieties resistant to charcoal rot, maintain good soil moisture | Reduced plant growth and yield, plant death |
| Phialophora Yellows | Yellowing and wilting of leaves, stunted plant growth, reduced seed production | Plant sunflower varieties resistant to Phialophora yellows, rotate crop to a non-host for 4 years, maintain good soil moisture | Reduced plant growth and yield, reduced seed production |
| Verticillium Wilt | Yellowing of leaves, stunted plant growth, reduced seed production | Plant sunflower varieties resistant to Verticillium wilt, rotate crop to a non-host for 4 years, maintain good soil moisture | Reduced plant growth and yield, reduced seed production |
| Sunflower Beetle | Defoliation, reduced plant growth and yield | Apply appropriate insecticide, maintain good plant vigor | Reduced plant growth and yield |
| Red Sunflower Seed Weevil | Reduced seed production | Apply appropriate insecticide, maintain good plant vigor | Reduced seed production |
| Lygus Bugs | Reduced seed production, reduced plant growth and yield | Apply appropriate insecticide, maintain good plant vigor | Reduced seed production, reduced plant growth and yield |
| Dectes Stem Borer | Reduced plant growth and yield, plant death | Rotate crop to a non-host for 4 years, plant sunflower varieties resistant to Dectes stem borer, maintain good plant vigor | Reduced plant growth and yield, plant death |
By being attentive to potential pest and disease threats, and implementing appropriate management strategies, sunflower growers can protect their plants and maximize their yield. However, it is important to note that the effectiveness of control methods may vary depending on the specific pest or disease, as well as the environmental conditions. Consulting with local agricultural extension services or engaging with experienced sunflower growers can provide valuable insights and guidance for effectively managing common pests and diseases in sunflowers.
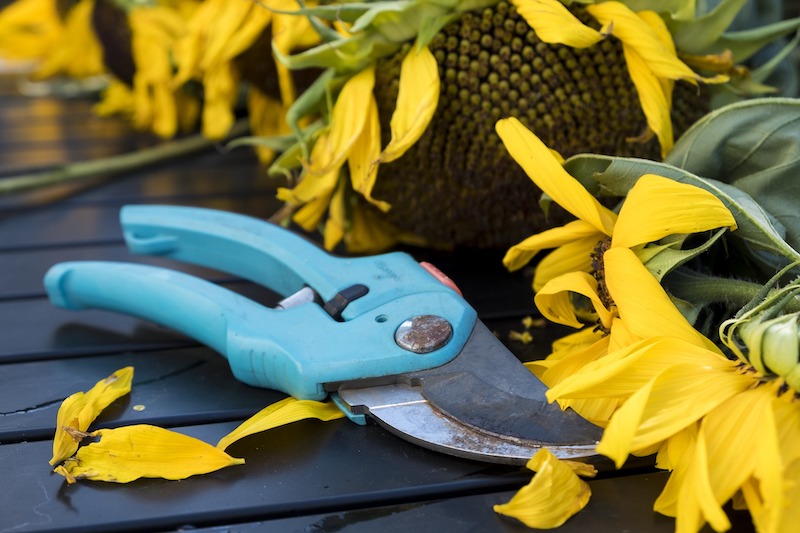
Pruning Sunflowers: When and How to Do It
Pruning is an essential technique in sunflower cultivation, allowing gardeners to maintain the health and appearance of their plants. Knowing when and how to prune sunflowers is crucial in ensuring optimal growth and productivity.
Begin pruning sunflowers when they reach a height of around 2 feet.
Selectively remove smaller side branches to promote the growth of larger flowers.
Only remove a few branches at a time to maintain a balanced and manageable shape.
Excessive pruning can hinder sunflower growth.
Prune during cooler times of the day, such as early morning or late afternoon, to reduce stress on plants.
Use sharp and clean pruning shears or scissors to minimize damage to plants.
Make clean cuts just above leaf nodes or lateral branch junctions to stimulate new growth.
Remove any dead or diseased branches that can hinder overall plant health and vigor.
Consider removing lower branches for better airflow and reduced risk of fungal diseases.
Prune regularly throughout the growing season to prolong the blooming period and extend the overall lifespan of the sunflowers.
By following the proper timing and methods, gardeners can ensure that their sunflowers thrive and bring joy with their vibrant blooms.
Supporting Sunflower Stalks: Staking and Trellising Methods
Sunflower stalks have a tendency to grow tall and can become heavy with large flower heads. This can lead to the stalks bending, breaking, or toppling over under the weight. To provide proper support and ensure the health and stability of your sunflowers, staking and trellising methods are essential.
stake
One method for supporting sunflower stalks is to stake them. This involves driving a sturdy stake into the ground beside the sunflower plant and gently tying the stalk to the stake with soft and flexible plant ties. Staking is particularly useful for tall sunflower varieties or if your garden is prone to strong winds. It helps to keep the sunflowers upright, preventing them from leaning or falling over, and allows them to grow straight and tall. It is important to ensure that the stake is securely anchored into the ground to provide adequate support for the sunflower stalks.
Harvesting Sunflowers: Signs of Readiness and Techniques
Once your sunflowers have reached their full bloom and the vibrant petals begin to fade and wilt, it’s time to start thinking about harvesting. But how do you know if your sunflowers are truly ready to be harvested? There are a few signs to look out for.
Check the Backsides of the Flower Heads:

- Examine the backside of the flower heads and look for seed shells that have turned a pale yellow or brown color. This indicates that the seeds are maturing, and the flower is nearing readiness for harvest.
Observe the Plant’s Leaves:
- Monitor the leaves of the sunflower plant. As the seeds mature, the leaves may start to dry out and turn brown, further indicating that the seeds are ripening.
Gently Press the Seed Head:
- Lightly press on the outside of the seed head. If it feels firm and the seeds don’t easily fall out, it’s likely that your sunflowers are ready to be harvested.
Prepare for Harvesting:
- Gather the necessary tools for harvesting, such as pruning shears or a sharp knife, and prepare a clean workspace.
Cut the Flower Head:
- Carefully cut the flower head off the stem, leaving a few inches of stem attached. This can be done using pruning shears or a sharp knife.
Remove Remaining Leaves:
- Remove any remaining leaves from the stem, taking care not to disturb the seeds in the process.
Dry the Flower Heads:
- Place the harvested flower heads in a cool, well-ventilated area to dry. Hanging them upside down is a popular method, as it allows air to circulate around the flower head, aiding in the drying process.
Wait for Drying:
- Allow the flower heads to dry for a few weeks until they are fully dry.
Release the Seeds:
- Once dried, gently shake the flower heads to release the mature seeds.
Following these steps will help ensure that you harvest your sunflowers at the optimal time and preserve the quality of the seeds for future use.
Drying Sunflower Heads: Steps for Optimal Seed Collection
Once your sunflower heads have matured and the petals have fallen, it’s time to begin the process of drying them for optimal seed collection. Properly dried sunflower heads will ensure that you have high-quality seeds for future planting or for snacking. Here are the steps to follow for effective drying:
1. Cut the sunflower heads: Using a sharp pair of garden pruners or shears, carefully cut the sunflower heads from the stalk. Leave a few inches of stem attached to the head to make handling easier.
2. Remove excess foliage: Remove any leaves or remaining petals from the sunflower heads. These can contribute to moisture retention and hinder the drying process.
3. Choose a drying location: Find a warm, well-ventilated area to dry the sunflower heads. A location with good air circulation is essential to prevent mold or moisture buildup. Hanging the heads upside down is a common method for drying.
4. Prepare a drying rack: If hanging the sunflower heads is not feasible for you, you can create a drying rack using a mesh screen or netting. Place the heads in a single layer on the rack, ensuring they are not touching each other.
5. Monitor the drying process: Check the sunflower heads regularly for any signs of moisture or mold. If you notice any, remove the affected heads immediately to prevent further contamination.
Remember, sunflower heads can take anywhere from several weeks to a couple of months to fully dry, depending on environmental conditions. Patience is key during this stage, as rushing the process may result in inferior seed quality.
Saving Sunflower Seeds for Next Year’s Planting
Sunflowers are not only beautiful additions to any garden, but they also provide seeds that can be saved for next year’s planting. Saving sunflower seeds ensures that you can continue to enjoy their vibrant blooms year after year. However, it is important to know the proper methods for collecting and storing sunflower seeds to ensure their viability.

To save sunflower seeds for next year’s planting, follow these steps:
- Allow the flower heads to fully mature on the plant: Observe the back of the flower head to determine when the seeds are ready. The seeds should appear plump and dark in color, and the back of the head should turn yellow or brown.
- Harvest the flower heads: Use sharp scissors or pruning shears to cut the heads from the stalk, leaving a few inches of stem attached. Harvest the heads before they become fully dry to prevent the seeds from falling out.
- Remove debris and excess plant material: Gently rub the heads together to remove any debris or excess plant material.
- Air dry the seeds: Lay the heads out in a single layer on a clean and dry surface in a warm, well-ventilated area. Allow the seeds to air dry for about two weeks, or until the heads become brittle and the seeds are easy to remove.
- Remove the seeds: Gently rub the heads between your hands to release the seeds, being careful not to damage the seeds in the process.
- Store the seeds properly: Place the seeds in airtight containers, such as glass jars or plastic bags, and store them in a cool, dry, and dark place. Label the containers with the variety and date of harvest to keep track of the seeds.
By following these simple steps, you can successfully save sunflower seeds for next year’s planting. Not only will you be able to continue growing these beautiful flowers, but you will also have the satisfaction of knowing that you are able to preserve their genetic diversity and adaptability in your own garden.
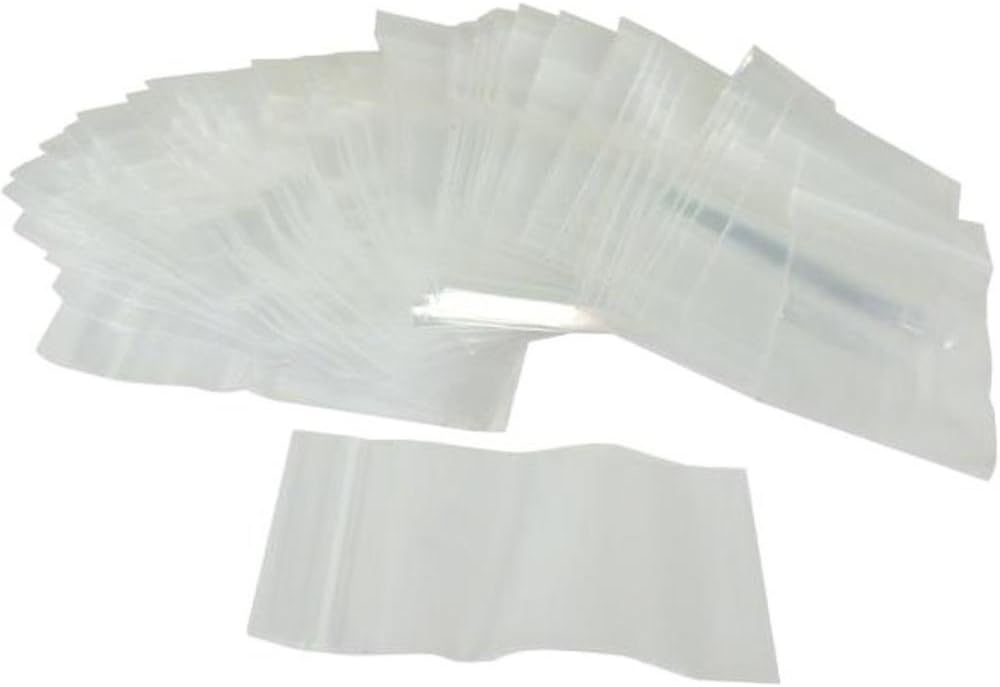
I recently used Beadaholique’s 2 by 3-Inch Self Sealing Plastic Bags, Clear to store and preserve flowers and plant seeds, and I’m delighted with the results. These bags are perfect for storing and organizing small items like seeds, and the self-sealing feature ensures that the contents are securely stored. The clear plastic bags allow me to easily see what’s inside, which is very convenient when labeling the bags with the type of flower or plant seed.
I found that the bags are airtight, which is essential for preserving the freshness of the flowers and plant seeds. I was able to store different types of flowers and seeds in separate bags, which helped me keep them organized and fresh until I was ready to use them.
Overall, I highly recommend Beadaholique’s 2 by 3-Inch Self Sealing Plastic Bags, Clear for anyone looking for a reliable and affordable storage solution for their flowers and plant seeds. They are durable, easy to use, and have helped me keep my seeds and flowers fresh and organized.
✅ Sealing: The sealing feature of these bags helps in keeping the contents secure and protected from dust, moisture, and other external elements.
✅ Size: The 3-inch size of the bags may be suitable for storing small items like jewelry, beads, seeds, or other small craft supplies.
✅ Versatility: These bags can be used for various purposes such as packaging small gifts, organizing craft supplies, storing seeds, or even for small business purposes like selling jewelry or handmade items.
❌ Environmental Impact: As these bags are made of plastic, they may not be environmentally friendly and could contribute to plastic waste if not disposed of properly or recycled.
❌ Limited Use: The small size of the bags may limit their use to storing only small items, which might not be suitable for those looking to store larger items or quantities.
❌ Closure Mechanism: Depending on the design of the sealing mechanism, some users might find it challenging to open and close the bags easily, especially if they are using them frequently.
Extending the Blooming Season: Succession Planting Tips
Succession planting is a valuable technique for extending the blooming season of sunflowers in your garden. By strategically timing your plantings, you can ensure a continuous display of vibrant blooms throughout the summer months.

Here are the steps for implementing succession planting and extending the blooming season of sunflowers:
- Begin by determining the average days to maturity for the sunflower variety you have chosen. This information is usually provided on the seed packet or can be obtained from reputable gardening sources.
- Based on the average days to maturity and the length of your growing season, calculate the ideal interval between plantings. For example, if your sunflowers have an average maturity of 75 days and your growing season lasts 150 days, you can sow new seeds every two weeks to ensure a continuous bloom.
- Prepare the planting area by clearing any debris, loosening the soil, and amending it with compost or fertilizer if necessary. Ensure that the area receives adequate sunlight for sunflower growth.
- Sow the sunflower seeds according to the calculated planting intervals. Plant the seeds at the recommended depth and spacing for the specific variety you are growing.
- Keep the soil consistently moist but not waterlogged, especially during the germination and early growth stages. Monitor the plants for any signs of pests or diseases and take appropriate action if needed.
- Choose sunflower varieties with varying flowering times to extend the blooming season. Select early, mid, and late-season varieties to ensure a prolonged display of sunflowers in your garden.
- Add visual interest and diversity to your sunflower beds by selecting varieties with different heights and colors. Mix tall and dwarf varieties, as well as traditional yellow, red, orange, and multi-colored blooms.
- As the sunflowers reach maturity, harvest the flowers for bouquets or allow them to remain on the plant for birds to enjoy. Deadhead spent flowers regularly to encourage continuous blooming throughout the season.
By following these steps, you can effectively implement succession planting and enjoy a prolonged blooming season of beautiful sunflowers in your garden.
Incorporating Sunflowers into Your Garden Design
Sunflowers can be a stunning addition to any garden design, bringing forth vibrant colors and adding height and interest to your outdoor space. When incorporating sunflowers into your garden design, consider their size and growth habits.
- Choose sunflower varieties based on garden size, desired height, bloom color, seed production, and suitability for your local climate and soil.
- Sunflowers can serve as an excellent backdrop for lower-growing plants, creating a dramatic effect.
- Mix sunflowers with a variety of perennials and annuals to create a dynamic, multi-layered display.
- Dwarf sunflower varieties are perfect for container gardening, adding a splash of color to patios, balconies, or small garden spaces.
- Incorporate sunflowers into vegetable gardens or orchards to attract essential pollinators like bees and butterflies.
- Plant sunflowers along garden pathways for a sunny, inviting walkway.
- Tall sunflower varieties can be used to create natural screens or dividers in the garden, offering privacy and a unique aesthetic.
- Pollen-free varieties are ideal for indoor arrangements without the mess of pollen.
- Sunflowers excel in companion planting, offering both aesthetic and functional benefits.
- Plant sunflowers based on their growth habits, such as branching or single stem, to achieve desired effects in your garden design.
- Consider bloom times when incorporating sunflowers into your garden design to extend the blooming season and maintain a constant burst of color throughout your garden.
- Experiment with various heights, colors, and plant combinations to enhance the overall aesthetic appeal of your outdoor space.
Incorporating sunflowers into your garden design offers an opportunity to experiment with various heights, colors, and plant combinations. Whether you choose to create a dedicated sunflower garden or intersperse sunflowers with other plants, their unique features are sure to enhance the overall aesthetic appeal of your outdoor space. So unleash your creativity and let these cheerful blooms brighten up your garden with their radiant beauty.
Troubleshooting Common Sunflower Growing Issues
Common Sunflower Growing Issues
1) Poor Germination Rate:
One common issue that gardeners may face when growing sunflowers is a poor germination rate. This can be frustrating, especially if you have carefully prepared the soil and followed all the recommended planting techniques. Low germination rates can be caused by various factors, including incorrect planting depth, inadequate soil temperature, or poor seed quality. To ensure better germination, it is essential to plant the sunflower seeds at the appropriate depth, typically around 1-2 inches deep.
Additionally, the soil temperature should be warm enough, ideally between 55-70°F (12-21°C). If the temperature is lower or higher than this range, it can negatively impact seed germination. Lastly, using high-quality seeds from reputable suppliers can significantly improve your chances of successful germination. Ensuring optimal soil conditions and following proper planting techniques are key in addressing the issue of poor germination rates in sunflowers.
2) Stunted Growth and Yellowing Leaves:
Another problem that sunflower growers might encounter is stunted growth and yellowing leaves. In order to thrive, sunflowers require well-draining soil that is rich in organic matter. If the soil becomes compacted or lacks nutrients, it can impede the growth of the plants and cause the leaves to turn yellow. To address this issue, it is recommended to amend the soil with organic matter such as compost or well-rotted manure before planting. This will improve soil structure and provide essential nutrients for healthy plant growth.
Additionally, regular watering and proper irrigation practices are crucial to prevent moisture stress, which can also lead to stunted growth and yellowing of leaves. Ensuring the plants receive adequate water without waterlogging the soil is important for maximizing sunflower growth and vitality.
Watch video for more information:
FAQ
Why are my sunflowers not growing well in my garden?
There could be several reasons why sunflowers are not growing well in your garden. It could be due to poor soil quality, inadequate sunlight, lack of water, or pest and disease issues. It is important to assess each of these factors and make the necessary adjustments to ensure optimal growth.
How can I select the right sunflower variety for my garden?
When selecting a sunflower variety for your garden, consider factors such as the space available, desired height, flower size and color, and the climate in your area. Research different varieties and choose one that suits your preferences and growing conditions.
How often should I water my sunflowers?
Sunflowers generally require regular watering, especially during dry periods. Aim to keep the soil evenly moist but not waterlogged. Water deeply at the base of the plants, ensuring that the water reaches the root zone. The frequency of watering may vary depending on your climate and soil type, so it is important to monitor the moisture levels.
How can I prevent common pests and diseases from affecting my sunflowers?
To manage common pests and diseases in sunflowers, practice good garden hygiene by removing any plant debris and weeds that may harbor pests. Regularly inspect your plants for signs of infestation or disease, and take appropriate measures such as using organic pest control methods or applying fungicides as necessary.
When is the best time to harvest sunflowers?
Sunflowers are ready for harvest when the back of the flower head turns yellow and the petals start to dry out and fall off. Additionally, the seeds should be plump and firm. It is recommended to harvest sunflowers in the morning when the flower heads are dry. Cut the stems about one foot below the flower head and hang them upside down in a dry, well-ventilated area to complete the drying process.
How can I save sunflower seeds for next year’s planting?
To save sunflower seeds for next year’s planting, allow the flower heads to fully mature on the stalk. Once the back of the flower head turns brown, cut it off and place it in a paper bag or hang it upside down in a dry, well-ventilated area. After a few weeks, the seeds will dry and can be easily removed from the flower head. Store the seeds in a cool, dry place in an airtight container until the next planting season.
How can I extend the blooming season of my sunflowers?
Succession planting is a technique that can help extend the blooming season of sunflowers. By sowing seeds at different intervals, you can ensure a continuous supply of blooming sunflowers throughout the season. Start by sowing a batch of seeds, then sow another batch a couple of weeks later, and repeat the process until desired blooming time.
What are some creative ways to incorporate sunflowers into my garden design?
Sunflowers can add a vibrant and cheerful touch to your garden design. Consider planting them as a backdrop to other flowering plants, creating a sunflower border, or mixing them with different colors and heights of flowers for a visually appealing display. You can also use sunflowers as a focal point in your garden or incorporate them into a themed garden, such as a wildflower or butterfly garden.
Studied Agricultural Engineering-Plant Protection at University of California, Davis.
Head of Content writing team at Southelmontehydroponics.com