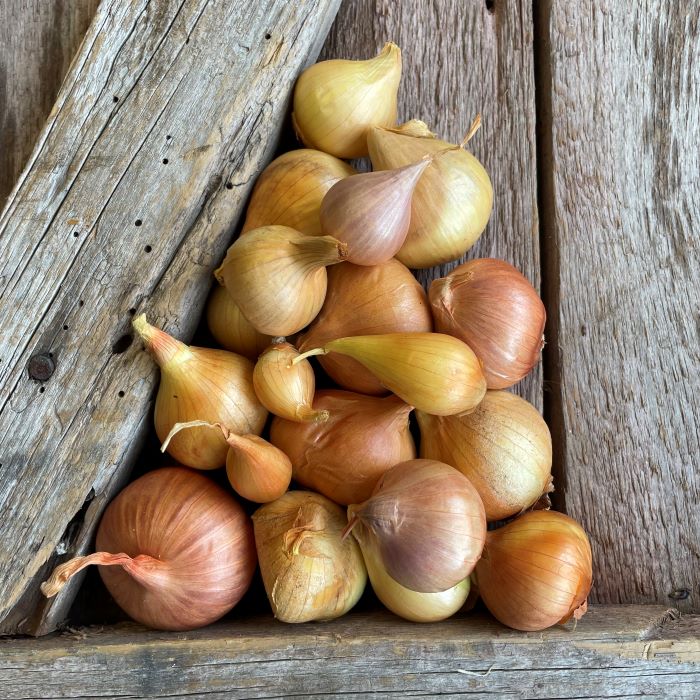
How to Grow Shallots: A Guide to Growing These Mild and Savory Bulbs
Did you know that shallots, often overlooked in favor of their onion cousins, pack a uniquely mild and savory punch that can elevate any dish? Growing your own shallots is easier than you think and offers a fresh, homegrown flavor that store-bought varieties simply can’t match. Whether you’re a seasoned gardener or a novice looking to try something new, our guide will walk you through each step of the process. From selecting the best bulbs to planting, nurturing, and harvesting, we’ve got you covered. Dive into our comprehensive guide and discover how rewarding it is to grow your own shallots right at home. Ready to get started? Let’s dig in!
Table of Contents
Introduction to These Versatile Bulbs
Shallots, those small and versatile bulbs, have been beloved by gardeners and chefs alike for centuries. With their distinct flavor and culinary uses, they add depth and complexity to a wide range of dishes. But shallots are more than just a flavorful ingredient; they also offer numerous health benefits.

- Nutrient Powerhouse: Shallots are rich in essential vitamins and minerals, including vitamin C, potassium, and folate, contributing to a balanced diet.
- Antioxidant Boost: Their antioxidant properties help fend off chronic diseases like heart disease and certain cancers, thanks to compounds that combat oxidative stress.
- Health Benefits: Shallots boast antimicrobial and anti-inflammatory effects, promoting overall health and well-being.
- Ease of Cultivation: Suitable for both seasoned gardeners and beginners, shallots are relatively low-maintenance and adaptable to various climate conditions.
- Soil Requirements: Understanding soil needs is crucial; shallots prefer well-draining, fertile soil with a slightly acidic pH.
- Planting Preparation: Properly prepare the planting area by clearing weeds and adding organic matter for nutrient-rich soil.
- Watering Techniques: Consistent watering, ensuring the soil remains moist but not waterlogged, is key to shallot growth.
- Pest Control: Implement pest control measures to protect shallots from common threats like onion flies and fungal diseases.
In this article, we will delve deep into the world of shallots, exploring their characteristics, cultivation methods, and culinary applications. So, grab your gardening gloves, and let’s embark on this journey together!
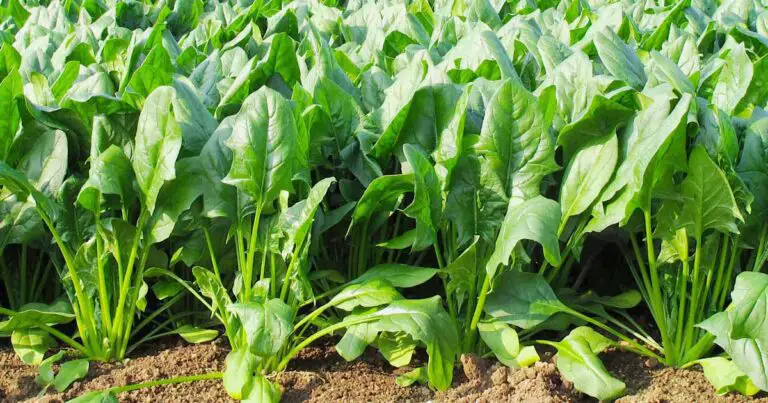
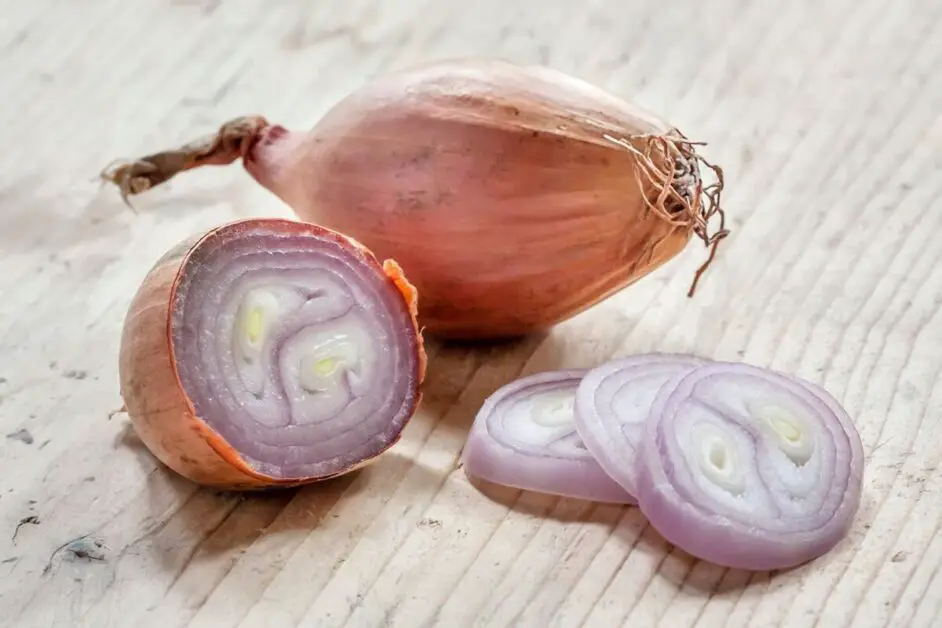
Choosing the Right Shallot Varieties for Your Garden
Shallots are a fantastic addition to any garden, offering a delicate and sweet flavor that can enhance a wide variety of dishes. When it comes to choosing the right shallot varieties for your garden, it’s important to consider your specific needs and growing conditions.
- French Gray Shallot (Allium oschaninii):
- Exceptional taste.
- Thrives in various climates.
- Mild and slightly peppery flavor.
- Ideal for sauces and dressings.
- Dutch Yellow Shallot (Allium cepa var. aggregatum):
- Larger bulbs.
- Slightly sweeter taste.
- Well-suited for savory dishes and roasting.
Remember to consider your garden’s conditions, such as soil type, climate, and sunlight, when choosing the right shallot variety. Consult gardening resources or local agricultural extension offices for personalized advice. Happy gardening! 🌱🌼
Understanding Soil Requirements for Growing Shallots
Understanding the soil requirements for growing shallots is crucial for achieving healthy and productive plants. Shallots thrive in well-draining soil that is rich in organic matter. This allows for proper root development and optimal nutrient absorption. Sandy loam or loamy soil with a pH level between 6.0 and 7.0 is considered ideal for shallot cultivation.
:max_bytes(150000):strip_icc()/growing-shallots-in-the-vegetable-garden-1403464-01-2d7d33250a324799bc32393e7bb1cd15.jpg)
- Soil Fertility Check: Conduct a soil test before planting shallots to assess fertility levels and identify any deficiencies.
- Amendment Preparation: Based on the soil test results, amend the soil by adding organic compost or well-rotted manure to enhance its nutrient content.
- Nutrient Enhancement: Incorporate a balanced fertilizer containing nitrogen, phosphorus, and potassium to provide essential nutrients for robust shallot growth.
- Healthy Start: Preparing the soil adequately ensures a healthy start for shallot bulbs, promoting vigorous growth and optimal yield.
- Fertile Soil Requirement: Shallots thrive in fertile soil that is rich in nutrients, emphasizing the importance of soil preparation before planting.
By understanding and catering to the soil requirements of shallots, gardeners can create an optimal growing environment, setting the stage for a bountiful harvest.
Using Jack’s Professional 20-20-20 All Purpose Fertilizer has been a game-changer for my garden. The balanced formula provided essential nutrients, resulting in lush, vigorous growth and vibrant blooms across my plants. Its water-soluble nature made it easy to apply, ensuring even distribution and quick absorption. However, it’s important to use it carefully to avoid overapplication and potential nutrient burn. Overall, it’s a fantastic choice for anyone looking to boost their plant’s health and productivity.
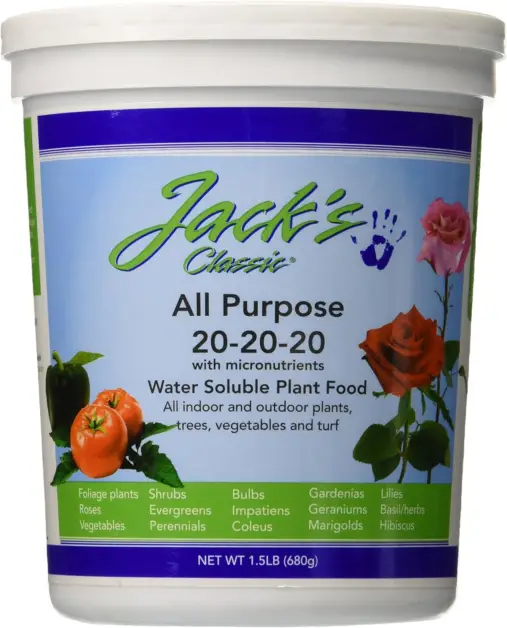
- Balanced Nutrients: The 20-20-20 formula provides a well-balanced mix of nitrogen, phosphorus, and potassium, essential for overall plant health.
- Versatile Use: Suitable for a wide variety of plants, including vegetables, flowers, and houseplants.
- Water-Soluble: Easily dissolves in water, making it convenient to apply through watering systems or directly to the soil.
- Boosts Growth: Promotes vigorous growth, lush foliage, and vibrant blooms, enhancing the overall appearance and productivity of plants.
- Chemical-Based: As a synthetic fertilizer, it may not be suitable for those seeking organic gardening solutions.
- Overapplication Risk: There is a risk of nutrient burn if overapplied, requiring careful measurement and adherence to recommended dosages.
- Environmental Impact: Potential for runoff and environmental impact if not used responsibly, particularly near waterways.
Preparing the Soil for Shallot Planting
Preparing the soil for shallot planting is a critical step in ensuring successful growth and a bountiful harvest.
Aim for a pH level between 6.0 and 7.5.
Test the soil’s pH and adjust if necessary.
Add compost or well-rotted manure to improves the soil structure and increase nutrient content.
Mix the organic matter thoroughly into the soil to a depth of at least 8 inches.
Remove weeds or debris to prevent competition for nutrients and space.
Loose and crumbly soil is ideal for shallot planting.
Till or dig the soil to break up clumps and create a smooth surface.
Incorporate a balanced fertilizer to promote strong growth.
Adjust the amount based on soil conditions and consider a soil test for precise needs.
When and Where to Plant Shallot Bulbs
Shallot bulbs are a versatile and rewarding addition to any garden. But to ensure their success, it is important to understand when and where to plant them.
- Climate Preference: Shallots thrive in cool and temperate climates, making late winter to early spring the best planting time.
- Sunlight Requirement: Choose a planting location that receives six to eight hours of direct sunlight daily for optimal growth.
- Well-Draining Soil: Select a site with well-draining soil to prevent waterlogging, which can lead to rot and disease.
- Soil Preparation: Mix organic matter like compost or aged manure into the soil before planting to enhance fertility and provide essential nutrients.
- Root System Establishment: Planting in the recommended season allows shallot bulbs to establish their root systems before warmer temperatures arrive, promoting healthier growth.
Proper Watering Techniques for Shallots
Proper watering techniques are vital for the healthy growth and development of shallots. As with any plant, maintaining the correct moisture levels is crucial in ensuring their overall well-being. Watering shallots requires a delicate balance, as overwatering can lead to rot and fungal issues, while underwatering can hinder their growth and yield.
- Consistent Moisture:
- Provide consistent moisture without waterlogged conditions.
- Aim for soil that is consistently moist but not soggy.
- Watering Amount:
- Provide around 1 to 1.5 inches of water per week.
- Use a combination of rainfall and irrigation.
- Soil Moisture Test:
- Conduct a simple soil moisture test by inserting your finger up to the first knuckle.
- If the soil feels dry, it’s time to water; if moist or slightly damp, wait.
- Prevent Overwatering:
- Overwatering can lead to root rot and fungal diseases.
So now that we have covered the crucial aspects of watering shallots, let’s delve into the next topic of fertilizing techniques to further enhance the growth and nutrient content of these versatile bulbs.
Fertilizing Shallots: Tips for Nutrient-Rich Bulbs
Shallots are a prized addition to any kitchen garden, offering a delicate yet distinct flavor to a wide range of culinary creations. To ensure a bountiful harvest of nutrient-rich bulbs, proper fertilization is key. By understanding the specific needs of shallots and implementing effective fertilizing techniques, gardeners can maximize both the yield and quality of their harvest.
- Fertilizer Importance: Well-balanced fertilizer promotes healthy shallot growth by providing essential nutrients.
- Organic Matter Addition: Incorporate compost or well-rotted manure into the soil before planting for a nutrient-rich foundation.
- Soil Structure Enhancement: Organic matter improves soil structure and drainage, creating an optimal growing environment for shallots.
- Soil Test Benefits: Conduct a soil test to identify nutrient deficiencies and customize fertilizer application accordingly.
- Fertilizer Selection: Choose a general-purpose, slow-release fertilizer high in nitrogen for shallot growth, but avoid over-application.
- Nitrogen Balance: Excessive nitrogen can lead to lush foliage but hinder bulb formation, so maintaining the right balance is crucial for a successful harvest.
- Nutrient-Rich Bulb Development: Adequate nutrition is vital for developing nutrient-rich shallot bulbs, emphasizing the importance of proper fertilizer management.
Stay tuned for the next section where we delve further into the topic, exploring the specific nutrients shallots require and the best fertilizers to use for optimal results. With these insights, you’ll be able to foster robust shallot plants, boasting bulbs that not only enhance your dishes with their delicious flavor but also provide a wealth of nutritional benefits.
Protecting Shallots from Pests and Diseases
Shallots, like any other plant, are susceptible to a variety of pests and diseases that can significantly impact their growth and productivity. Therefore, protecting your shallots from these potential threats is crucial for a successful harvest.
| Issue | Symptoms | Treatment and Prevention | Effects on Plants |
|---|---|---|---|
| Onion Maggots | – Cream-colored larvae tunnel inside shallot bulbs. | – Prevent by avoiding decaying organic matter in the garden. | – Severe damage to bulbs; multiple generations can hatch each year. |
| Root Rot | – Yellowing leaves, wilting, and stunted growth. | – Ensure well-draining soil and avoid overwatering. | – Reduced plant vigor; potential plant death. |
| Downy Mildew | – Yellow spots on leaves, followed by white, fuzzy growth. | – Provide good air circulation and avoid overhead watering. | – Reduced yield and quality of shallots. |
| Purple Blotch | – Purple or reddish-brown spots on leaves. | – Remove affected leaves and practice crop rotation. | – Reduced photosynthesis; weakened plants. |
| White Rot | – Yellowing leaves, wilting, and decay of bulbs. | – Practice crop rotation and avoid planting in infected soil. | – Bulb rot; can persist in soil for years. |
| Thrips | – Silver streaks on leaves; distorted growth. | – Use insecticidal soap or neem oil; remove affected leaves. | – Reduced plant health; cosmetic damage. |
| Aphids | – Sticky residue on leaves; curled leaves. | – Spray with soapy water or neem oil; introduce beneficial insects. | – Distorted growth; transmission of viruses. |
| Leaf Miners | – Serpentine tunnels in leaves. | – Remove affected leaves; use row covers. | – Reduced photosynthesis; cosmetic damage. |
| Rust | – Orange or yellow pustules on leaves. | – Remove affected leaves; use fungicides if necessary. | – Reduced photosynthesis; weakened plants. |
Remember to monitor your shallots regularly and take appropriate measures to prevent and manage these issues for a successful harvest!
Mulching Techniques for Shallot Beds
Mulching is an essential technique that can greatly benefit the growth and development of shallot beds. By applying a layer of organic or inorganic material to the soil surface, gardeners can create a protective barrier that helps regulate soil temperature, conserve moisture, suppress weed growth, and improve overall soil health.
- Organic Mulching Benefits: Choose organic materials like straw, grass clippings, or compost for shallot beds for their ability to break down and enrich the soil with nutrients over time.
- Soil Improvement: Organic mulches promote better air and water circulation, creating an optimal environment for shallot root development.
- Nutrient Addition: As organic mulches decompose, they add valuable nutrients to the soil, further enhancing shallot growth.
- Inorganic Mulching: Options like plastic or landscape fabric provide effective weed control and moisture retention, suitable for areas with high weed pressure or limited water availability.
- Proper Irrigation: Ensure proper irrigation and drainage to prevent waterlogging when using impermeable mulches, maintaining optimal soil moisture levels for shallot growth.
- Mulch Selection Consideration: Choose mulching materials based on specific needs, balancing between organic options for soil enrichment and inorganic options for weed control and moisture retention.
I recently used Michigan Peat 5240 Garden Magic Compost and Manure for my vegetable garden, and the results were impressive. The compost provided a significant nutrient boost, leading to healthier and more vigorous plant growth. It also improved the soil structure, making it easier for the roots to penetrate and absorb nutrients. The moisture retention properties reduced my watering frequency, which was a welcome benefit during the hot summer months.
However, the 40-pound bag was quite heavy to handle, and there was a noticeable odor initially. Additionally, I encountered some larger chunks that needed breaking down. Despite these minor issues, the overall quality and benefits of this compost make it a fantastic choice for gardeners looking to enrich their soil naturally.

- Nutrient-Rich: Provides essential nutrients for plants, promoting healthy growth and increased yield.
- Improves Soil Structure: Enhances soil texture and aeration, helping roots to thrive and absorb nutrients efficiently.
- Organic Material: Made from natural ingredients, suitable for organic gardening.
- Versatile Use: Ideal for a variety of gardening applications, including vegetable gardens, flower beds, and lawns.
- Moisture Retention: Helps soil retain moisture, reducing the need for frequent watering.
- Heavy Bag: The 40-pound bag can be cumbersome to handle, especially for those with limited physical strength.
- Odor: As with many compost products, it may have a strong odor, particularly when first applied.
- Inconsistent Texture: Some users report variability in the texture, with occasional large chunks that need to be broken down.
Pruning Shallot Plants for Optimal Growth
Pruning shallot plants is an essential practice for promoting optimal growth and ensuring a bountiful harvest. By correctly pruning your shallot plants, you can encourage stronger stems, increase air circulation, and prevent overcrowding in the garden bed. This, in turn, reduces the risk of diseases and enhances the overall health of your shallot plants.
- Start at the Right Height:
- Begin pruning when shallot plants reach 8 to 10 inches in height.
- Remove Yellowing or Dead Leaves:
- Trim any yellowing or dead leaves at the base of the plants.
- These leaves don’t contribute to growth and may attract pests or diseases.
- Use Sharp, Sterile Pruning Shears:
- Make clean cuts to ensure the health of remaining foliage.
- Sterilize your pruning shears to prevent disease transmission.
- Address Weak or Thin Stems:
- Remove weak or struggling stems.
- Redirect energy to stronger stems for thicker, healthier bulbs.
- Thinning Overcrowded Clusters:
- Shallots form clusters of bulbs.
- Separate bulbs gently to create space between plants.
- Better nutrient absorption and disease prevention result in larger, high-quality shallots. 🌱🧅
| Pruning Shallot Plants for Optimal Growth | Key Practices and Considerations |
|---|---|
| 1. Pruning Timing | – Early Pruning: Begin pruning when shallot plants are around 6 inches tall. |
| – Regular Maintenance: Prune regularly throughout the growing season. | |
| 2 Types of Pruning | – Top Growth Removal: Pinch off the top inch or two of young shoots. |
| – Bulbils Removal: Remove any small bulbils that form at the leaf axils. | |
| 3.Encouraging Bulb Development | – Focus on Bulb Growth: Pruning redirects energy to bulb development. |
| – Enhance Bulb Size: Removing flowers and bulbils helps increase bulb size. | |
| 4. Removing Flower Stalks | – Prevent Bolting: Remove flower stalks promptly to prevent bolting. |
| – Prioritize Bulb Formation: Channel energy into forming larger bulbs. | |
| 5. Thinning Out Clumps | – Adequate Spacing: Thin out crowded areas to provide ample space for each plant. |
| – Air Circulation: Enhance air circulation to reduce disease risk. | |
| 6. Cutting Back Yellowing Foliage | – Remove Yellow Leaves: Trim back yellowing or damaged foliage. |
| – Nutrient Redistribution: Helps redistribute nutrients to healthier parts. | |
| 7. Harvesting Green Onions | – Harvest Continuously: Harvest outer green leaves regularly for culinary use. |
| – Stimulate Growth: Frequent harvesting encourages new leaf growth. | |
| 8. Pruning After Bulb Formation | – Cease Pruning: Stop pruning once bulbs have reached desirable size. |
| – Allow Maturation: Allow the remaining foliage to contribute to bulb maturation. | |
| 9.Sanitization Practices | – Clean Tools: Use clean and sharp pruners to prevent disease transmission. |
| – Dispose of Debris: Properly dispose of pruned material to prevent disease spread. |
In conclusion, pruning shallot plants is a vital task for ensuring optimal growth and an abundant harvest. By removing dead or yellowing leaves, thinning out crowded clusters, and redirecting energy to stronger stems, you can enhance the health and vigor of your shallot plants.
Stay tuned for more expert tips on successfully cultivating these versatile bulbs and elevating your culinary dishes with their unique flavor profile.
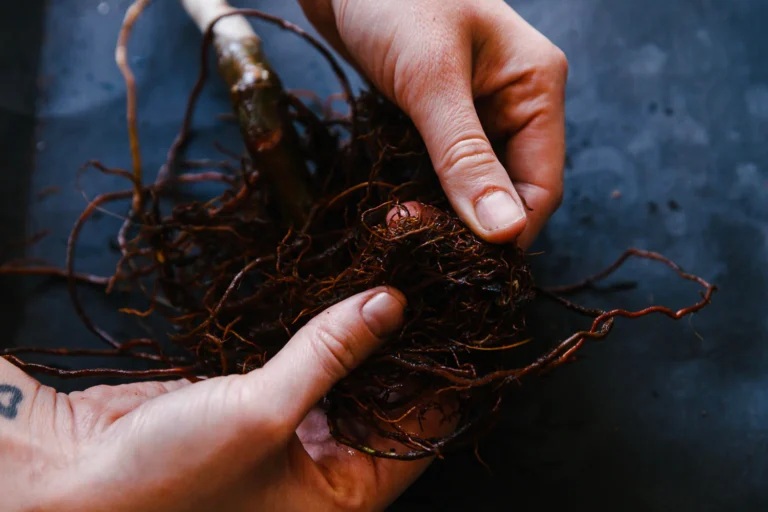
Harvesting Shallots at the Right Time
Shallots, with their mild flavor and delicate aroma, are a cherished addition to many dishes.
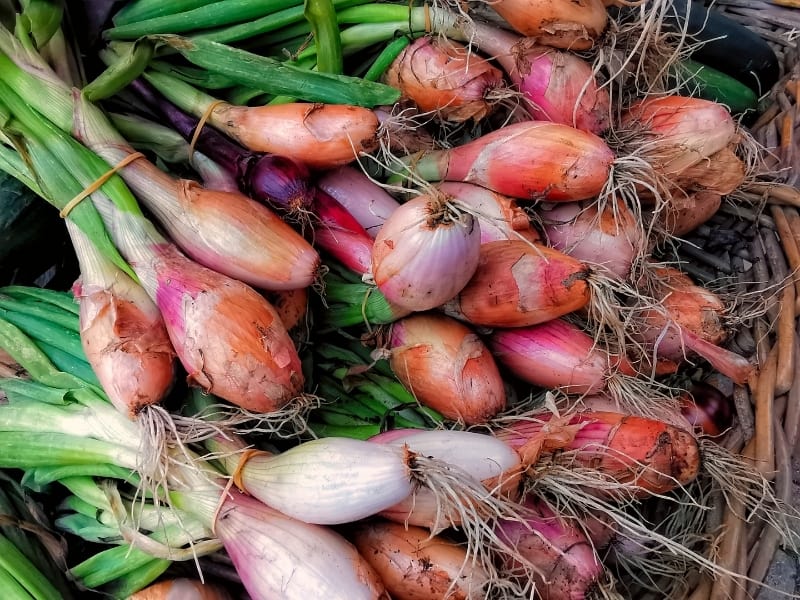
- Harvest Timing: Knowing when to harvest shallots is crucial for enjoying them at their peak flavor.
- Growth Stage Observation: Shallots are ready for harvest when their green tops have withered and turned brown, indicating bulb maturation.
- Bulb Check: Gently dig around the base of a plant to check for the desired size and firmness of the shallot bulbs.
- Desired Characteristics: Harvest shallots when the bulbs are plump, about one to two inches in diameter, swollen, and tightly clustered.
- Avoid Overripeness: To prevent splitting and deterioration, avoid leaving shallots in the ground for too long.
- Optimal Flavor and Storage: Timely harvesting ensures shallots retain optimal flavor, texture, and storage potential, enhancing culinary enjoyment.
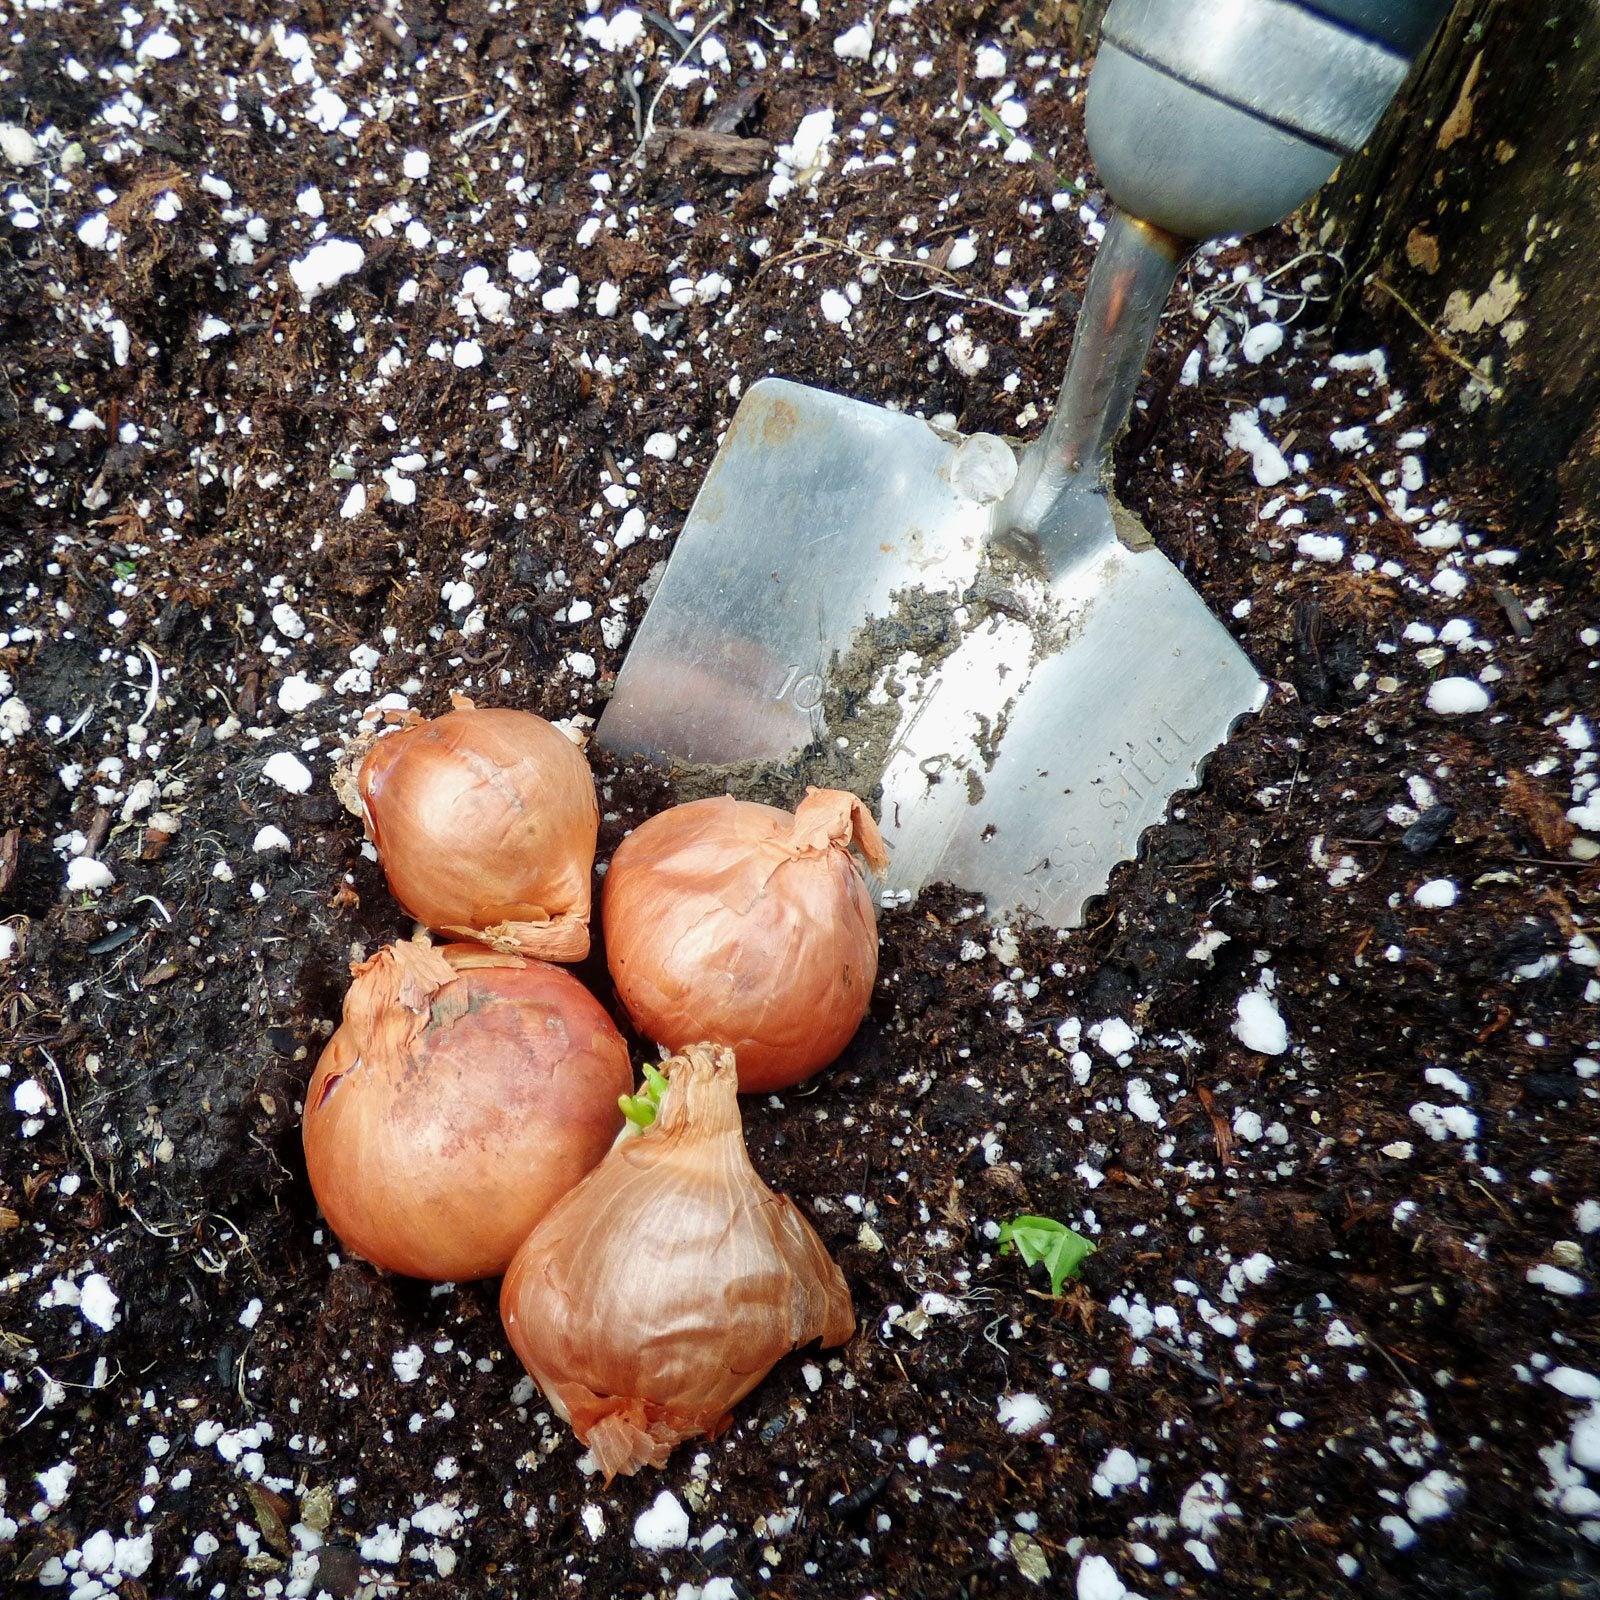
Storing and Curing Shallots for Long-Term Use
Storing and curing shallots properly is essential for extending their shelf life and ensuring that they retain their flavors and textures.
- Harvesting Shallots:
- Harvest shallots around late summer (August to September).
- When the tops of the shallots turn color, they are ready for picking.
- Use a garden spade to dig up the bulbs, gently removing excess soil.
- Shallots have two edible parts: the tops and the bulbs.
- If you plan to eat them, harvest the tops after 30 days.
- Save the bulbs for future planting or preservation.
- Curing Shallots:
- Cure shallots in a warm, dry location for 1 to 2 weeks.
- Lay them out in a single layer to allow even drying.
- The outer skins will become papery, and the necks will shrink slightly.
- Curing prevents rot during storage.
- Preparing for Storage:
- Trim the roots and tops, leaving about an inch of stem.
- Choose a cool, dark, and dry storage location.
- Store shallots in mesh bags, wooden crates, or well-ventilated containers.
Remember to label and date your storage containers for easy identification later. With the proper curing and storage techniques, your shallots can last up to six months or more, providing a flavorful addition to your culinary creations throughout the year.
Creative Culinary Uses for Shallots: Elevating Your Dishes
Shallots, with their subtle yet complex flavor, are a treasure trove for culinary enthusiasts. These versatile bulbs have the power to elevate any dish, adding a touch of elegance and sophistication. Whether you prefer them raw or cooked, shallots offer a delightful combination of sweet and savory notes, making them an essential ingredient in many cuisines around the world.
- Sauce and Dressing Enhancement: Shallots are prized for their mellow flavor, which complements the richness of creams and butter in sauces, adding depth and complexity.
- Flavor Elevator: Finely minced shallots elevate the flavor profile of sauces and dressings, whether it’s a classic béarnaise or a tangy vinaigrette, creating a culinary masterpiece.
- Texture Contribution: With their delicate texture, shallots seamlessly melt into sauces and dressings, ensuring a smooth and velvety consistency.
- Versatile Culinary Use: Shallots bring sophistication to various dishes; sautéed shallots enhance the flavor of roasted meats, while caramelized shallots add a sweet and savory twist to vegetable dishes.
- Endless Possibilities: From soups and stews to stir-fries and gratins, shallots offer endless culinary possibilities, enriching dishes with their distinctive flavor and aroma.
So why not experiment with these versatile bulbs and discover the endless ways they can elevate your dishes to new heights of flavor?
For more information watch video:
FAQ
What are some creative culinary uses for shallots?
Shallots can be used in a variety of ways to elevate your dishes. They can be used in salad dressings, sauces, marinades, and as a flavorful addition to grilled meats and vegetables. Shallots can also be caramelized and used as a topping for pizzas, bruschetta, or added to pasta dishes for added depth of flavor.
Can shallots be used as a substitute for onions?
Yes, shallots can be used as a substitute for onions in many recipes. They have a milder and sweeter flavor compared to onions, so they can add a delicate and subtle taste to dishes. However, keep in mind that shallots have a more complex flavor profile, so the end result may vary slightly.
How should shallots be stored for long-term use?
To store shallots for long-term use, they should be stored in a cool, dry, and well-ventilated place. Avoid storing them in areas with high humidity or near sources of heat. Shallots can be stored in a mesh bag or a well-ventilated container to prevent moisture buildup and prolong their shelf life.
Can shallots be grown in containers or pots?
Yes, shallots can be grown in containers or pots, making them a suitable option for those with limited garden space. Use a pot with good drainage and fill it with well-draining soil. Plant the shallot bulbs with the pointy side up and ensure they have enough space to grow. Place the container in a sunny spot and water regularly.
How do I prevent pests and diseases from affecting my shallots?
To protect shallots from pests and diseases, it is important to practice good garden hygiene. Remove any weeds or debris that can harbor pests. Additionally, consider using organic pest control methods such as companion planting, applying neem oil, or introducing beneficial insects to the garden.
Can I freeze shallots for later use?
Yes, shallots can be frozen for later use. To freeze shallots, peel and chop them into desired sizes. Place the chopped shallots in an airtight freezer bag or container and remove any excess air before sealing. Label the package with the date and store in the freezer for up to six months. Thawed shallots may have a slightly softer texture but can still be used in cooked dishes.
How do I know when shallots are ready to be harvested?
Shallots are ready to be harvested when the foliage turns yellow and starts to die back. Carefully loosen the soil around the bulbs and gently lift them out of the ground. Allow the shallots to dry in a well-ventilated area for a few weeks before removing any excess soil and storing them for long-term use.
Can I use shallots in desserts or sweet dishes?
While shallots are often used in savory dishes, they can also be used in certain desserts or sweet dishes that require a subtle onion-like flavor. Shallots can be caramelized and added to sweet sauces or used in savory-sweet combinations like shallot-infused ice cream or shallot-flavored caramel. However, it’s important to use shallots sparingly and experiment with caution in sweet recipes.
Studied Agricultural Engineering-Plant Protection at University of California, Davis.
Head of Content writing team at Southelmontehydroponics.com