How To Harvest Mint And Store It For Later
Did you know that mint is one of the easiest herbs to grow in your garden? But do you know how to harvest mint and store it for later use? Properly harvesting and storing mint can ensure that you have a continuous supply of this refreshing herb in your kitchen all year round.
As a professional writer, I’ve done my research to bring you the latest and most accurate information on harvesting and storing mint. In this blog post, I’ll guide you through the process of harvesting mint at the right time, using the right tools, and storing it for later use. You’ll learn how to dry mint, freeze it, and even make mint-infused oil.
By following my tips and tricks, you’ll be able to enjoy the fresh taste of mint in your favorite dishes, drinks, and desserts, even during the winter months. So, let’s get started and learn how to harvest mint and store it for later.
Table of Contents
Understanding Mint and its Benefits
- Mint is a versatile herb that offers a multitude of benefits for both culinary and medicinal purposes.
- The genus Mentha encompasses numerous species, each highlighting unique characteristics and flavors.
- Mint contains essential oils rich in menthol, menthone, and other compounds that contribute to its notable qualities.
- Adding mint to your diet can aid digestion, alleviate symptoms of irritable bowel syndrome (IBS), and reduce inflammation.
- Mint’s soothing properties make it a common ingredient in teas and remedies for respiratory ailments like coughs and congestion.
- Mint is a rich source of vitamin A, vitamin C, and antioxidants which support a healthy immune system and combat oxidative stress.
- The menthol found in mint offers a refreshing sensation and helps relieve muscle tension and headaches.
- Incorporating mint into your daily routine can contribute to overall well-being while enhancing the flavor and aroma of your favorite dishes.
Identifying the Right Time to Harvest Mint
Mint is a versatile herb that offers numerous health benefits and enhances the flavor of various dishes and beverages. To fully enjoy the benefits of mint, it is essential to harvest it at the right time. But how do you determine the optimal time to harvest your mint?
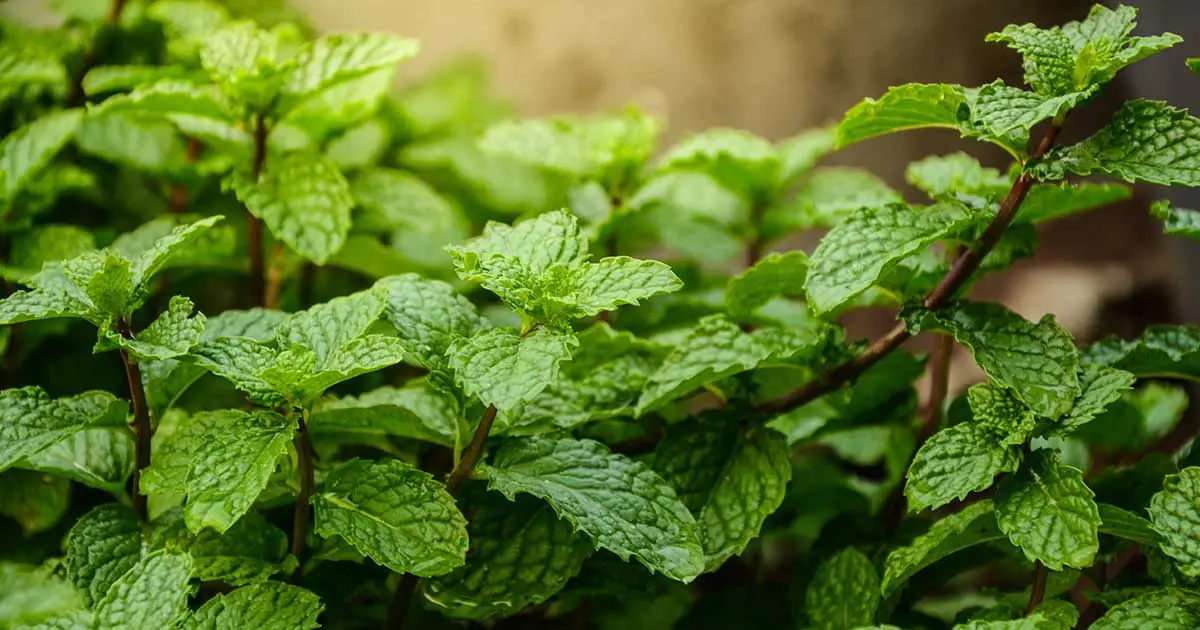
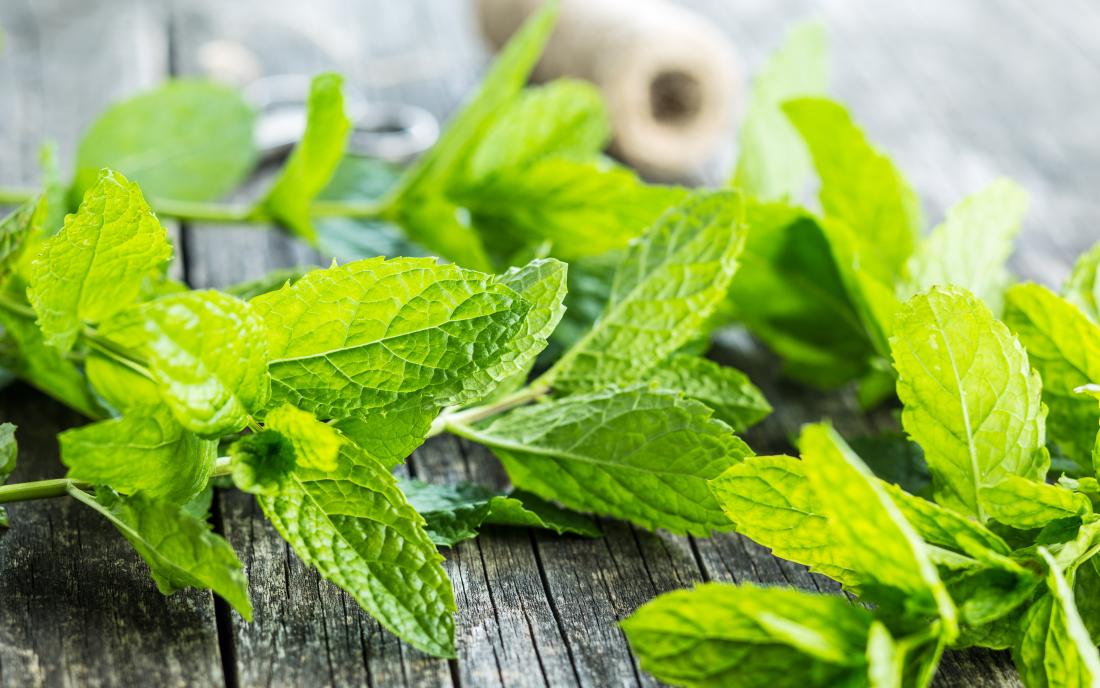
- Mint is typically ready for harvest when it reaches a height of 8 to 12 inches and appears bushy, indicating peak essential oil concentration for the best flavor.
- Harvest mint in the morning after the dew has evaporated to ensure the leaves are at their freshest and most aromatic.
- Avoid harvesting mint when the plant is small as the flavor may not be as pronounced.
- Dark green and vibrant leaves signify freshness and vitality, ideal for harvesting.
- Morning harvesting preserves the concentrated essential oils, resulting in a stronger flavor and aroma compared to later in the day.
By following these guidelines, you can ensure that you harvest mint at its peak flavor and aroma, enhancing the culinary delights you create with this delightful herb.
Selecting the Best Tools for Harvesting Mint
When it comes to harvesting mint, having the right tools can make the process much easier and efficient. The first tool you’ll need is a sharp pair of pruning shears.
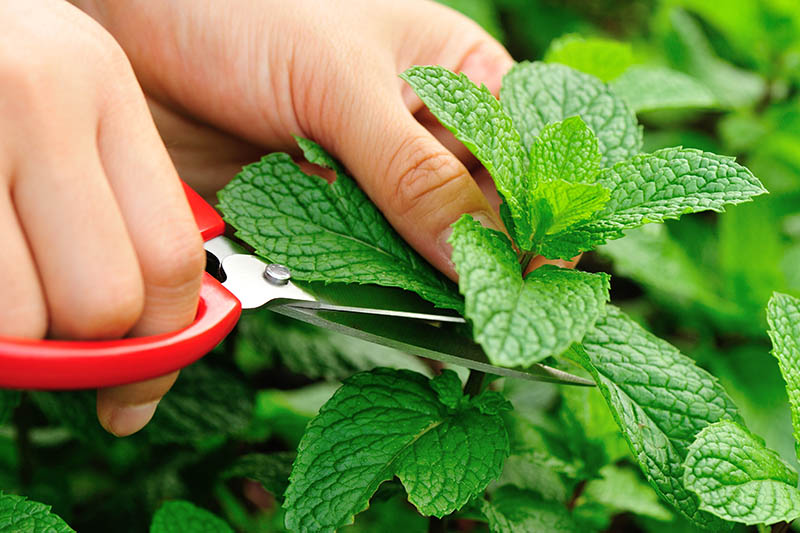
- Choose shears with a pointed blade for clean cuts through thick mint stems.
- Look for shears with a comfortable grip to prevent hand fatigue during harvesting.
- Opt for a good quality pair of shears to minimize the risk of damaging the mint plant.
- Use gardening gloves to protect hands from prickly plants and prevent skin irritation from mint.
- Select gloves made from durable and breathable material for comfort and protection.
- Use a lightweight basket or container for collecting freshly harvested mint.
- Opt for a wide-mouthed basket or bucket to avoid crushing or bruising the mint leaves.
- Avoid using plastic bags or tightly sealed containers to prevent dampness and spoilage of mint.
The following table explains about the different tools for harvesting mint:
| Tool | Description | Quantitative Impact |
|---|---|---|
| 1. Harvesting Shears | – Sharp blades for clean cuts. | – Length: 6-8 inches |
| – Comfortable grip handles. | – Cost: $10 – $20 | |
| 2. Pruning Scissors | – Fine-pointed blades for precision cutting. | – Length: 4-6 inches |
| – Lightweight and easy to maneuver. | – Cost: $5 – $15 | |
| 3. Hand Pruners | – Sturdy construction for durability. | – Length: 7-9 inches |
| – Spring-loaded handles for ease of use. | – Cost: $15 – $30 | |
| 4. Harvesting Knife | – Serrated blade for efficient cutting. | – Length: 6-8 inches |
| – Ergonomic handle for comfortable grip. | – Cost: $10 – $25 | |
| 5. Electric Trimmer | – Motorized blade for rapid harvesting. | – Power: 500-800 watts |
| – Adjustable cutting length. | – Cost: $50 – $100 |
By selecting the best tools for harvesting mint, you can ensure a successful and enjoyable herb-gathering experience. With sharp pruning shears, protective gloves, and a suitable container, you’ll be well-equipped to properly harvest your mint and enjoy its many benefits.
I recently had the opportunity to use the MAGID Extra-Long Thornproof Pruning and Gardening Gloves while working in my garden, and I was impressed by their performance. The gloves provided excellent protection against thorns and scratches, with the extra-long forearm design keeping my arms safe from harm. The puncture-resistant design also gave me peace of mind while pruning thorny plants, and I was able to complete my tasks with confidence. The gloves were comfortable to wear, with a flexible design that allowed for fine motor tasks.
However, I did find that the gloves were a bit stiff and hard to use for certain tasks, such as picking berries. I also found that the gloves were too warm for use in hot climates, and I would recommend using them in cooler weather. Overall, I would recommend the MAGID Extra-Long Thornproof Pruning and Gardening Gloves to anyone who needs protection while working in their garden.

- Puncture-resistant design, allowing for safe pruning of thorny plants.
- Extra-long forearm protection, keeping arms safe from thorns and scratches.
- Comfortable and easy to wear, with a flexible design that allows for fine motor tasks.
- High-quality materials, including premium puncture-proof goat skin leather and Kevlar stitching.
- Suitable for a variety of gardening tasks, including pruning roses and taking care of plants with thorns.
- Some customers have mentioned that the gloves may be stiff and hard to use for certain tasks, such as picking berries.
- The gloves may be too warm for use in hot climates.
- The gloves may not be as durable as some customers would like, with some reporting mold issues upon receipt.
- The gloves may not provide as much protection as some customers would like, with some reporting scratches and damage to their hands and arms while wearing them.
- The gloves may not be as puncture-resistant as some customers would like, with some reporting punctures and injuries while using them.
Proper Techniques for Cutting Mint Stems
Properly cutting mint stems is essential for maintaining the health and vigor of your plants. When harvesting mint, it’s important to use correct techniques to avoid damaging the plant or hindering its future growth.

By following these proper techniques for cutting mint stems, you can ensure the continued health and productivity of your mint plants. With regular and careful harvesting, you’ll be able to enjoy a steady supply of fresh mint for all your culinary and medicinal needs.
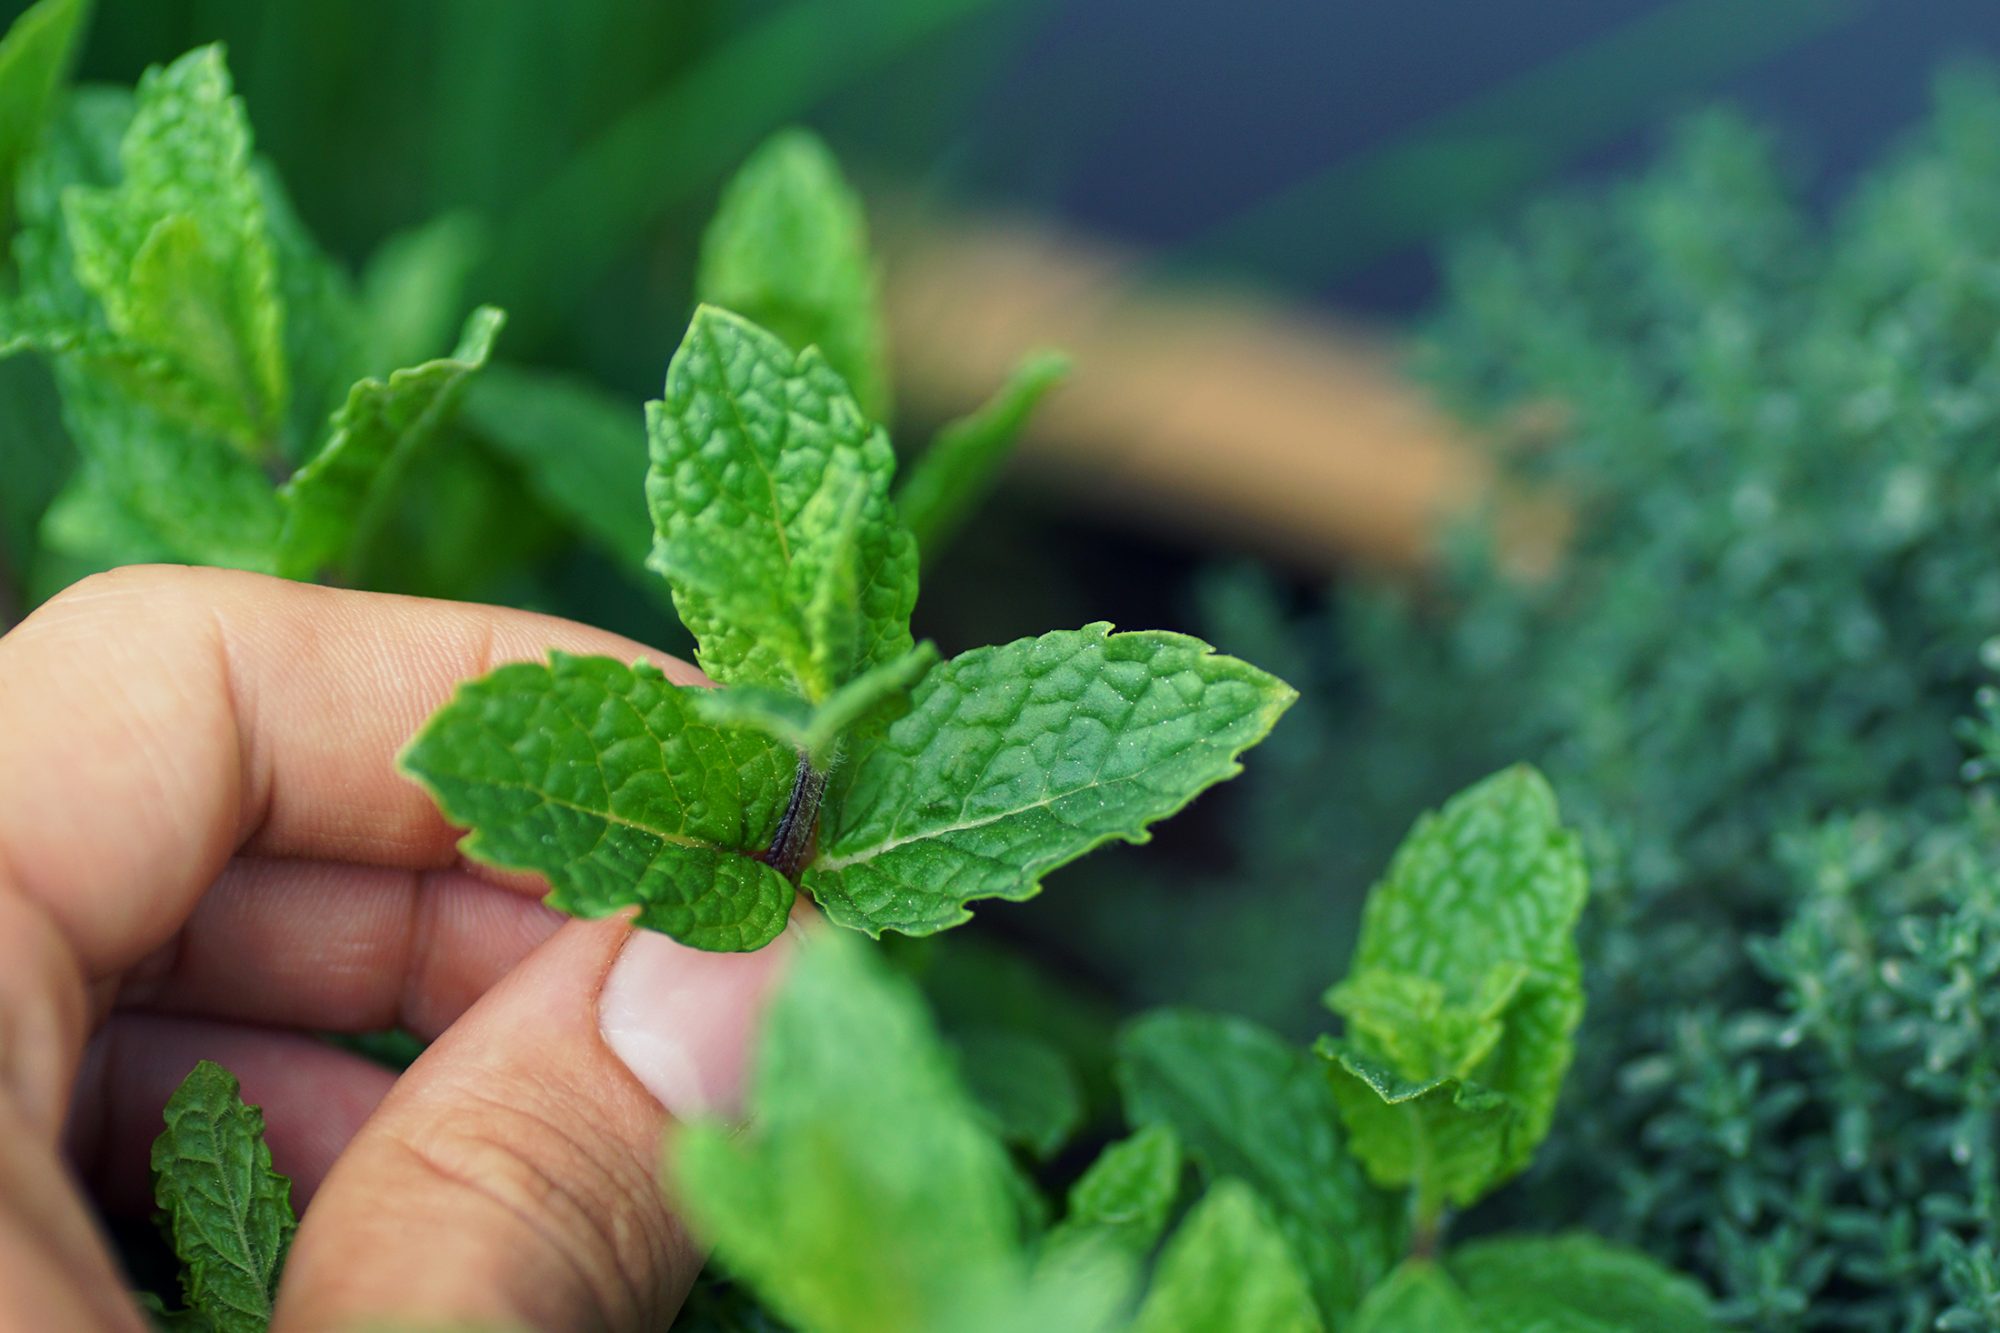
Handling Mint Leaves with Care
Mint leaves are delicate and can easily bruise or become damaged if not handled with care. When harvesting or working with mint leaves, it is important to use a gentle touch to preserve their freshness and flavor. Start by properly washing your hands to remove any dirt, oils, or residue that could transfer to the leaves.
To handle mint leaves properly, follow these steps:
Harvesting Mint Leaves:
- Hold the mint leaves by the stem and use clean kitchen shears to snip off the desired amount.
- Avoid squeezing or crushing the leaves to prevent the release of aromatic oils and maintain quality.
- Minimize handling to reduce bruising.
Storing Mint Leaves:
- Wrap the mint leaves in a damp paper towel or place them in a zip-top bag with a slightly damp paper towel to keep them moist.
- This helps prevent the leaves from drying out and preserves their vibrant color.
- Store the wrapped or bagged mint leaves in the refrigerator for up to a week.
- For longer-term storage, freeze the mint leaves.
By following these steps, you can ensure that mint leaves are handled with care during harvesting and storage, preserving their flavor and quality for your culinary creations.
Washing Mint Leaves to Remove Dirt and Debris
To ensure that your mint leaves are clean and ready for use, it is important to wash them thoroughly to remove any dirt or debris that may be present. This step is crucial not only for maintaining the quality of your mint leaves, but also for ensuring that they are safe to consume.
- Gently separate mint leaves from the stems to begin the washing process.
- Fill a clean sink or basin with cold water and place the leaves in the water.
- Swish the leaves around gently with your hands to loosen any dirt or debris.
- Consider using a colander or strainer to facilitate the washing process.
- Carefully lift the mint leaves out of the water, avoiding disturbing sediment at the bottom.
- Transfer the leaves to a clean kitchen towel or paper towels and pat them dry.
- Inspect the leaves for any remaining dirt or debris and repeat the washing process if necessary.
By following these simple steps, you can ensure that your mint leaves are thoroughly cleaned and ready to be used in your culinary creations or other applications.
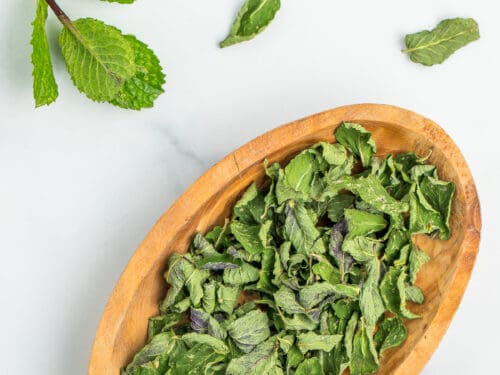
Drying Mint Leaves for Storage
Drying mint leaves is a crucial step in preserving the aromatic flavor and medicinal properties of this versatile herb. When done correctly, it can extend the shelf life of your mint leaves, allowing you to enjoy their refreshing taste long after the growing season ends.
To begin the drying process, harvest your mint leaves in the morning when the essential oils are at their peak. Avoid picking leaves that appear wilted or damaged, as they may not dry evenly. Gently remove any dirt or debris by rinsing the leaves in cold water and patting them dry with a clean towel.
Next, you have two primary options for drying the mint leaves: air drying or using a dehydrator.
Air Drying:
- Bundle a few stems together and tie them with a rubber band or string.
- Hang the bundles upside down in a cool, well-ventilated area away from direct sunlight.
- Allow the leaves to dry for approximately one to two weeks or until they become brittle to the touch.
Using a Dehydrator:
- Set the dehydrator to a low temperature, around 95°F (35°C).
- Arrange the mint leaves in a single layer on the dehydrator trays.
- Let them dry for two to three hours, or until they crumble easily.
- Be sure to rotate the trays every hour to ensure even drying.
Once the mint leaves are fully dried, carefully remove them from the stems and store them in airtight containers, such as glass jars or resealable bags. Keep the containers in a cool, dark place to prevent exposure to light and moisture, which can degrade the quality of the dried leaves.
Now that you have successfully dried your mint leaves, you can confidently use them in various culinary creations, such as teas, desserts, or infused oils. The intense flavor and aroma of dried mint leaves can enhance the taste and aroma of your dishes, making them more enjoyable and flavorful.
I recently had the opportunity to use the COSORI Dehydrator (B09GFVL7QX) and was impressed with its performance. The stainless steel design is sleek and modern, and the digital touch screen is user-friendly, allowing for easy temperature and time adjustments. The dehydrator is surprisingly quiet, making it suitable for home use without causing disturbance.
During my testing, I found that the COSORI Dehydrator evenly distributes heat, ensuring consistent results for various foods and herbs, such as mint, banana chips and fruit leather. The trays are dishwasher safe, simplifying cleanup. The magnetic catch and protective mesh across the fan and heating elements provide additional safety and convenience.
Overall, I am pleased with the COSORI Dehydrator’s performance and would recommend it to anyone looking for a reliable and efficient food preservation solution.

✅ Overheat Protection: The dehydrator has an overheat protection feature, ensuring safety during use.
✅ Quiet Operation: According to transcript, dehydrators are generally quieter than freeze dryers, making them suitable for home use.
✅ Energy Efficient: Dehydrators consume less energy compared to freeze dryers, as mentioned in transcript.
✅ Easy to Use: Dehydrators are straightforward to operate, as stated in transcript.
❌ Limited Shelf Life: Dehydrated food may not last as long as freeze-dried food, as mentioned in transcript.
❌ Lower Nutrient Retention: Dehydration may result in slightly lower nutrient retention compared to freeze drying, as indicated in transcrip.
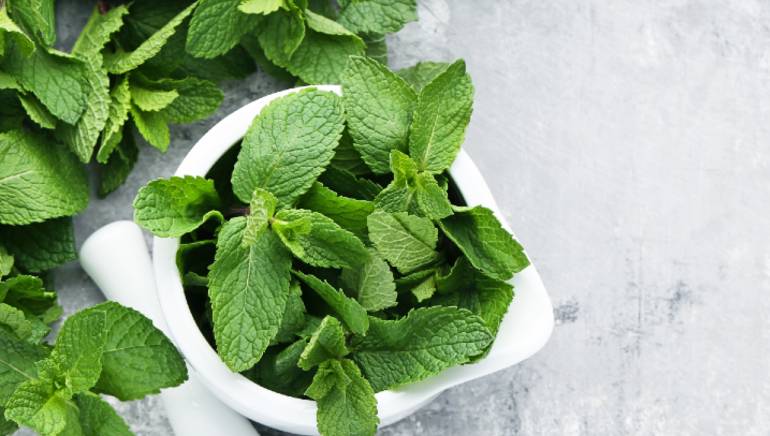
Choosing the Ideal Storage Containers for Mint

When it comes to storing mint, choosing the right containers is crucial to preserve its freshness and flavor.
- Choose containers with airtight sealing to preserve mint freshness and flavor.
- Glass jars with tight-fitting lids are an excellent option for storing mint due to their non-reactive nature and transparency.
- Glass allows easy monitoring of freshness and prevents alteration of taste or aroma.
- Food-grade plastic containers or bags designed for herb storage are also suitable options.
- Ensure plastic containers have airtight seals and are made from safe food storage materials.
- Plastic containers are lightweight and less prone to breakage, ideal for transportation or refrigeration.
- Select containers of appropriate size to minimize air contact and slow the oxidation process.
- Minimizing air contact helps preserve flavor and potency of stored mint.
By selecting well-sealed containers of the right size, you can ensure that your mint stays fresh and aromatic for an extended period.
Preparing Mint for Freezing
When it comes to preserving the vibrant flavor and aroma of mint, freezing can be a fantastic option. Freezing mint is a great way to ensure that you have a supply of this versatile herb readily available, even when it’s out of season or not available in your area. The best part is that freezing mint is a simple process that can be done in just a few easy steps.
To prepare mint for freezing, follow these steps:
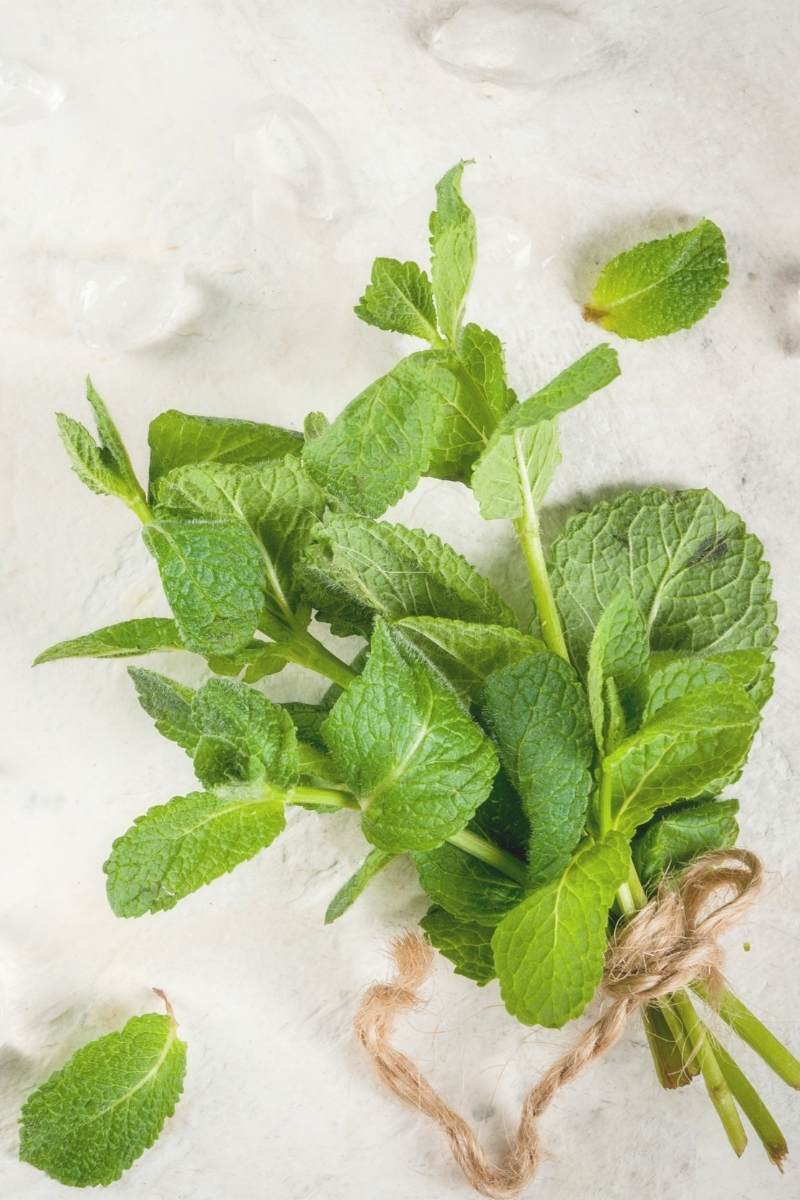
- Harvest the mint leaves when they are at their peak freshness, choosing young and vibrant leaves for the best flavor and aroma.
- Gently wash the mint leaves under cold running water to remove any dirt or debris.
- Pat them dry using a paper towel or a clean kitchen towel, ensuring not to bruise or damage the leaves.
- Choose between freezing the leaves whole or freezing them in ice cube trays with water or oil.
- Seal the mint tightly in airtight containers or freezer bags to prevent freezer burn and maintain freshness for a longer period.
By following these steps, you can preserve the taste and fragrance of mint, allowing you to enjoy this delightful herb year-round.
Properly Sealing Mint for Long-Term Storage
To ensure the long-term storage of mint, proper sealing is essential. By sealing mint effectively, you can preserve its freshness, aroma, and flavor for extended periods. The first step in properly sealing mint is to ensure that the leaves are completely dry, as moisture can lead to mold or rot during storage. Once the mint leaves are dry, you can use various methods to seal them.
Use a vacuum sealer to remove all the air from the packaging, preventing oxidation and maintaining the mint’s quality.
Store the vacuum-sealed mint in the pantry or freezer.
Fill the containers with dried mint leaves, ensuring there is minimal empty space.
Seal the containers tightly and store them in a cool, dark place, such as a pantry or cupboard.
Place the mint in a plastic bag, not sealing all the way to allow air circulation.
Store in the refrigerator, changing the water every two to three days to maintain freshness.
Seal the mint tightly in airtight containers or freezer bags to prevent freezer burn.
Store in the freezer for long-term preservation.
By following these proper sealing techniques, you can keep your mint fresh and flavorful for an extended period. Remember to always label your sealed mint containers with the date of storage to track their freshness. Proper sealing ensures that you can enjoy the benefits of mint all year round, whether in your favorite recipes, herbal remedies, or homemade beauty products.
Storing Mint in the Refrigerator
Storing mint in the refrigerator is a simple and effective way to prolong its shelf life and maintain its freshness. When it comes to preserving this aromatic herb, refrigeration is the ideal method. By following a few key steps, you can ensure that your mint stays vibrant and flavorful for as long as possible.
- Rinse the mint leaves under cold water to remove dirt and debris.
- Pat the leaves dry with a clean towel or use a salad spinner to remove excess moisture. Alternatively, allow the leaves to air dry for a short while.
- Once dry, wrap the mint loosely in a damp paper towel to retain moisture.
- Place the wrapped mint in a sealable plastic bag or an airtight container.
- Squeeze out any excess air from the bag or container before sealing to prevent wilting.
- Store the mint in the refrigerator.
- Fresh mint can last for up to two weeks when properly stored in the refrigerator.
- Use the stored mint for culinary purposes or for its potential medicinal benefits.
So, next time you harvest your homegrown mint, don’t forget to follow these simple steps to ensure it stays fresh and flavorful for an extended period.
Creating Mint Infused Oils for Culinary Use
Creating mint infused oils is a simple and effective way to elevate your cooking and add a fresh burst of flavor to your dishes. Whether you’re a seasoned chef or a home cook, incorporating mint-infused oils into your culinary repertoire can take your recipes to the next level.
To create mint-infused oils, follow these steps:
Select Fresh Mint Leaves:
- Choose fresh mint leaves from your garden or a reputable source, selecting a mint variety like spearmint or peppermint based on your taste preferences.
Clean the Leaves:
- Gently wash the mint leaves to remove any dirt or debris.
- Pat the leaves dry with a clean towel.
Infusion Process:
- Place the mint leaves in a glass jar.
- Cover the leaves with a high-quality oil like olive oil or sunflower oil, ensuring they are completely submerged.
- Seal the jar tightly and store it in a cool, dark place for approximately two weeks to allow the mint flavors to infuse into the oil.
Strain and Store:
- After the infusion period, strain the oil to remove the mint leaves.
- Transfer the infused oil to a clean, airtight container for storage.
By following these steps, you can create your homemade mint-infused oil, ready to add a burst of flavor to your favorite dishes.
Making Mint Tea with Fresh or Dried Leaves
Fresh or dried mint leaves can be used to make a delightful and refreshing cup of mint tea. Whether you have a bountiful mint plant in your garden or a stash of dried leaves in your pantry, making mint tea is a simple and enjoyable process.

Fresh Mint Tea Recipe:
Ingredients:
- Handful of fresh mint sprigs
- Water
- Optional: Honey or lemon slice for sweetness
Instructions:
- Harvest a handful of fresh mint sprigs and wash the leaves thoroughly to remove any dirt or debris.
- Bring a pot of water to a boil.
- Add the washed mint leaves to the boiling water.
- Let the mint leaves steep in the boiling water for 5-10 minutes, or until the desired strength is reached.
- Optional: Add a touch of honey or a slice of lemon for sweetness.
- Strain the tea into a cup or teapot to remove the mint leaves.
- Enjoy the invigorating aroma and soothing flavor of freshly brewed mint tea.
Dried Mint Tea Recipe:
Ingredients:
- 1 teaspoon dried mint leaves
- Water
Instructions:
- Place 1 teaspoon of dried mint leaves in a tea infuser or tea bag.
- Bring a cup of water to a boil.
- Place the tea infuser or tea bag with the dried mint leaves in the boiling water.
- Let the tea steep for 5-10 minutes, or until the desired strength is reached.
- Once the tea is sufficiently steeped, remove the infuser or tea bag.
- Enjoy the cozy warmth and comforting taste of dried mint tea.
Note: Mint tea can be enjoyed hot or cold, depending on your preference. Adjust sweetness and steeping time according to taste.
Mint tea is not only a delicious herbal beverage but also offers several health benefits. It is known for its ability to alleviate digestive issues, such as indigestion, bloating, and stomach cramps. Additionally, mint tea has a soothing and calming effect, making it an excellent choice for relaxation and stress relief.
So, whether you prefer the vibrant taste of fresh mint leaves or the convenience of dried ones, indulging in a cup of mint tea is a delightful way to experience the refreshing goodness of this versatile herb.
Exploring Different Methods for Preserving Mint Flavor
Preserving the fresh flavor of mint is a fantastic way to ensure that you can enjoy it throughout the year. There are several different methods you can explore to keep the essence of mint alive long after it has been harvested.
Drying
One popular method is drying mint leaves. Drying not only concentrates the flavor of the mint but also extends its shelf life. To dry mint leaves, simply harvest them when they are at their peak and spread them out in a cool, dark place with good air circulation. Once the leaves are completely dry, you can store them in an airtight container for later use.
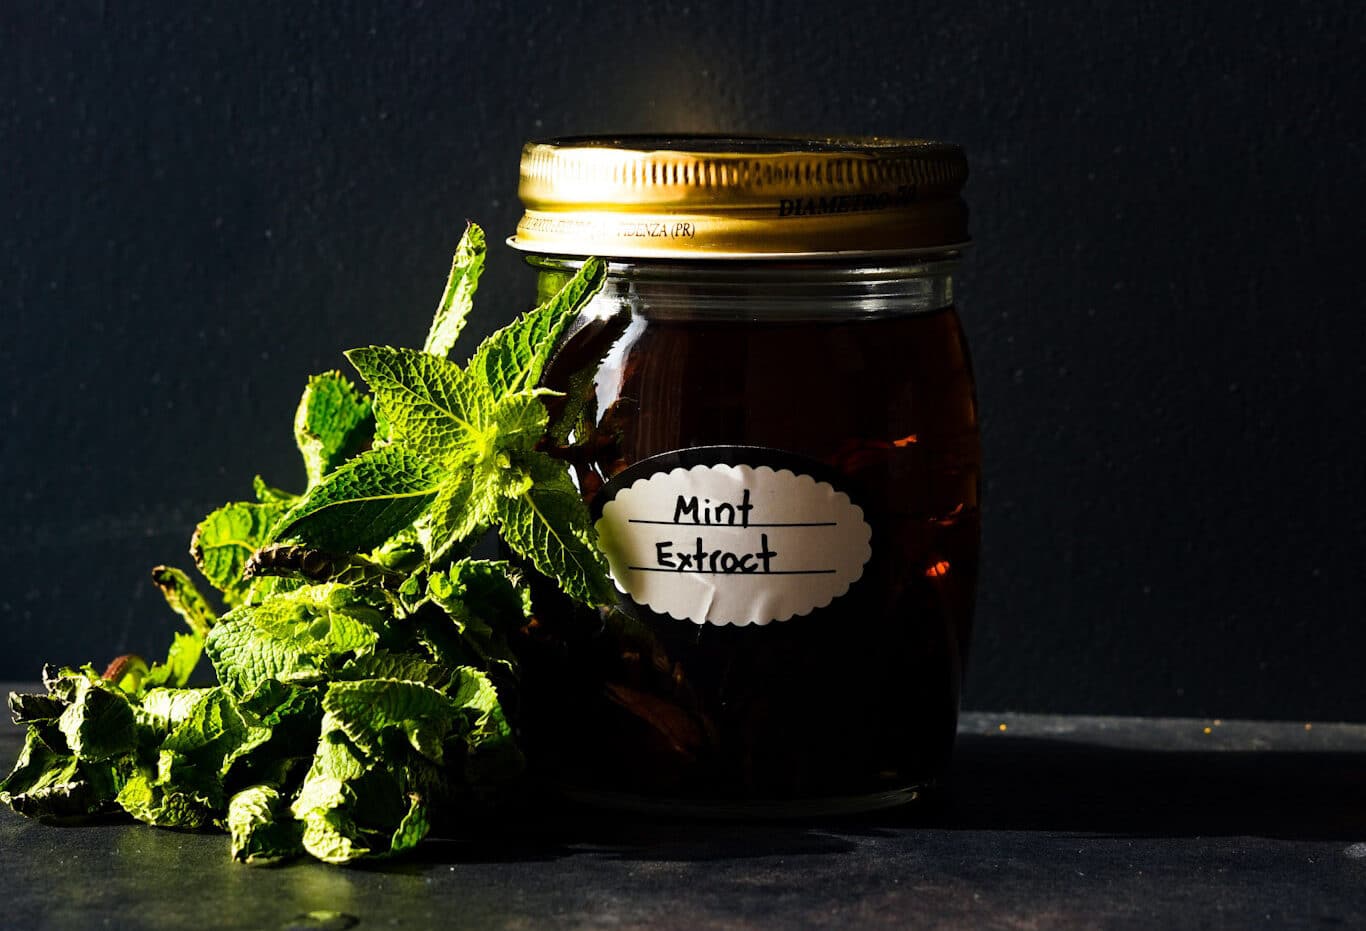
Mint-infused oils
Another method for preserving mint flavor is to extract its essential oils. Mint-infused oils can be used in a variety of culinary applications, such as salad dressings, marinades, or even homemade soaps and candles. To create mint-infused oil, you will need fresh mint leaves and a carrier oil, such as olive or coconut oil.
- Gently crush the mint leaves to release their essential oils and place them in a clean glass jar.
- Pour the carrier oil over the leaves, making sure they are completely submerged.
- Seal the jar and let it sit in a cool, dark place for at least two weeks, shaking the jar occasionally to allow the flavors to infuse.
- After the infusion period, strain the oil to remove the mint leaves, and voila! You have a delightful mint-infused oil that will add a burst of flavor to your dishes.
By exploring different methods for preserving mint flavor, you can prolong the enjoyment of this refreshing herb. Whether you choose to dry the leaves or extract the essential oils, these techniques will ensure that you always have a touch of mint at hand. So, why not try one of these preservation methods today and savor the vibrant taste of mint all year round?
Incorporating Mint into Homemade Beauty Products
Mint, with its refreshing aroma and cooling properties, can be a valuable addition to your homemade beauty products. Not only does it add a pleasant scent, but it also offers numerous benefits for your skin and hair.

- Mint’s menthol content provides a soothing and cooling effect on the skin, making it suitable for facial toners and sprays.
- Its antibacterial properties can combat acne and other skin blemishes, while antioxidants protect the skin from free radical damage.
- When used in shampoos or hair rinses, mint refreshes the scalp and helps control dandruff.
- Mint’s stimulating properties promote hair growth by increasing blood flow to hair follicles.
- Its natural astringent properties regulate excess oil production on the scalp, leaving hair clean and revitalized.
- To incorporate mint into homemade beauty products, infuse mint leaves into carrier oils like almond or jojoba oil to create mint-infused oils.
- These oils serve as bases for skincare products such as balms, lotions, and salves.
- Alternatively, prepare a mint tea infusion for facial steams or incorporate it into DIY face masks for a refreshing and rejuvenating experience.
Frequently Asked Questions about Harvesting and Storing Mint
Harvesting and storing mint can sometimes be a bit tricky, but with the right knowledge and techniques, you can ensure that your mint stays fresh and flavorful for as long as possible. To help you navigate through the process, here are some frequently asked questions about harvesting and storing mint.
Question 1: When is the best time to harvest mint?
The best time to harvest mint is in the morning, after the dew has dried but before the heat of the day sets in. This is when the essential oils in the leaves are at their peak, giving you the maximum flavor and aroma. Additionally, it’s recommended to harvest mint before it starts flowering, as flowering can lead to a decline in flavor. Keep in mind that the frequency of harvesting will depend on the growth rate of your mint plant, but a general rule of thumb is to harvest only about one-third of the plant at a time, allowing it to regenerate and continue growing.
Question 2: How should I store freshly harvested mint?
To store freshly harvested mint, start by trimming off any damaged or discolored leaves. Then, rinse the leaves thoroughly with cold water to remove any dirt or debris. Pat them dry gently with a clean towel or paper towel. Next, you can either wrap the mint leaves loosely in a damp paper towel and store them in a plastic bag in the refrigerator, or you can place them in a glass of water as you would with fresh flowers. Either way, make sure to change the water or dampen the paper towel every couple of days to keep the mint from wilting. Stored properly, fresh mint can last up to a week in the refrigerator.
Watch video for more information:
FAQ
Can I harvest mint leaves at any time of year?
Mint leaves can be harvested throughout the growing season, from spring to fall. However, it is best to harvest them before the plant flowers for the best flavor.
How do I know when mint leaves are ready to be harvested?
Mint leaves are ready to be harvested when the plant has reached a height of about 6 inches (15 cm) and has several sets of fully developed leaves.
What tools do I need to harvest mint?
To harvest mint, you will need a pair of clean, sharp garden shears or scissors. This will ensure clean cuts and minimize damage to the plant.
How should I cut mint stems for harvesting?
When harvesting mint, cut the stems about 1 inch (2.5 cm) above the ground to encourage new growth. Make sure to cut just above a set of leaves to promote branching.
Do I need to wash mint leaves before storage?
Yes, it is recommended to wash mint leaves before storing to remove any dirt, debris, or pests. Gently rinse the leaves under cold water and pat them dry with a clean towel.
Can I freeze mint leaves for long-term storage?
Yes, mint leaves can be frozen for long-term storage. Simply wash and dry the leaves, then place them in a freezer-safe container or bag. They can be used directly from the freezer in cooking or for making tea.
How long can I store mint in the refrigerator?
Mint can be stored in the refrigerator for up to 1 week. To extend its shelf life, place the mint stems in a glass of water, cover them loosely with a plastic bag, and store them in the refrigerator.
How can I incorporate mint into homemade beauty products?
Mint can be used in homemade beauty products such as scrubs, soaps, and lotions. You can infuse mint leaves in oil or use dried mint leaves to add fragrance and soothing properties to your DIY creations.
Can I use dried mint leaves to make mint tea?
Yes, dried mint leaves can be used to make mint tea. Simply steep a teaspoon of dried mint leaves in hot water for about 5-10 minutes, strain, and enjoy.
How else can I preserve the flavor of mint?
Apart from drying and freezing, you can also preserve the flavor of mint by making mint-infused vinegars or syrups. These can be used in various culinary and cocktail recipes.

Studied Agricultural Engineering-Plant Protection at University of California, Davis.
Head of Content writing team at Southelmontehydroponics.com