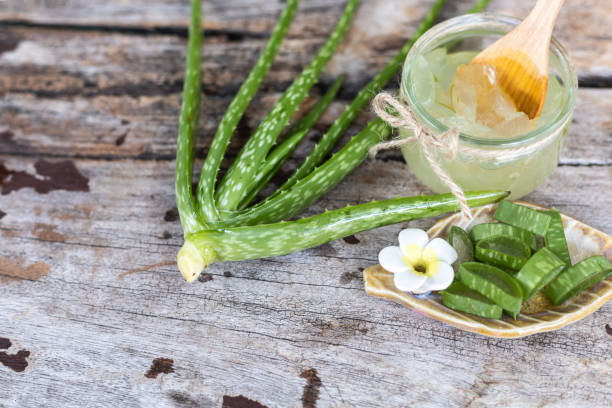
Propagating Aloe Plants: A Simple Guide
Table of Contents
Preparing Your Aloe Plant for Propagation
Preparing your aloe plants for propagation is an essential step in ensuring successful growth of new plants. First and foremost, it is crucial to select a healthy and mature aloe plant for propagation. Look for a plant that is at least three years old, as younger plants may not have developed enough offshoots or pups to propagate. Additionally, choose a plant that is disease and pest-free, as any existing issues could potentially affect the new propagated plants.
Once you have chosen the right plant, it is important to prepare it for propagation by providing optimal growing conditions. Aloe plants thrive in bright, indirect sunlight, so ensure that the chosen plant is placed in a spot where it can receive adequate light. Moreover, maintaining a temperature range between 70°F and 80°F (21°C to 27°C) will promote healthy growth and development. Lastly, it is crucial to water the plant sparingly prior to propagation to avoid over-watering, as excess moisture can hinder the success of propagation. Taking these precautions will help set the stage for successful propagation and the growth of healthy new aloe plants.
Selecting the Right Time for Propagation aloe plants
Selecting the right time for propagation is crucial in ensuring the success of your aloe plant’s growth and development. Timing plays a significant role in determining the readiness of the plant to reproduce and produce healthy offspring. Aloe plants typically propagate best during the spring and early summer months when they are entering their active growth phase. This period is characterized by increased metabolic activity, which promotes faster root development and overall plant vigor.
It is important to note that propagation should be avoided during the dormant winter months as the aloe plant’s growth slows down significantly. Attempting propagation during this time may result in poor root development and increased vulnerability to diseases and pests. By waiting for the optimal time to propagate, you give your aloe plant the best chance to thrive and produce strong, healthy offspring.
Choosing the Ideal Propagation Method
Choosing the ideal propagation method is an important step in successfully multiplying your aloe plants. There are several methods to choose from, each with its own advantages and considerations.
One common method is through offset or pup division. This involves separating the small offshoots that form around the base of the parent plant. Carefully dig around the base of the aloe plant to expose the offshoots, ensuring that you do not damage the roots. Once the offshoots are visible, gently separate them from the parent plant using a clean and sharp knife. This method is ideal for aloe plants that have produced multiple healthy offshoots.
Another popular method is leaf cutting propagation. This involves cutting a healthy leaf from the parent plant and allowing it to callus for a few days. Once the cut end has callused, place it in a well-draining potting mix and water sparingly. With time, new roots will develop and a new plant will emerge. This method is suitable for larger aloe plants with thick leaves that can be easily cut without causing harm to the parent plant.
Both methods have their advantages and it ultimately depends on your specific circumstances and preferences. It is important to choose a method that suits your plant’s current condition and ensures the best chances of success. By carefully considering the different propagation methods, you can ensure the healthy growth and future prosperity of your aloe plant collection.
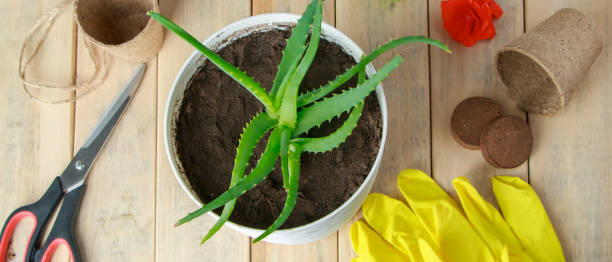
Gathering the Necessary Materials for Propagation
When it comes to propagating your aloe plant, it is essential to gather all the necessary materials beforehand. This will ensure that you have everything you need to successfully carry out the propagation process. Here are the key materials you will need:
Here’s a table summarizing the essential tools and materials for propagating aloe plants:
| Item | Description |
|---|---|
| Sharp, sterilized knife or garden shears | Use a clean and sharp cutting tool to separate offshoots or pups from the parent plant without causing damage. |
| Clean, dry containers or pots | Prepare appropriately sized containers with adequate drainage holes to plant the newly propagated aloe plant. |
| Well-draining potting mix | Choose a potting mix that provides good drainage for aloe plants, such as a pre-made cactus and succulent mix or a DIY mix with sand, perlite, and peat moss. |
| Rooting hormone (optional) | Consider using a rooting hormone to promote root growth and increase the chances of successful propagation. |
| Water spray bottle | Use a water spray bottle to mist the propagating aloe plant and provide necessary moisture during the rooting process. |
By gathering these materials in advance, you will be fully prepared to embark on the journey of propagating your aloe plant successfully. Remember, having everything you need at hand will make the process more efficient and increase the likelihood of a positive outcome.
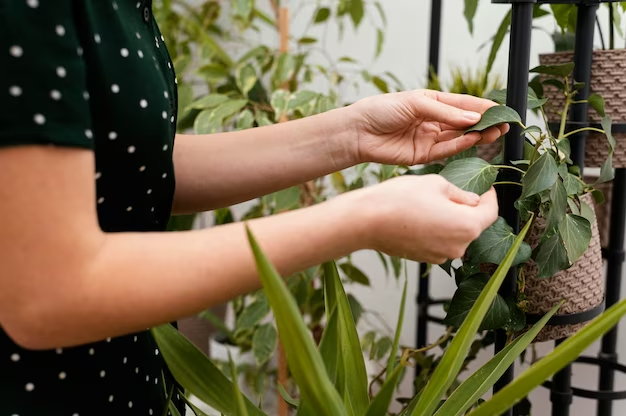
Identifying a Healthy Offshoot or Pup for Propagation
To ensure successful aloe plant propagation, it is crucial to identify a healthy offshoot or pup. This will give you the best chances of producing a thriving new plant. When considering an offshoot or pup for propagation, look for robust growth and a vibrant green color. A healthy offshoot should have several well-formed leaves and a strong root system.
Inspect the offshoot or pup closely for any signs of disease or pest infestation, such as discoloration, spots, or wilted leaves. It is essential to choose an offshoot that is free from any visible damage or abnormalities. Furthermore, the offshoot or pup should have a good size, typically measuring around one-third the size of the parent plant. Selecting a healthy offshoot or pup will ensure a strong foundation for successful propagation and the growth of a thriving new aloe plant.
Preparing the Offshoot or Pup for Separation
When preparing an offshoot or pup for separation from the parent plant, it is crucial to ensure that both the offshoot and the parent plant are in optimal health. This will increase the chances of successful separation and successful propagation. Before attempting to separate the offshoot, it is important to closely examine it for any signs of disease, pests, or damage. Inspecting the offshoot thoroughly will help identify any potential issues that may affect its ability to thrive on its own.
Additionally, it is advisable to provide the offshoot with proper care and nutrition in the weeks leading up to separation. This includes regular watering and fertilization, as well as providing adequate sunlight and temperature. By taking these steps, gardeners can increase the chances of a healthy and successful separation of the offshoot from the parent plant.
Once the offshoot has been inspected and deemed suitable for separation, the next step is to prepare it physically for the process. This involves carefully loosening the soil around the offshoot, ensuring that it can be easily separated without damaging its delicate root system. It is crucial to handle the offshoot with care, as any damage to its roots can significantly hinder its ability to establish itself as a new, independent plant.
To aid in the separation process, the gardener can use a clean, sharp knife or a pair of garden shears to cut through any connecting roots or shoots. It is important to ensure that the tools used for separation are disinfected beforehand to minimize the risk of introducing pathogens or causing infection. By following these steps, gardeners can prepare the offshoot or pup for separation successfully and increase its chances of thriving as a new plant.
Ensuring Proper Sanitization for Successful Propagation
Proper sanitization is a crucial step in the successful propagation of aloe plants. Ensuring a clean and sanitized environment helps prevent the spread of diseases and pests, increases the chances of healthy growth, and maximizes the overall success of your propagation efforts.
To begin, it is essential to thoroughly clean all tools and equipment that will come into contact with the parent plant, offshoots, or pups. This includes pruning shears, knives, and any other cutting instruments. Sterilizing these tools will help eliminate any potential pathogens, bacteria, or fungi that could be transferred to the new plants.
One effective method of sanitization is to soak the tools in a mixture of 1 part bleach to 9 parts water. After soaking for approximately 10 minutes, rinse the tools thoroughly with clean water to remove any residue. Alternatively, you can also use rubbing alcohol or hydrogen peroxide to disinfect your tools. Whichever method you choose, ensure that the tools are completely dry before using them to prevent any potential damage to the plants.
In addition to sanitizing tools, it is important to clean the surrounding work area as well. Remove any debris or fallen plant material that may harbor pests or diseases. Wipe down surfaces with a mild disinfectant to eliminate any potential contaminants.
By taking these necessary precautions and maintaining a sanitized environment, you can significantly increase the likelihood of successful propagation and ensure the health and vitality of your newly propagated aloe plants.
Dividing the Offshoot or Pup from the Parent Plant
To successfully propagate your aloe plant, it is crucial to know the proper technique for dividing the offshoot or pup from the parent plant. This process requires precision and care to ensure the survival and healthy growth of the newly separated plant.
Before you begin dividing the offshoot or pup, make sure that both the parent plant and the offshoot are healthy and free from any diseases or pests. Inspect the offshoot to ensure it has developed sufficient roots and has grown to a suitable size for separation. The ideal time for dividing the offshoot is when it has formed at least three to four leaves, indicating its ability to sustain itself after separation.
To start the division process, gently loosen the soil around the base of the offshoot, taking care not to damage the roots. Slowly and steadily pull the offshoot away from the parent plant, ensuring that you have a clean separation without causing any injuries to either plant. It is important to be patient during this step, as rushing might result in damage to the offshoot or the parent plant’s roots.
Once the offshoot is separated, allow the cut end to callus for a day or two. This callusing period will help prevent any rot or infection and allow a protective barrier to form over the cut area. By doing this, you are giving the offshoot the best chance for successful propagation.
Remember, dividing the offshoot or pup from the parent plant is a delicate process that requires careful handling and patience. By following these steps, you can ensure a successful transition for the offshoot from its parent and give it the best start in its new pot.
Allowing the Cut to Callus for Optimal Propagation
Once you have successfully divided the offshoot or pup from the parent plant, it is important to allow the cut to callus before further propagation steps. This crucial step in the process promotes optimal propagation success by creating a protective barrier that prevents moisture loss and potential infection.
To allow the cut to callus, simply place it in a dry and well-ventilated area for a period of time. This can range from a few days to a couple of weeks, depending on the size of the cut and environmental conditions. During this time, it is essential to avoid exposing the cut to direct sunlight, excessive moisture, or extreme temperature fluctuations. By allowing the cut to callus undisturbed, you are giving it the opportunity to form a protective layer of tissue that will help support its growth in the next stages of propagation.
Remember, patience is key during this phase. Rushing the process may lead to poor callus formation, weakening the cutting and potentially hindering its chances of rooting successfully. By providing the cut with the ideal conditions for callusing, you are setting the stage for a healthy and thriving newly propagated aloe plant.
Choosing the Right Potting Mix for the New Plant
When it comes to choosing the right potting mix for your newly propagated aloe plant, there are a few important factors to consider. First and foremost, you’ll want to select a mix that provides excellent drainage. Aloe plants do not thrive in overly wet conditions, so a well-draining potting mix is essential to prevent root rot and other water-related issues.
Additionally, opt for a mix that is lightweight and airy. This will allow for proper aeration of the roots and help prevent compaction, which can hinder root growth. Look for a mix that includes ingredients such as perlite or vermiculite, as these will help create a more porous and breathable environment for your plant.
While there are pre-packaged potting mixes available on the market specifically formulated for succulents and cacti, you can also create your own mix by combining equal parts of regular potting soil, perlite, and coarse sand. This DIY mix provides the ideal balance of water drainage, aeration, and nutrient retention that aloe plants require for optimal growth.
By selecting the right potting mix for your new aloe plant, you’ll be setting it up for success right from the start. Remember, a well-draining and lightweight mix will help promote healthy root development and overall plant growth.
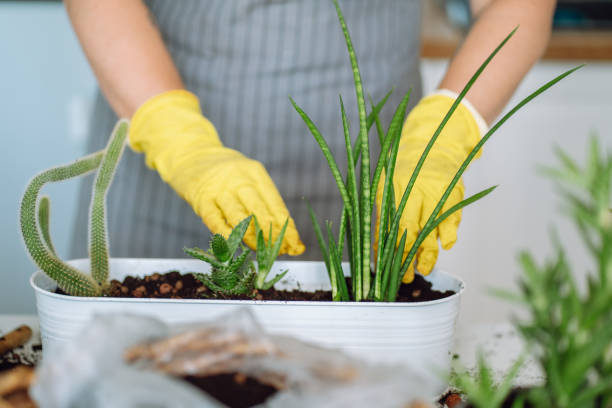
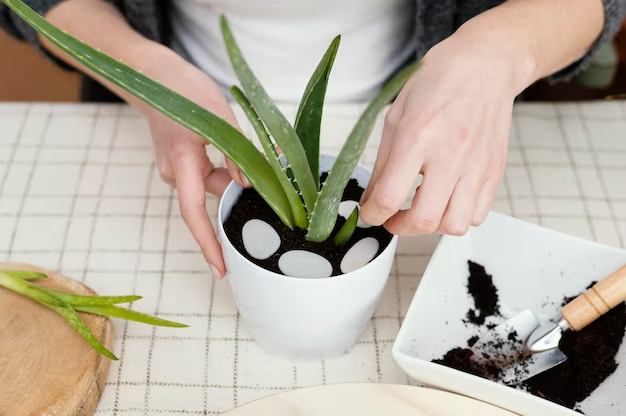
Planting the Offshoot or Pup in the Pot
Once you have prepared the offshoot or pup for separation, it is time to plant it in a pot. Choosing the right pot is crucial for the successful growth of your propagated aloe plant. A pot that is too small may restrict the roots’ growth, while a pot that is too large can lead to excessive moisture retention, which can cause root rot.
When selecting a pot, opt for one that is slightly larger than the offshoot or pup’s root system. It should have drainage holes to allow excess water to escape. This will help prevent waterlogged soil, which can be detrimental to the plant’s health. Additionally, consider using a terracotta or clay pot, as these materials allow for better airflow and can help regulate soil moisture levels.
Once you have chosen the right pot, fill it with a well-draining potting mix. A mixture composed of equal parts sand, perlite, and potting soil specifically formulated for succulents is an excellent choice. This blend provides the ideal balance of water retention and drainage for aloe plants. Gently place the offshoot or pup in the center of the pot, ensuring that the roots are spread out and covered with soil. Avoid burying the plant too deeply, as this can hinder its growth. Finally, lightly press the soil around the base of the plant to secure it in place.

Caring for the Newly Propagated Aloe Plant
Caring for the Newly Propagated Aloe Plant
Once you’ve successfully propagated your aloe plant, it’s essential to provide the right care to ensure its healthy growth and development. Proper care will help the newly propagated plant establish strong roots and thrive in its new environment. Here are some important tips to keep in mind when caring for your newly propagated aloe plant.
First and foremost, provide adequate sunlight and temperature for the plant. Aloe plants love bright, indirect sunlight, so place your propagated plant in a location where it can receive plenty of light throughout the day. Keep in mind that direct sunlight can cause the leaves to turn yellow or brown, so finding the right balance is crucial. Additionally, maintain a temperature range of 60-75°F (15-24°C), as aloe plants prefer warm conditions.
Watering and fertilizing are also important aspects of caring for your propagated aloe plant. Aloe plants are succulents and store water in their leaves, so they don’t require frequent watering. Allow the soil to dry out completely between waterings and then thoroughly soak the soil, ensuring excess water drains out. Overwatering can lead to root rot and other issues, so it’s important to strike the right balance. As for fertilization, aloe plants benefit from a balanced fertilizer diluted to half strength, applied every few months during the growing season.
By following these care guidelines, you’ll set your newly propagated aloe plant up for success. Remember to monitor your plant closely for signs of root development and any potential issues that may arise. With proper care and attention, your propagated aloe plant will grow into a beautiful and healthy addition to your garden or indoor space.
Providing Adequate Sunlight and Temperature for Growth
Providing adequate sunlight and temperature for growth is essential in ensuring the healthy development of your newly propagated aloe plant. Aloe vera plants thrive in bright, indirect sunlight, making it crucial to place your plant in a location that receives ample natural light. A south-facing window is often the perfect spot as it provides the right amount of brightness without subjecting the plant to harsh, direct sunlight.
While aloe vera plants are known for their ability to tolerate a wide range of temperatures, it is important to maintain a consistent temperature range for optimal growth. Ideally, the temperature should be between 70°F and 85°F (21°C and 29°C) during the day, with a slight drop of around 10°F (5°C) at night. These temperature conditions mimic the plant’s natural habitat and promote healthy growth.
To monitor and regulate the temperature, it is recommended to use a thermometer placed near the plant. This will help you keep track of any significant fluctuations that may affect its health. Additionally, avoid placing your aloe plant near drafts or areas with extreme temperature changes, such as near vents or windows that are frequently opened.
By providing your newly propagated aloe plant with the right balance of sunlight and temperature, you’ll create an environment where it can thrive and flourish. However, it is crucial to keep in mind that different varieties of aloe may have varying sunlight and temperature requirements. Therefore, it is always best to refer to specific care instructions for the particular type of aloe you are propagating.
Watering and Fertilizing the Propagated Aloe Plant
Watering and fertilizing are crucial aspects of caring for a propagated aloe plant. Properly following these practices will ensure the healthy growth and development of the new plant.
When it comes to watering, it is important to strike the right balance. Aloe plants are succulents that store water in their leaves, so overwatering can lead to root rot and other problems. On the other hand, underwatering can cause the plant to become dehydrated and stunted. To determine when to water, it is best to observe the soil moisture level. Stick your finger about an inch into the soil, and if it feels dry, it’s time to water.
It is important to note that aloe plants prefer well-draining soil, so make sure the pot has adequate drainage holes to prevent waterlogged conditions. Additionally, use room temperature water to prevent shocking the roots. Aim for watering once every two weeks during the growing season and reduce frequency during the dormant period.
Fertilizing is another important aspect of caring for a propagated aloe plant. While aloe plants are known for their resilience and ability to thrive in nutrient-poor conditions, providing them with the right nutrients can support their growth and overall health. Use a balanced fertilizer specifically designed for succulents, with an NPK ratio of around 10-10-10 or lower. Apply the fertilizer sparingly, following the instructions on the label.
Overfertilizing can lead to burning of the roots and foliage, so it is always better to err on the side of caution. During the active growth period in spring and summer, fertilize once every two to four weeks. Reduce or stop fertilization during the winter months when the plant goes into dormancy. Regular monitoring of the plant’s response to fertilization will help determine the ideal frequency and amount.
By providing the proper moisture and nutrients, you can ensure the long-term health and vitality of your propagated aloe plant. However, it is important to note that each plant is unique, and factors such as the environment, temperature, and size of the plant can affect watering and fertilizing requirements. Keeping a close eye on the plant’s appearance and condition will allow you to make adjustments as needed to support optimal growth.
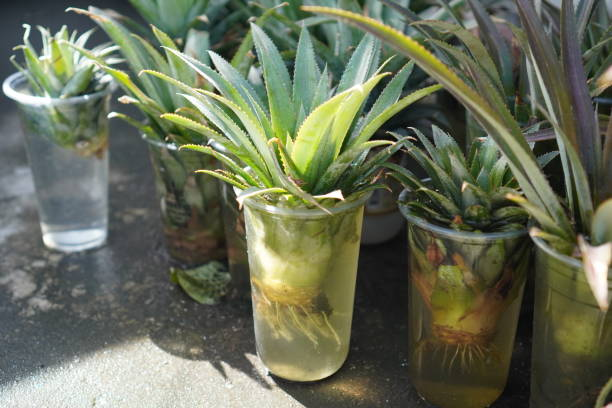
Monitoring for Signs of Root Development
Once you have successfully divided the offshoot or pup from the parent plant and planted it in a pot, the next step is to monitor for signs of root development. Root development is a crucial phase in the propagation process as it ensures the new plant establishes a strong and healthy root system.
One of the first signs to look for is the appearance of white, thread-like structures emerging from the base of the plant. These structures, known as root hairs, are responsible for absorbing water and nutrients from the soil. The presence of root hairs indicates that the plant’s roots are actively growing and establishing themselves in their new environment. To check for root hairs, gently remove the plant from its pot and carefully examine the base of the plant and the surrounding soil. If you notice numerous white, hair-like structures, it is a good indication of successful root development.
Troubleshooting Common Propagation Issues
When it comes to propagating aloe plants, there are a few common issues that can arise. One such issue is root rot. Root rot occurs when the roots of the plant become waterlogged and start to decay. This can be caused by overwatering or poor drainage. To prevent root rot, it is important to ensure that the soil is well-drained and that you are not overwatering the plant. Additionally, using a well-draining potting mix can help prevent water from pooling at the bottom of the pot.
Another common issue when propagating aloe plants is transplant shock. Transplant shock occurs when the plant is moved from one environment to another and struggles to adjust. This can result in wilting, leaf discoloration, or slowed growth. To minimize transplant shock, it is important to gradually acclimate the plant to its new environment. Start by placing the newly propagated aloe plant in a shaded area for a few days, gradually increasing the amount of sunlight it receives. Additionally, make sure to water the plant thoroughly after transplanting and monitor its moisture levels closely to ensure it does not become over or underwatered.
How do I know if my aloe plant is ready for propagation?
You can tell if your aloe plant is ready for propagation by checking for healthy offshoots or pups that have formed near the base of the parent plant.
What is the best time of year to propagate my aloe plant?
The ideal time for propagation is during the spring or early summer when the plant is actively growing.
Can I propagate my aloe plant using multiple methods?
Yes, you can choose between methods such as division, leaf cuttings, or offsets to propagate your aloe plant.
What materials do I need for aloe plant propagation?
You will need a clean cutting tool, a suitable potting mix, a new pot, and rooting hormone (optional) for aloe plant propagation.
How do I determine if an offshoot or pup is healthy enough for propagation?
Look for offshoots or pups that have grown to a reasonable size and have their own root system, indicating their ability to survive on their own.
Is it necessary to sanitize the tools before propagating my aloe plant?
Yes, it is important to sanitize your cutting tool to prevent the spread of any potential diseases or infections to the parent plant or the propagated offshoot.
How do I separate the offshoot or pup from the parent plant?
Use a clean and sharp cutting tool to carefully separate the offshoot or pup from the parent plant, ensuring that it has its own roots.
Why is it important to allow the cut to callus before planting the offshoot or pup?
Allowing the cut to callus helps to protect the wound from potential infections and promotes healthy root development in the propagated plant.
What type of potting mix should I use for my newly propagated aloe plant?
Use a well-draining potting mix specifically designed for succulent plants to ensure proper growth and prevent root rot.
How often should I water and fertilize my propagated aloe plant?
Water your propagated aloe plant only when the soil is completely dry, and fertilize it sparingly to avoid overfeeding.
What signs should I look for to determine if the roots of my propagated aloe plant are developing?
Look for new growth and signs of stability in the propagated plant, indicating that the roots are successfully developing and providing the necessary nutrients.
Beck Wakeford is a dedicated writer at SouthElMonteHydroponics, with a fervent enthusiasm for agriculture and technological innovation. Armed with a degree in Agricultural Engineering from a leading university, Beck specializes in hydroponic systems design, automation, and optimization. Their passion for merging traditional farming with cutting-edge technology drives them to explore novel solutions for sustainable food production. Beck’s expertise and keen interest in the intersection of engineering and agriculture make them a valuable asset in the quest for efficient and eco-friendly farming practices. Through their writing, Beck aims to inspire others to embrace the potential of hydroponics in shaping a more sustainable future.