Turnips Unveiled: Planting, Growing, and Caring
Table of Contents
The Origins of Turnips: A Brief History
Turnips, scientifically known as Brassica rapa, are believed to have originated in ancient Central Asia and have been cultivated for over 4,000 years. These versatile root vegetables have a long and fascinating history that dates back to ancient civilizations. The exact timeline of their cultivation and domestication is not well-documented, but early records suggest that turnips were consumed by various ancient civilizations, including the Greeks, Romans, and Egyptians.
In ancient Greece, turnips were considered a staple crop and were highly valued for their nutritional properties. They were even used in religious ceremonies. The Romans, known for their advancement in agriculture, further developed turnip cultivation techniques and introduced them to other parts of Europe. These early civilizations recognized the turnip’s ability to thrive in different climates and soil conditions, making it an essential crop for their survival.
Despite being a prominent food source throughout history, turnips fell somewhat out of favor during the Middle Ages. This decline in popularity can be attributed to the introduction of other root vegetables, such as potatoes and carrots, which gained more attention due to their larger sizes and sweeter flavors. However, turnips remained an important crop in colder regions where they could withstand harsh climates and provided a reliable food source.
Today, turnips continue to be a popular vegetable in many cultures around the world. They are appreciated for their versatility in both culinary and agricultural practices. From delicious soups and stews to nutritious animal feed, turnips have secured their place as a valuable crop. With their rich history and enduring cultivation, turnips exemplify the longevity and adaptability of agricultural practices throughout human civilization.
Understanding Turnip Varieties: Different Types and Their Characteristics
Turnips, members of the Brassicaceae family, come in a variety of types, each with its own unique characteristics. Understanding the different turnip varieties is essential for any gardening enthusiast looking to cultivate this versatile vegetable.
One popular variety is the Purple Top White Globe turnip, known for its smooth skin and creamy-white flesh. This variety is often preferred for its mild and sweet flavor, making it suitable for both raw consumption and cooking. Another well-known type is the Tokyo Cross Hybrid, which boasts a distinctively cylindrical shape and a crispy texture. Tokyo Cross Hybrid turnips are especially favored for their tender and delicate flesh.
Other turnip varieties include the Scarlet Queen and the Golden Ball. The Scarlet Queen turnip displays a vibrant deep red exterior with a crisp and juicy white flesh. Its slightly spicy flavor adds a delightful kick to salads and stir-fries. On the other hand, the Golden Ball turnip is renowned for its golden yellow exterior and tender texture. Its mild and sweet flavor pairs well with a range of dishes, from roasts to soups.
Each turnip variety brings its own characteristics to the table, allowing gardeners to select the perfect type to suit their culinary preferences and gardening goals. Whether you’re looking for a milder flavor or a splash of color, the diverse range of turnip varieties ensures there’s an ideal option for every taste.
This Table Summarizes Various Turnip Varieties Along With Their Characteristics:
| Variety | Description | Maturity (Days) | Root Size | Flavor | Best Uses |
| Purple-Top White Globe | Round root with a purple top, matures in 50-55 days, spicy flavor, great for stews and braises. | 50-55 | 4-6 inches | Spicy | Stews, braises |
| Scarlet Queen | Bright red, slightly flat shape, matures in 40-45 days, sweet and crispy, pairs well with other ingredients. | 40-45 | Slightly flat | Sweet, crispy | Salads, colorful dishes |
| Baby Bunch | Small, 1-2 inches in diameter, crunchy flesh, white, purple, gold, and pink tops, tart apple and radish flavor. | Young harvest | Small | Tart apple, radish | Harvested young, no storage qualities |
| White Lady | Mild taste, pure white skin and flesh, tender greens are edible, matures in 30-35 days. | 30-35 | 2-3 inches | Mild | Edible greens, versatile in dishes |
| Gold Ball | Golden-yellow flesh and skin, mildly sweet, almond-like flavor, matures in 40-45 days. | 40-45 | 5-6 inches | Mild, sweet | Soups, stews (pairs well with carrots) |
| Manchester Market | Creamy-white, globe-shaped root (3-5 inches), light green top, edible leaves, peppery flavor. | Tennis ball size | 3-5 inches | Peppery | Stews, versatile in cooking |
| Tokyo Cross | Award-winning hybrid, ready in 30-35 days, white globe (3-6 inches), mild, sweet, and crispy flesh. | 30-35 | 3-6 inches | Mild, sweet, crispy | Spring to fall, garden or containers |
Selecting the Right Location: Ideal Conditions for Turnip Growt
The success of turnip growth greatly depends on selecting the right location and providing optimal conditions for their development. As a gardener, it is important to understand the ideal conditions needed for turnips to thrive.
Firstly, turnips prefer well-drained soil with a pH level between 5.5 and 7.5. This allows for proper root expansion and nutrient absorption. Conducting a soil test before planting can provide valuable insights into the pH level and nutrient composition of the soil, allowing necessary adjustments to be made. Additionally, turnips thrive in fertile soil that is rich in organic matter. Adding compost or well-rotted manure prior to planting can improve soil fertility and provide essential nutrients for the growing turnips.
Secondly, turnips require full sun exposure to ensure healthy and vigorous growth. Select a location in your garden that receives at least 6-8 hours of direct sunlight daily. Insufficient sunlight can hinder the growth and overall productivity of turnips. Furthermore, ensure that the chosen location is sheltered from strong winds, as excessive wind can damage the tender leaves and stunt the growth of turnip plants.
By carefully selecting a suitable location and providing ideal growing conditions, gardeners can set themselves up for success in turnip cultivation. The proper combination of well-drained soil, optimal pH levels, abundant sunlight, and protection from harsh winds will create an environment favorable for turnip growth. Remember, successful turnip cultivation relies on making informed decisions based on the specific needs of this versatile vegetable.
Preparing the Soil: Steps to Ensure Optimal Nutrient Content
For any successful turnip cultivation, proper soil preparation is crucial. Ensuring optimal nutrient content in the soil sets the stage for healthy growth and abundant yields. There are certain steps that gardening enthusiasts can take to achieve this goal.
The first step is to conduct a soil test to determine its nutrient composition. This can be done using a soil testing kit or by sending a sample to a professional laboratory. Analyzing the results will reveal any deficiencies or excessive levels of nutrients, allowing gardeners to make informed decisions about fertilization.
Once the nutrient levels are known, the next step is to amend the soil accordingly. Adding organic matter, such as compost or well-rotted manure, boosts the organic content and improves the soil’s structure. This improves water retention, promotes beneficial microbial activity, and enhances nutrient availability. Gardeners can use a tiller or garden fork to thoroughly mix the organic matter into the soil, ensuring even distribution. Additionally, incorporating sources of specific nutrients, such as bone meal for phosphorus or blood meal for nitrogen, can address specific deficiencies identified in the soil test.
By taking these steps in preparing the soil, gardeners can provide turnips with the ideal nutrient content they need to thrive. In doing so, they create a fertile environment that sets the stage for healthy growth, strong root development, and ultimately, a bountiful harvest.
Here is a tabular representation to the steps to prepare your soil for optimal nutrient content when growing turnips:
| Step | Description |
| 1. Soil Testing | Conduct a soil test before planting. Check for nutrients (especially phosphorus and potassium) and soil pH. Most turnips thrive in soil with a pH between 6.0 and 7.0. Knowing nutrient levels helps you apply the right amount of fertilizer. |
| 2. Cultivating the Soil | Remove weeds and grass from the area. Amend soil with organic matter like compost or well-rotted manure. Break up compacted soil using a garden fork or tiller. Ensure proper drainage by adding sand or gravel if needed. |
Remember, healthy soil is essential for a bountiful turnip harvest. Good soil provides necessary water and nutrients, allowing turnips to grow stronger and resist pests and diseases.
Sowing Turnip Seeds: Techniques for Successful Planting
When it comes to sowing turnip seeds, employing proper techniques is crucial for successful planting. The first step is to choose the right time for sowing, as turnips prefer cool weather. Generally, it is best to sow the seeds in early spring or late summer. During these seasons, the soil temperature is relatively low, which promotes higher germination rates.
Before planting, it is important to prepare the soil adequately. Start by removing any rocks or debris, as they can hinder the growth of turnip roots. Loosen the soil using a garden fork or a tiller to improve drainage and ensure proper root development. Additionally, adding organic matter such as compost or well-rotted manure can enhance the soil’s fertility and nutrient content, providing a beneficial environment for turnip seeds to thrive.
Using a well-designed garden planer will be handy when sowing turnip seeds. Create rows in the prepared soil, spacing them a few inches apart to allow ample room for growth. Aim to sow the seeds about half an inch deep, ensuring they are evenly spaced along the row. To assist with even distribution, you may consider using a seed spreader or creating furrows with a garden tool. Once the seeds are in place, lightly cover them with soil and gently pat it down to provide good seed-to-soil contact.
When sowing turnip seeds, it is essential to monitor the soil moisture to promote successful germination. Keep the soil evenly moist but not overly saturated, as excess water can lead to seed rot or fungal diseases. Regularly check the moisture levels and adjust watering accordingly, ensuring the soil remains damp but not waterlogged.
By following these techniques for sowing turnip seeds, you’ll set the stage for healthy plant growth and a bountiful harvest. Remember to select the appropriate time for sowing, prepare the soil diligently, and provide adequate moisture for optimum germination. With these steps completed, your turnip seeds will be off to a great start on their journey to becoming delicious and nutritious vegetables.
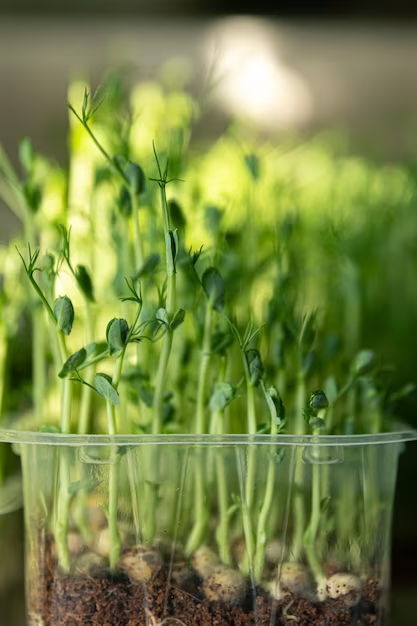
Thinning Out Seedlings: Promoting Stronger Growth and Development
Thinning out seedlings is a crucial step in promoting stronger growth and development for your turnip crop. As your seedlings emerge and start to grow, it’s important to make sure they have enough space to thrive. By thinning out the excess seedlings, you are allowing the remaining plants to access the necessary nutrients and sunlight, which promotes healthier and more robust growth.
When thinning out your turnip seedlings, it’s essential to be gentle and careful to avoid damaging the remaining plants. Start by identifying the strongest and healthiest-looking seedlings, as these are the ones that are most likely to produce a good yield. Remove the weaker or overcrowded seedlings by carefully pulling them out from the base, making sure not to disturb the surrounding soil or the roots of the other plants. Aim to leave a spacing of about 4-6 inches between each remaining turnip seedling to provide ample room for growth.
Thinning out seedlings not only helps in preventing overcrowding, but it also reduces competition for resources such as water and nutrients. This allows the remaining plants to develop a stronger root system, enabling them to access the essential nutrients from the soil more efficiently. Additionally, thinning out promotes better airflow and reduces the risk of diseases and pests, as it helps to create a healthier growing environment for the turnips. Remember, the goal of thinning is to provide the best conditions for your turnips to flourish, leading to a bountiful and successful harvest.
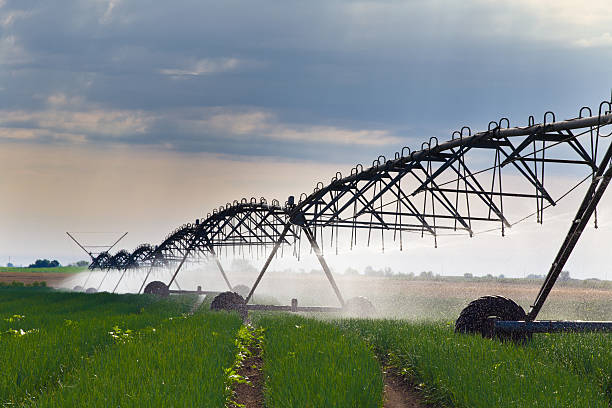
Watering Techniques: Proper Irrigation for Healthy Turnips
Watering techniques play a crucial role in ensuring the health and vitality of turnip plants. Proper irrigation not only meets the water requirements of turnips but also promotes robust growth and high yields. To achieve optimal results, it is essential to understand the specific needs of turnips when it comes to watering.
One important factor to consider is the stage of growth the plants are in. During the germination and early growth stages, turnips require consistent moisture to establish strong root systems. Keep the soil evenly moist, but avoid overwatering, as excessive moisture can lead to root rot and other fungal diseases. As the plants mature, gradually reduce the frequency of watering, allowing the soil to dry slightly between waterings. This helps encourage the development of a deep and extensive root system, which is crucial for nutrient uptake and overall plant health. By adjusting the watering schedule according to the growth stage, you can ensure that your turnips receive the right amount of moisture at each phase of their growth.
Fertilization Methods: Providing Essential Nutrients for Maximum Yield
Fertilization plays a crucial role in ensuring optimal growth and maximum yield of turnip crops. By providing essential nutrients, we can enhance the overall health and productivity of the plants. One of the key elements needed for turnip cultivation is nitrogen, which aids in the development of foliage and root formation. To meet the nitrogen requirements, incorporating a balanced nitrogen fertilizer into the soil is recommended. The amount of nitrogen needed can vary depending on factors such as soil quality and existing nutrient levels. It is advisable to conduct a soil test before fertilizing to determine the precise nitrogen requirements for your turnip crop. This will help avoid over or under-fertilization, which may negatively affect plant growth and yield.
In addition to nitrogen, other nutrients like phosphorus and potassium are also vital for turnip cultivation. Phosphorus aids in root development, while potassium strengthens plants and helps them withstand environmental stressors. Incorporating a phosphorus-rich fertilizer during the early stages of growth can promote healthy root development and overall plant vigor. Potassium can be added to the soil during different growth stages to ensure proper nutrient balance and enhance crop resistance to pests, diseases, and adverse weather conditions. Using a complete fertilizer with the appropriate ratios of nitrogen, phosphorus, and potassium will provide the necessary nutrients for maximum yield and quality of turnips.
Remember, it is important to follow the recommended application rates and timing guidelines provided by reputable sources or local agricultural authorities. Over-fertilization can lead to nutrient runoff, water pollution, and plant burn, while insufficient fertilization may result in nutrient deficiencies and poor growth. By understanding the specific nutrient requirements of turnips and implementing proper fertilization methods, we can optimize our crops’ health and productivity, ultimately reaping the rewards of a bountiful harvest.
Managing Weeds: Strategies to Keep Your Turnip Patch Weed-Free
Weeds can be a common nuisance for turnip growers, as they compete for precious nutrients and sunlight. However, by implementing effective weed management strategies, you can ensure that your turnip patch remains weed-free and promotes healthy growth. One key strategy is regular cultivation of the soil to disrupt weed growth and eliminate any emerging weeds. This can be achieved by using a hoe or cultivating tool to loosen the soil surface and uproot any weeds that have begun to sprout. Cultivating the soil also helps to break up and prevent the formation of large clumps, improving the soil structure and promoting better water and nutrient absorption for your turnip plants.
Another effective strategy for weed control in turnip patches is mulching. Applying a layer of organic mulch around the plants can help to smother existing weeds and prevent new ones from growing. Organic mulch not only suppresses weed growth but also helps to retain soil moisture and regulate soil temperature, creating a favorable environment for turnip growth. When using mulch, be sure to properly apply it around the turnip plants, leaving a small gap around the stems to prevent moisture buildup and potential rot. Additionally, make sure to regularly inspect your turnip patch and remove any weeds that manage to penetrate the mulch layer, as timely weed removal is crucial for preventing weed competition and maintaining a weed-free environment for optimal turnip growth.
Pest and Disease Control: Preventing and Treating Common Issues
Pest and disease control is a vital aspect of ensuring the health and productivity of your turnip crop. Prevention is always better than cure, and implementing proactive measures can significantly reduce the risk of pests and diseases taking hold in your garden. Proper sanitation practices, regular monitoring, and timely intervention are key to maintaining a thriving turnip patch.
One common pest that can wreak havoc on turnip plants is the flea beetle. These small, jumping insects feed on the foliage, leaving behind numerous tiny holes that weaken the plants. To prevent flea beetle damage, it is important to employ various strategies. Firstly, consider using floating row covers to physically block the beetles from reaching your plants. Additionally, companion planting with aromatic herbs like mint or basil can deter flea beetles due to their strong scent. Lastly, applying a layer of organic insecticidal soap or neem oil can effectively control flea beetle populations without harming beneficial insects.
Another common ailment that affects turnip plants is clubroot, a soil-borne disease caused by a fungal pathogen. Clubroot can cause stunted growth, yellowing leaves, and swollen, deformed roots. To prevent clubroot, ensure that you are practicing good crop rotation, as the pathogen can survive in the soil for several years. Additionally, maintaining proper soil pH (around 6.5 to 7.0) can help inhibit clubroot development. If you suspect clubroot in your garden, remove and destroy infected plants, and avoid planting susceptible crops in that area for at least three to four years. Using resistant turnip varieties is also a proactive measure to mitigate the impact of clubroot.
Here’s a Table Summarizing Pest and Diseases Control for Turnips:
| Issue | Control Measures |
| Diseases | Sanitary Practices: Maintain cleanliness to prevent disease spread. |
| Seed Treatment: Treat seeds with hot water before planting. | |
| Crop Rotation: Rotate crops to minimize disease buildup in the soil. | |
| Good Drainage: Plant in well-draining soil to avoid waterlogged conditions. | |
| Weed Management: Remove cruciferous weeds that can harbor fungal pathogens. | |
| Black Rot Disease | Use disease-free seeds or resistant varieties if possible. |
| Keep the area around turnips weed-free. | |
| Sanitize garden equipment to prevent disease spread. | |
| Water plants at their roots (drip irrigation is ideal). | |
| Remove and destroy any cruciferous crop debris. | |
| Apply bactericides at the first sign of leaf infection. | |
| Common Pests | Aphids: Use tolerant varieties and consider insecticides if infestation is high. |
| Wireworms and Root Maggots: Monitor and take appropriate action. |
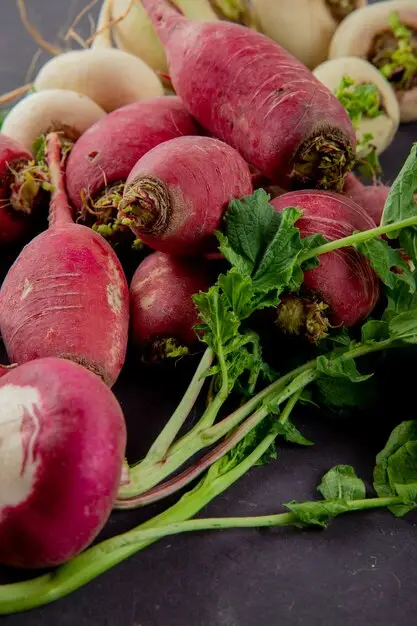
Harvesting Turnips: Determining the Perfect Time to Reap the Rewards
Determining the perfect time to harvest turnips is crucial for enjoying their full flavor and nutritional value. Unlike some vegetables, turnips can be harvested at various stages of maturity to cater to individual preferences. However, understanding the signs that indicate optimal ripeness is essential for a satisfying harvest.
One key indicator of a mature turnip is its size. When turnips reach their peak size, they are generally ready for harvesting. Depending on the variety, this can range from small and round to larger, elongated shapes. It is important not to let turnips grow too large, as they may become tough and fibrous.
Another factor to consider when determining harvest time is the turnip’s texture. Gently press the topsoil around the turnip to check for firmness. The root should feel solid and resistant, indicating its maturity. Additionally, the color of the turnip can provide a clue as to its readiness. Most turnip varieties develop vibrant colors, such as white, purple, or red, when fully mature. Paying attention to these visual cues will ensure you harvest turnips at their peak flavor and texture, allowing you to reap the rewards of your gardening endeavors.
Storing Turnips: Preserving Freshness for Extended Use
Properly storing turnips plays a crucial role in preserving their freshness and extending their shelf life. By following the right techniques, you can ensure that these versatile root vegetables remain crisp and flavorful for an extended period. One essential aspect of turnip storage is to remove the greens from the roots. While turnip greens are edible and nutritious, they can draw moisture and nutrients away from the root, causing it to deteriorate more quickly.
After separating the greens, it is essential to store turnips in a cool and dark place to maintain their quality. A root cellar, basement, or refrigerator are ideal options. The temperature for turnip storage should be maintained between 32°F and 40°F (0°C to 4°C) with a relative humidity level of 90 to 95 percent. This environment helps slow down the metabolic activity of the turnips, preventing them from sprouting or wilting prematurely. Consider using perforated plastic bags or containers to keep the turnips slightly moist without suffocating them, as they require a little bit of humidity to prevent excessive dehydration. Remember to check your stored turnips regularly and discard any that show signs of rot or decay to avoid contaminating the others.
Utilizing Turnip Greens: Creative Ways to Enjoy the Leafy Tops
When it comes to turnips, many people focus solely on the roots, overlooking the fact that the leafy tops are also incredibly nutritious and flavorful. Utilizing turnip greens in your cooking not only adds a burst of vibrant color to your dishes but also provides an array of health benefits. These leafy greens are packed with vitamins A, C, and K, as well as essential minerals like calcium and iron.
One creative way to enjoy turnip greens is by incorporating them into salads. Their slightly bitter taste pairs well with sweet and tangy dressings. Simply wash and chop the greens, then toss them with your favorite salad ingredients such as cherry tomatoes, thinly sliced red onions, and crumbled feta cheese. Drizzle with a light vinaigrette and you have a refreshing and nutrient-rich salad that is sure to impress.
Turnip Recipes: Delicious Dishes Featuring This Versatile Vegetable
Turnips are a versatile vegetable that can be incorporated into a variety of delicious dishes. Whether cooked as a main ingredient or used as a flavorful addition, turnips offer a unique flavor profile that can enhance any recipe. One popular way to enjoy turnips is by roasting them in the oven. Simply toss cubed turnips with olive oil, salt, and pepper, then spread them out on a baking sheet and roast at 400°F (200°C) for about 25-30 minutes, or until golden brown and tender. The roasting process brings out the natural sweetness of the turnips and results in a deliciously caramelized flavor.
Another tasty option is to mash turnips as a healthier alternative to traditional mashed potatoes. Boil peeled and cubed turnips until tender, then drain and mash them with butter, salt, and pepper. For added creaminess, you can also mix in a bit of Greek yogurt or sour cream. The result is a flavorful and nutritious side dish that pairs well with a variety of main courses. So next time you’re looking to add some variety to your meals, don’t overlook the humble turnip – it’s a versatile ingredient that can take your culinary creations to the next level.

Crop Rotation: Ensuring Long-Term Success with Turnip Cultivation
Crop rotation is a fundamental practice that plays a vital role in ensuring the long-term success of turnip cultivation. By systematically alternating the crops grown in a particular area, gardeners can effectively minimize the risk of pests and diseases, enhance soil fertility, and achieve optimal yields. This practice has been employed for centuries and is rooted in sound agricultural principles.
One of the key benefits of crop rotation for turnip cultivation is the reduction of pests and diseases. By rotating turnips with other unrelated crops, such as legumes or grains, gardeners can break the life cycles of pest organisms that specifically target turnips. This disruption prevents the buildup of pests in the soil, reducing the need for chemical interventions and promoting a healthier growing environment.
Moreover, crop rotation helps optimize soil fertility. Different crops have varying nutrient requirements, and rotating turnips with legumes, for example, can enhance soil nitrogen levels naturally. This occurs when legume crops fix atmospheric nitrogen into the soil through a symbiotic relationship with specific bacteria. Subsequent turnip crops can then benefit from the enriched nitrogen levels, resulting in increased growth and improved overall yields.
Furthermore, crop rotation helps break up pest and disease cycles by interrupting their life cycles and providing a period of rest for the soil, reducing the risk of contamination and depletion. It also aids in weed management, as certain crops can suppress or inhibit the growth of specific weed species. By strategically planning crop rotations, turnip growers can maintain a more balanced and sustainable ecosystem, ultimately ensuring long-term success in their cultivation endeavors.
Troubleshooting Guide: Common Problems and Solutions for Turnip Growers
One common problem that turnip growers may encounter is poor germination. If your turnip seeds are not sprouting as expected, there could be several factors at play. One possibility is that the soil temperature is not within the optimal range for germination, which is typically between 50°F and 86°F (10°C and 30°C) for turnips. Be sure to check the soil temperature using a thermometer to ensure it falls within this range. Another possible reason for poor germination is improper seed depth. Turnip seeds should be sown at a depth of about ¼ to ½ inch (0.6 to 1.3 cm) for best results. If the seeds are buried too deeply or not covered enough, it can hinder their ability to sprout.
Here’s a Troubleshooting Guide For Common Problems Faced By Turnip Growers, Along With Their Solutions:
| Problem | Description | Possible Causes | Solutions |
| Seed and Seedling Problems | Seeds rot or seedlings collapse with dark water-soaked stems as soon as they appear. | Damping off fungus in high-humidity soil. – Planting in cold, moist soil. | Avoid planting in cold, wet conditions. Ensure well-drained soil. |
| Young plants are eaten or cut off near the soil level. | Cutworms (gray grubs) under the soil. | Place a 3-inch paper collar around the stem. Keep the garden weed-free and sprinkle wood ash around plants. | |
| Seedlings fail to emerge from soil; seedlings are eaten; root surfaces tunneled or scarred; plants wilt. | Cabbage maggots (small gray-white worms). | Apply lime or wood ashes around plant base. Time planting to avoid insect growth cycle. | |
| Leaf Problems | Leaves curl under, become deformed, and yellowish. | Various issues. | Address underlying problems (e.g., pests, nutrient deficiencies). |
| Leaves blotched white and yellow, leading to wilting. | |||
| Leaves yellow between veins; leaf margins brown and curl upward; stem base rots. | |||
| Yellow spots on leaves become circular with gray centers. | |||
| Yellow-gray-brown spots on leaves. | |||
| Irregular yellowish to brownish spots on upper leaf surfaces; grayish powder or mold on undersides. | |||
| Leaves yellow, curl; stalks twisted, brittle; plants stunted. | |||
| Leaves eaten, partial defoliation. | |||
| Holes eaten in leaves, buds, or roots. | |||
| Irregular small holes eaten in leaves. | |||
| Growing Success Tips | Planting: Start turnips, rutabagas, and kohlrabi early in spring or late summer. | ||
| Planting Time: Avoid extreme heat. | |||
| Care: Thin crops early to prevent crowding. | |||
| Harvest: Harvest rapidly for best flavor. |
Another issue that turnip growers may face is root damage or deformities in their plants. If you notice that your turnips are developing small or misshapen roots, one possible cause could be overcrowding. Turnip plants need adequate space to develop healthy roots, so ensure that you are thinning out the seedlings properly. Overcrowding can also lead to competition for resources, such as nutrients and water, which can further impair root development. Additionally, poor soil quality and nutrition can contribute to root deformities. Conduct a soil test to determine if your soil is lacking essential nutrients and make appropriate amendments to rectify the situation.
To Know More About Growing And Caring For Turnips, Watch This Video!
What are some common problems that turnip growers may encounter?
Some common problems that turnip growers may encounter include pest infestations, diseases such as powdery mildew or clubroot, poor germination of seeds, weed competition, and nutrient deficiencies.
How can I prevent pest infestations in my turnip patch?
To prevent pest infestations, you can use organic pest control methods such as introducing beneficial insects, practicing crop rotation, using row covers, and regularly inspecting plants for signs of pests.
What is clubroot and how can I treat it?
Clubroot is a soil-borne disease that affects turnips. To treat clubroot, you can try adjusting the soil pH, using resistant turnip varieties, practicing crop rotation, and removing and destroying infected plants.
What should I do if my turnip seeds are not germinating well?
If your turnip seeds are not germinating well, you can try scarifying the seeds to break their hard coating, providing optimal soil moisture and temperature, and ensuring that the seeds are not planted too deep.
How often should I water my turnips?
Turnips generally require about 1 inch of water per week. It is important to water deeply and infrequently to encourage deep root growth. Monitor the soil moisture and adjust watering as needed based on weather conditions.
What are some signs of nutrient deficiencies in turnips?
Signs of nutrient deficiencies in turnips can include yellowing or discoloration of leaves, stunted growth, poor root development, and overall weak and unhealthy plants. Soil testing can help identify specific nutrient deficiencies.
Can I eat the leafy tops of turnips?
Yes, turnip greens are edible and can be enjoyed in various ways. They can be cooked like spinach or added to salads for a nutritious addition to your meals.
How long can turnips be stored?
Turnips can be stored for several months if kept in a cool and moist environment, such as a root cellar or refrigerator. Remove the green tops before storing to prolong their freshness.
What is crop rotation and why is it important for turnip cultivation?
Crop rotation is the practice of growing different crops in a specific order in the same area over multiple seasons. It helps prevent the buildup of pests, diseases, and nutrient depletion in the soil, leading to healthier turnip plants and improved long-term yield.
How can I troubleshoot turnip plants that appear weak and unhealthy?
If turnip plants appear weak and unhealthy, it is important to assess various factors such as nutrient deficiencies, pest infestations, diseases, inadequate watering, or poor soil conditions. Identifying and addressing the root cause will help troubleshoot and restore the health of the plants.