How to Grow a Potato Plant: A Guide to Growing These Nutritious and Versatile Vegetables
Did you know that potatoes are not just for French fries and mashed dishes? They’re also one of the most versatile and nutritious vegetables you can grow at home! Whether you have a spacious backyard or just a few pots on your apartment balcony, learning how to grow your own potato plants can be a rewarding experience. From choosing the right variety to harvesting your spuds at the perfect time, this comprehensive guide will walk you through each step, ensuring you get the most out of your potato-growing journey. Get ready to dig into the world of homegrown goodness and enjoy a bounty of fresh, flavorful potatoes right at your fingertips!
Table of Contents
Planting the Right Variety of Potatoes
When it comes to planting potatoes, selecting the right variety is crucial for a successful and bountiful harvest. With numerous potato varieties available, each boasting its own unique characteristics, it’s important to consider factors such as taste, texture, disease resistance, and growing conditions. By choosing the right variety, you can tailor your potato garden to your specific preferences and growing environment.
| Potato Variety | Shape and Size | Texture | Flavor | Best Uses | Advantages | Disadvantages |
|---|---|---|---|---|---|---|
| Russet Potatoes | Large, oblong shape with rough, thick brown skin | Fluffy and dry due to high starch content | Mild, earthy flavor | Baking, frying, mashed potatoes | Excellent for crispy fries and fluffy baked potatoes | Thick skin may not be desirable; not great for boiling or mashing |
| Red Potatoes | Medium-sized, round or oval shape with smooth, thin red skin | Waxy and creamy when cooked | Slightly sweet and buttery | Boiling, roasting, salads | No need to peel; holds shape well in salads | Can be waxy and not ideal for mashed potatoes |
| Yukon Gold Potatoes | Medium-sized, round shape with thin, light yellow skin | Creamy and smooth texture | Buttery and slightly sweet | Mashing, boiling, gratins | Thin skin with pleasant flavor; versatile | Not as fluffy as russets; can become mushy if overcooked |
Remember, every potato variety has its own unique qualities, so take the time to research and choose the one that best fits your culinary preferences and growing conditions. By making an informed decision, you’ll be well on your way to a thriving potato garden and tasty homegrown harvest.
Understanding the Ideal Growing Conditions for Potatoes
Potatoes are one of the most versatile and widely consumed vegetables around the world. Growing your own potatoes can be a rewarding experience, but it’s important to understand the ideal growing conditions to ensure a successful harvest. To maximize the yield and quality of your potato crop, there are a few key factors to keep in mind.
- Optimal Climate: Potatoes thrive in cool climates with temperatures between 60°F and 70°F (15°C – 20°C), preferring cooler nights and tolerating slightly higher daytime temperatures. Plant in early spring or late summer depending on your area.
- Soil Requirements: Ensure well-drained soil with a pH level of 5.0 to 6.5, slightly acidic. Choose loose, loamy soil rich in organic matter for optimal root development and yields. Heavy clay or compacted soil can hinder growth, so amend with compost for better drainage and fertility.
- Sunlight Needs: Select a sunny spot in your garden with at least six to eight hours of direct sunlight daily. Adequate sunlight is crucial for photosynthesis, allowing plants to convert sunlight into energy for growth and tuber production.
By understanding and providing these ideal growing conditions for your potatoes, you’ll be well on your way to a bountiful harvest. Remember, selecting the right variety, preparing the soil, and providing proper care throughout the growing season are equally important aspects of successful potato cultivation. So, let’s dig deeper and explore these topics further to help you become a potato-growing expert.
Preparing the Soil for Planting Potatoes
Preparing the soil is a crucial first step in ensuring healthy potato growth and a bountiful harvest. The soil composition and structure can greatly affect the growth and development of potato plants, so it is important to create optimal conditions.
:max_bytes(150000):strip_icc()/growing-potatoes-in-containers-848220-01-f526fb3f2a234b048d97668529e91dce.jpg)
By taking the time to properly prepare the soil, you will create an ideal environment for your potato plants to flourish. With the right pH level, fertility, and drainage, your potato garden will be off to a great start, setting the stage for a successful growing season.
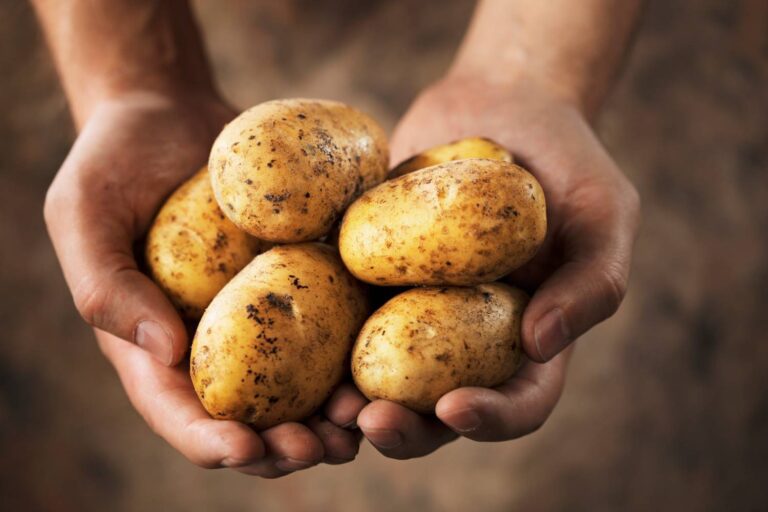
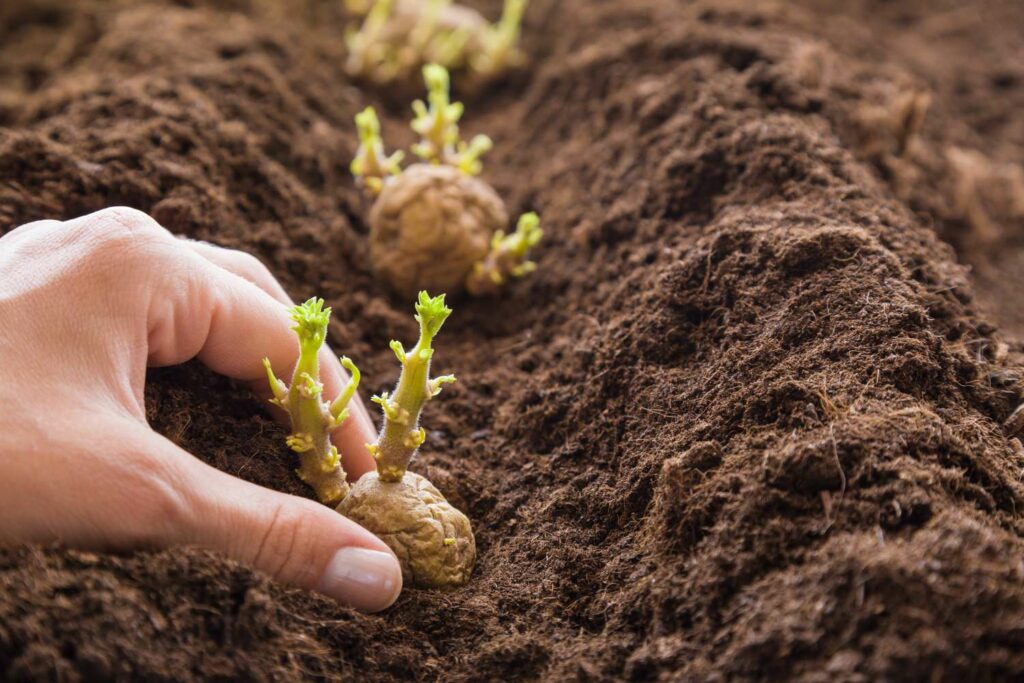
Selecting and Preparing Seed Potatoes
Selecting and preparing seed potatoes are crucial steps in ensuring a successful potato harvest. When choosing your seed potatoes, it is important to select disease-free potatoes to minimize the risk of introducing harmful pathogens to your garden. Look for certified seed potatoes, as they have undergone thorough inspections and testing to ensure their quality.
- Variety Selection:
- Different potato varieties have varying flavors and textures.
- Popular varieties include Russet Burbank, Yukon Gold, and Red Norland.
- Research each variety’s characteristics to choose the best fit for your preferences and growing conditions.
- Seed Potato Preparation:
- Curing: Place seed potatoes in a cool, dry, well-ventilated area for a few weeks.
- Curing helps develop a sturdy skin and heal any wounds from harvesting.
- Avoid direct sunlight to prevent greening and solanine development (toxic substance).
- Inspection: Check seed potatoes for signs of disease or damage.
- Discard any rotting, diseased, or physically damaged potatoes.
- Cutting: If using large seed potatoes, cut them into smaller pieces.
- Each piece should have at least one “eye” or bud.
- This allows multiple plants to grow from a single potato, increasing yield.
- Curing: Place seed potatoes in a cool, dry, well-ventilated area for a few weeks.
- Planting:
- Follow recommended practices and guidelines specific to your region and variety.
- Properly prepared seed potatoes set the foundation for a successful potato garden.
Happy gardening, and may your potato harvest be abundant and delicious! 🌱🥔👩🌾
Cutting and Curing Seed Potatoes
Cutting and curing seed potatoes is a crucial step in preparing them for planting. When selecting seed potatoes, it is important to choose healthy and disease-free tubers. Look for firm, unblemished potatoes free from any signs of rot or damage.
- Cutting Seed Potatoes: Use a clean, sharp knife to divide seed potatoes into pieces, ensuring each piece has at least one or two eyes—these are small indentations from which new sprouts emerge. Cutting maximizes planting material, with each piece capable of growing into a new plant.
- Curing Process: After cutting, cure seed potatoes to promote healing and prevent rot. Allow cut surfaces to dry and form a protective layer. Place them in a cool, well-ventilated area for a few days until surfaces develop a dry, hard layer, reducing the risk of disease and rot during planting.
By properly cutting and curing your seed potatoes, you are setting the stage for a successful potato harvest. Taking the time to select and prepare your seed potatoes will help ensure healthy and vigorous plants that will produce a bountiful crop.
Creating the Perfect Planting Bed for Potatoes
Creating the perfect planting bed for potatoes is essential for ensuring healthy growth and a bountiful harvest.
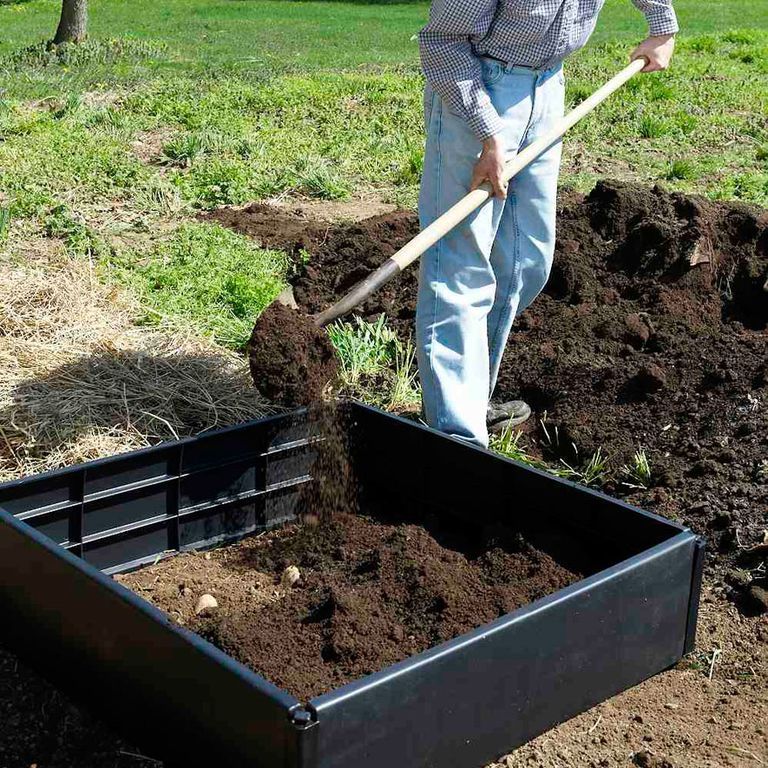
- Location Selection: Choose a sunny spot in your garden with 6-8 hours of direct sunlight daily for optimal potato growth. Ensure the area has well-drained soil to prevent waterlogging and tuber rot.
- Soil Preparation: Clear the selected area of weeds and grass to minimize competition for resources. Loosen the soil using a garden fork or tiller, breaking up clumps to create a fine, crumbly texture conducive to root establishment.
- Incorporate Organic Matter: Improve soil fertility and moisture retention by adding compost or well-rotted manure. Aim for a loose, nutrient-rich bed approximately 8-10 inches deep to allow ample space for tuber development without obstruction.
By taking the time to create a well-prepared planting bed, you are laying the foundation for healthy and productive potato plants.
Having used the Spear & Jackson Garden Fork in my gardening endeavors, I can confidently attest to its reliability and effectiveness. The traditional design coupled with durable stainless steel construction makes it a sturdy and long-lasting tool. I found the ergonomic handle comfortable to grip, reducing strain on my hands and wrists during prolonged use.
This garden fork proved versatile in various gardening tasks, from turning soil to aerating compost. Its sharp tines easily penetrated the soil, making it efficient for breaking up compacted ground and lifting plants. Despite its robust build, the fork maintained its balance, allowing for precise control and maneuverability. Overall, the Spear & Jackson Garden Fork has become an essential tool in my gardening arsenal, offering exceptional performance and durability for all my outdoor projects.

- Traditional Design: The Spear & Jackson Garden Fork features a classic, traditional design that is both functional and aesthetically pleasing.
- Stainless Steel Construction: Made from durable stainless steel, this garden fork offers excellent resistance to rust and corrosion, ensuring long-lasting performance even in outdoor conditions.
- Ergonomic Handle: The fork is equipped with an ergonomic handle that provides a comfortable grip and reduces strain on the hands and wrists during use.
- Versatile: Suitable for a variety of gardening tasks, including turning soil, aerating compost, and lifting plants, making it a versatile tool for gardeners of all skill levels.
- Trusted Brand: Spear & Jackson is a well-known and respected brand in the gardening industry, known for producing high-quality, reliable tools.
- Efficient: The fork’s sharp tines penetrate soil easily, making it efficient for breaking up compacted soil and digging into dense or rocky ground.
- Multi-Purpose: Apart from gardening, the fork can also be used for other outdoor tasks, such as turning compost or spreading mulch.
- Limited Availability: Depending on location, the Spear & Jackson Garden Fork may be challenging to find in some stores, requiring special ordering or online purchases.
- Price: The cost of the fork may be higher compared to some other options on the market, potentially impacting its affordability for some users.
- Weight: Some users may find the fork to be heavier than expected, especially when working with it for extended periods, leading to fatigue or discomfort.
- Handle Durability: While the stainless steel tines are durable, the handle material may not be as robust, leading to potential wear or breakage over time, especially with heavy use.
- Size: The size of the fork may be too large or too small for some users, depending on their height and the tasks they intend to use it for.
- Maintenance: Like any garden tool, the fork requires regular maintenance to ensure optimal performance and longevity, including cleaning and occasional sharpening of the tines.
- Soil Type: While effective in most soil types, the fork may struggle to penetrate extremely compacted or rocky soil, requiring additional effort or the use of other tools.
Planting Potatoes: Depth and Spacing Guidelines
When it comes to planting potatoes, getting the depth and spacing just right is crucial for a successful crop.
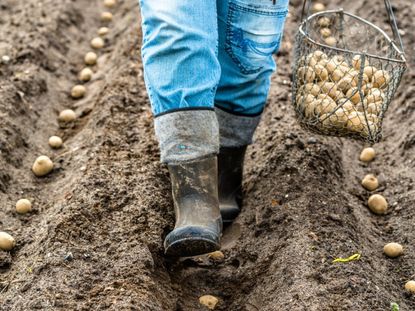
- Planting Depth:
- Dig a trench or furrow in your garden soil.
- Place the seed potatoes in the trench, eyes (small sprouts) facing up.
- Cover the potatoes with soil, ensuring they are buried 4-6 inches (10-15 cm) deep.
- Deeper planting helps protect tubers from sunlight, preventing greening and bitterness.
- Spacing Within Rows:
- Plant seed potatoes approximately 12-15 inches (30-38 cm) apart within the row.
- Adequate spacing allows each plant to grow without crowding.
- Proper airflow reduces the risk of disease and encourages healthy growth.
- Row Spacing:
- Maintain a distance of 2-3 feet (60-90 cm) between rows.
- Wider rows make it easier to cultivate, weed, and harvest.
- Adjust row spacing based on your specific potato variety and local conditions.
Consulting local experts or referring to reliable gardening resources can provide more specific guidance tailored to your situation. So, take the time to plan and prepare your potato planting bed, ensuring each tuber has the space it needs to flourish.
Watering and Fertilizing Potato Plants
Proper watering and fertilizing are crucial for the healthy growth of potato plants.
- Watering: Maintain consistent moisture levels, providing 1-2 inches of water per week through rainfall or irrigation. Avoid overwatering to prevent rot and disease. Check soil moisture by inserting a finger 1 inch deep—if dry, it’s time to water.
- Fertilizing: Incorporate organic matter like compost or well-rotted manure into the soil before planting for initial nutrient boost. Apply a balanced fertilizer, such as 10-10-10 or 14-14-14 blend, during the growing season. Timing is crucial: fertilize when plants reach 6 inches in height, then repeat application 4-6 weeks later for healthy growth and abundant harvest. Follow package instructions for application rates.
Managing Weeds and Pests in Potato Gardens
Managing weeds and pests is an essential part of maintaining a healthy and thriving potato garden. Weeds can compete with potatoes for essential nutrients and water, while pests can cause significant damage to the plants. To effectively manage these challenges, it is important to employ a combination of preventive measures and targeted interventions.
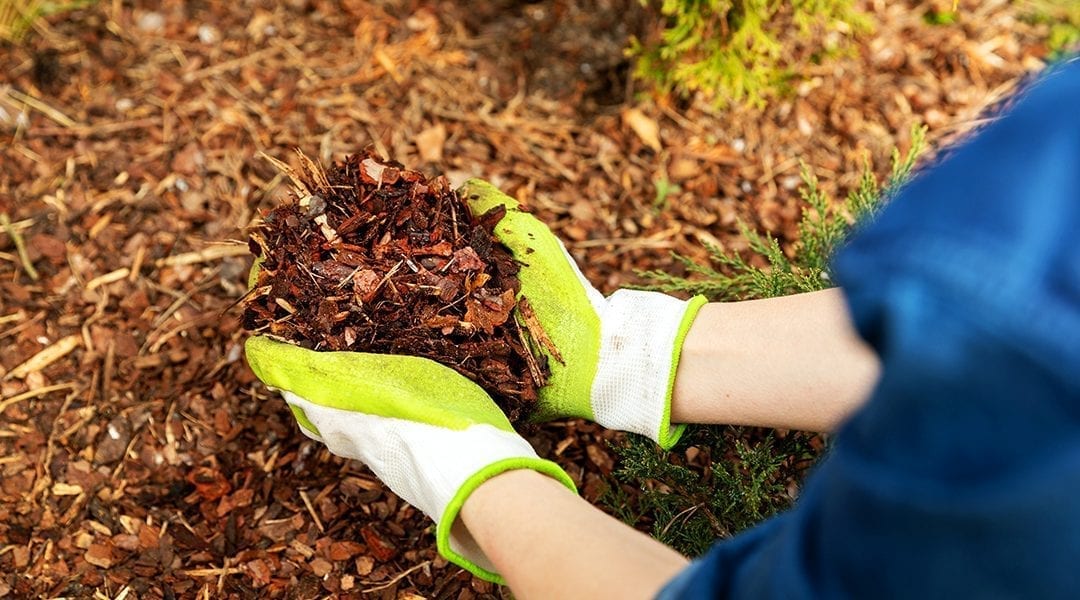
- Mulching for Weed Control: Apply organic mulch like straw or wood chips around potato plants to suppress weed growth and conserve soil moisture, reducing competition for resources.
- Weed Management: Regularly inspect the garden for weeds and hand-pull them to prevent spreading and overwhelming the potato plants.
- Pest Identification: Correctly identify pests like potato beetles, aphids, and nematodes to effectively manage them.
- Companion Planting: Plant marigolds or garlic near the potato plants to deter pests through companion planting strategies.
- Organic Pest Control: Use organic methods such as insecticidal soap or neem oil to minimize pest populations without harming beneficial insects, ensuring a healthy potato garden ecosystem.
In conclusion, proactive weed and pest management is crucial for maintaining a healthy potato garden. By employing preventative measures and targeted interventions, gardeners can ensure the optimal growth and productivity of their potato plants. Stay tuned for our next section on “Hilling Up Potatoes to Promote Growth” to learn more about this important cultivation technique.
After using Blue Mountain Hay as mulch in my garden, I can confidently say it’s a reliable and eco-friendly option. Its natural composition adds an organic touch to the landscape while serving multiple purposes. I found that it effectively suppressed weed growth, reducing the need for frequent weeding sessions. Additionally, the hay retained moisture in the soil, ensuring my plants remained hydrated even during dry spells. Its decomposition over time also contributed to soil enrichment, fostering healthier plant growth.
However, I did encounter a few drawbacks. One notable issue was the presence of weed seeds within the hay, which led to unexpected weed growth in some areas of my garden. I also noticed that the hay decomposed relatively quickly compared to other mulching materials, requiring more frequent replenishment. Despite these minor inconveniences, I appreciated the natural aesthetic it added to my garden and its overall effectiveness in improving soil quality and plant health. Overall, Blue Mountain Hay proved to be a valuable addition to my gardening routine, providing both functional and aesthetic benefits.
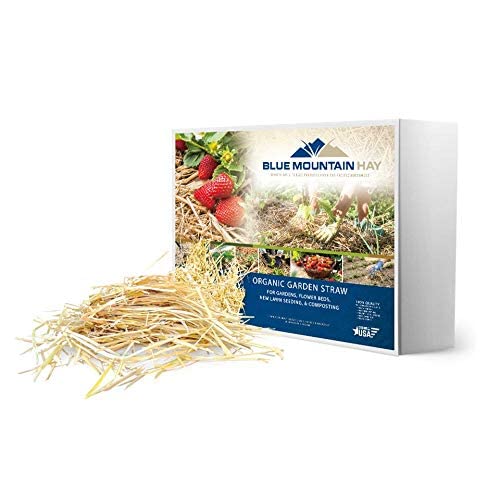
✅ Weed Suppression: The mulch helps suppress weed growth by blocking sunlight from reaching weed seeds, reducing the need for manual weeding.
✅ Moisture Retention: It retains moisture in the soil, promoting healthy plant growth and reducing the frequency of watering.
✅ Soil Protection: Blue Mountain Hay acts as a protective barrier, shielding the soil from erosion caused by wind and rain.
✅ Nutrient Addition: As the hay decomposes, it enriches the soil with organic matter, improving soil structure and fertility.
✅ Insulation: During extreme temperatures, the mulch provides insulation for plant roots, protecting them from heat stress in summer and frost damage in winter.
✅ Aesthetic Appeal: The natural color and texture of Blue Mountain Hay enhance the visual appeal of garden beds and landscapes.
❌ Decomposition Rate: Compared to other mulching materials like bark or wood chips, hay may decompose more quickly, requiring more frequent replenishment.
❌ Attraction of Pests: Hay mulch may attract pests such as rodents, insects, and slugs, especially if not properly stored or applied.
❌ Initial Odor: Fresh hay may emit a distinct odor that some individuals find unpleasant, although it typically dissipates over time.
❌ Affect on pH: Depending on the type of hay and soil conditions, the decomposition process may temporarily affect soil pH levels, requiring monitoring and potential adjustments.
❌ Flammability: Dry hay can be highly flammable, posing a fire hazard in dry and windy conditions, so caution must be exercised when using it near open flames or in fire-prone areas.
❌ Allergen Concerns: Hay may contain allergens such as dust or pollen, which could trigger allergic reactions in sensitive individuals, necessitating precautions during handling and application.
Hilling Up Potatoes to Promote Growth
Hilling up potatoes is a beneficial practice that can greatly enhance the growth and yield of your potato plants. By gradually covering the base of the plants with soil, you are encouraging the development of additional roots and tubers, leading to more bountiful harvests. This process involves mounding the soil around the stems of the plants as they continue to grow.
- Sunlight Protection:
- Hilling up prevents potatoes from being exposed to sunlight.
- Sunlight exposure can cause potatoes to turn green and become toxic.
- By covering stems with soil, tubers remain hidden and safe for consumption.
- Improved Soil Drainage:
- Mounding soil creates raised beds around potato plants.
- Raised beds allow excess water to flow away, preventing waterlogging.
- Proper drainage reduces the risk of disease and promotes healthier growth.
- Moisture Retention and Weed Control:
- Soil around plants retains moisture better.
- Less frequent watering is needed.
- Mounded soil acts as a barrier, restricting weed growth.
- Reduced competition for nutrients benefits potato plants.
| Hilling Up Potatoes for Growth Promotion | Key Steps and Considerations |
|---|---|
| 1. Initial Planting Depth | – Plant at Proper Depth: Initially plant potatoes 4-6 inches deep. |
| – Allow Sprouts to Emerge: Let sprouts emerge from the soil. | |
| 2. First Hilling | – When Sprouts Reach 6 Inches: Begin the first hilling process. |
| – Use Soil or Mulch: Cover the lower part of the stems with soil or mulch. | |
| 3. Promote Tuber Formation | – Encourage Underground Growth: Hilling promotes tuber development. |
| – Prevent Greening: Covering tubers with soil prevents greening. | |
| 4. Regular Hilling During Growth | – Repeat Every Few Weeks: Continue hilling as plants grow taller. |
| – Leave Top Foliage Exposed: Keep the top foliage above the soil surface. | |
| 5. Benefits of Hilling Up | – Increased Yield: Encourages more potatoes to form on the stems. |
| – Weed Suppression: Helps suppress weed growth around the plants. | |
| 6. Harvesting Considerations | – Stop Hilling Before Harvest: Stop hilling a few weeks before harvest. |
| – Allow Skins to Set: Allowing skins to set reduces skin damage during harvest. |
Now that you understand the benefits of hilling up potatoes, let’s discuss the proper technique and timing for this practice in the next section.
Recognizing and Addressing Potato Plant Diseases
Recognizing and addressing potato plant diseases is crucial for ensuring a healthy and productive harvest. These diseases, if left untreated, can significantly reduce yield and quality. Therefore, it is important for gardeners to be able to identify the symptoms and take appropriate measures to control and prevent further spread.
| Disease | Symptoms | Treatment | Effect on Plant |
|---|---|---|---|
| Blackleg | – Wilting – Yellowing of leaves – Blackening of stems near soil line | – Remove and destroy infected plant material | Causes rotting and decay in both potato plants and tubers |
| Early Blight | – Dark spots on leaves and stems | – Fungicides (copper-based) – Proper spacing and ventilation | Affects plant health and can reduce yield |
| Late Blight | – Water-soaked lesions on leaves – White mold on undersides – Dark brown/black spots on tubers | – Fungicides (copper-based) – Remove infected plant parts – Avoid overhead irrigation | Devastating disease leading to rapid plant death and tuber decay |
| Common Scab | – Rough, corky patches on tubers | – Soil pH adjustment – Avoid planting in infested soil – Use disease-resistant varieties | Affects tuber appearance but usually not plant health |
| Potato Virus Y | – Mottled or distorted leaves – Reduced growth – Poor tuber quality | – No cure exists – Use virus-free seed potatoes – Control aphid vectors | Reduces yield and quality of tubers |
Remember that early diagnosis is crucial for effective disease management. If you notice any symptoms, take prompt action to protect your potato plants! 🌱🥔 Stay tuned for our upcoming section on effective management strategies for these and other potato plant diseases.
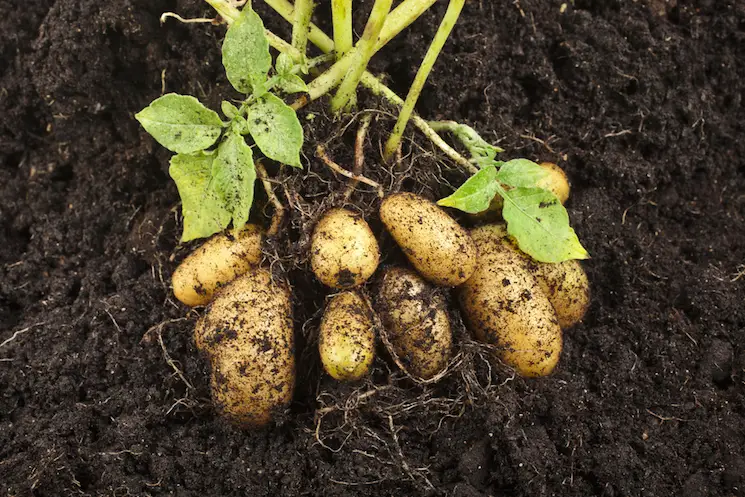
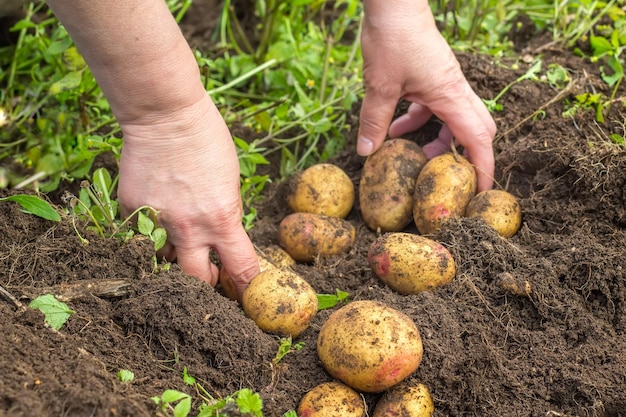
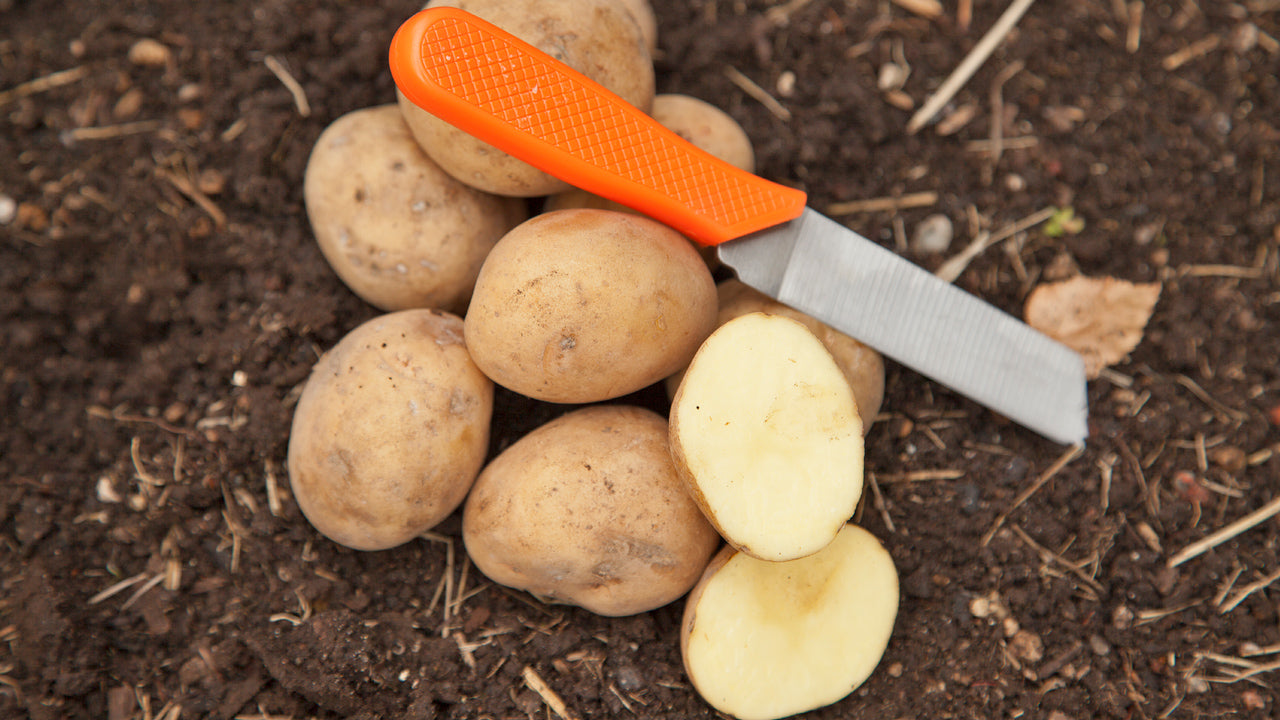
Harvesting Potatoes at the Right Time
Harvesting potatoes at the right time is crucial to ensure a bountiful and flavorsome yield. Timing plays a significant role in determining the quality, size, and storage potential of the tubers.
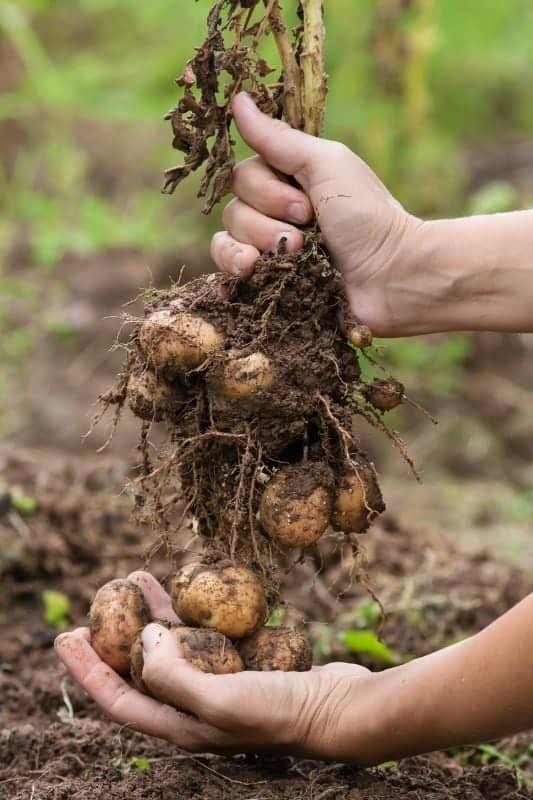
- Harvesting Indicators: Mature potatoes are ready for harvest when foliage begins to yellow and die back, signaling tuber readiness. Use a garden fork or shovel to carefully dig around plants, avoiding tuber damage.
- Gentle Handling: Remove potatoes from soil gently to prevent bruising or cuts, prolonging shelf life.
- Consider Variety and Maturity: Different potato varieties have varying maturation periods. Early-season types can be harvested in 50-60 days, mid-season in 90-120 days. Environmental factors and personal preferences also influence timing.
- Early Harvest for New Potatoes: For smaller “new potatoes,” harvest earlier by carefully digging around plants and selecting small tubers, leaving others to continue growing.
- Late Harvest for Storage Potatoes: For larger storage potatoes, wait until foliage completely dies back before harvesting, ensuring maximum tuber development.
By understanding the estimated days to maturity, observing the condition of the foliage, and considering your desired potato size, you can make informed decisions about the optimal time to harvest your potatoes for the best results.
Storing and Preserving Potatoes for Long-term Use
Storing and preserving potatoes for long-term use is essential in ensuring a well-stocked pantry and a continuous supply of this versatile and nutritious vegetable. Proper storage methods can extend the shelf life of potatoes and maintain their quality for many months, allowing you to enjoy them even during the off-season.
- Quality Inspection: Before storage, carefully inspect potatoes for decay, mold, or damage. Discard any compromised tubers and remove green potatoes containing solanine.
- Optimal Storage Conditions: Store potatoes in a cool, dark, and well-ventilated area with temperatures between 40-50°F (4-10°C). Avoid refrigeration to prevent conversion of starches into sugars, which affects texture and taste.
- Use Breathable Containers: Store potatoes in breathable containers like burlap sacks or mesh bags to allow proper air circulation, preventing moisture buildup and rotting.
- Avoid Excessive Humidity and Sunlight: Ensure storage area is free from excessive humidity and direct sunlight to prevent spoilage. Maintaining ideal storage conditions helps prolong freshness and quality of stored potatoes.
By following these storage guidelines, you can preserve your potatoes for an extended period, ensuring a year-round supply of this nutritious staple crop. In the next section, we will delve into the various ways you can utilize your harvested potatoes in delicious recipes, allowing you to truly savor the fruits of your labor.
Watch video for more information:
FAQ
Can I store potatoes in the refrigerator for long-term use?
No, storing potatoes in the refrigerator can cause the starches to convert to sugar more quickly, resulting in a sweeter taste and potentially unpleasant texture. It is best to store potatoes in a cool, dark, and well-ventilated area.
How long can potatoes be stored for?
Potatoes can typically be stored for several months if stored properly. The exact length of storage time will depend on the variety and conditions in which they are stored.
Should I wash potatoes before storing them?
No, it is best to store potatoes unwashed. Washing potatoes before storage can remove the protective layer on their skin, making them more susceptible to spoilage. Instead, gently brush off any dirt or debris from the potatoes before storing.
What is the best temperature for storing potatoes?
Potatoes should be stored in a cool and dark place with a temperature between 45-50°F (7-10°C). Avoid storing them in areas that are too cold or too warm, as extreme temperatures can cause potatoes to sprout or spoil.
Can I store potatoes with other fruits and vegetables?
It is not recommended to store potatoes with other fruits and vegetables. Potatoes release a natural gas called ethylene, which can cause other produce to spoil more quickly. It is best to store potatoes separately or in a well-ventilated container.
How can I prevent potatoes from sprouting during storage?
To prevent potatoes from sprouting, store them in a cool and dark place with proper ventilation. Additionally, storing potatoes with an apple or placing an apple in the storage container can help inhibit sprouting.
What should I do if I notice any sprouted or rotten potatoes?
If you notice any sprouted or rotten potatoes, it is important to remove them immediately. Rotten potatoes can cause nearby potatoes to spoil more quickly. It is also best to regularly inspect stored potatoes for any signs of decay or sprouting.
Can I freeze potatoes for long-term storage?
Yes, potatoes can be frozen for long-term storage. However, it is important to blanch them first to prevent enzyme action that can cause discoloration and texture changes. Once blanched, pack the potatoes in airtight containers or freezer bags and store them in the freezer.
How long can frozen potatoes be stored?
When properly frozen and stored, potatoes can be kept in the freezer for up to 12 months. However, it is recommended to use them within 6-8 months for best quality.
Are green potatoes safe to eat?
Green potatoes contain a substance called solanine, which can be toxic if consumed in large amounts. It is best to avoid eating green potatoes. If you notice any green patches on your potatoes, simply cut them away before cooking or discard the affected areas.
Studied Agricultural Engineering-Plant Protection at University of California, Davis.
Head of Content writing team at Southelmontehydroponics.com