Seed Starting Success: Avoiding 5 Common Errors
Table of Contents
Common Mistake #1: Improper Seed Depth
Improper seed depth is a common mistake that can significantly impact the success of your seed starting process. When seeds are planted too deep in the soil, they may struggle to reach the surface, leading to weak and stunted seedlings. On the other hand, seeds that are planted too shallow may dry out quickly and fail to establish strong roots. It is crucial to follow the specific planting depth recommendations provided on the seed packet for each type of seed you are planting to ensure optimal germination and growth.
Maintaining the correct seed depth is essential for providing seeds with the appropriate conditions for germination and healthy development. By ensuring that seeds are planted at the right depth, you give them the best chance of accessing the necessary light, moisture, and nutrients in the soil. Remember to carefully read and follow the instructions for each seed variety to prevent issues related to improper seed depth and set your seedlings up for success from the very beginning.

Common Mistake #2: Overwatering
Overwatering is a common mistake that many gardeners make when tending to their seedlings. Excessive watering can lead to waterlogged soil, which deprives the roots of essential oxygen needed for proper growth. As a result, the roots may rot, causing irreversible damage to the plant. It is crucial to understand the specific watering needs of each type of seedling and to strike a balance between providing enough moisture for growth without drowning the delicate roots.
In addition to root rot, overwatering can also invite the growth of harmful pathogens such as mold and mildew, which thrive in moist environments. These pathogens can weaken the seedlings and make them more susceptible to disease. To prevent the negative effects of overwatering, it is advisable to water seedlings only when the top layer of soil feels dry to the touch. By allowing the soil to slightly dry out between waterings, you can help promote healthy root development and overall plant vigor.
Common Mistake #3: Insufficient Light
Insufficient light is a common mistake that many gardeners make when starting seeds indoors. Without adequate light, seedlings can become leggy, weak, and stunted. Light is essential for the process of photosynthesis, which provides plants with the energy they need to grow. When seedlings do not receive enough light, they will stretch towards any available light source, leading to weak stems and poor overall growth. Inadequate light can also result in delayed development and lower chances of successful transplanting.
To ensure your seedlings receive sufficient light, it is essential to place them in a location where they can get at least 12-16 hours of bright, indirect sunlight each day. If natural light is insufficient, supplemental artificial lighting, such as grow lights, can be used to provide the necessary light intensity for healthy growth. Proper spacing between the light source and seedlings should also be maintained to prevent burning or overheating. Remember, light is one of the most critical factors in seed starting success, so be sure to prioritize this aspect for robust and thriving seedlings.
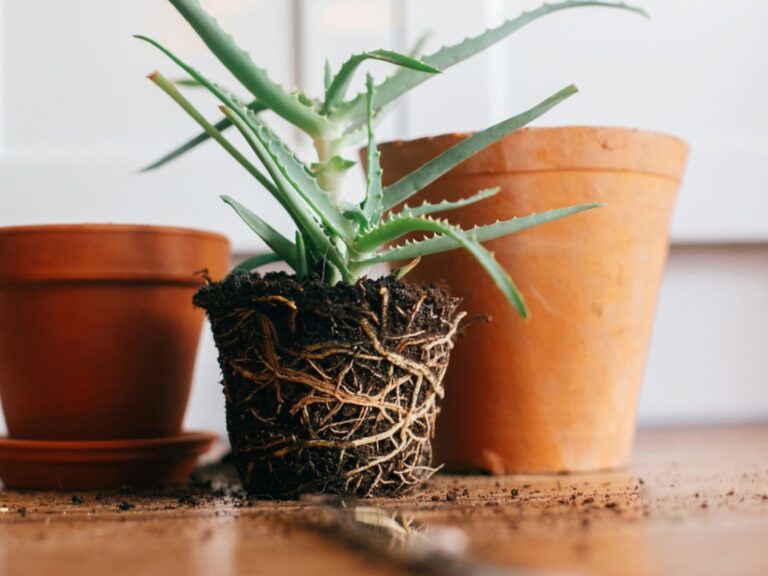
Common Mistake #4: Using the Wrong Soil
When starting seeds, using the correct soil is crucial for successful germination and growth. Many gardeners make the mistake of selecting soil that is too dense or lacks sufficient nutrients for young seedlings to thrive. Improper soil composition can lead to issues such as poor drainage, root rot, or stunted growth, ultimately hindering the development of healthy plants. It is essential to choose a well-draining, sterile seed-starting mix that provides a balance of moisture retention and aeration to support seedling growth and establishment.
In addition to selecting the right soil type, it is equally important to avoid using garden soil or compost for starting seeds indoors. These soil types can contain pathogens, pests, and weed seeds that may harm delicate seedlings. Opting for a specialized seed-starting mix or a blend of peat moss, perlite, and vermiculite will create a sterile and lightweight medium suitable for promoting strong root development and overall plant health during the critical early stages of growth. By choosing the correct soil for seed starting, gardeners can set the foundation for successful germination and robust plant growth.
Common Mistake #5: Neglecting Temperature Requirements
Ensuring that your seedlings receive the right temperature is crucial for their healthy growth. Many gardeners overlook this aspect, leading to stunted or unhealthy plants. Each type of plant has specific temperature requirements for optimal germination and growth. Ignoring these needs can hinder the development of your seeds and jeopardize the success of your gardening endeavors.
Temperature fluctuations can have a significant impact on seedlings, affecting their metabolic processes and overall health. Inconsistent temperatures can slow down germination, weaken seedlings, or even cause them to die off. By closely monitoring and regulating the temperature around your seeds, you provide them with the stable environment they need to thrive. Remember, paying attention to these small details can make a big difference in the success of your seed starting journey.
Tips for Successful Seed Starting
To ensure successful seed starting, it is crucial to select the right seeds that are suitable for your climate and growing conditions. Different plants have specific requirements for temperature, light, and moisture, so choosing seeds that align with your environment is vital for their successful growth.
Preparing your containers properly before starting your seeds can greatly impact their development. Make sure your containers have proper drainage to prevent waterlogging, use a high-quality seed starting mix to provide essential nutrients, and label your containers to keep track of different seeds. Proper container preparation sets a strong foundation for healthy seedling growth.
Here are some seed starting tips to help you get your garden off to a healthy start:
| Tip | Description |
| 1. Choose Seeds or Seedlings | Decide whether to start from seeds or buy seedlings. Starting your own seeds offers a wider variety of plants than what you can find locally. |
| 2. Where to Buy Seeds | Consider ordering seeds from catalogs or online companies. Local stores may have limited varieties, but online options provide more choices. |
| 3. Keep Good Records | Maintain written records of your seed starting attempts. Note where you purchased the seeds, germination dates, success rates, and transplant readiness. |
| 4. Proper Seed Storage | Store seeds in a cool, dark place with low humidity (such as a fridge) to maintain their viability. |
| 5. Starter Containers | Use containers at least 2-3 inches wide and deep. Recycle materials like yogurt containers, eggshells, or cut-off milk cartons. |
| 6. Label Your Seedlings | Use sticks or garden markers to label your seedlings. Permanent markers work well. |
| 7. Potting Soil | Choose a potting soil with a light, loamy texture and a blend of vermiculite. Avoid synthetic fertilizers for an organic start. |
| 8. South-Facing Window | Place seedlings near a south-facing or sunny window with a large ledge or table space. |
| 9. Larger Pots for Transplanting | Eventually, you’ll need slightly larger pots to transplant your seedlings into. |
| 10. Organic Fertilizer | Use safe organic fertilizers like fish and seashell emulsion for healthy plant growth. |
Remember, starting seeds indoors allows you to extend your growing season, save money, and have more control over germination.
Selecting the Right Seeds
When selecting seeds for your garden, it is crucial to consider factors such as your growing zone, available space, and desired plant varieties. Different plants have varying requirements in terms of sunlight, water, and soil type, so it is essential to choose seeds that align with your gardening conditions. Additionally, consider whether you want to grow vegetables, flowers, herbs, or a combination of these, as this will impact your seed selection.
Before purchasing seeds, research the ideal growing conditions for each plant variety to ensure they are suitable for your garden. Take note of the seed packet information regarding recommended planting times, germination requirements, and mature plant size. It is also beneficial to select seeds from reputable suppliers or nurseries to ensure quality and viability. By carefully selecting seeds that match your garden environment and preferences, you can set yourself up for a successful and flourishing garden.
When selecting seeds for your garden, there are several important factors to consider:
| Factor | Description |
| 1. Adaptability to Local Conditions | Choose seeds that are well-adapted to your local climate and soil types. This ensures successful crop production. |
| 2. Yield Potential | The yield potential of a seed variety directly impacts the profitability of your farming operations. Consider the expected harvest from each type of seed. |
| 3. Disease Resistance | Look for seeds that exhibit resistance to common pests and diseases prevalent in your area. This can reduce the need for chemical interventions. |
| 4. Nutritional Value | Consider the nutritional content of the crops grown from these seeds. Opt for varieties that provide essential vitamins, minerals, and other nutrients. |
| 5. Environmental Impact | Assess how the cultivation of these seeds affects the environment. Choose seeds that promote sustainable practices and minimize negative impacts. |
| 6. Market Demand | Research market trends and demand for specific crops. Growing seeds that align with consumer preferences can enhance your market success. |
| 7. Seed Quality and Purity | Select high-quality, certified seeds from reputable sources. Ensuring seed purity and viability is crucial for a successful crop. |
Remember, thoughtful seed selection is a critical step in sustainable agriculture, and it sets the foundation for a fruitful harvest!
Preparing Your Containers
When it comes to preparing your containers for seed starting, it is essential to ensure they are clean and sterile to provide a healthy environment for your seeds to germinate. Start by washing your containers with a mild soap solution and rinse them thoroughly to remove any potential contaminants. For additional sterilization, you can soak the containers in a mixture of water and bleach, making sure to rinse them well before use. This step is crucial in preventing the growth of fungi or harmful bacteria that can hinder the growth of your seedlings.
Once your containers are clean and sterilized, it’s time to fill them with a suitable seed starting mix. Avoid using garden soil, as it may contain pests or diseases that can harm your seedlings. Opt for a high-quality seed starting mix that is light, well-draining, and sterile to provide the perfect environment for your seeds to sprout. Fill the containers to the top and gently pat down the soil to ensure there are no air pockets, which can impede water uptake by the seeds.
Timing Your Seed Starting
When it comes to timing your seed starting, it is crucial to consider the specific requirements of the seeds you are planting. Each type of plant has its optimal germination and growth conditions, so it is essential to research and understand the ideal timing for starting your seeds.
Factors such as the average last frost date in your area, the specific requirements of the plant species, and the time it takes for seeds to reach maturity should all be taken into account when determining the best time to start your seeds. By carefully considering these factors and planning accordingly, you can maximize the success of your seed starting efforts and ensure healthy growth and development of your plants.
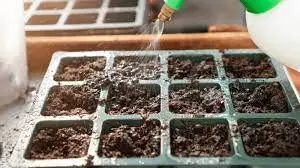
Providing Adequate Watering
Proper watering is crucial for the successful growth of your seedlings. Overwatering can lead to root rot, while underwatering can cause stress and stunted growth. The key is to find the right balance by ensuring that the soil is evenly moist but not waterlogged. One effective way to check if your seedlings need watering is by gently inserting your finger into the soil about an inch deep – if it feels dry, it’s time to water. Remember, consistency is key – aim to provide a regular watering schedule to promote healthy root development and overall plant growth.
When it comes to watering your seedlings, the method you choose can make a significant difference. One popular technique is bottom watering, where you place your seed trays in a shallow tray of water and let the soil soak up moisture from the bottom. This approach helps prevent water from directly hitting the delicate stems and leaves, reducing the risk of fungal diseases. Alternatively, you can use a fine mist sprayer to lightly water the soil surface, ensuring even distribution without causing soil compaction. Whichever method you opt for, be mindful not to overwater, as excess moisture can lead to a host of issues such as damping off and fungal infections.
Ensuring Proper Ventilation
Proper ventilation is crucial for the healthy growth of seedlings. Adequate airflow helps prevent the buildup of excess moisture, which can lead to fungal diseases and damping off. Without sufficient ventilation, seedlings may also struggle to develop strong stems and leaves, making them more susceptible to pests and diseases.
When setting up your seed starting area, ensure there is proper air circulation around your seed trays or containers. Placing a small fan on a low setting nearby can help simulate a gentle breeze, promoting sturdier seedling growth. Additionally, opening windows or using an exhaust fan if indoors can help maintain a good flow of fresh air, preventing any stagnant pockets that might encourage the growth of harmful pathogens.
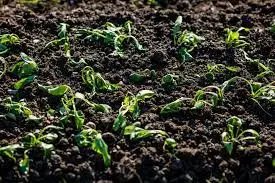
Monitoring for Signs of Growth
After sowing your seeds, it is crucial to monitor them closely for signs of growth. This can involve observing the emergence of tiny sprouts from the soil, the unfurling of the first leaves, or the development of true leaves that signify the plants are maturing. Keep a keen eye on the rate of growth and any abnormalities that may indicate potential issues with the seedlings.
It’s essential to be patient during this phase, as different seeds have varied germination times. Some may sprout quickly, while others may take longer. By regularly checking on your seeds and monitoring their progress, you can ensure that they are healthy and thriving. Remember that consistent monitoring is key to successful seed starting.
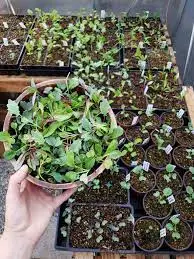
Transplanting Seedlings Carefully
When it comes time to transplant your seedlings, it’s crucial to handle them with care to ensure their continued growth and success in the garden. Before moving your seedlings to their final location, prepare the new planting area by loosening the soil and creating a hole that is large enough to accommodate the root system of the seedling without crowding. Gently remove the seedling from its container by lightly squeezing the sides to loosen the roots, being careful not to damage them in the process. Once the seedling is free, place it in the prepared hole and backfill with soil, gently firming around the base to provide support.
After transplanting, it’s important to water the seedling thoroughly to help settle the soil around the roots and reduce transplant shock. Monitor the seedling closely in the days following transplantation, ensuring that it receives adequate moisture and light to support its establishment in the new environment. Be mindful of any signs of stress, such as wilting or yellowing leaves, and adjust the care accordingly to help the seedling adapt successfully to its new surroundings. Remember, a little extra attention during this critical period can go a long way in ensuring the health and vitality of your transplanted seedlings.
Hardening Off Your Seedlings
When it comes to hardening off your seedlings, it’s essential to gradually acclimate them to the outdoor conditions so they can thrive once planted in the garden. Abruptly transitioning tender seedlings from the controlled environment of indoors to the harsher outdoor elements can cause stress and stunted growth. Start by placing your seedlings outdoors in a sheltered spot for a few hours each day, gradually increasing their exposure to sunlight, wind, and temperature fluctuations over the course of a week or two.
During the hardening off process, keep a close eye on your seedlings for any signs of stress such as wilting, yellowing, or drooping leaves. If you notice any adverse reactions, scale back their outdoor exposure and provide extra protection. Remember that the goal of hardening off is to build resilience in your seedlings, preparing them for the challenges of the garden. With patience and careful monitoring, your seedlings will be strong and ready for successful transplantation when the time comes.
Troubleshooting Common Seed Starting Issues
Seed starting can be an exciting endeavor for gardeners, but sometimes issues can arise that hinder the success of your seedlings. One common issue is damping off, which is caused by overly wet conditions and can result in seedling death. To prevent damping off, ensure proper drainage in your containers and avoid overwatering your seeds.
Another common problem is leggy seedlings, where plants grow tall and spindly due to insufficient light. To combat this issue, make sure to provide adequate light to your seedlings, either through natural sunlight or grow lights. Adjusting the height of the light source can help promote sturdier growth in your seedlings.
To Know More About Seed Starting Success And Some Common Errors To Avoid, Watch This Video1
How can I prevent damping off in my seedlings?
To prevent damping off, make sure your containers have good drainage, avoid overwatering, and provide adequate air circulation.
What should I do if my seedlings are leggy?
If your seedlings are leggy, it is likely due to insufficient light. Move them to a brighter location or provide supplemental grow lights.
Can I reuse soil from previous seed starting trays?
It is not recommended to reuse soil from previous seed starting trays, as it may harbor diseases or pests. It is best to use fresh, sterile potting mix for each new batch of seeds.
How can I protect my seedlings from pests?
To protect your seedlings from pests, you can use natural pest control methods such as neem oil or insecticidal soap, and ensure proper sanitation of your seed starting area.
What should I do if my seedlings are not germinating?
If your seedlings are not germinating, check the temperature requirements for the specific seeds you are growing and make sure they are within the optimal range. Additionally, ensure that the seeds are not planted too deep or too shallow.