Marigold Flowers: Super Plant, Grow, and Care for Them
Table of Contents
Understanding the Basics of Marigold Flowers

Marigold flowers, known for their vibrant colors and strong, pleasant scent, are a popular choice for many garden enthusiasts. These beautiful blooms belong to the Calendula and Tagetes genus, with various species and varieties available to suit different tastes and preferences. Marigolds are native to the Americas and have been cultivated for centuries, not only for their ornamental value but also for their medicinal properties.
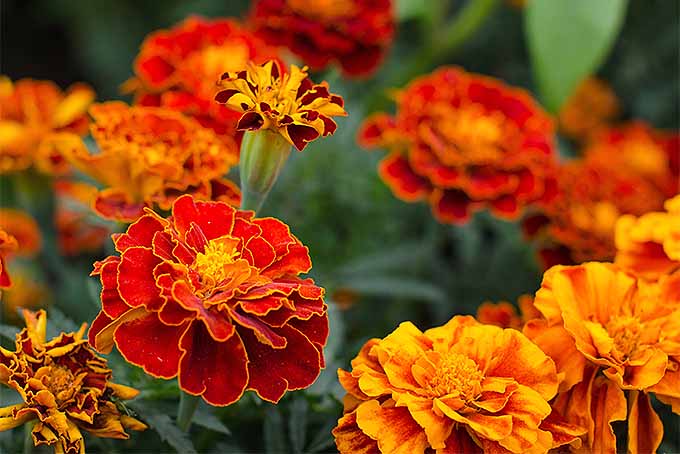
One of the distinctive features of marigold flowers is their composite nature, with a central disk surrounded by ray florets that resemble petals. The color range of marigolds is quite extensive, including shades of yellow, orange, red, and even bi-color combinations. They usually have a daisy-like appearance and can vary in size, from petite varieties to larger, more robust ones. Their scent is another characteristic that sets them apart, with a fragrance that is often described as spicy or musky.
When it comes to the cultivation of marigold flowers, it is important to note that they are relatively low-maintenance plants. They thrive in full sun and prefer well-draining soil, although they can tolerate a range of soil types. Marigolds are also known for their ability to repel certain insect pests, making them a popular choice for companion planting in vegetable gardens. By understanding these basic aspects of marigold flowers, garden enthusiasts can make informed decisions about incorporating these beautiful blooms into their outdoor spaces.
Selecting the Right Marigold Flowers Variety for Your Garden
Marigolds are a popular choice for gardeners due to their vibrant colors, ability to repel pests, and easy maintenance. Selecting the right variety of marigold for your garden is crucial to ensure optimal growth and blooming. With a wide range of options available, it’s essential to consider several factors before making your selection.
Firstly, consider the purpose for planting marigolds in your garden. Are you looking to add a burst of color to your flower beds? Or perhaps you want to deter pests from your vegetable garden? Different marigold varieties offer various benefits, including insect-repellent properties, compact growth habits, or long-lasting blooms. Understanding your gardening goals will help narrow down the options and choose the variety that best suits your needs.
Another factor to consider is the climate and growing conditions in your area. Marigolds thrive in full sunlight and well-drained soil, but some varieties may be more tolerant of heat, drought, or cold temperatures. By selecting a marigold variety that is well-adapted to your local climate, you increase the chances of successful growth and abundant blooms.
Furthermore, consider the height and spread of the marigold variety you choose. Compact varieties are suitable for containers and edging, while taller varieties are ideal for background plantings or incorporating into a mixed flower bed. Take into account the available space in your garden and the desired aesthetic you wish to achieve.
Lastly, consider the color and bloom type of the marigold variety. Marigolds come in a range of colors, including vibrant yellows, oranges, and reds. The bloom type can vary as well, with single blossoms, double blooms, and pompom-like clusters. Consider the overall color scheme of your garden and choose a marigold variety that complements or adds a striking contrast to the existing plants.
By carefully considering these factors, you can select the right marigold variety for your garden, ensuring a beautiful and thriving display of blooms. Whether you’re looking to enhance your flower beds or protect your vegetable garden, the right choice of marigold variety can make all the difference in achieving your gardening goals.
Preparing the Soil for Planting Marigold Flowers
Preparing the soil is a crucial step in ensuring the successful growth of marigold plants. The right soil conditions provide the necessary nutrients and aeration that allows these vibrant flowers to thrive. Before planting marigolds, it’s essential to evaluate the soil quality and make any necessary amendments.
Start by testing the soil’s pH level using a soil testing kit, readily available at garden centers. Marigolds prefer a slightly acidic soil with a pH range between 6.0 and 7.0. If the pH is outside this range, you can adjust it by adding soil amendments. For acidic soil, add agricultural lime, while sulfur is suitable for alkaline soil. The correct pH level ensures optimal nutrient availability to the plants.
Next, assess the soil’s texture and drainage. Marigolds thrive in well-draining soil, and heavy or compacted soil can hinder their growth. If the soil is too dense, you can improve its structure by incorporating organic matter, such as compost or well-rotted manure. These amendments will enhance the soil’s water-holding capacity and promote healthy root development.
Before planting, remove any weeds or debris from the soil. Weeds can compete with marigold plants for nutrients, water, and sunlight, impairing their overall growth. Clearing the area of debris also helps minimize the risk of disease and pest infestations.
By ensuring the soil has the right pH, proper drainage, and is free from weeds and debris, you are setting the foundation for the healthy growth of your marigold plants.
Following these preparation steps will contribute to robust and abundant blooms throughout the growing season.
• Test the soil’s pH level using a soil testing kit
• Marigolds prefer a slightly acidic soil with a pH range between 6.0 and 7.0
• Adjust the pH by adding agricultural lime for acidic soil or sulfur for alkaline soil
• Assess the soil’s texture and drainage
• Marigolds thrive in well-draining soil, so improve its structure if it is too dense
– Incorporate organic matter such as compost or well-rotted manure to enhance water-holding capacity
– Promote healthy root development
• Remove any weeds or debris from the soil before planting
– Weeds can compete with marigold plants for nutrients, water, and sunlight
– Clearing debris minimizes the risk of disease and pest infestations
Choosing the Ideal Location for Your Marigold Flowers Garden
Choosing the ideal location for your marigold garden is crucial in ensuring the successful growth and blooming of these beautiful flowers. Marigolds thrive in areas that receive full sun exposure for at least six hours a day. Therefore, it is essential to select a spot in your garden that offers ample sunlight throughout the day.
Additionally, marigolds prefer well-drained soil that is rich in organic matter. Before planting, it is advisable to test the soil pH to ensure it falls within the optimal range of 6.0 to 7.0 for marigolds. If the pH is too acidic, you can amend the soil by adding lime to raise it to the desired level.
Furthermore, the location of your marigold garden should also consider protection from strong winds. While marigolds are relatively resilient flowers, strong winds can cause damage to their delicate stems and petals. Choosing a location that is sheltered from strong gusts will help keep your marigold plants healthy and intact.
In conclusion, selecting the ideal location for your marigold garden involves considering factors such as sunlight exposure, soil quality, and protection from wind. By providing the right conditions, you will create an environment where marigolds can thrive and bring vibrant colors and beauty to your garden. So, take the time to find the perfect spot and prepare your garden for the flourishing of these wonderful flowers.
Planting Marigold Flowers Seeds: Step-by-Step Guide
Marigolds are popular flowering plants that can add a vibrant splash of color to any garden. Planting marigold seeds is a straightforward process that can be done by gardeners of all levels of experience. To begin, choose a suitable spot for your marigold garden, ensuring it receives at least six hours of direct sunlight daily. Marigolds prefer well-draining soil, so it’s essential to prepare the soil before planting the seeds.
Before planting the marigold seeds, thoroughly loosen the top layer of soil using a garden fork or shovel. This step improves the soil’s texture and allows the roots to penetrate more easily. Once the soil is prepared, make small grooves or furrows in the soil using a garden hoe or your fingers. The furrows should be approximately half an inch deep and spaced about six inches apart. Gently sprinkle the marigold seeds into the furrows, aiming for a spacing of about one to two inches between seeds.
Cover the seeds with a thin layer of soil and lightly press it down to secure the seeds in place. Water the soil gently, ensuring it remains moist but not waterlogged. With proper care and ideal growing conditions, you can soon enjoy the vibrant blooms of your marigold plants.
Caring for Young Marigold Flowers Seedlings
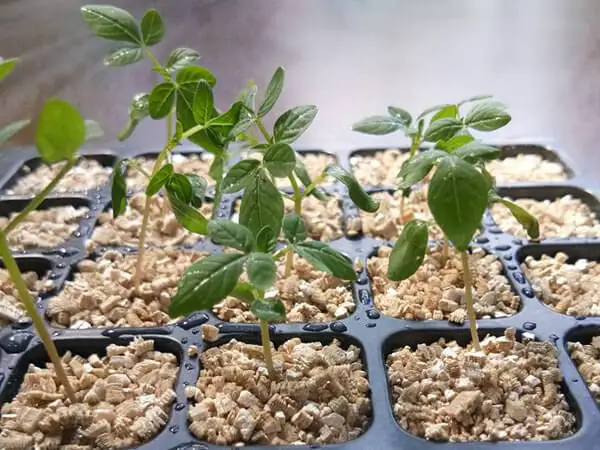
Caring for young marigold seedlings is a crucial step in ensuring their healthy growth and development. These tender plants require proper care and attention to thrive and produce vibrant blooms in your garden.
One important aspect of caring for young marigold seedlings is providing them with adequate sunlight. These plants thrive in full sun conditions, so it is essential to place them in a location that receives at least six hours of direct sunlight each day. This will promote sturdy stem growth and prevent leggy or weak seedlings.
In addition to sunlight, proper watering is essential for the health of young marigold seedlings. It is important to keep the soil consistently moist but not wet, as waterlogging can lead to root rot. Water the seedlings deeply once a week, ensuring that the soil is fully saturated, and allow the top inch of soil to dry out between watering. Using a mulch around the base of the seedlings can help retain moisture and prevent weed growth.
Furthermore, providing young marigolds with a well-balanced fertilizer will support their growth and development. Choose a slow-release fertilizer specifically formulated for flowering plants and follow the instructions on the package for application rates. Overfertilizing can lead to excessive foliage growth at the expense of flowers, so it is crucial to adhere to the recommended dosage.
Lastly, protecting young marigold seedlings from pests and diseases is important to ensure their survival. Keep an eye out for common pests like aphids, slugs, and snails, and take appropriate measures to eliminate them. Regularly inspect the seedlings for any signs of diseases, such as fungal infections or wilting, and promptly treat them with organic fungicides or pesticides if necessary.
By providing young marigold seedlings with proper sunlight, watering, fertilization, and protection against pests and diseases, you can set them up for success in your garden. Remember to monitor their progress closely and make adjustments as needed to ensure their healthy growth. With proper care, these seedlings will soon transform into beautiful and vibrant marigold flowers that will delight both you and your garden visitors.
Watering Marigolds: Dos and Don’ts
Watering is an essential part of caring for your marigold plants, as it directly affects their growth and overall health. However, it’s crucial to understand the dos and don’ts of watering marigolds to ensure optimal results in your garden.
Dos:
1. Water deeply but infrequently: Marigolds prefer to be watered deeply, allowing the water to penetrate the root zone. Aim for watering the plants once a week, providing approximately one inch of water. This promotes healthy root development and encourages the plants to establish a strong foundation.
2. Water at the base: When watering marigolds, it’s important to direct the water at the base of the plants. Avoid wetting the foliage as this can lead to the development of fungal diseases. By focusing on the root zone, you ensure that water reaches the plants’ roots where it’s most needed.
Don’ts:
1. Avoid overwatering: While marigolds require adequate moisture, overwatering can be detrimental to their health. Excess water can lead to root rot and other fungal diseases. Before watering, check the soil’s moisture level by sticking your finger into the top inch of soil. Only water if it feels dry at this depth.
2. Steer clear of shallow watering: Shallow watering, where only the surface of the soil gets wet, doesn’t provide enough moisture for the roots to access. This can result in weak and shallow root systems. Make sure to water deeply to encourage the roots to grow deeply into the soil.
By following these dos and don’ts of watering marigolds, you can ensure that your plants receive the right amount of moisture for healthy growth and abundant blooms. Remember, proper watering practices go hand in hand with other aspects of marigold care, such as proper fertilization and protection from pests and diseases.
Fertilizing Marigold Plants: Tips for Healthy Growth
Marigolds are vibrant and resilient flowers that can brighten up any garden with their cheerful colors. To ensure healthy growth and abundant blooms, proper fertilization is essential. The right balance of nutrients can provide marigolds with the necessary nourishment for robust development and stunning flowers.
When it comes to fertilizing marigold plants, the key is to choose a fertilizer that is high in phosphorus. Phosphorus is crucial for promoting healthy root development and stimulating flower production. Look for a fertilizer with a balanced N-P-K ratio, with a higher percentage of phosphorus (P), such as a 5-10-5 or 10-20-10 formulation. This will provide the marigolds with the necessary nutrients without risking excessive foliage growth at the expense of flowers.
In terms of application, it is best to spread the fertilizer evenly around the base of the plants, taking care not to let it come into direct contact with the stems or foliage. Water the plants thoroughly after applying the fertilizer to help it penetrate the soil and reach the root zone. Additionally, be mindful of the dosage and frequency of fertilization. Applying too much fertilizer can burn the plants, while under-fertilization may result in stunted growth and limited flowering. Following these tips for fertilizing marigold plants will help ensure healthy growth and vibrant blooms throughout the season.
Protecting Marigold Flowers from Pests and Diseases
Marigolds are generally considered to be low-maintenance plants, but like any other garden species, they can be susceptible to pests and diseases. Protecting your marigolds from these common threats is crucial to ensuring their health and longevity.
One of the most common pests that affect marigolds is aphids. These tiny insects feed on the sap of the plants and can cause significant damage if left untreated. To prevent aphid infestations, regularly inspect your marigolds for any signs of these pests and promptly remove any affected leaves or plants. Additionally, you can introduce natural predators to your garden, such as ladybugs, which feed on aphids and help keep their population in check.
Another common pest that can wreak havoc on marigolds is the spider mite. These tiny creatures suck the sap from marigold leaves, resulting in yellowing, wilting, and the formation of webbing. To prevent spider mite infestations, make sure to keep your marigolds adequately watered and avoid overfertilizing them, as these conditions can attract these pests. If you notice any signs of spider mites, remove affected leaves or plants and consider using organic insecticidal soap to control their population.
In addition to pests, marigolds can also be susceptible to diseases such as powdery mildew and root rot. Powdery mildew is a fungal infection that appears as white powdery patches on the leaves, while root rot can cause the roots to become mushy and discolored. To prevent these diseases, ensure proper air circulation around your marigolds by spacing them adequately and avoiding overcrowding. Additionally, water your marigolds at the base to prevent moisture from lingering on the leaves, as this can create an environment favorable to fungal growth.
By implementing these preventive measures and promptly addressing any pest or disease issues, you can effectively protect your marigolds and ensure their healthy growth and vibrant blooms. Stay vigilant, keep a close eye on your plants, and provide them with the care they need to thrive.
Pruning Marigold Flowers: Enhancing Shape and Blooms
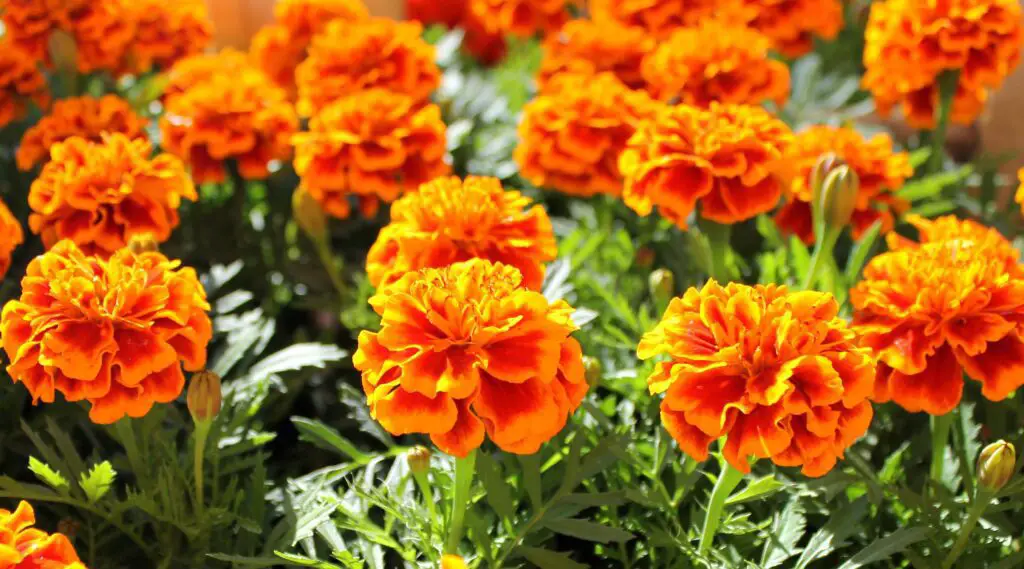
To enhance the shape and blooms of your marigold flowers, regular pruning is essential. Pruning not only helps maintain the overall appearance of your plants but also encourages continuous blooming throughout the growing season. When done correctly, pruning can also prevent overcrowding and improve air circulation, reducing the risk of diseases.
When it comes to pruning marigold flowers, a general rule of thumb is to remove any spent or faded blooms. This process, known as deadheading, redirects the plant’s energy towards new growth and flower production. To deadhead marigolds, simply pinch off the faded flower heads with your fingers or use clean pruning shears.
Additionally, the removal of leggy or overgrown stems can help maintain a compact and bushy shape. Look for stems that have grown excessively tall or have fewer leaves and buds compared to others. Using sharp pruning shears, make a clean cut just above a leaf node or healthy side branch to encourage new growth and branching.
Extending the Blooming Season of Marigolds
To extend the blooming season of marigolds, there are a few key strategies to consider. Firstly, deadheading spent flowers regularly is essential. Removing faded blooms prevents the plant from putting energy into seed production, allowing it to redirect resources towards new growth and more blooms. Additionally, regular pruning can play a crucial role in prolonging the blooming period. By cutting back leggy or overgrown stems, the plant is encouraged to produce new healthy growth, resulting in a longer flowering season.
Another technique to consider is fertilization. Providing adequate nutrients throughout the growing season can significantly enhance the blooming duration of marigolds. A balanced fertilizer, rich in phosphorus, is recommended to promote strong root development and more abundant blossoms. However, it is important to note that excessive nitrogen can lead to lush foliage at the expense of flower production. Therefore, finding the right balance of nutrients is crucial to sustaining continuous blooms.
Harvesting Marigold Seeds for Future Planting
Harvesting marigold seeds is a rewarding process that allows you to preserve your favorite varieties and ensure a successful planting season in the future. When it comes to collecting marigold seeds for future planting, timing is crucial. Begin by selecting the healthiest marigold flowers from your garden, preferably those that have fully bloomed and are starting to fade. It’s important to note that hybrid varieties often do not produce viable seeds, so it’s best to focus on open-pollinated or heirloom marigold varieties for seed harvesting.
To harvest marigold seeds, gently pluck the faded flowers from the plant, making sure to remove any surrounding petals or debris. Place the flowers in a paper bag or envelope and label them with the date and variety. Allow the flowers to dry completely in a warm, well-ventilated area for about two weeks. Once dry, gently shake the flowers to release the seeds, which are small, slender, and dark in color. Carefully separate the seeds from any remaining flower parts or chaff, and transfer them into a clean, dry container for storage.
Properly harvested and stored marigold seeds can remain viable for up to five years. Keep them in a cool, dark, and dry place to prevent moisture buildup and prolong their shelf life. When it’s time to plant your marigold seeds in the future, remember to follow the appropriate sowing and care instructions for a successful germination and growth. By saving and replanting marigold seeds, you can perpetuate your favorite varieties while adding a touch of vibrant color to your garden year after year.
Here’s a table providing information on how to grow Marigold flowers in a garden:
| Aspect | Marigold Flower Garden Care |
|---|---|
| Sunlight | Full sunlight is ideal for marigolds; they thrive in sunny locations. |
| Soil | Well-drained soil with a slightly acidic to neutral pH (6.0-7.0). |
| Watering | Water regularly; allow the soil to dry between watering to prevent root rot. |
| Fertilization | Use a balanced, all-purpose fertilizer during the growing season. |
| Planting Time | Plant marigold seeds or seedlings after the last frost in spring. |
| Spacing | Space plants according to the variety; typically 8-18 inches apart. |
| Mulching | Apply mulch to retain moisture and suppress weeds around the plants. |
| Pruning/Deadheading | Deadhead spent flowers to encourage continuous blooming. Trim leggy stems for bushier growth. |
| Pest Control | Keep an eye out for aphids and spider mites; use insecticidal soap if needed. |
| Disease Prevention | Provide good air circulation to prevent fungal diseases. |
| Companion Plants | Marigolds are known to deter nematodes; plant them near vegetables susceptible to nematode damage. |
| Varieties | Explore different marigold varieties, such as French, African, and signet marigolds. |
| Harvesting Seeds | Allow flowers to dry on the plant; collect seeds for future planting. |
| Uses | Use marigolds as garden borders, in containers, or as companion plants. |
| Overwintering | In colder climates, marigolds are annuals, but you can collect seeds for the next season. |
| Common Issues | Watch for signs of powdery mildew or rust; treat promptly if detected. |
| Additional Tips | Marigolds are easy to grow and make excellent companion plants; avoid overwatering to prevent root diseases. |
Remember that specific care instructions may vary based on your location, local climate conditions, and the particular variety of marigolds you are growing. Adjustments may be necessary depending on factors like temperature, humidity, and soil quality in your region.
Overwintering Marigold Plants: Essential Tips

Overwintering marigold plants is an essential practice to ensure their survival and revive their vibrant beauty for the next growing season. Marigolds, despite their hardiness, are not frost-tolerant and require some protection during the cold winter months. In this section, we will discuss some key tips to successfully overwinter your marigold plants.
Firstly, it is crucial to plan ahead and select the right location for overwintering your marigolds. Choose an area that offers protection from harsh winds and extreme temperature fluctuations. A well-insulated garage, basement, or even a cool greenhouse can serve as suitable overwintering spots. Ensure the area receives sufficient light, whether from natural sources or supplemental grow lights, to avoid weakening the plants.
Before moving your marigolds indoors for overwintering, it is essential to prepare them adequately. Start by trimming back any dead or damaged foliage, leaving only healthy growth. Gently remove the plants from the ground or containers and shake off excess soil. Inspect the roots for any signs of disease or pests, and if necessary, treat them accordingly. Transplant the marigolds into appropriately sized pots using a well-draining potting mix, providing ample space for the roots to develop. Finally, water the plants thoroughly to ensure they are adequately hydrated before their indoor stay.
Remember, successful overwintering depends on maintaining the right conditions for your marigolds. Resist the temptation to overwater as the reduced sunlight and lower temperatures often result in slower growth and less water demand. Monitor the soil moisture levels carefully and only water when the top inch of soil feels dry to the touch. Additionally, avoid fertilizing your marigolds during the winter months, as this can encourage excessive growth that may be difficult to sustain in limited light conditions.
Properly overwintered marigold plants can be a source of joy and a colorful addition to your garden for years to come. By selecting the right location, preparing the plants adequately, and providing appropriate care, you can ensure the survival and health of your marigolds during the winter season.
Troubleshooting Common Marigold Issues
Marigolds are generally low-maintenance flowers that are favored by many gardeners for their bright blooms and pest-repellent properties. However, like any plant, marigolds can face certain issues that may hinder their growth and overall health. In this section, we will discuss some common problems that gardeners may encounter when growing marigolds and offer guidance on troubleshooting these issues.
One common problem with marigolds is powdery mildew, a fungal disease that can manifest as a white, powdery substance on the leaves and stems of the plants. This disease thrives in humid and crowded conditions, so it is important to provide proper spacing and ensure good air circulation around your marigolds. To control powdery mildew, you can try removing and disposing of affected leaves, avoiding overhead watering, and applying fungicides specifically formulated for powdery mildew. Additionally, providing adequate sunlight and keeping the soil well-drained can help prevent this fungal disease from taking hold.
Another issue that can occur with marigolds is root rot caused by overwatering or poorly drained soil. Excess moisture can lead to root rot, which can cause the plant’s roots to become discolored, mushy, and eventually die. To prevent root rot, it is important to water your marigolds properly. Allow the top inch of soil to dry out before watering again, and ensure that the soil has good drainage. If you notice signs of root rot, such as wilting or yellowing leaves, it may be necessary to repot the plant in fresh, well-drained soil and reduce watering frequency.
Why are my marigold flowers not blooming?
There could be several reasons why your marigold flowers are not blooming. Lack of sunlight, improper watering, or nutrient deficiencies are common causes. Make sure your marigolds are receiving at least 6 hours of direct sunlight, water them consistently but avoid overwatering, and consider using a balanced fertilizer to provide essential nutrients.
Why are the leaves of my marigold plants turning yellow?
Yellowing leaves in marigold plants can be a sign of various issues. Overwatering, nutrient deficiencies, or fungal diseases like root rot may be the cause. Ensure that you are not overwatering your marigolds and provide them with well-draining soil. Consider using a balanced fertilizer to address any nutrient deficiencies. If the problem persists, it may be necessary to treat your plants with appropriate fungicides.
How do I protect my marigolds from pests?
Marigolds are generally resistant to many pests, but they can still be vulnerable to aphids, spider mites, and slugs. To protect your marigolds, regularly inspect them for signs of pests, and if needed, use organic insecticidal soap or neem oil to control the infestation. Additionally, planting companion plants like garlic, chives, or onions can help deter pests.
Can I grow marigolds indoors?
Yes, marigolds can be grown indoors as long as they receive sufficient sunlight. Place them near a south-facing window or provide them with artificial grow lights. Ensure proper drainage and water them adequately, allowing the soil to dry out between waterings.
Can marigolds tolerate frost?
Marigolds are generally frost-sensitive plants. They thrive in warm climates and do not tolerate freezing temperatures well. It is recommended to plant marigolds after the danger of frost has passed and to bring them indoors or provide protective coverings if frost is expected.
Can I save marigold seeds for future planting?
Yes, marigold seeds can be saved for future planting. Allow the flower heads to fully mature and dry on the plant. Once dried, remove the seeds from the flower heads and store them in a cool, dry place in a labeled envelope or container. Make sure the seeds are completely dry before storing to prevent mold or rot.


