Turnips: Planting, Growing, and Care
Are you ready to add a versatile and nutritious vegetable to your garden? Turnips, with their crisp texture and earthy flavor, are not only a delicious addition to your meals but also a joy to grow. From planting the seeds to caring for the plants, mastering the art of turnip cultivation can be a rewarding experience for any gardener.
Join us as we delve into the world of planting, growing, and caring for turnips, sharing expert tips and insights to help you achieve a successful harvest. Get ready to enjoy the fresh taste of homegrown turnips in your favorite dishes. Let’s dig in and discover the wonders of turnip gardening together!
Table of Contents
Understanding the Ideal Soil Conditions for Turnips
Turnips, a versatile and nutritious vegetable, thrive in specific soil conditions that promote optimal growth and yield. Understanding the ideal soil conditions is essential for gardeners and enthusiasts looking to cultivate healthy turnips. The key factors to consider are soil type, pH level, drainage, and nutrient content.
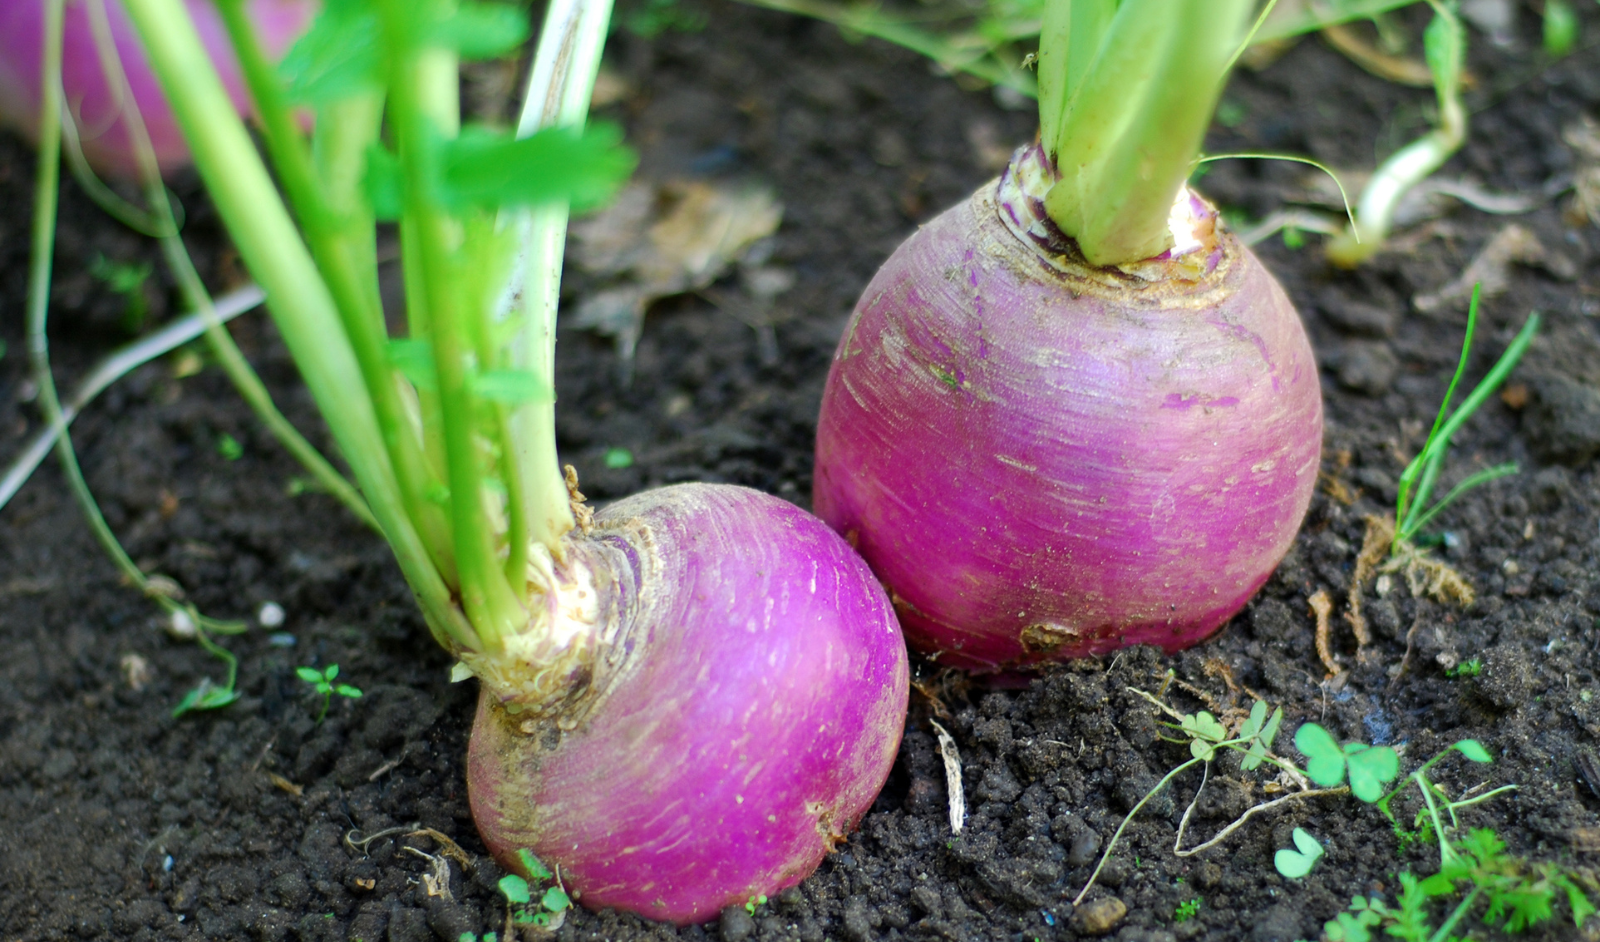
- Drainage: Well-draining soil is essential to prevent root rot. Sandy loam or loamy soil with good structure works best.
- pH Level: Aim for a slightly acidic to neutral pH range of 6.0 to 7.0. Extreme pH levels can hinder nutrient absorption.
- Soil Test: Conduct a soil test to determine the pH level and adjust as needed using organic matter or soil amendments.
- Nutrient-Rich Soil: Turnips thrive in soil rich in nutrients. Prior to planting, incorporate balanced organic fertilizers containing nitrogen, phosphorus, and potassium.
Remember these points for successful turnip cultivation! 🌱🥕
Selecting the Right Turnip Varieties for Your Garden
Turnips are a versatile and nutritious vegetable that can thrive in a variety of growing conditions. When selecting the right turnip varieties for your garden, it is important to consider your climate, soil type, and personal preferences. Different turnip varieties have distinct characteristics, including varying sizes, colors, and flavors.

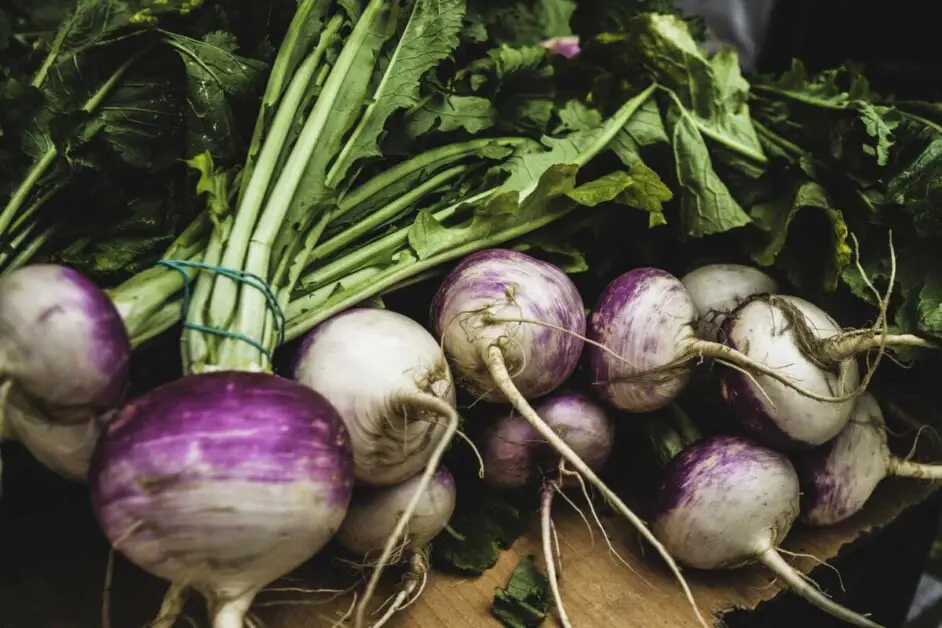
- Purple Top White Globe:
- Features a purple-colored top and white, crisp flesh.
- Reliable performance in various climates.
- Harvest when roots are tender and tops are 2-3 inches in diameter.
- Tokyo Cross:
- Prized for mild and sweet flavor.
- Quick maturity; great for early harvest.
- Purple Top Milan:
- Ideal for fresh consumption.
- Delicate texture suitable for salads and stir-fries.
- Amber Globe:
- Better for processing and canning.
- Larger size and sweet flavor.
Consider your preferences and usage to choose the perfect turnip varieties for your garden! 🌱🥕
Preparing the Soil for Turnip Planting
Once you have decided to grow turnips in your garden, it is essential to prepare the soil to provide the optimal conditions for successful planting.

Remember, proper soil preparation is the foundation for successful turnip cultivation. Taking the time to test and amend your soil will create the ideal growing environment for your turnips, resulting in healthy plants and a bountiful harvest.
Sowing Turnip Seeds: Best Practices
To ensure successful germination and optimal growth of turnip plants, it is important to follow best practices when sowing turnip seeds. Here are some key steps to consider:
1. Choose the right time: Turnip seeds are typically sown directly into the soil in early spring or late summer, when the soil temperature is around 45-85°F (7-29°C). It is crucial to select the appropriate time to ensure favorable conditions for germination and growth.
2. Prepare the soil: Before sowing turnip seeds, prepare the soil by removing any weeds, rocks, or debris. Loosen the soil to a depth of about 8-10 inches (20-25 cm) using a garden fork or a tiller. Incorporate organic matter such as compost or well-rotted manure to improve soil fertility and drainage.
3. Sow the seeds: Create furrows in the prepared soil, spaced about 12-18 inches (30-45 cm) apart. Sow the turnip seeds about ½ inch (1.3 cm) deep, placing them approximately 1 inch (2.5 cm) apart. For larger turnips, increase the spacing between seeds to allow enough room for the roots to develop.
4. Provide adequate moisture: After sowing the seeds, ensure that the soil remains consistently moist. Water the area gently and evenly, taking care not to wash away the seeds. Avoid over-watering, as it can lead to poor germination and root rot. A layer of mulch can help retain moisture and regulate soil temperature.
By following these best practices when sowing turnip seeds, you can lay a solid foundation for healthy and vigorous plants. In our next section, we will discuss the importance of providing adequate watering for turnip germination, ensuring optimal moisture levels for successful growth.
Providing Adequate Watering for Turnip Germination
When it comes to turnip germination, providing adequate watering is crucial for the successful growth and development of the plants. Turnips are known to be relatively hardy and tolerant of drought conditions, but their germination stage requires consistent moisture to ensure optimal results.

- During germination, maintain soil moisture without waterlogging to prevent seed rotting or weak roots.
- Overwatering can lead to seed issues, while underwatering can cause poor germination rates or stunted growth.
- Check soil moisture regularly using a moisture meter or by manually testing with fingers.
- Soil should feel slightly damp but not saturated; water when the top inch of soil is dry.
- Use a gentle stream of water to avoid displacing seeds or causing soil erosion.
- Water early in the morning or late afternoon to allow plants to absorb moisture before evaporation.
- Adjust watering frequency based on climate, soil type, and seedling density for optimal growth.
- Monitoring moisture levels consistently will support successful turnip seed germination and healthy plant development.
Thinning Turnip Seedlings for Optimal Growth
Thinning turnip seedlings is a crucial step in ensuring optimal growth and a bountiful harvest. As the seedlings emerge and begin to grow, it is important to thin them out to provide adequate space for each plant to thrive. This process allows the remaining turnip plants to receive sufficient sunlight, nutrients, and water, promoting healthy development and robust root growth.
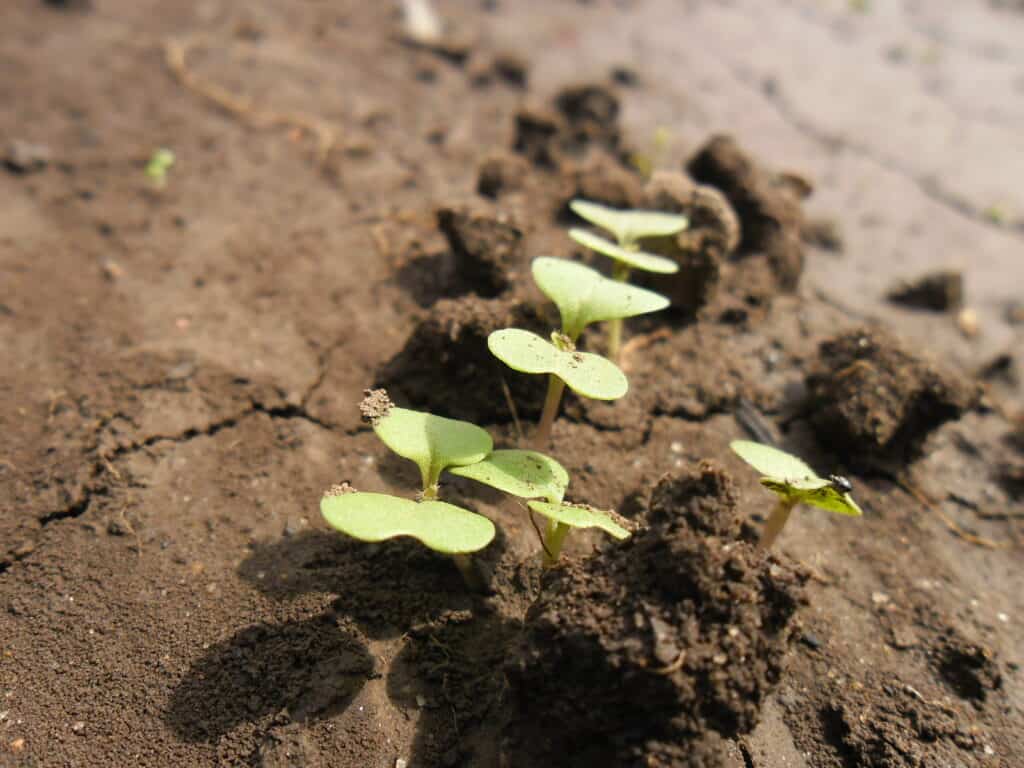
- Thinning turnip seedlings is recommended when plants reach a height of 2-3 inches to prevent overcrowding and stunted growth.
- Removing excess seedlings allows the strongest and healthiest ones space to spread their roots, promoting optimal growth and reducing disease and pest risks.
- Adequate spacing between plants improves air circulation, preventing moisture buildup and lowering the likelihood of fungal infections.
- A well-spaced garden facilitates easier inspection and identification of potential infestations, enabling timely intervention for turnip crop protection.
Remember, an overcrowded garden can result in smaller turnips with inferior flavor and texture. Take the time to thin out your turnip seedlings, and you will be rewarded with a healthier, more productive crop.
Implementing Effective Weed Control Methods for Turnips
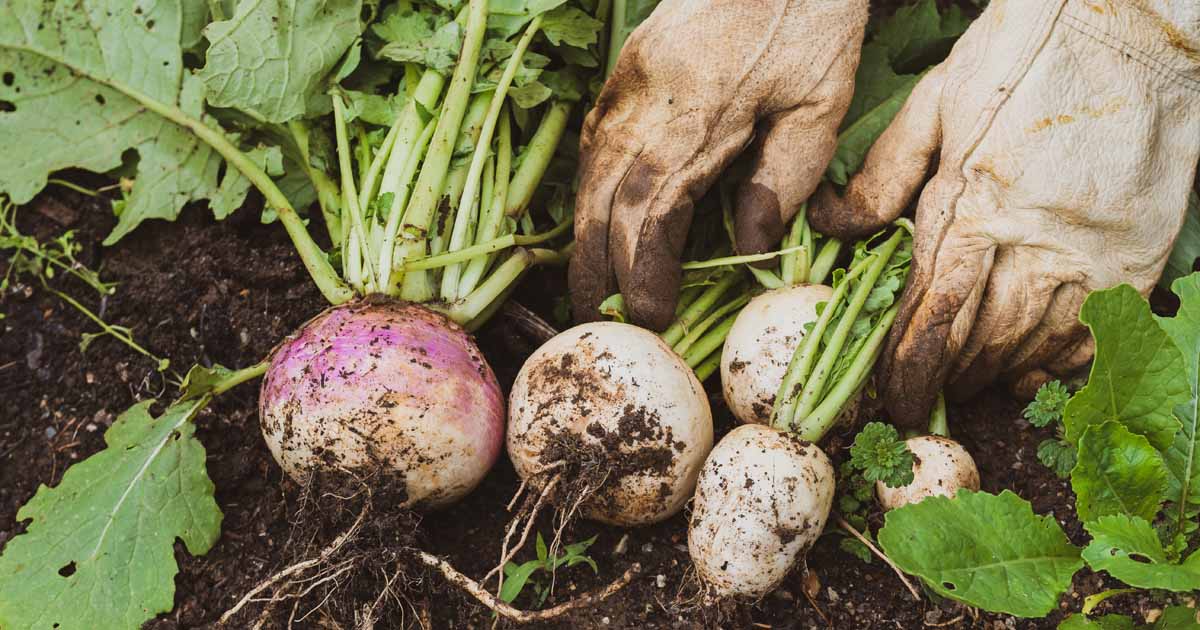
Weeds can quickly overtake a turnip garden if left uncontrolled, competing with the turnip plants for essential nutrients, water, and sunlight. To ensure the successful growth and development of your turnip crop, it is crucial to implement effective weed control methods. By utilizing these techniques, you can minimize weed infestation, promote optimal turnip growth, and ultimately maximize your harvest.
- Thinning Turnip Seedlings: Remove excess seedlings when plants reach 2-3 inches to prevent overcrowding and stunted growth.
- Integrated Weed Management: Use an integrated long-term approach for weed control in swedes and turnips, focusing on early residual herbicide treatments and programmed approaches.
- Physical Weed Control: Consider hand weeding as a mechanical method to physically remove weeds from turnip beds for effective weed prevention.
- Soil Preparation: Select well-draining, light soil for turnip cultivation and consider using soil amendments like composted organic matter to improve soil quality and deter weed growth.
- Consistent Monitoring: Regularly inspect turnip beds for weed growth and promptly intervene to prevent weed competition and ensure optimal turnip growth.
By combining these methods, you can effectively control weeds in turnip beds, promoting healthy growth and maximizing crop yield.
Protecting Turnip Plants from Common Pests and Diseases
One of the challenges that gardeners face when growing turnips is protecting the plants from common pests and diseases. These can wreak havoc on your crop, causing damage and reducing yield. It is important to implement effective strategies to prevent and control these problems, ensuring the health and vitality of your turnip plants.
| Protection Measures | Description |
|---|---|
| Garden Hygiene | – Remove debris, weeds, and dead plant material to eliminate hiding places for pests and diseases. |
| – Regularly inspect plants for signs of infestation or infection (e.g., yellowing leaves, holes, wilting). | |
| Companion Planting | – Plant marigolds or nasturtiums near turnips to repel pests like aphids and flea beetles. |
| – Introduce beneficial insects (e.g., ladybugs, lacewings) to control common pests. | |
| Organic Pest Control | – Use insecticidal soaps or neem oil sprays if needed (safe for the environment). |
| Disease Prevention | – Avoid overhead watering to prevent fungal infections (water at the base of plants). |
| – Promptly trim and discard infected foliage to prevent pathogen spread. | |
| – Rotate crops annually to reduce soil-borne disease risk. |
By following these practices and staying vigilant, you can effectively protect your turnip plants from common pests and diseases. Remember that prevention is key, so it is crucial to regularly monitor your garden and take necessary actions promptly.
Fertilizing Turnips: Tips for Nutrient-Rich Soil
Turnips are a versatile and nutritious addition to any garden, but to ensure their growth and development, it is crucial to provide them with the right nutrients. Fertilizing turnips is an important step in creating a nutrient-rich soil environment that supports their optimal growth. By understanding the specific needs of turnips, you can ensure that they receive the necessary nutrients for healthy and bountiful harvests.

- Nitrogen Requirement: Turnips benefit from nitrogen for foliage and leafy top growth, crucial for photosynthesis. Organic fertilizers like compost, manure, or blood meal are excellent nitrogen sources.
- Phosphorus and Potassium: Phosphorus aids in root development, while potassium boosts disease resistance and overall plant health. Use a balanced fertilizer with higher phosphorus content before planting.
- Soil pH Management: Maintain a slightly acidic to neutral pH (6.0-7.0) for optimal turnip growth. Adjust pH with agricultural lime for acidity or sulfur for alkalinity to ensure efficient nutrient uptake.
- Recommended Nutrient Amounts:
- Nitrogen (N): 60-80 lbs per acre for leaf and stem growth.
- Phosphorus (P): 40-60 lbs per acre for root development.
- Potassium (K): 80-100 lbs per acre for plant health.
- Calcium (Ca): 50-80 lbs per acre to prevent disorders.
- Magnesium (Mg): 20-30 lbs per acre for chlorophyll production.
In the next section, we will explore techniques for effectively mulching turnip beds, which can further enhance their growth and development. Proper mulching helps retain moisture, suppresses weed growth, and regulates soil temperature, all of which are beneficial for turnip plants. So, let’s dive into the world of mulching and discover how it can contribute to your turnip garden’s success.
I recently incorporated Espoma Blood Meal Fertilizer into my gardening routine, and the results have been impressive. Its organic composition provides a natural nitrogen boost to my plants, promoting lush, green foliage and robust growth. I’ve noticed a significant improvement in the overall health and vitality of my garden since using this product.
However, I must mention the strong odor that accompanies the application of blood meal fertilizer, which may be overpowering for some users. Additionally, its attractiveness to wildlife, such as deer and rodents, can pose challenges for gardeners in certain regions. Despite these minor drawbacks, Espoma Blood Meal Fertilizer remains a reliable choice for those seeking an organic, slow-release nitrogen source to nourish their plants and improve soil fertility.
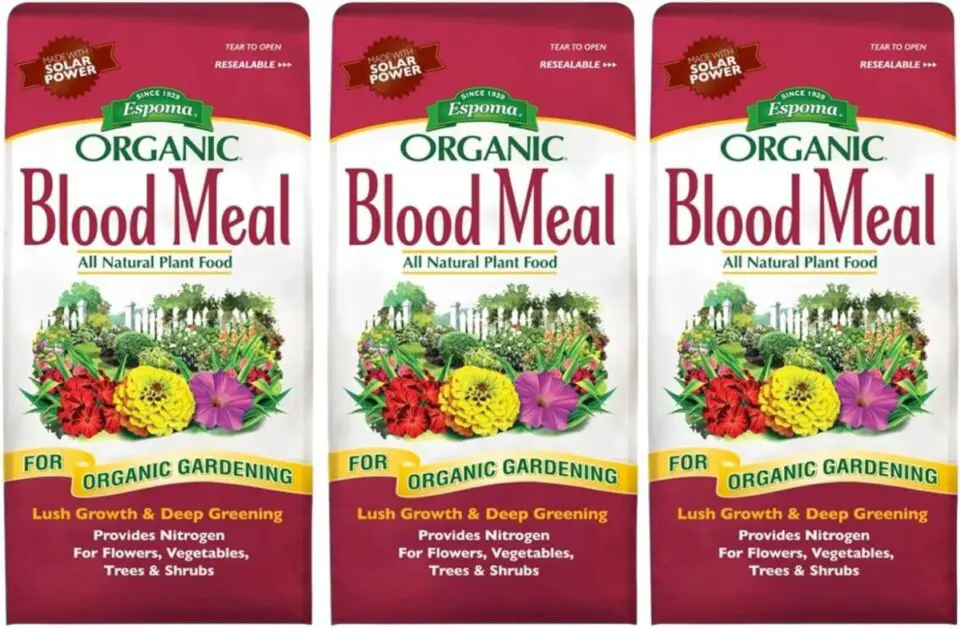
✅ High Nitrogen Content: Blood meal is known for its high nitrogen content, promoting healthy leafy growth in plants.
✅ Slow Release: Releases nutrients gradually, ensuring long-lasting benefits for plants without the risk of burning.
✅ Versatile: Suitable for a wide range of plants, including vegetables, flowers, and shrubs, making it a versatile option for gardeners.
✅ Improves Soil Fertility: Helps improve soil structure and fertility over time, leading to healthier and more vibrant plants.
❌ Attracts Wildlife: The scent of blood meal can attract unwanted wildlife, such as deer or rodents, to the garden.
❌ Potential for Nitrogen Imbalance: Overuse of blood meal fertilizer can lead to an imbalance of nutrients in the soil, potentially causing issues such as excessive vegetative growth or nutrient deficiencies in other areas.
❌ Cost: Compared to synthetic fertilizers, organic options like blood meal may be more expensive upfront, although they offer long-term benefits for soil health.
❌ Application Caution: Due to its high nitrogen content, it’s essential to follow application guidelines carefully to avoid over-fertilizing and damaging plants.
Mulching Techniques to Enhance Turnip Growth
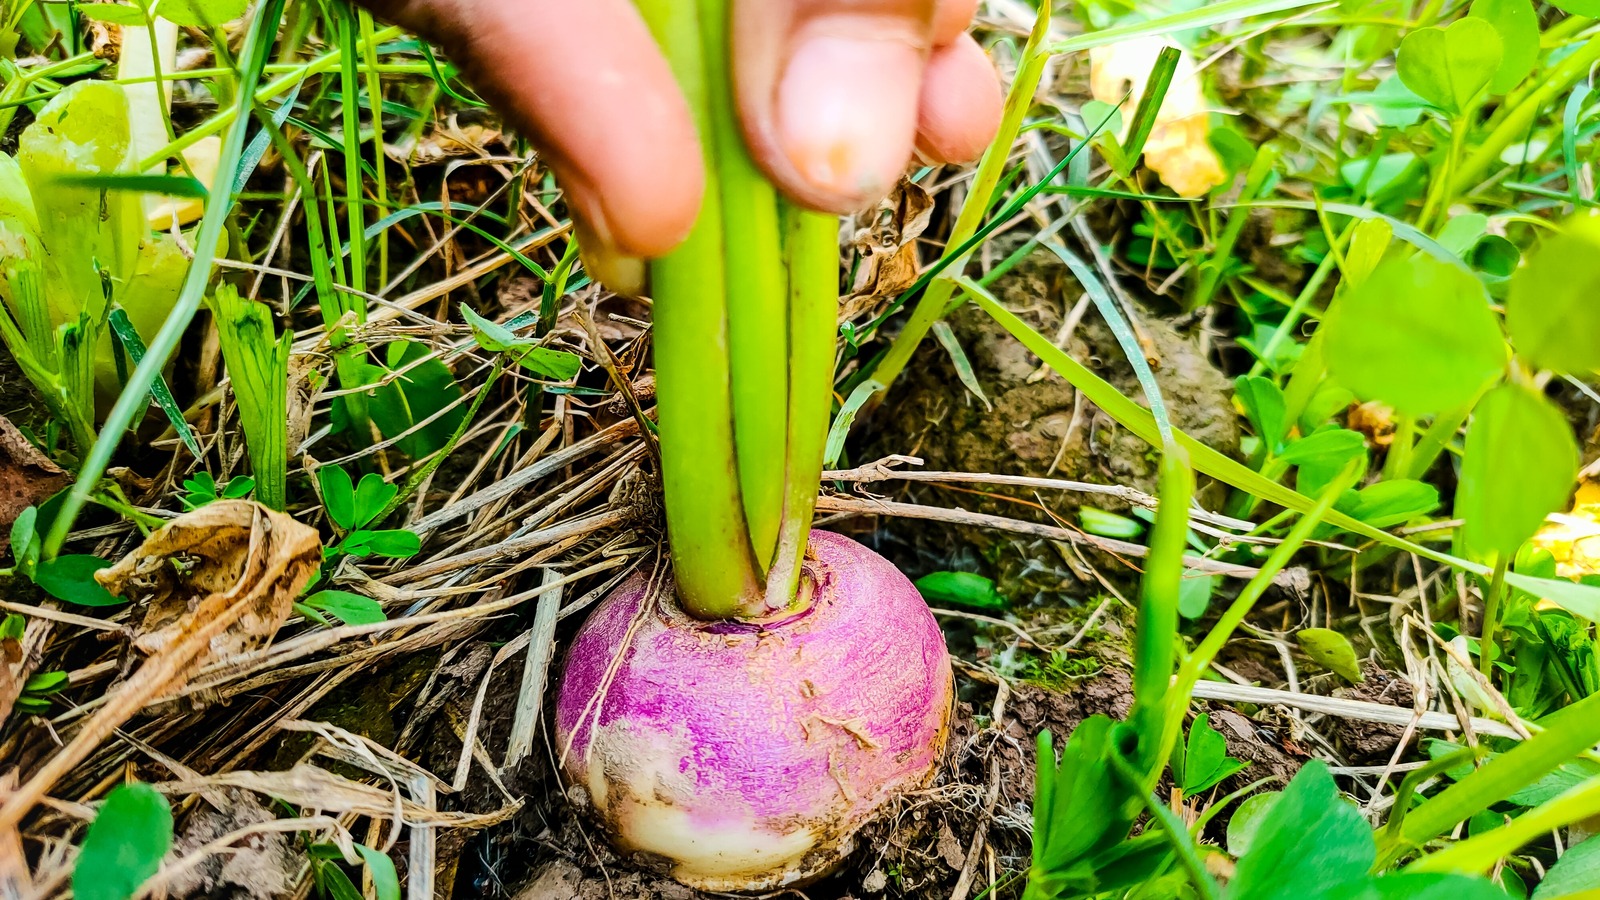
Mulching is a crucial technique that can greatly enhance the growth of turnips in your garden. By providing a protective layer of organic material on top of the soil, mulching helps to retain moisture, regulate temperature, suppress weeds, and improve soil fertility. These benefits ultimately lead to healthier and more productive turnip plants.
- Soil Moisture Conservation:
- Mulch acts as a barrier, reducing soil evaporation.
- Turnip plants can access water for a longer duration, especially during dry periods or in regions with limited rainfall.
- Soil Temperature Regulation:
- Mulch insulates the soil, maintaining stable temperatures.
- Optimal conditions for turnip root growth are ensured.
- Weed Suppression:
- Mulch suffocates weed seeds and limits sunlight access.
- Reduced weed growth minimizes competition with turnip plants.
- Time and Effort Savings:
- Less manual weeding required due to weed suppression.
- Turnip plants thrive without weed stress.
- Soil Enrichment:
- Organic mulch breaks down over time, enriching the soil.
- Essential nutrients promote healthy root development and overall plant vigor.
In summary, mulching is an effective technique for enhancing turnip growth in your garden. By conserving soil moisture, regulating temperature, suppressing weeds, and improving soil fertility, mulch provides ideal conditions for the healthy growth of turnip plants. Implementing proper mulching techniques can significantly contribute to the success of your turnip cultivation, leading to robust plants, abundant yields, and ultimately, a rewarding gardening experience.
Understanding the Optimal Temperature Range for Turnips
Turnips, a popular cool-season crop, require specific temperature conditions to thrive and produce a bountiful harvest. Understanding the optimal temperature range for turnips is essential for successful cultivation.
- Optimal Temperature Range: Turnips, scientifically known as Brassica rapa, thrive best within a temperature range of 55°F (13°C) to 75°F (24°C).
- Ideal Conditions for Growth: Within this temperature range, turnips exhibit optimal growth rates, facilitating the development of strong root systems.
- Quality Root Production: Turnips grown within the recommended temperature range yield quality roots suitable for consumption.
- Effects of Low Temperatures: When temperatures drop below 55°F (13°C), turnip growth slows down, potentially hindering their development.
- Risk of Frost Damage: Prolonged exposure to freezing temperatures, particularly frost, poses a significant risk to turnips, potentially causing severe damage or plant loss.
- Negative Impact of High Temperatures: Excessively high temperatures, exceeding 75°F (24°C), can negatively affect turnips by reducing their growth rate and compromising root quality.
The following table explains about the optimal temperature range for turnips:
| Growth Stage | Temperature Range (°F) |
|---|---|
| Germination | 50°F – 70°F |
| Seedling Establishment | 55°F – 70°F |
| Vegetative Growth | 60°F – 75°F |
| Bulb Development | 55°F – 70°F |
| Maturation | 45°F – 65°F |
To ensure the best conditions for your turnips, it is crucial to monitor temperature fluctuations and provide appropriate protection when necessary. By maintaining the optimal temperature range, you can support the healthy growth of turnips and maximize their yield in your garden or farm.
Promoting Healthy Root Development in Turnips
Promoting healthy root development in turnips is crucial for achieving abundant and robust harvests. The roots serve as the foundation for the plant’s overall growth and productivity, as they absorb water and nutrients from the soil. By implementing a few key practices, you can optimize the root development of your turnips and ensure they reach their full potential.

- Well-Drained Soil Environment: Turnip roots thrive in well-drained soil that is loose, friable, and rich in organic matter, promoting proper aeration and water movement.
- Incorporation of Organic Matter: Enhance soil structure and nutrient content by incorporating compost or well-rotted manure into the soil before planting, providing essential nutrients for healthy root growth.
- Consistent Soil Moisture: Maintain consistent soil moisture levels, especially during germination and early growth stages, to optimize root development.
- Balanced Watering: Avoid waterlogged conditions that can lead to root rot and dry spells that hinder root growth by carefully monitoring soil moisture levels and adjusting watering frequency accordingly.
- Monitoring and Adjusting: Regularly monitor soil moisture levels and adjust watering practices as needed to ensure optimal conditions for turnip root development.
- Foundation for Healthy Roots: By implementing these practices, establish a solid foundation for healthy root development in turnips, allowing them to absorb nutrients and thrive, ultimately leading to bountiful harvests.
Harvesting Turnips: Signs of Readiness and Proper Techniques
Signs of Readiness for Harvesting Turnips
Knowing the signs of readiness for harvesting turnips is crucial to ensure you pick the vegetables at their peak flavor and texture.

- Size:
- Mature turnips typically have a diameter of 2 to 3 inches.
- Varieties may vary, so check specific guidelines for the variety you’re growing.
- Texture:
- A mature turnip should feel firm to the touch.
- Soft or spongy bulbs are overripe and may have lost crispness.
- Hard or woody turnips may not be fully developed.
- Skin Inspection:
- Examine the turnip’s skin for cracks or blemishes.
- Cracks or blemishes can indicate age or disease.
- Overall Appearance:
- Opt for healthy, vibrant-looking turnips.
- Moderate size and firm texture are ideal for harvesting.
Proper Techniques for Harvesting Turnips
To ensure a successful harvest, it is essential to employ the correct techniques when harvesting turnips.
- Loosening Soil: Begin by using a garden fork or shovel to loosen the soil around the turnip, taking care not to damage the bulb.
- Gentle Extraction: Apply steady pressure to gently pull the turnip out of the ground, ensuring it is released smoothly from the soil without causing damage.
- Utilization of Turnip Greens: Harvest turnip greens by cutting them from the root using shears or a sharp knife, leaving a small amount of stem intact to allow for regrowth.
- Continued Production: By harvesting the greens properly, the turnip plant can continue producing additional foliage for future consumption.
- Cleaning and Storage: After harvesting, remove excess soil from the turnip bulbs and, if desired, separate them from the greens. Store the turnips in a cool, dry place such as a root cellar or refrigerator to maintain freshness and flavor.
- Longevity of Storage: Properly harvested and stored turnips can last for several weeks, providing a versatile and delicious vegetable option for various recipes.
I recently acquired the VNIMTI Garden Spading Fork for my gardening needs, and I must say, it has exceeded my expectations. Its sturdy construction makes it ideal for various tasks around the garden, from turning compost to digging up soil for planting. The ergonomic design ensures comfortable use, even during prolonged periods of work. The sharp tines penetrate the soil effortlessly, making tasks like aerating and planting a breeze. Overall, it’s a reliable tool that has become an essential part of my gardening arsenal.
However, one minor drawback I noticed is its weight, which can feel slightly heavy after extended use. Additionally, the price point may be a bit steep for some budget-conscious gardeners. Despite these small drawbacks, the VNIMTI Garden Spading Fork delivers excellent performance and durability, making it a worthwhile investment for any serious gardener.
- Durable Build: Constructed with high-quality materials, ensuring longevity and reliability.
- Versatile: Suitable for a variety of gardening tasks, including spading, compost turning, and digging.
- Ergonomic Design: Comfortable grip and balanced weight distribution reduce strain on hands and arms during use.
- Multi-Purpose: Can be used for both traditional gardening and compost management, offering great value for money.
- Effective Digging: Sharp tines penetrate soil easily, making it efficient for planting and aerating.
- Price: While offering excellent quality, it may be considered relatively expensive compared to other garden forks on the market.
- Limited Availability: Depending on location, it might be challenging to find in local stores, leading to reliance on online purchasing.
- Requires Maintenance: Like all gardening tools, regular cleaning and maintenance are necessary to ensure longevity and optimal performance.
- Weight: Some users may find it slightly heavier than expected, potentially causing fatigue during prolonged use.
- Tine Thickness: While sharp, the tines’ thickness may be a concern for those dealing with compacted or rocky soil, requiring extra effort to penetrate.
Storing Turnips: Preserving Freshness and Flavor
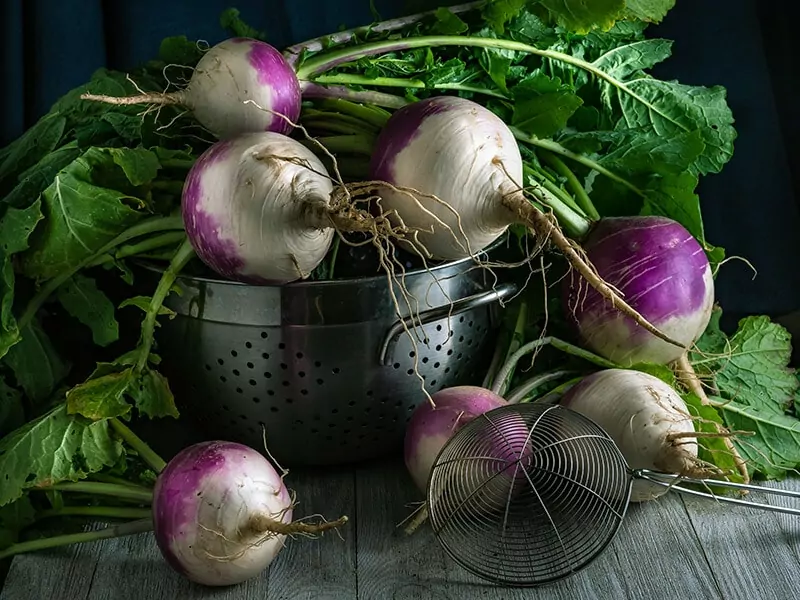
Properly storing turnips is essential for preserving their freshness and flavor, ensuring that you can enjoy these nutritious root vegetables for an extended period. By following a few simple guidelines, you can maintain the quality of your harvested turnips and enhance their taste in various culinary applications.
- Cleaning:
- Gently brush off excessive soil from the turnip roots.
- Alternatively, rinse them under cold running water to remove loose dirt.
- Air dry the cleaned turnips completely.
- Storage Conditions:
- Ideal temperature range: 32°F to 40°F (0°C to 4°C).
- Relative humidity: 90% to 95%.
- Maintain these conditions to prevent moisture loss and maintain crisp texture.
- Dark Environment:
- Store turnips in a dark place.
- Helps retain natural flavor and prevents discoloration.
- Storage Options:
- Consider using a root cellar, refrigerator, or cool basement.
- Use a well-ventilated container or bag to prevent excessive moisture buildup.
By carefully controlling these factors, you can prolong the storage life of your turnips and ensure they remain fresh and flavorful for an extended period.
Utilizing Turnip Greens: Delicious Recipes and Nutritional Benefits
When it comes to turnips, many people focus solely on the root portion of the plant, overlooking the immense potential of its greens.
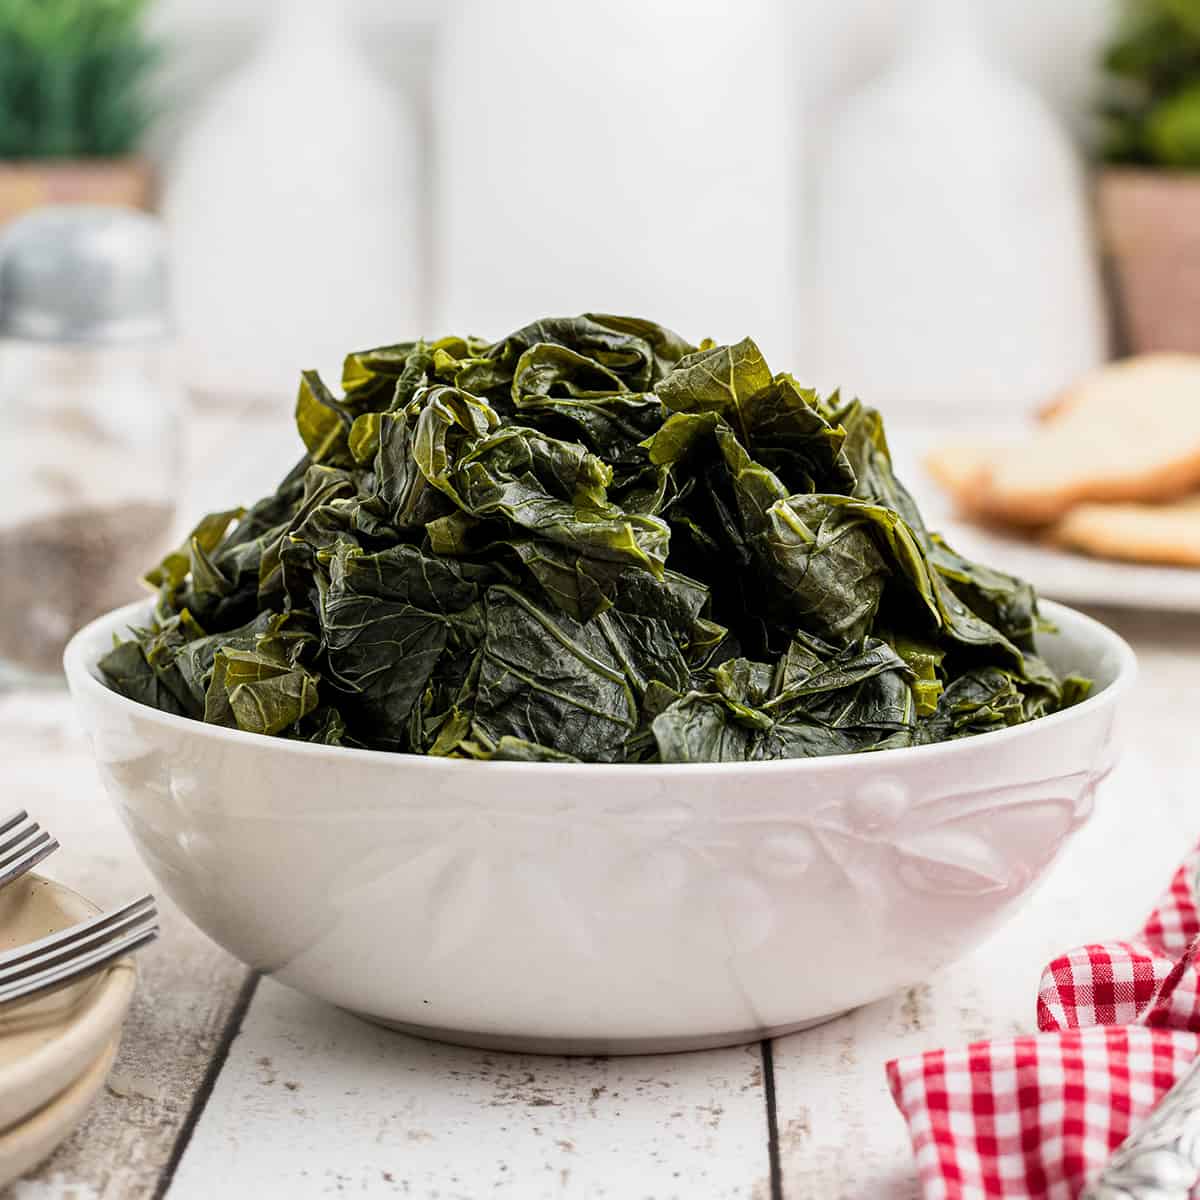
Furthermore, turnip greens can be added to salads for a refreshing and nutrient-packed twist. The possibilities are endless when it comes to utilizing turnip greens in your culinary adventures. So why not give them a try and discover the delicious flavors and nutritional benefits they have to offer?
Crop Rotation: Important Considerations for Next Season’s Turnips.
When it comes to growing healthy and productive turnips, crop rotation is an essential consideration for the next season.
- Pest and Disease Management:
- By rotating turnips with unrelated crops, you disrupt pest and disease cycles.
- Certain pests and pathogens specific to turnips and related plants are less likely to build up.
- Reduced impact on future turnip crops due to diversified planting.
- Soil Fertility Improvement:
- Rotating with nitrogen-fixing plants (e.g., legumes) enhances soil fertility.
- Nitrogen-fixers convert atmospheric nitrogen into usable forms for other plants.
- Improved nutrient availability benefits turnip growth.
- Preventing Nutrient Depletion:
- Continuous turnip cultivation in the same area depletes soil nutrients.
- Crop rotation replenishes essential nutrients, including nitrogen.
By rotating turnips with nitrogen-restorative plants, such as legumes, you can replenish the soil with nitrogen and other beneficial nutrients. This not only ensures that future turnip crops have the necessary nutrition for healthy growth but also promotes better overall soil health. Through careful planning and rotation, you can optimize nutrient availability and balance the nutritional needs of your turnip crops season after season.
Watch video for more information:
FAQ
What are the benefits of crop rotation for turnips?
rop rotation helps prevent soil-borne diseases and pests from building up in the soil, improves soil health and fertility, and enhances overall turnip yield and quality.
How often should I practice crop rotation for turnips?
It is recommended to rotate crop every two to three years to maximize the benefits and avoid potential issues with soil depletion or disease buildup.
Can I grow turnips in any type of soil?
While turnips can grow in a wide range of soil types, they prefer well-drained, loamy soil with a pH level between 6.0 and 7.0 for optimal growth and development.
What turnip varieties are best suited for my garden?
There are various turnip varieties available, but it is important to choose ones that are well-adapted to your climate, have good disease resistance, and meet your desired taste and culinary preferences.
How should I prepare the soil for turnip planting?
To prepare the soil, remove any weeds and debris, loosen the soil with a garden fork or tiller, and incorporate organic matter such as compost or aged manure to improve its fertility and structure.
When is the best time to sow turnip seeds?
Keep the soil consistently moist but not waterlogged during germination. Water deeply at least once a week, providing approximately 1 inch of water, adjusting based on rainfall and soil moisture levels.
How can I protect turnip plants from common pests and diseases?
Implement preventive measures such as crop rotation, using floating row covers, and practicing good garden hygiene. Monitor for signs of pests or diseases and use appropriate organic insecticides or fungicides if necessary.
What are some effective weed control methods for turnips?
Regularly remove weeds by hand or use mulch to suppress weed growth. Additionally, you can use organic weed control methods such as hoeing or applying corn gluten meal.
How do I thin turnip seedlings for optimal growth?
Thin turnip seedlings to ensure proper spacing, typically leaving about 3-4 inches between plants. This allows room for the roots to develop and prevents overcrowding.
What is the optimal temperature range for turnips?
Turnips thrive in cool weather conditions. The optimal temperature range for growth is between 50°F and 70°F (10°C to 21°C). Higher temperatures can cause the roots to become woody and pungent.
What are some mulching techniques to enhance turnip growth?
Apply a layer of organic mulch, such as straw or shredded leaves, around the base of turnip plants. This helps conserve moisture, suppresses weeds, and regulates soil temperature.
How often should I fertilize turnips?
Prior to planting, incorporate a balanced fertilizer into the soil. Additionally, side-dress with nitrogen-rich fertilizer when the turnip plants have reached about half their growth to promote healthy leaf and root development.
How can I store turnips to preserve freshness and flavor?
Remove the tops from the turnips and store them in a cool and dark place with a temperature between 32°F and 40°F (0°C to 4°C). Place them in a perforated plastic bag or store in a root cellar for extended storage.
How do I know when turnips are ready to be harvested?
Turnips are typically ready to harvest when the roots have reached 2-3 inches in diameter. Gently pull up one turnip and check for firmness and size. The greens can also be an indicator of readiness, as they should be vibrant and healthy-looking.
How can I promote healthy root development in turnips?
Ensure the soil is loose and well-drained, as compacted soil can hinder root growth. Adequate watering, fertilization, and providing sufficient spacing between plants also contribute to healthy root development.
Are turnip greens edible, and what are their nutritional benefits?
Yes, turnip greens are edible and highly nutritious. They are rich in vitamins.
How can crop rotation benefit my turnip crops for the next season?
Crop rotation helps break disease and pest cycles specific to turnips, improves soil fertility and structure, and reduces nutrient depletion. It is an essential practice for long-term turnip cultivation success.

Studied Agricultural Engineering-Plant Protection at University of California, Davis.
Head of Content writing team at Southelmontehydroponics.com

