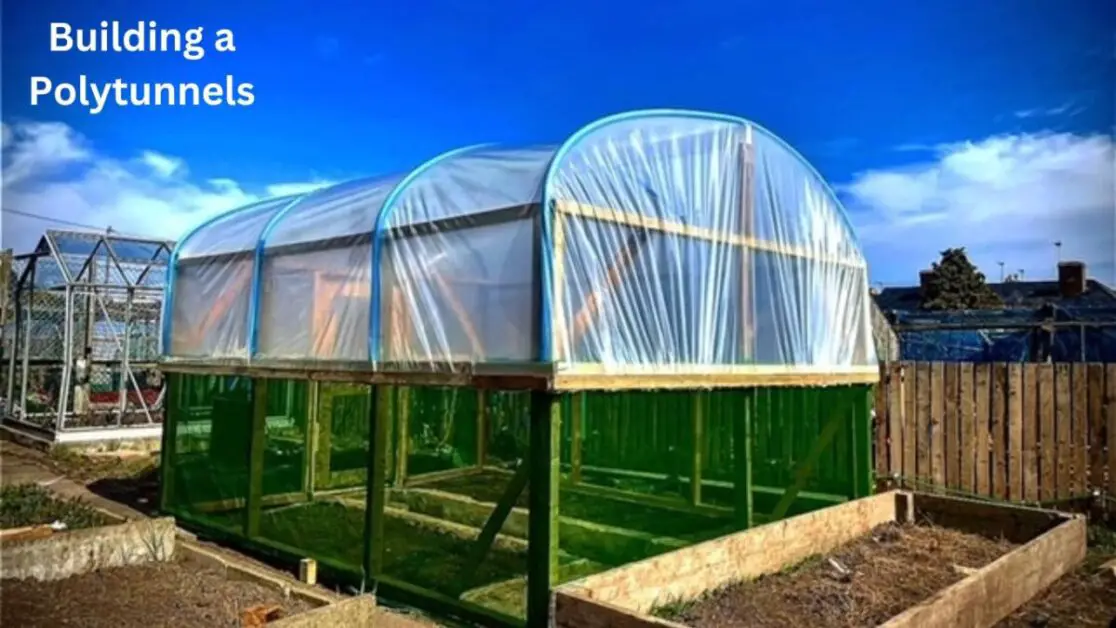
Building a Polytunnels: A DIY Vibrant Gardening Project
Table of Contents
Why Build a Polytunnels for Your Garden

A polytunnels offers numerous advantages for gardeners looking to extend their growing season and protect delicate plants from harsh weather conditions. By creating a controlled environment, polytunnels provide a stable climate that promotes healthy growth and abundant harvests. Whether you’re cultivating vegetables, flowers, or herbs, a polytunnel can significantly enhance the success of your gardening endeavors.
In addition to safeguarding your crops, polytunnels also contribute to more sustainable gardening practices by reducing water usage and minimizing the need for chemical pesticides. The enclosed structure helps retain moisture in the soil, leading to less evaporation and water wastage. Furthermore, the controlled environment limits exposure to pests and diseases, reducing reliance on harmful chemicals. Embracing the use of polytunnels in your garden not only enhances productivity but also promotes eco-friendly and efficient growing practices.
Benefits of Using a Polytunnels
Polytunnels offer a range of benefits for gardeners looking to extend their growing season. Firstly, they provide a controlled environment that protects plants from harsh weather conditions such as excessive rain, wind, or frost. This controlled climate allows for a longer growing season, enabling gardeners to start planting earlier in the spring and continue harvesting later into the fall.
Additionally, polytunnels can enhance plant growth and yield by creating optimal conditions for photosynthesis. The natural light and warmth trapped inside the tunnel promote healthy plant development, leading to larger and more abundant crops. With the ability to regulate temperature and humidity levels, gardeners have the flexibility to cultivate a wider variety of plants that may not thrive in their local climate otherwise.
Choosing the Right Location for Your Polytunnels
When choosing the right location for your polytunnel, it is important to consider several factors to ensure optimal plant growth and productivity. One crucial aspect to take into account is sunlight exposure. Select a spot that receives ample sunlight throughout the day, as most plants require at least 6-8 hours of direct sunlight to thrive. Avoid areas shaded by large trees or structures that could obstruct the sunlight.
Furthermore, assess the wind patterns in your garden before positioning your polytunnel. Strong winds can damage the structure and affect plant growth. Choose a location shielded from strong gusts, such as placing the polytunnel behind a solid fence or hedge. Additionally, consider the proximity to water sources for easy irrigation access. Opt for a location that allows convenient water supply for efficient watering of your plants within the polytunnel.
Preparing the Ground for Your Polytunnels
Before constructing your polytunnel, it is crucial to properly prepare the ground to ensure the best growing conditions for your plants. Start by clearing the area of any debris, rocks, and weeds, as these can hinder proper drainage and root growth. Level the ground as much as possible to provide a stable foundation for your polytunnel.
Next, consider testing the soil to assess its composition and nutrient levels. This will help you determine if any amendments, such as compost or fertilizers, are needed to optimize plant growth within the polytunnels. Additionally, ensure that the location of your polytunnel receives adequate sunlight throughout the day to promote healthy plant development. Properly preparing the ground sets the stage for a successful gardening experience inside your polytunnel.
Selecting the Right Materials for Your Polytunnels
When selecting materials for your polytunnel, it is essential to consider durability, light transmission, and insulation properties. Opt for sturdy galvanized steel poles or PVC pipes for the frame to ensure stability and longevity. Additionally, choose a high-quality polythene cover with UV protection to maximize light penetration while safeguarding your plants from excessive sun exposure.
It is crucial to select materials that are resistant to tears and punctures, as they will be exposed to various weather conditions throughout the year. Reinforced polythene covers are recommended for added strength and durability. Lastly, consider the thickness of the polythene cover, with 800-1000 gauge being a common choice for polytunnels to strike a balance between durability and light diffusion.
Measuring and Cutting the Materials for Your Polytunnels
When embarking on the task of measuring and cutting the materials for your polytunnel, accuracy is key to ensure a successful construction process. Begin by carefully measuring the dimensions of the area where your polytunnel will be placed. Use a tape measure to accurately determine the length, width, and height needed for the frame of your structure. Precision at this stage will help in avoiding mistakes during the cutting process.
Once you have obtained the precise measurements for your polytunnel, the next step is to cut the materials accordingly. When cutting the metal or PVC pipes for the frame, ensure that each piece is trimmed to the correct length using a suitable cutting tool. Remember to double-check your measurements before making any cuts to prevent wastage of materials and to guarantee that all components fit together seamlessly during the assembly stage.
Assembling the Frame of Your Polytunnels

Assembling the frame of your polytunnel is a critical step in the construction process that lays the foundation for the structure’s stability and durability. Begin by laying out all the frame components in an organized manner to ensure a smooth assembly process. Refer to the manufacturer’s instructions or your own design plan to identify each part and its specific placement within the frame.
Next, carefully connect the frame pieces together, making sure they are securely fastened to withstand environmental elements and the weight of the polythene covering. Utilize appropriate tools such as screws, bolts, or clips as recommended by the manufacturer to ensure a tight and secure fit. As you progress with the assembly, periodically check for alignment and symmetry to guarantee a uniform and sturdy frame that will support the entire polytunnel structure effectively.
Covering Your Polytunnels with Polythene
When it comes to covering your polytunnel with polythene, it’s essential to choose high-quality, UV-stabilized polythene to ensure longevity and durability. This material will help protect your plants from harsh weather conditions while allowing sunlight to penetrate for optimal growth. Measure the dimensions of your polytunnel frame accurately before cutting the polythene to size to ensure a snug and secure fit.
Securing the polythene cover on your polytunnel is crucial to protect your plants and maintain the structure’s integrity. Use strong polytunnel clips or rolls of fixing tape to firmly attach the polythene to the frame, ensuring there are no gaps or loose areas that could compromise the cover. Properly securing the polythene will also help maintain the internal temperature and humidity levels, creating a favorable environment for your plants to thrive.
Securing the Polythene Cover on Your Polytunnels
Once you have securely anchored the polythene cover over the frame of your polytunnel, it is essential to check for any loose areas or gaps that could compromise the structure’s integrity. Smooth out the cover as much as possible to prevent tears or wear from wind stress. It’s advisable to periodically inspect the polythene cover for any signs of damage and make timely repairs to extend its lifespan and maintain optimal growing conditions inside the polytunnel.
Properly securing the polythene cover on your polytunnel not only protects your plants from external elements but also helps maintain a consistent climate within the structure. By ensuring a tight and secure fit, you can minimize heat loss, prevent pests and disease from entering, and create a controlled environment conducive to plant growth. Investing time in securely fastening the polythene cover will pay off in the long run by providing a stable and productive space for your gardening endeavors.
Installing Doors and Vents in Your Polytunnels
When it comes to installing doors and vents in your polytunnel, it is crucial to pay attention to proper placement and functionality. Doors provide access to your polytunnel and should be strategically positioned to ensure easy entry and exit while maintaining structural integrity. Vents play a vital role in regulating temperature and humidity inside the polytunnel, promoting air circulation crucial for plant growth and health. Proper placement and size of vents are essential to create a well-ventilated environment for your plants.
Choosing the right type of doors and vents for your polytunnel is equally important. Opt for durable materials that can withstand the elements and frequent use. Select doors that are wide enough to allow comfortable access for you and any equipment you may need inside the polytunnel. Vents should be adjustable to control airflow based on the specific needs of your plants and the prevailing weather conditions. By carefully considering the placement and type of doors and vents in your polytunnel, you can create an optimal environment for successful gardening.
Adding Shelving and Benches Inside Your Polytunnels
When outfitting your polytunnel with shelving and benches, it’s important to consider the layout and spacing to maximize your gardening space. Shelving can be used to organize pots, trays, and tools, while benches provide a convenient work surface for potting and tending to your plants. By strategically placing these features, you can create an efficient and functional workspace inside your polytunnel.
Additionally, the choice of materials for your shelving and benches is crucial to ensure durability and longevity in the humid environment of a polytunnel. Opt for materials that are resistant to moisture and can withstand constant exposure to varying temperatures. Wooden shelving and benches treated with weatherproof sealant or rust-resistant metal options are popular choices that can withstand the conditions inside a polytunnel while providing a sturdy support for your gardening activities.
Watering and Ventilating Your Polytunnels
When it comes to maintaining a healthy environment inside your polytunnel, proper watering and ventilation are essential factors to consider. Adequate watering ensures that your plants receive the necessary moisture to thrive, promoting growth and productivity. Depending on the type of plants cultivated and the prevailing weather conditions, you may need to adjust the watering schedule and methods accordingly.
In addition to watering, effective ventilation plays a crucial role in regulating temperature and humidity levels within your polytunnel. Proper ventilation helps prevent the buildup of excess heat and moisture, reducing the risk of fungal diseases and improving air circulation for optimal plant growth. By incorporating vents or windows in strategic locations and considering natural airflow patterns, you can create a conducive environment that promotes the well-being of your plants.
Maintaining Your Polytunnels Throughout the Seasons
To keep your polytunnel in optimal condition throughout the seasons, regular maintenance is key. Inspect the structure for any signs of wear and tear, such as loose fastenings or damaged framework. Addressing these issues promptly can prevent further damage and ensure the longevity of your polytunnel. Additionally, ensure that the polythene cover is securely in place, with no tears or holes that could compromise its effectiveness in regulating temperature and humidity inside the structure.
In the colder months, consider insulating your polytunnel with additional layers of bubble wrap or horticultural fleece to protect delicate plants from frost. Adequate heating can also be beneficial, especially during extreme cold spells. Conversely, in the warmer seasons, proper ventilation is crucial to prevent overheating. Regularly open doors and vents to allow air circulation and regulate the internal temperature. By staying proactive in maintaining your polytunnel, you can create a thriving environment for your plants year-round.
Harvesting and Enjoying the Fruits of Your Gardening Labor
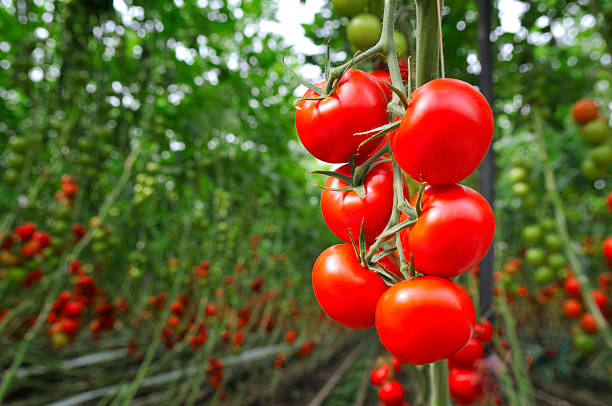
When the time comes to harvest your crops from the polytunnel, it’s a moment of satisfaction and pride, knowing that your hard work has paid off. The taste of freshly picked vegetables and fruits directly from your garden is unbeatable in flavor and freshness. From juicy tomatoes to crisp cucumbers, each harvest brings a sense of accomplishment and joy to the gardener.
As you enjoy the fruits of your gardening labor, take time to appreciate the benefits of growing your own produce in a polytunnel. Not only are you able to enjoy a variety of fresh, organic fruits and vegetables, but you also have the opportunity to reduce your carbon footprint by growing food locally. By cultivating your own crops, you can ensure that you know exactly where your food comes from and how it was grown, promoting a sustainable and healthy lifestyle for you and your family.
Here’s a basic table outlining the steps involved in building a polytunnel as a DIY gardening project:
| Step | Description |
|---|---|
| 1 | Planning and Preparation |
| – Determine the location and size of the polytunnel. | |
| – Check local regulations or restrictions regarding construction. | |
| – Gather materials and tools needed such as PVC pipes, connectors, polyethylene film, ground anchors, etc. | |
| 2 | Site Preparation |
| – Clear the chosen area of any debris, rocks, or vegetation. | |
| – Level the ground if necessary. | |
| – Install any necessary irrigation or drainage systems. | |
| 3 | Building the Frame |
| – Lay out the PVC pipes according to the planned dimensions of the polytunnel. | |
| – Connect the pipes using appropriate connectors to form the frame. | |
| – Ensure the frame is sturdy and securely anchored to the ground. | |
| 4 | Covering the Frame |
| – Unroll the polyethylene film over the frame, ensuring it covers the entire structure with some overhang on the sides. | |
| – Secure the film to the frame using clamps, staples, or UV-resistant zip ties. | |
| – Trim any excess film and make sure the covering is taut and free of wrinkles. | |
| 5 | Door and Ventilation |
| – Install a door at one end of the polytunnel for entry and exit. | |
| – Create vents along the sides or roof to allow for airflow and temperature regulation. | |
| – Install any additional features like roll-up sides or automated ventilation systems if desired. | |
| 6 | Anchoring and Securing |
| – Anchor the polytunnel securely to the ground using ground anchors, stakes, or other suitable methods. | |
| – Ensure all connections are tight and secure to withstand wind and weather. | |
| 7 | Interior Setup |
| – Prepare the soil inside the polytunnel for planting, adding amendments or fertilizers as needed. | |
| – Set up shelving, benches, or planting beds according to your gardening preferences. | |
| – Install any additional equipment such as irrigation systems, heaters, or shading if required. | |
| 8 | Planting and Maintenance |
| – Plant your desired crops or flowers inside the polytunnel, taking into account spacing and sunlight requirements. | |
| – Regularly monitor and maintain the polytunnel, watering plants, controlling pests, and adjusting ventilation as needed. | |
| – Make any necessary repairs or modifications over time to ensure the longevity and efficiency of the structure. |
Troubleshooting Common Issues with Your Polytunnel
Ensure the structural integrity of your polytunnel by regularly checking for any tears, holes, or loose fittings in the polythene cover. These issues can compromise the effectiveness of the tunnel in regulating temperature and humidity, which are essential for plant growth. Promptly patch up any damages with suitable repair tape or patches to maintain the optimal growing conditions inside your polytunnel.
Monitor the ventilation system in your polytunnel to prevent issues such as overheating or excessive humidity. Inadequate ventilation can lead to the buildup of heat and moisture, creating an environment conducive to the growth of pathogens and pests. Ensure that vents are clear of obstructions and functioning correctly to promote proper air circulation within the polytunnel. Regularly clean and maintain the ventilation openings to prevent blockages and ensure a healthy growing environment for your plants.
How can I prevent pests from entering my polytunnel?
To prevent pests from entering your polytunnel, you can install insect netting on the doors and vents, use organic pest control methods, and regularly inspect your plants for any signs of infestation.
What should I do if my polythene cover gets damaged?
If your polythene cover gets damaged, you can patch it up using polythene repair tape or replace the cover altogether if the damage is extensive.
How can I keep my polytunnel warm during the colder months?
To keep your polytunnel warm during the colder months, you can use a heater or install thermal insulation inside the polytunnel. Additionally, keeping the polytunnel well-sealed and using a double-layered polythene cover can help retain heat.
What should I do if there is excessive condensation inside my polytunnel?
Excessive condensation inside your polytunnel can be controlled by improving ventilation, especially during the warmer months. You can also use a dehumidifier or absorbent materials to reduce moisture levels.
How do I prevent mold and mildew growth inside my polytunnel?
To prevent mold and mildew growth inside your polytunnel, ensure proper air circulation and ventilation. Regularly clean and disinfect surfaces, and avoid overwatering your plants to reduce humidity levels.