How to Grow Sweet Potatoes in Containers in 8 Simple Steps
“Did you know you can enjoy the delicious taste of homegrown sweet potatoes even if you don’t have a sprawling backyard? Yes, it’s true! With just a bit of space and some creativity, you can cultivate these nutritious gems right on your patio or balcony. Imagine the satisfaction of harvesting your own sweet potatoes, knowing they’re free from harmful pesticides and full of flavor. In this guide, we’ll walk you through the process in 8 straightforward steps, perfect for beginners and seasoned gardeners alike. Get ready to dig in and discover the joys of container gardening with sweet potatoes!”
Table of Contents
Preparing Sweet Potato Slips:
When it comes to preparing sweet potato slips, there are a few key steps to follow.

Select Healthy Sweet Potatoes
- Choose sweet potatoes that are free from any signs of damage or disease.
- Opt for varieties known for success in your region, ensuring they thrive in your climate.
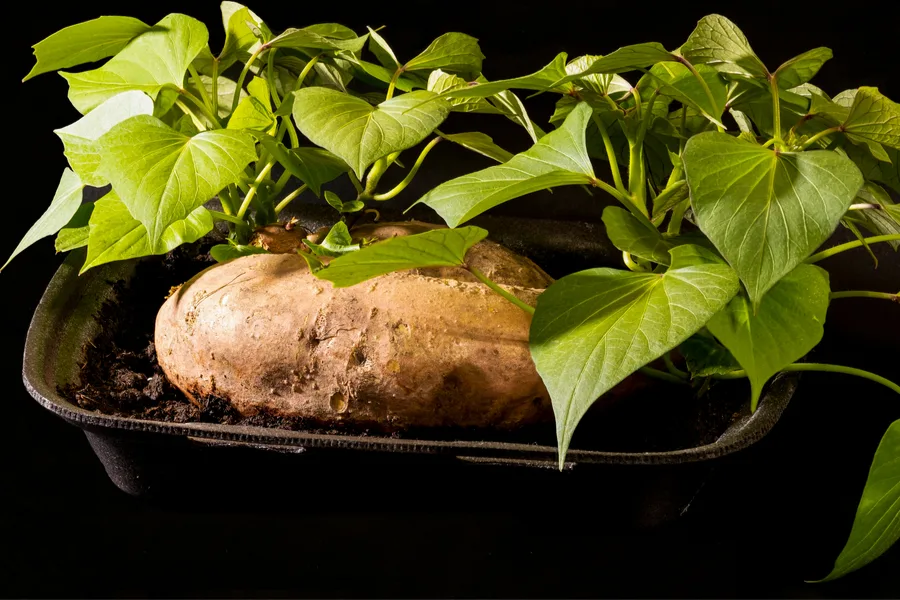
Cure the Sweet Potatoes
- Place the selected sweet potatoes in a warm and humid environment for 7-10 days.
- This curing process encourages the development of sprouts, known as slips, which are essential for planting.
Remove the Slips
- Carefully twist off the slips from the cured sweet potatoes, ensuring to keep the base intact.
- Each slip should have a small section of the sweet potato attached, where roots will develop.
Prepare for Root Growth
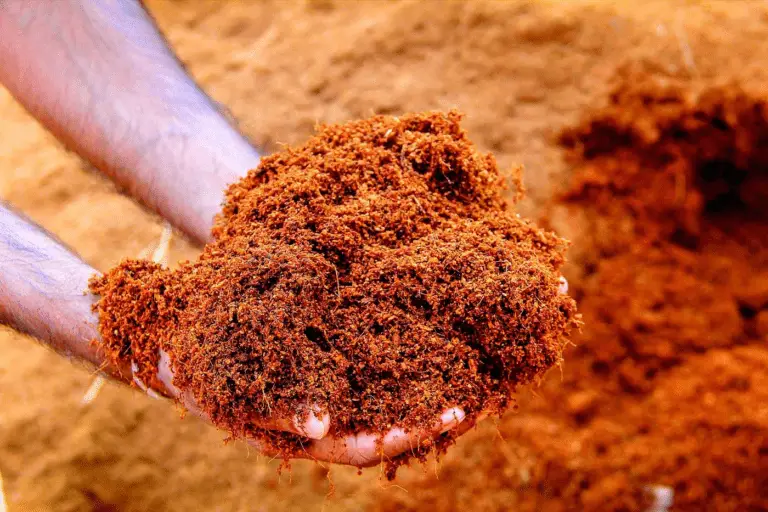
- Place the slips in a jar of water or moist vermiculite to stimulate root growth.
- Monitor the slips closely, ensuring they remain moist but not waterlogged to prevent rot.
I used Burpee Natural Fine Grade Horticultural Vermiculite for my sweet potatoes, and it has made a noticeable difference in their growth and health. The vermiculite improved soil aeration and lightened the heavy soil, allowing the roots to expand more easily. Its excellent moisture retention helped keep my sweet potatoes consistently hydrated, while its ability to retain nutrients ensured that the plants had better access to essential minerals.
Additionally, using it for seed starting provided a sterile and effective medium that promoted healthy sprouting. Although it is pricier and can be dusty when handled, the benefits far outweigh these minor inconveniences. I found that storing it properly to prevent moisture absorption was necessary, but overall, the positive impact on my sweet potatoes’ growth makes Burpee’s vermiculite a valuable addition to my gardening supplies.

- Improves Soil Aeration: Enhances soil structure by increasing aeration, promoting healthy root development.
- Moisture Retention: Retains moisture effectively, helping maintain consistent hydration for plants.
- Soil Lightening: Lightens heavy soils, making it easier for roots to expand and grow.
- Nutrient Retention: Helps retain nutrients in the soil, making them more available to plants.
- Seed Germination: Ideal for seed starting, providing a sterile medium that promotes healthy sprouting.
- Eco-Friendly: Made from natural minerals, making it an environmentally friendly choice for gardeners.
- Price: More expensive than some other soil amendments, which might be a concern for those on a tight budget.
- Dust: Can be dusty when handled, requiring careful handling to avoid inhalation and mess.
- Limited Nutrients: While it retains nutrients, it does not provide them, so additional fertilization may be necessary.
- Over-Retention Risk: Can retain too much moisture if overused, potentially leading to root rot in some plants.
- Packaging Size: May come in smaller packaging, necessitating multiple purchases for larger gardening projects.
- Storage: Needs to be stored in a dry place to maintain its effectiveness, as it can absorb moisture from the air.
Understanding the process of growing sweet potato slips and preparing them for container planting.
Growing sweet potato slips and preparing them for container planting is an essential step in the successful cultivation of sweet potatoes. A slip is a young plant that is grown from a mature sweet potato.
To begin the process, choose a healthy sweet potato that is free from any signs of disease or rot. Select a variety that is well-suited for container gardening, such as Beauregard or Centennial. These varieties are known for their high yield and delicious flavor.
Step 1: Choose a Healthy Sweet Potato
- Select a sweet potato free from any signs of disease or rot.
- Opt for container-friendly varieties like Beauregard or Centennial known for high yield and flavor.
Step 2: Encourage Slip Growth
- Place the sweet potato in a container filled with water, submerging one-third of it.
- Keep in a warm, humid area (75-85°F or 24-29°C) with indirect sunlight.
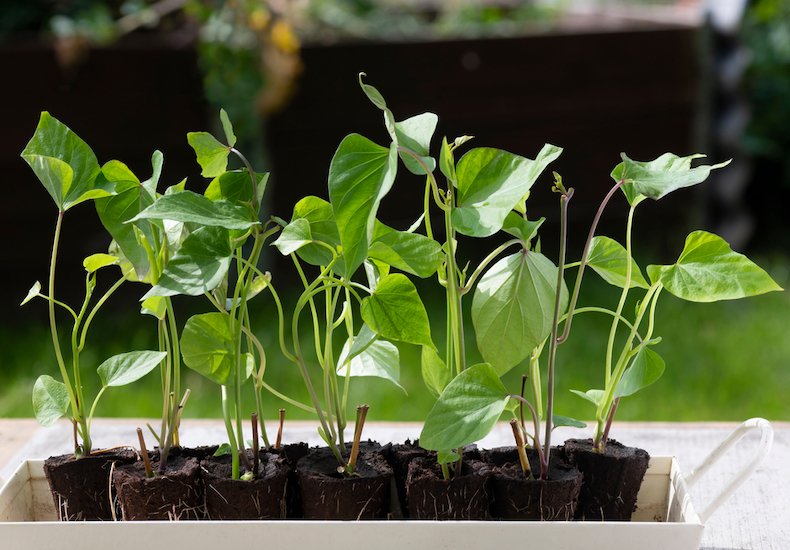
- Within weeks, roots and sprouts will emerge; when slips reach 6-8 inches, carefully twist them off.
Step 3: Harden the Slips
- Gradually expose slips to outdoor conditions, starting with a few shaded hours daily.
- Increase sunlight exposure over a week to strengthen slips for container planting.
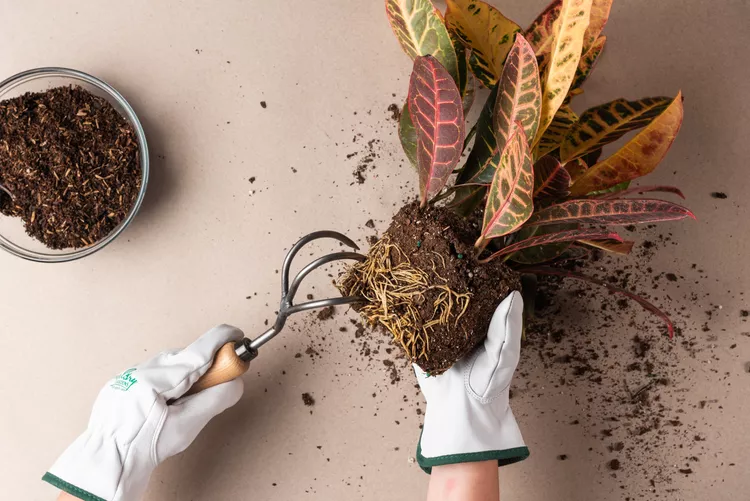
Step 4: Plant the Slips
- Select a container at least 12 inches deep with good drainage.
- Fill with well-draining potting mix, leaving space for slips.
- Make a small hole, plant slip ensuring roots are covered, and leaves are exposed.
- Firm soil gently around the slip for stability.
Conclusion:
Understanding the process of growing and preparing sweet potato slips for container planting is vital for a successful harvest. By selecting the right variety, providing optimal conditions, and ensuring proper hardening and planting techniques, you’re on your way to a bountiful sweet potato harvest.
Planting Sweet Potato Slips:
To ensure optimal growth and development of your sweet potato slips, proper planting techniques are crucial.
- Select a Container:
- Choose a container that is at least 12 inches deep to accommodate the root system of the sweet potato slips.
- Prepare the Potting Mix:
- Fill the container with a well-draining potting mix.
- Break up any clumps or compacted areas to ensure proper drainage and aeration.
- Create Holes for the Slips:
- Using your finger or a small stick, create holes in the soil, spaced about 12-18 inches apart.
- The holes should be deep enough to bury the slips up to their first set of leaves.
- Plant the Slips:
- Gently place each slip into a hole, being careful not to damage the delicate roots.
- Secure the Slips:
- Lightly pack the soil around the base of each slip to provide stability.
- Ensure that the soil is neither too loose nor too compact, as this can hinder root development.
- Water the Container:
- Give the container a thorough watering to settle the soil and initiate the growth process.
Remember, the planting stage sets the foundation for a successful sweet potato harvest. By providing a suitable container and employing proper planting techniques, you can optimize the growth and potential yield of your sweet potato plants.
Properly planting the prepared sweet potato slips in the container for optimal growth.
Planting sweet potato slips properly in a container is crucial for ensuring optimal growth and bountiful harvests. To start, choose a container that is at least 12 inches deep and has sufficient drainage holes. Fill the container with a well-draining potting mix that is rich in organic matter and provides good aeration for the roots.
Ensure the leafy portion is above the soil surface, with roots evenly spread below.
Avoid compacting the soil too much to prevent hindering root development.
By following these proper planting techniques, you are setting the stage for healthy sweet potato growth and a successful container garden harvest. Now, let’s explore the watering needs of sweet potatoes and how to provide adequate moisture for their flourishing growth.
Providing Adequate Watering:
The watering requirements of sweet potatoes are crucial to ensure their healthy growth and maximize their yield. These plants thrive in moist soil, but it is important to strike a balance and avoid overwatering, which can lead to root rot. To provide adequate watering, it is recommended to keep the soil consistently moist but not waterlogged.
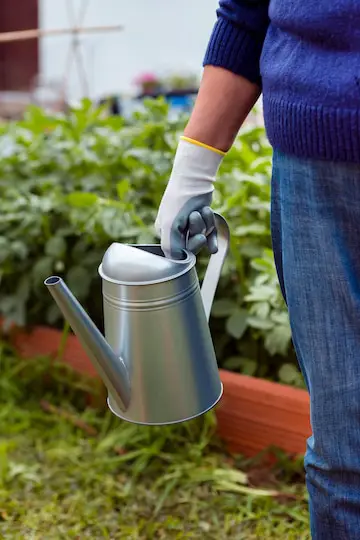
- Check soil moisture regularly by inserting your finger up to the knuckle; if dry, it’s time to water.
- Aim to water to a depth of at least six inches to encourage deep root growth and drought resistance.
- Water sweet potatoes once or twice a week, adjusting based on climate and soil moisture retention.
- During hot, dry weather, increase watering frequency; reduce during rainy spells to avoid waterlogging.
- Maintain a delicate moisture balance to provide optimal growing conditions for sweet potato plants.
By maintaining a delicate balance of moisture, you can provide the optimal growing conditions for your sweet potato plants.
Understanding the watering requirements of sweet potatoes and providing proper moisture levels.
Proper watering is essential for the healthy growth and development of sweet potatoes. Understanding the watering requirements of these crops and providing the right amount of moisture is crucial for maximizing their yield and overall quality. Sweet potatoes need consistent moisture throughout the growing season, especially during the initial stages when they are establishing their roots.
- Maintain a balance between over-watering and under-watering to prevent root rot and stunted growth.
- Regularly check soil moisture by inserting your finger up to the first knuckle; if dry, water the sweet potatoes.
- Adjust watering schedule based on weather conditions; increase frequency during hot and dry weather, decrease during cooler and rainy periods.
- Pay close attention to the moisture needs of your sweet potatoes to ensure their health and productivity.
The table shows the requirement of watering for sweet potatoes:
| Watering Sweet Potatoes | Description |
| Consistent Moisture | Keep soil consistently moist but well-drained throughout the growing season. Avoid waterlogged conditions. |
| Establishment Phase | Maintain consistent moisture during the first weeks after planting for slip or transplant establishment. |
| Reduced Watering After Establishment | Gradually reduce watering frequency once plants are established, ensuring soil never dries out completely. |
| Deep, Infrequent Watering | Water deeply when needed to encourage strong root development. Avoid shallow, frequent watering. |
| Critical Watering Periods | Pay attention to watering during tuber formation to prevent irregular shapes. |
| Avoid Waterlogging | Prevent waterlogged conditions to avoid root rot. Ensure proper drainage. |
| Mulching for Moisture Retention | Apply organic mulch to retain moisture, suppress weeds, and regulate soil temperature. |
| Watering in the Morning | – Water in the morning to reduce disease risk and allow leaves to dry during the day. |
| Monitoring Soil Moisture | Regularly check soil moisture levels and water when the topsoil feels dry. |
| Adjusting Based on Weather | Adjust watering frequency based on weather conditions. Consider more during hot and dry periods, less during cool and rainy times. |
| Container Gardening Considerations | Monitor container moisture closely; water when the topsoil feels dry. |
| Cease Watering Before Harvest | Stop watering 2-3 weeks before harvest to promote skin curing and prevent storage issues. |
Ensuring Proper Sunlight:
Sweet potatoes are a warm-season crop that thrives in full sun. Adequate sunlight is crucial for proper growth and development of sweet potato plants. When choosing a location for your container, it’s important to select an area that receives at least 6-8 hours of direct sunlight daily. This will ensure that the plants receive the necessary energy for photosynthesis and optimal growth.

- Understand Sunlight Requirements:
- Sweet potatoes are classified as full sun plants, needing direct sunlight for most of the day.
- They can tolerate partial shade, especially in hot summer months to prevent stress.
- Balancing Sunlight Exposure:
- Provide direct sunlight to sweet potatoes for vigorous growth and tuber development.
- Insufficient sunlight can result in small, malformed, or discolored tubers.
- Excessive shade may delay crop maturity and reduce yields.
- Optimizing Sunlight:
- Ensure your container is placed in a location that receives adequate sunlight.
- Consider providing a few hours of shade during the hottest part of the day in exceptionally sunny conditions.
By following these steps and understanding the sunlight requirements of sweet potatoes, you can create an optimal environment for healthy growth and abundant yields of sweet potatoes in your container garden.
Determining the ideal sunlight conditions for sweet potatoes and ensuring adequate exposure.
Sweet potatoes are a warm-season crop that thrives in full sunlight.
- Understand Sunlight Requirements:
- Sweet potatoes require at least 6-8 hours of direct sunlight per day for optimal growth and development.
- Selecting a Location:
- Choose a location for your sweet potato container that receives ample sunlight throughout the day.
- Ensure there are no obstructions like tall trees or buildings casting shadows over the designated spot.
- Observation and Placement:
- Observe your gardening area at different times of the day to assess sunlight exposure.
- Select a spot with full sun exposure and minimal shade for the majority of the day.
- Setting Up for Success:
- By providing sweet potatoes with the proper sunlight conditions, you are setting them up for success and maximizing their yield potential.
By following these steps and ensuring that your sweet potatoes receive adequate sunlight, you can promote healthy growth and optimize the yield of your sweet potato plants in a container garden.
The table shows the requirement of sunlight conditions for sweet potatoes:
| Sunlight Conditions for Sweet Potatoes | Description |
| Ideal Sunlight | – Sweet potatoes thrive in full sunlight, receiving at least 6 to 8 hours of direct sunlight per day. |
| Site Selection | – Choose a planting site that receives maximum sunlight exposure, preferably in an open area without shading from tall structures or trees. |
| Avoiding Shade | – Avoid planting sweet potatoes in areas with significant shade, as inadequate sunlight can lead to poor growth and reduced yield. |
| Sun Exposure Duration | – Ensure the sweet potato plants receive consistent sunlight throughout the growing season, especially during the crucial stages of root development. |
| Orientation in the Garden | – Plant sweet potatoes in rows or beds with a north-south orientation to maximize sunlight exposure on both sides of the plants. |
| Container Gardening Considerations | – If growing sweet potatoes in containers, place the containers in locations that receive full sunlight and consider moving them to track the sun if needed. |
| Regularly Trim Surrounding Vegetation | – Trim nearby bushes, tall plants, or weeds that could cast shade on sweet potato plants to maintain optimal sunlight exposure. |
| Adjust Planting Density | – Ensure proper spacing between sweet potato plants to avoid shading each other. Adequate spacing promotes better air circulation and sunlight penetration. |
| Use of Reflective Mulch | – Consider using reflective mulch around sweet potato plants. Reflective mulch bounces sunlight back onto the plants, enhancing exposure. |
| Monitor Sunlight Changes | – Be aware of changes in sunlight patterns throughout the growing season. Adjust planting locations if new shading issues arise due to seasonal changes. |
| Evaluate Microclimates | – Assess microclimates in the garden and choose planting spots that avoid frost pockets or excessive heat, ensuring consistent sunlight without extreme conditions. |
Implementing Support Structures
When it comes to growing sweet potatoes in containers, implementing support structures is a crucial step in ensuring the success of your crop.
- Selecting SupportStructures:
- Choose sturdy structures like trellises, cages, stakes, or poles to support the sprawling nature of sweet potato vines.
- Opt for materials such as bamboo or metal that can withstand the weight and growth of the plants.
- Vertical Placement:
- Place trellises or cages vertically in the container to allow the vines to climb and grow upwards.
- Ensure the structures are securely anchored in the container to provide stable support.
- Creating a Framework:
- Use stakes or poles to create a framework for the vines to spread and climb upon, especially in larger containers.
- This framework will help organize the growth of the vines and prevent them from falling over or getting tangled.
- Ensuring Stability:
- Anchor the support structures firmly in the container to withstand the weight and growth of the sweet potato vines over time.
- Regularly check and adjust the supports as the vines grow to maintain their stability and prevent damage.
By following these steps and providing adequate support structures for your sweet potato vines in a container garden, you can promote organized growth, prevent damage, and create a visually appealing and well-supported garden display.
Creating support structures within the container to provide necessary stability for growing vines.
Support structures are essential for providing stability and support to growing vines in containers, especially when it comes to cultivating sweet potato plants. These plants have vigorous growth with long trailing vines that can become heavy and pose a risk of toppling over. To prevent this, it is crucial to create suitable support structures within the container.
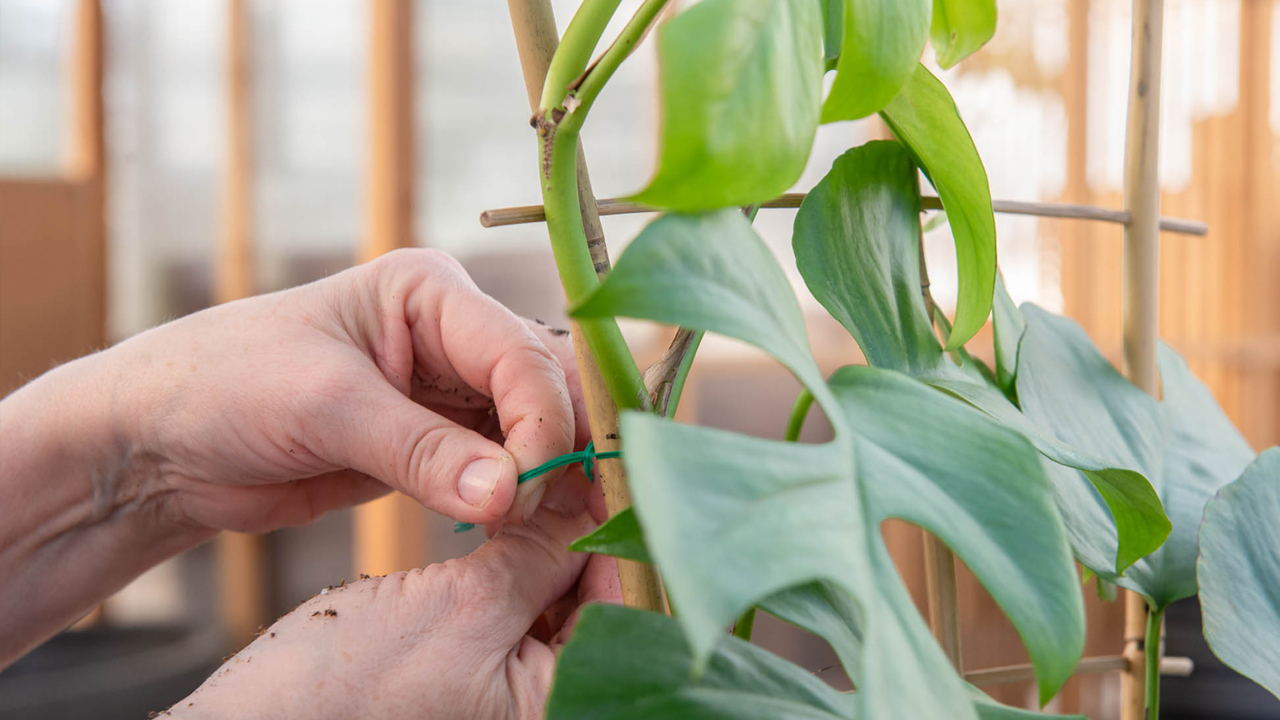
- Utilize Trellises or Cages:
- Assemble trellises or cages using stakes/posts and sturdy wire or netting material.
- As the vines grow, gently train them to climb and twine around the trellis or cage.
- This provides natural support, improves sunlight exposure, and promotes healthier growth.
- Implement Vertical Supports:
- Place bamboo poles or wooden stakes around the perimeter of the container.
- Create a framework for the vines to grow along the vertical supports.
- Tie the vines loosely to the supports using soft plant ties or twine to guide their upward growth.
- Maximize Vertical Space:
- The vertical support structures allow you to efficiently use limited space in the container.
- This method encourages the sweet potato vines to grow upwards rather than sprawling across the container.
- Promote Plant Health:
- The support structures improve air circulation and sunlight exposure for the vines.
- This helps prevent disease and ensures the overall health and vigor of the sweet potato plants.
By following these steps and providing the necessary stability through trellises, cages, or vertical supports, you can successfully grow sweet potato vines in a container, allowing them to thrive and produce a bountiful harvest.
Fertilizing Sweet Potatoes
Fertilizing sweet potatoes is an essential aspect of their growth and development. Proper fertilization can significantly contribute to healthy plant growth and a bountiful harvest. When it comes to fertilizing sweet potatoes, it is important to understand their nutrient requirements and apply the right type and amount of fertilizers at the appropriate times.
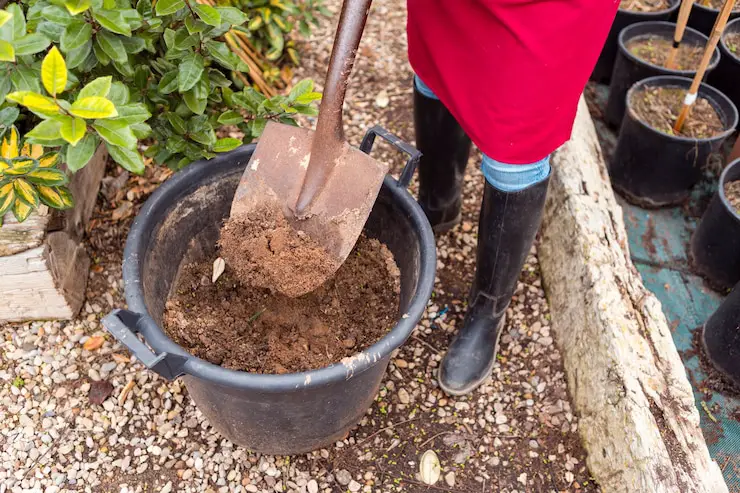
- Incorporate compost or well-rotted manure into the soil before planting:
- This will enhance soil fertility and provide a solid foundation for the sweet potatoes to grow.
- Compost and manure are rich in organic matter and nutrients that support plant growth.
- Conduct a soil test to determine nutrient deficiencies:
- A soil test will help identify any deficiencies in the soil and guide the fertilizer application.
- Addressing deficiencies through targeted fertilization promotes healthier plants and maximizes yield.
- Apply a balanced fertilizer during planting or when vines start to spread:
- Use a balanced fertilizer like 10-10-10 or 14-14-14 to provide a steady supply of essential nutrients.
- Avoid over-fertilization, as excessive vine growth can occur at the expense of tuber development.
- Follow the fertilizer manufacturer’s instructions on application rates:
- Carefully read and follow the recommended application rates on the fertilizer package.
- Applying too much fertilizer can lead to issues like nutrient burn or leaching.
- Provide periodic fertilization during the growing season:
- Sweet potatoes benefit from regular fertilization throughout their growth cycle.
- Apply fertilizer at intervals recommended for the specific product and growing conditions.
By following these guidelines, gardeners can optimize the nutrient uptake of sweet potatoes and promote their overall health and productivity.
I used Scotts All Purpose Vegetable Continuous Release Plant Food for my sweet potatoes, and it has significantly boosted their growth and yield. The balanced 10-10-10 nutrient ratio provided essential nutrients in a consistent manner, thanks to its continuous release formula. This meant I didn’t have to worry about frequent applications, which saved me time and effort. The ease of use and versatility made it an excellent choice for my garden, as I could use it for a variety of other vegetables as well.
Although the price is higher and it’s a synthetic fertilizer, the improvement in my sweet potatoes’ health and the increased yield made it worth the investment. Proper storage was necessary to prevent clumping, but overall, Scotts’ plant food has been a reliable and effective fertilizer for my gardening needs.
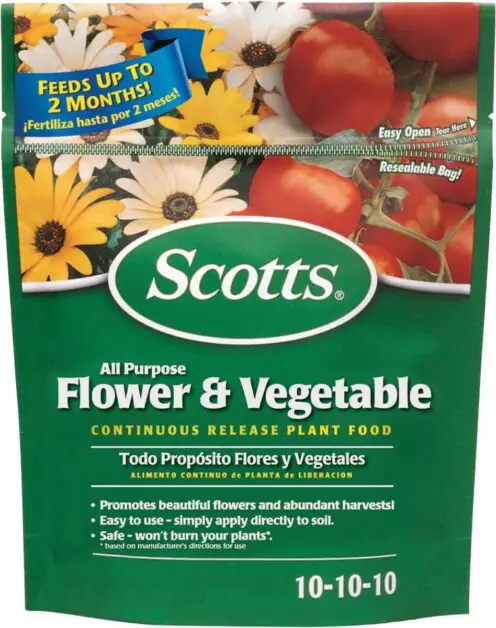
✅ Continuous Release: Offers a continuous release of nutrients for up to two months, ensuring consistent feeding.
✅ Easy to Use: Simple to apply, reducing the hassle of frequent fertilizing.
✅ Versatile: Suitable for a wide range of vegetables and plants, making it a versatile addition to any garden.
✅ Improves Yield: Helps increase the yield and quality of crops, leading to better harvests.
✅ Prevents Overfeeding: The slow-release formula reduces the risk of overfeeding and nutrient burn.
❌ Chemical Fertilizer: Contains synthetic chemicals, which might not appeal to those preferring organic options.
❌ Potential Runoff: Risk of nutrient runoff if over-applied, which could affect local waterways.
❌ Non-Specific: While versatile, it may not be specifically tailored to the unique needs of certain plants.
❌ Storage: Requires proper storage to prevent moisture absorption and clumping.
❌ Odor: Some users may find the fertilizer’s odor unpleasant when first applied.
Applying appropriate fertilizers at the right time to promote healthy growth and maximize yield.
Applying appropriate fertilizers at the right time is crucial for promoting healthy growth and maximizing the yield of sweet potatoes. Sweet potatoes are heavy feeders and require additional nutrients to thrive. By providing the right fertilizers, you can ensure that your sweet potato plants receive the necessary nutrients for optimal growth and abundant harvests.
Potassium is crucial for root development and overall plant health.
Applying it early helps establish a strong root system, supporting vigorous vine growth and larger, healthier sweet potatoes.
Phosphorus promotes root and tuber development.
Nitrogen encourages leafy growth.
A balanced fertilizer ensures plants receive a steady supply of essential nutrients for robust growth and high yields.
Apply products at the recommended rates to avoid nutrient imbalances or plant damage.
Overdosing can lead to nutrient imbalances or plant burn, while underdosing may result in deficiencies.
Adjust fertilizer applications as needed based on plant growth and any observed deficiencies.
By carefully managing nutrient requirements, you can ensure healthy plants and a bountiful harvest.
Managing Pests and Diseases
Pests and diseases can pose a significant threat to the health and productivity of sweet potato plants. It is essential for gardeners to be proactive in managing these issues to ensure a successful harvest.
| Pest/Disease | Symptoms | Treatment | Effects on Plant |
|---|---|---|---|
| Sweet Potato Weevil | – Holes in tubers – Larvae in tubers | – Remove and destroy infested tubers – Apply insecticides | Reduced yield – Tubers become unsuitable for consumption |
| Sweet Potato Whitefly | – Yellowing leaves – Sticky honeydew on leaves – Sooty mold on leaves | – Insecticidal soap or neem oil – Biological control with predators like ladybugs | Reduced photosynthesis – Weakening of plant – Transmission of viruses |
| Sweet Potato Beetle | – Holes in leaves – Skeletonized leaves | – Handpicking and destroying beetles – Apply insecticides | Reduced photosynthesis – Defoliation – Reduced yield |
| Fusarium Wilt | – Yellowing and wilting of leaves – Stunted growth | – Plant resistant varieties – Rotate crops – Soil solarization | Wilting – Reduced yield – Plant death |
| Sweet Potato Leaf Curl Virus | – Leaf curling – Yellowing and mottling of leaves – Stunted growth | – Remove infected plants – Control whitefly vectors – Plant virus-free slips | Reduced photosynthesis – Stunted growth – Reduced yield |
| Root Rot | – Wilting – Yellowing of leaves – Rotting roots | – Improve soil drainage – Avoid overwatering – Apply fungicides | Wilting – Reduced growth – Plant death |
By implementing effective pest and disease management strategies, gardeners can protect their sweet potato plants and maximize their yield. Regular monitoring, using disease-resistant varieties, and applying appropriate measures when necessary will contribute to a successful and thriving sweet potato crop.
For more information watch the given video:
FAQ
Can I use regular potatoes instead of sweet potatoes for this process?
No, sweet potatoes and regular potatoes are different plants and have different growing requirements. Sweet potato slips are specific to sweet potatoes and cannot be substituted with regular potatoes.
How long does it take for sweet potato slips to grow?
Sweet potato slips typically take 6-8 weeks to grow. The exact time may vary depending on factors such as temperature and growing conditions.
Can I plant sweet potato slips directly into the ground instead of a container?
Yes, you can plant sweet potato slips directly into the ground. However, growing them in a container allows for better control of soil conditions and makes it easier to harvest the sweet potatoes later.
How often should I water my sweet potato slips?
Sweet potato slips require regular watering to maintain proper moisture levels. Water them deeply once a week and adjust the frequency based on the weather conditions and moisture retention of the soil.
Can sweet potatoes tolerate full sun exposure?
Sweet potatoes prefer full sun exposure and require at least 6-8 hours of direct sunlight per day for optimal growth. However, they can also tolerate partial shade if necessary.
Do sweet potato vines need support structures?
Yes, sweet potato vines can become heavy and require support structures to prevent them from trailing on the ground. You can create trellises or use stakes to provide the necessary stability.
When should I fertilize my sweet potato plants?
It is best to fertilize sweet potato plants at planting time and then again about four weeks after planting. Use a balanced fertilizer with equal amounts of nitrogen, phosphorus, and potassium.
What are common pests and diseases that affect sweet potato plants?
Common pests that affect sweet potato plants include sweet potato weevils, aphids, and cutworms. Diseases like sweet potato scurf and fusarium wilt can also pose a threat. Proper pest management and regular inspection can help prevent and control these issues.
Studied Agricultural Engineering-Plant Protection at University of California, Davis.
Head of Content writing team at Southelmontehydroponics.com