How to Clean Your Grow Room Fans Effectively: A Step-by-Step Guide
Table of Contents
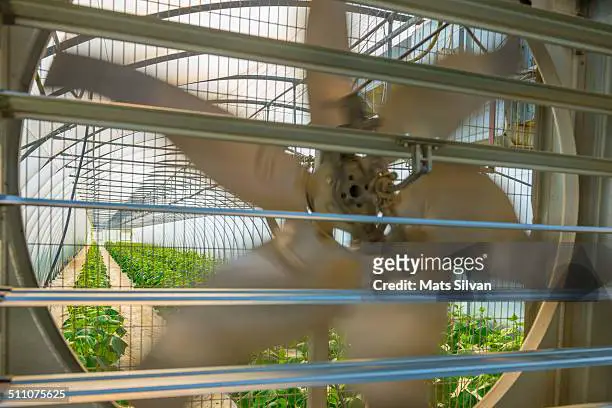
Identifying the Signs of a Dirty Fan
Signs of a Dirty Fan can be easily identified by observing certain indicators. One common sign is the presence of a thick layer of dust and dirt on the fan blades and grille. This accumulation hinders the fan’s ability to circulate air efficiently, resulting in reduced airflow and performance. Another indication of a dirty fan is the excessive noise it generates while in operation.
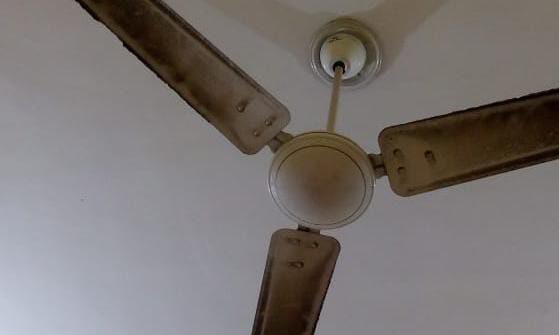
The buildup of debris on the blades can cause imbalances, leading to vibrations and loud noises. Moreover, a dirty fan may emit a musty or unpleasant odor, indicating the presence of mold or mildew due to moisture trapped within the fan components. These signs should not be ignored, as a dirty fan not only affects the air quality in your grow room but also increases the risk of potential damage to the fan motor.
• Thick layer of dust and dirt on fan blades and grille
• Excessive noise during operation.
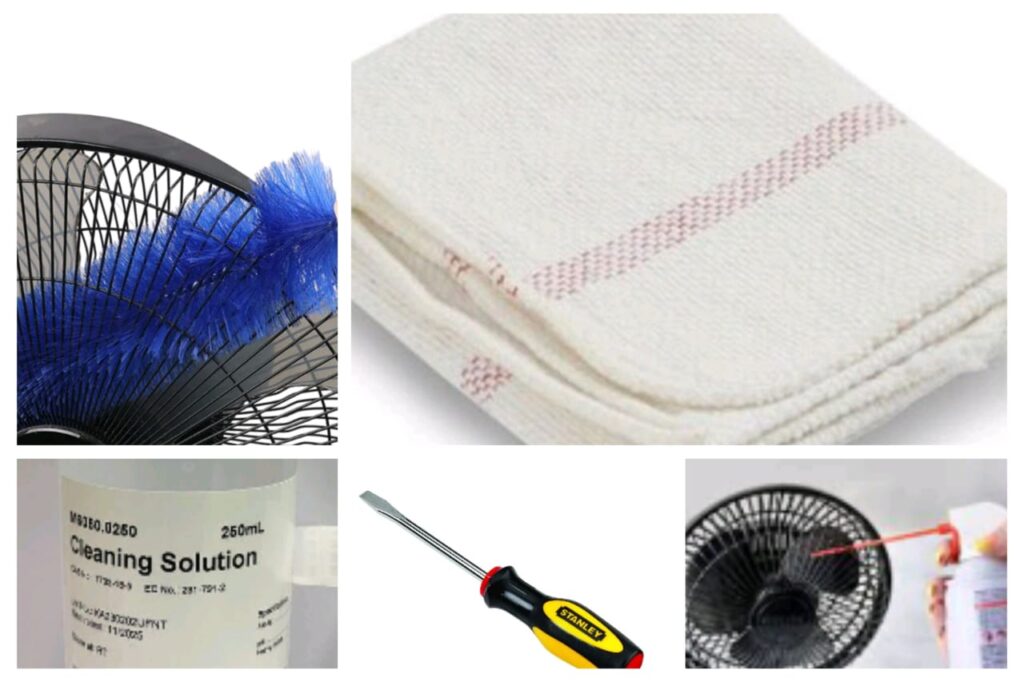
Gathering the Necessary Tools for Cleaning
To ensure a thorough and efficient cleaning process for your fan, it is important to gather all the necessary tools beforehand. Having the right tools at hand will not only make the cleaning process easier, but also help you achieve better results. Here are the essential tools you will need:
1. Soft-bristled brush or cloth: This will be used to clean the fan blades, grille, and other components without causing any damage. Make sure the brush or cloth is clean and free from any loose fibers to avoid leaving behind residue.
2. Compressed air canister: This powerful tool is ideal for removing dust and debris from hard-to-reach areas such as the motor and wires. It will effectively dislodge particles without causing any harm to the delicate components.
3. Screwdriver: Depending on the type of fan you have, you may need a screwdriver to remove the fan cover or grille. Ensure you have the appropriate size and type of screwdriver to avoid any damage to the fan.
4. Cleaning solution: In some cases, a mild cleaning solution may be required to remove stubborn stains or dirt buildup. It is important to use a gentle, non-abrasive solution that is safe for the fan’s material.
By having these tools ready, you’ll be fully prepared to give your fan a thorough and effective cleaning, ensuring optimal performance and longevity. Remember to always follow safety precautions and disconnect the power supply before starting the cleaning process.
Ensuring Safety Precautions before Cleaning
Safety should always be the top priority when it comes to any cleaning tasks, including cleaning your grow room fan. Taking the necessary precautions can help prevent accidents and ensure a smooth and hassle-free cleaning process. First and foremost, make sure to disconnect the power supply to the fan before starting any cleaning procedures. This will eliminate the risk of electric shock and protect both you and the fan from potential damage.
In addition to disconnecting the power, it is also important to wear appropriate protective gear such as gloves and safety goggles. This will safeguard you from any debris or dust particles that may be released during the cleaning process. Moreover, it is recommended to work in a well-ventilated area to minimize the inhalation of dust and chemicals. By following these safety precautions, you can ensure a safe and efficient cleaning experience for both yourself and your grow room fan.
• Disconnect the power supply to the fan before starting any cleaning procedures
• Wear appropriate protective gear such as gloves and safety goggles
• Work in a well-ventilated area to minimize inhalation of dust and chemicals
Disconnecting the Power Supply to the Fan
Before attempting to clean a fan, it is essential to disconnect the power supply to ensure personal safety and prevent any potential electrical accidents or damage to the fan. Working on a fan that is still connected to power can be extremely dangerous, as it exposes you to the risk of electric shocks or other injuries. Therefore, always start your cleaning process by identifying the power source and locating the appropriate switch or circuit breaker to cut off the power supply to the fan.
In most cases, you can safely disconnect the power supply by switching off the main power switch or unplugging the fan from the electrical outlet. However, it is crucial to double-check and ensure that the fan is indeed disconnected from the power source before proceeding with any cleaning tasks. This can be confirmed by testing the power status with a voltage tester or consulting a qualified electrician. Taking this precautionary measure establishes a secure environment for you to proceed with the fan cleaning process without any electrical risks or unreliable power supply.
• Disconnecting the power supply is crucial for personal safety and to prevent electrical accidents or damage to the fan.
• Working on a fan that is still connected to power exposes you to the risk of electric shocks or injuries.
• Start by identifying the power source and locating the appropriate switch or circuit breaker to cut off the power supply.
• In most cases, switching off the main power switch or unplugging the fan from the electrical outlet will disconnect it from power.
• Double-check and ensure that the fan is indeed disconnected before proceeding with any cleaning tasks.
• Confirm this by testing the power status with a voltage tester or consulting a qualified electrician.
Removing the Fan Cover or Grille
To effectively clean your grow room fan, it is crucial to start by removing the fan cover or grille. This step allows you to access the inner components and blades, which are often prone to accumulating dirt and dust. It is essential to note that the method of removing the fan cover or grille can vary depending on the fan model, so it is advisable to consult the manufacturer’s instructions or guidelines before proceeding.
In general, most fans have a removable cover or grille that can be easily taken off for cleaning. This usually involves unscrewing or unclipping the cover from the main housing of the fan. It is important to handle the cover with care to avoid any damages. Once removed, you will have a clear view of the fan blades and other parts that need thorough cleaning. Ensuring a clean and debris-free fan cover or grille is a crucial step in maintaining the overall performance and longevity of your grow room fan.
• Start by consulting the manufacturer’s instructions or guidelines for your specific fan model
• Identify if the fan cover or grille is removable
• If removable, locate any screws or clips that hold the cover in place
• Carefully unscrew or unclip the cover from the main housing of the fan
• Handle the cover with care to avoid any damages
• Once removed, inspect and clean both sides of the cover using a damp cloth or mild cleaning solution if necessary
• Take this opportunity to also clean any visible dirt or debris on the fan blades and other components
• Ensure thorough cleaning of all accumulated dirt and dust particles
• Replace and secure the fan cover or grille back onto its original position once cleaned
Cleaning the Fan Blades with a Brush or Cloth
To effectively clean the fan blades, it is crucial to use a brush or cloth that is specifically designed for this purpose. Using a soft-bristle brush or a microfiber cloth will ensure that the blades are cleaned thoroughly without causing any damage. Start by gently brushing the blades to remove loose dust and debris. Be sure to clean both sides of the blades to ensure a thorough cleaning.
For stubborn dirt or grime that cannot be removed with a brush alone, dampen the cloth slightly with water or a mild cleaning solution. Carefully wipe the blades, ensuring that excess moisture is avoided to prevent any potential damage. Take care not to apply too much pressure while cleaning, as this can bend or break the blades. Once the blades have been cleaned to your satisfaction, allow them to dry completely before reassembling the fan. By following these steps, you can ensure that your fan blades are kept clean and functioning efficiently.
• Use a soft-bristle brush or a microfiber cloth designed for cleaning fan blades
• Gently brush both sides of the blades to remove loose dust and debris
• Dampen the cloth slightly with water or mild cleaning solution for stubborn dirt or grime
• Carefully wipe the blades, avoiding excess moisture to prevent damage
• Avoid applying too much pressure while cleaning to avoid bending or breaking the blades
• Allow the blades to dry completely before reassembling the fan
Using Compressed Air to Remove Dust from Hard-to-Reach Areas
Using compressed air is an effective method for removing dust from hard-to-reach areas of your grow room fan. While basic cleaning may remove surface dust, using compressed air ensures a more thorough cleaning by eliminating particles nestled in crevices and inaccessible corners. This technique is especially useful for fans with intricate designs or multiple blades, where manual cleaning may be challenging.
When using compressed air, it is important to follow safety precautions to avoid any mishaps. Begin by disconnecting the power supply to the fan to prevent accidental activation. Next, hold the canister of compressed air upright and at a safe distance from the fan, typically 3-4 inches away. Direct the nozzle towards the areas with accumulated dust, blowing short bursts of compressed air. As the air spews out, it dislodges and propels the dust away, leaving your fan clean and free from debris. Remember to clean all sides of the blades, as well as other components like the motor and wires, for a thorough cleaning experience.
• Using compressed air is an effective method for removing dust from hard-to-reach areas of your grow room fan.
• Compressed air ensures a more thorough cleaning by eliminating particles nestled in crevices and inaccessible corners.
• This technique is especially useful for fans with intricate designs or multiple blades, where manual cleaning may be challenging.
• Safety precautions should be followed when using compressed air to avoid mishaps.
• Disconnect the power supply to the fan before starting the cleaning process to prevent accidental activation.
• Hold the canister of compressed air upright and at a safe distance from the fan, typically 3-4 inches away.
• Direct the nozzle towards areas with accumulated dust and blow short bursts of compressed air to dislodge and propel the dust away.
• Clean all sides of the blades, as well as other components like motor and wires, for a thorough cleaning experience.
Cleaning the Fan Housing or Casing
Cleaning the fan housing or casing is an essential step in maintaining the efficiency and longevity of your grow room fan. Over time, dust and debris can accumulate inside the housing, restricting airflow and potentially damaging the fan motor. By following a few simple steps, you can ensure that your fan continues to perform optimally.
First, make sure to disconnect the power supply to the fan before beginning any cleaning process. This is crucial for your safety and will prevent any accidental injuries. Once the power is disconnected, you can proceed to remove the fan housing or casing. Use a screwdriver or the appropriate tool recommended by the manufacturer to carefully unscrew and remove any screws or clips holding the housing in place. Take note of how the housing is attached, as this will make reassembling the fan much easier later on.
• Disconnect the power supply to the fan before starting the cleaning process
• Remove any screws or clips holding the housing in place using a screwdriver or manufacturer-recommended tool
• Take note of how the housing is attached for easier reassembly later on
Removing and Cleaning the Fan Filter
Removing and cleaning the fan filter is an essential step in maintaining the performance and longevity of your grow room fans. Over time, the fan filter can accumulate dust, debris, and other particles, obstructing airflow and reducing the efficiency of the fan. By regularly cleaning the fan filter, you can ensure optimal air circulation, minimize strain on the fan motor, and prevent potential issues in your grow room.
To begin, locate the fan filter on your grow room fan. In most cases, the filter is situated near the front or back of the fan, and it may be secured with clips or screws. Carefully remove the filter, taking note of its position and orientation for reassembly later. Inspect the filter for dust and debris buildup. Using a soft brush or a vacuum cleaner with a brush attachment, gently remove the accumulated dirt from the filter. If the filter is washable, follow the manufacturer’s instructions for cleaning, making sure to thoroughly rinse and dry it before reinstalling. For non-washable filters, consider replacing them with new ones to maintain optimal air quality in your grow room. By regularly removing and cleaning the fan filter, you can ensure that your grow room fans operate at their full potential, promoting healthy plant growth and efficient air exchange.
• Regularly cleaning the fan filter ensures optimal air circulation and prevents potential issues in your grow room.
• Locate the fan filter on your grow room fan, usually near the front or back of the fan.
• Carefully remove the filter, taking note of its position and orientation for reassembly later.
• Inspect the filter for dust and debris buildup.
• Gently remove accumulated dirt from the filter using a soft brush or a vacuum cleaner with a brush attachment.
• If washable, follow manufacturer’s instructions for cleaning, rinse thoroughly, and dry before reinstalling.
• Consider replacing non-washable filters with new ones to maintain optimal air quality in your grow room.
Cleaning the Fan Motor and Wires
The fan motor and wires are crucial components of your grow room fan that require regular cleaning to ensure optimal performance and longevity. Over time, dust and debris can accumulate on the motor and wires, leading to decreased efficiency and potential damage. Cleaning these parts is a relatively simple process that can be done with a few basic tools and a cautious approach.
To begin, make sure the fan is disconnected from the power supply to avoid any accidents or electrical shocks. Once this is done, carefully remove the fan cover or grille to gain access to the motor and wires. It may be necessary to use a screwdriver or similar tool to loosen any screws or fasteners holding the cover in place.
Next, gently clean the fan motor using a soft brush or cloth. Be thorough in your cleaning, ensuring that all dust and dirt particles are removed from the motor’s surface and any hard-to-reach areas. Avoid using excessive force that could potentially damage the motor or its delicate components.
Moving on to the wires, inspect them for any signs of dirt, debris, or corrosion. If necessary, use a slightly damp cloth to wipe away any dirt, being careful not to wet the wires excessively. It is crucial to double-check that the wires are completely dry before reconnecting the fan to the power supply to prevent any electrical issues.
Cleaning the fan motor and wires should be part of your regular maintenance routine to keep your grow room fan operating at its best. By taking the time to clean these components, you can ensure that your fan functions efficiently, minimizes the risk of electrical problems, and extends its lifespan.
• Disconnect the fan from the power supply before starting the cleaning process.
• Remove the fan cover or grille to access the motor and wires, using a screwdriver if necessary.
• Clean the fan motor thoroughly using a soft brush or cloth, being careful not to apply excessive force.
• Pay attention to hard-to-reach areas and remove all dust and dirt particles from the motor’s surface.
• Inspect the wires for any signs of dirt, debris, or corrosion.
• Use a slightly damp cloth to wipe away any dirt on the wires, ensuring they are not excessively wet.
• Double-check that both the motor and wires are completely dry before reconnecting them to avoid electricity.
CARBON SCRUBBERS IN GROW ROOM:
Reassembling the Fan Components
After thoroughly cleaning each component of the fan, it is time to reassemble them to ensure proper functioning. Begin by carefully placing the fan blades back onto the motor shaft, ensuring they fit snugly. Use any necessary screws or clamps to secure the blades in place, following the manufacturer’s instructions.
Next, reattach the fan grill or cover, making sure to align it correctly with the fan housing. Again, refer to the manufacturer’s guidelines for any specific instructions on fastening the grill or cover securely.
Take a moment to inspect the newly cleaned fan filter and, if necessary, replace it with a fresh one. Insert the clean filter back into its designated spot, ensuring it is properly positioned to effectively filter air flow.
Finally, reconnect the fan to its power supply, double-checking that all connections are secure and tight. Once connected, turn on the fan and listen for any unusual noises or vibrations. If everything sounds and operates normally, your fan is ready to be put back into action, providing efficient airflow to your grow room.
• Carefully place the fan blades back onto the motor shaft, ensuring a snug fit
• Use necessary screws or clamps to secure the blades in place
• Refer to manufacturer’s instructions for specific guidelines on securing the blades
• Reattach the fan grill or cover, aligning it correctly with the fan housing
• Follow manufacturer’s guidelines for fastening the grill or cover securely
• Inspect and replace if necessary, the newly cleaned fan filter with a fresh one
• Insert clean filter back into its designated spot, ensuring proper positioning for effective air flow filtration
• Reconnect the fan to its power supply, double-checking all connections are secure and tight
• Turn on the fan and listen for any unusual noises or vibrations
• Ensure everything sounds and operates normally before putting your fan back into action
Testing the Fan after Cleaning
After meticulously cleaning your grow room fan, it is crucial to test its functionality before putting it back into operation. Testing the fan not only ensures that it has been cleaned thoroughly but also alerts you to any potential issues that may have arisen during the cleaning process. A faulty or improperly cleaned fan can negatively impact your grow room environment, leading to decreased air circulation and potentially compromising the health of your plants.
To test the fan, reconnect the power supply and switch it on. Observe the fan blades, noting any irregularities such as wobbling or excessive noise. A well-cleaned and maintained fan should rotate smoothly and quietly. Additionally, check that the fan is generating the desired airflow. Place your hand in front of the fan to feel the intensity of the airflow, comparing it to previous performance. If you notice any unusual vibrations, excessive noise, or reduced airflow, it may indicate a problem that requires further investigation or professional assistance. Regular testing of your grow room fans will help ensure optimal performance and a healthy growing environment for your plants.
• Testing the fan after cleaning is crucial to ensure thorough cleaning and identify potential issues
• A faulty or improperly cleaned fan can negatively impact air circulation and plant health
• Reconnect the power supply and switch on the fan to test its functionality
• Observe the fan blades for any irregularities such as wobbling or excessive noise
• A well-cleaned and maintained fan should rotate smoothly and quietly
• Check that the fan is generating the desired airflow by feeling it with your hand
• Compare the intensity of airflow to previous performance for reference
• Unusual vibrations, excessive noise, or reduced airflow may indicate a problem that needs further investigation or professional assistance
• Regular testing of grow room fans ensures optimal performance and a healthy growing environment.
Creating a Regular Cleaning Schedule for Your Grow Room Fans
Regular cleaning of grow room fans is crucial for maintaining a healthy and efficient growing environment. By creating a consistent cleaning schedule, you can ensure that your fans operate at their optimal performance, preventing the build-up of dust and other contaminants. A dirty fan can lead to reduced airflow, increased energy consumption, and even potential damage to your plants.
To create a regular cleaning schedule for your grow room fans, start by assessing the specific needs of your setup. Consider factors such as the size of your grow room, the number of fans you have, and the amount of dust or debris that accumulates over time. Based on these factors, determine an appropriate frequency for cleaning your fans. For most setups, a monthly cleaning is recommended, but you may need to adjust the schedule based on the unique requirements of your grow room. By staying proactive and consistent with your cleaning efforts, you can ensure that your fans remain in top condition, providing optimal airflow and ventilation for your plants.
• Assess the specific needs of your grow room setup, including size, number of fans, and dust accumulation
• Determine an appropriate frequency for cleaning based on these factors
• Monthly cleaning is generally recommended for most setups
• Adjust the schedule as needed to meet the unique requirements of your grow room
• Stay proactive and consistent with your cleaning efforts to maintain optimal fan performance
• Prevent reduced airflow, increased energy consumption, and potential damage to plants by regularly cleaning fans.
Tips for Preventing Dust Build-up on Your Fans
Preventing dust build-up on your fans is crucial for maintaining optimal performance and prolonging their lifespan. Here are some valuable tips to help you keep your fans clean and dust-free.
1. Regularly dust the surrounding area: Dust particles in the air can quickly settle on fan blades, leading to build-up over time. By dusting the area around your fans regularly using a damp cloth or a static duster, you can significantly reduce the amount of dust that accumulates on the fan.
2. Use air purifiers or filters: Installing an air purifier or using air filters in your grow room can greatly minimize the dust particles in the environment. These devices effectively capture airborne particles, preventing them from settling on your fans and other surfaces. Ensure that you clean or replace the filters regularly for optimal results.
3. Keep doors and windows closed: One of the main sources of dust in grow rooms is outdoor air. By keeping doors and windows closed as much as possible, you can limit the amount of dust that enters the space. Consider using weatherstripping or seals to prevent dust from seeping in through gaps.
4. Implement positive air pressure: Maintaining positive air pressure in your grow room can help minimize the entry of dust from other areas. By using fans or an exhaust system to expel air, you create a slightly higher pressure inside the room, which reduces the infiltration of external dust particles.
Remember, regularly inspecting and cleaning your fans is essential, even with preventive measures in place. By adhering to these tips, you can effectively reduce the dust build-up on your fans and ensure their efficient operation in your grow room.
• Regularly dust the surrounding area using a damp cloth or static duster
• Install air purifiers or use air filters in your grow room to capture airborne particles
• Clean or replace filters regularly for optimal results
• Keep doors and windows closed to limit the amount of outdoor dust entering the space
• Consider using weatherstripping or seals to prevent dust from seeping in through gaps
• Implement positive air pressure by using fans or an exhaust system to expel air
and reduce infiltration of external dust particles
Common Mistakes to Avoid during Fan Cleaning
When it comes to cleaning your grow room fan, there are some common mistakes that you should avoid to ensure the best results. One of the biggest mistakes is not disconnecting the power supply before starting the cleaning process. This can be dangerous and increase the risk of electrical shock. Always remember to unplug or turn off the power to the fan before you begin cleaning.
Another mistake to avoid is not removing the fan cover or grille when cleaning the blades. Dust and debris can accumulate in these areas, affecting the fan’s performance if not cleaned properly. Take the time to remove the cover or grille and clean it separately to ensure a thorough cleaning of the entire fan.
By avoiding these common mistakes, you can ensure that your fan cleaning process is effective and safe. Taking the necessary precautions and being thorough in your cleaning will help maintain the performance and longevity of your grow room fan.
• Always remember to disconnect the power supply before cleaning your grow room fan
• Unplug or turn off the power to the fan to avoid electrical shock
• Remove the fan cover or grille when cleaning the blades for a thorough cleaning
• Dust and debris can accumulate in these areas, affecting fan performance if not cleaned properly
• Take the time to clean the cover or grille separately for better results
• Avoiding these mistakes ensures an effective and safe fan cleaning process
• Proper precautions and thorough cleaning help maintain performance and longevity of your grow room fan
Troubleshooting Common Issues with Grow Room Fans
Troubleshooting Common Issues with Grow Room Fans
When it comes to maintaining a healthy and efficient grow room, dealing with common issues that arise with your fans is essential. Understanding how to troubleshoot these problems can save you time, money, and the overall well-being of your plants. Here are some common issues you may encounter with your grow room fans and how to address them.
1. Insufficient airflow: If you notice that your plants are not receiving enough airflow despite having a fan in place, the first step is to check the fan speed. Make sure it is set to the appropriate level for your growing environment. Additionally, check for any obstructions that may be blocking the airflow, such as clogged filters or debris in the fan blades. Clean or replace the filters, and thoroughly clean the fan blades to improve airflow. If the issue persists, consider upgrading to a more powerful fan or adding additional fans to improve circulation.
2. Excessive noise: While some noise is expected from a functioning fan, excessive noise can disrupt the tranquility of your grow room and potentially indicate an underlying issue. Begin by inspecting the fan blades for any damage or misalignment. A bent or loose blade can cause vibrations and noise. Tighten any loose screws or bolts and, if necessary, replace damaged blades. Additionally, ensure that the fan is securely mounted to its designated location to minimize vibrations. If the noise continues, it may be an indication of a faulty motor, and it is recommended to consult a professional for further inspection.
By addressing these common issues with grow room fans promptly, you can maintain optimal airflow and ensure a healthy growing environment for your plants. Remember to follow proper safety procedures when troubleshooting and, when in doubt, seek the advice of a professional for assistance.
• Insufficient airflow:
– Check fan speed and adjust to appropriate level.
– Remove any obstructions blocking the airflow, such as clogged filters or debris in the fan blades.
– Clean or replace filters and thoroughly clean fan blades.
– Consider upgrading to a more powerful fan or adding additional fans for improved circulation.
• Excessive noise:
– Inspect fan blades for damage or misalignment.
– Tighten loose screws or bolts and replace damaged blades if necessary.
– Ensure the fan is securely mounted to minimize vibrations.
– Consult a professional if noise persists, as it may indicate a faulty motor.
By addressing these common issues promptly, you can maintain optimal airflow in your grow room and provide a healthy growing environment for your plants. Remember to prioritize safety when troubleshooting and seek professional assistance if needed.
Seeking Professional Help for Fan Maintenance and Repair.
When it comes to fan maintenance and repair, there may be instances where seeking professional help is necessary. Professionals have the expertise and experience to handle complex fan issues that may be beyond the scope of an average gardener or DIY enthusiast. They are well-versed in identifying and resolving problems related to fan motors, wiring, and other internal components.
Professional technicians also have access to specialized tools and equipment that are essential for thorough fan maintenance and repair. These tools, such as diagnostic devices and precision instruments, enable them to accurately diagnose the root cause of any fan malfunction and apply the appropriate solutions. Additionally, professional help ensures that the necessary safety precautions are taken during the maintenance or repair process, reducing the risk of injury or further damage.
By seeking professional assistance, you can benefit from their extensive knowledge and expertise, ensuring your fan is in optimal working condition. Their professionalism and attention to detail can give you peace of mind, knowing that your fan will be handled with care and precision. So, if you encounter significant or recurring issues with your fan, it’s worth considering reaching out to a professional for their assistance and guidance.
• Professionals have the expertise and experience to handle complex fan issues that may be beyond the scope of an average gardener or DIY enthusiast.
• They are well-versed in identifying and resolving problems related to fan motors, wiring, and other internal components.
• Professional technicians have access to specialized tools and equipment that are essential for thorough fan maintenance and repair.
• These tools, such as diagnostic devices and precision instruments, enable them to accurately diagnose the root cause of any fan malfunction and apply appropriate solutions.
• Professional help ensures that necessary safety precautions are taken during the maintenance or repair process, reducing the risk of injury or further damage.
• Seeking professional assistance allows you to benefit from their extensive knowledge and expertise, ensuring your fan is in optimal working condition.
• Their professionalism and attention to detail can give you peace of mind, knowing that your fan will be handled with care and precision.
How often should I clean my fan?
It is recommended to clean your fan at least once every three months to ensure optimal performance and prevent dust build-up.
Can I use water to clean my fan?
No, it is not recommended to use water to clean your fan as it can damage the electrical components. Stick to using a brush, cloth, or compressed air for cleaning.
Do I need to disconnect the power supply before cleaning the fan?
Yes, it is crucial to disconnect the power supply to the fan before starting the cleaning process. This ensures your safety and prevents any electrical accidents.
Can I clean the fan blades with a vacuum cleaner?
While a vacuum cleaner can be effective, it is better to use a brush or cloth to clean the fan blades. Vacuum cleaners can generate static electricity, which may damage the sensitive electrical components of the fan.
How do I clean hard-to-reach areas of the fan?
To clean hard-to-reach areas, you can use compressed air. It helps to blow away the dust from nooks and crevices that are difficult to access with a brush or cloth.
Should I clean the fan motor as well?
Yes, it is essential to clean the fan motor and wires carefully using a brush or cloth. Dust accumulation on the motor can hinder its performance and cause overheating.
Can I wash the fan filter?
Yes, you can wash the fan filter using mild soap and water. Ensure it is completely dry before reassembling the fan components.
How do I troubleshoot common issues with grow room fans?
If you encounter common issues like fan not spinning or unusual noises, check for loose connections, clean the fan thoroughly, and ensure the power supply is functioning correctly. If the problem persists, it is advisable to seek professional help.
How can I prevent dust build-up on my fans?
To prevent dust build-up, you can place a fine mesh screen or pre-filter in front of the fan. Regular cleaning and keeping the grow room environment clean and dust-free also contribute to reducing dust accumulation.
When should I seek professional help for fan maintenance and repair?
If you encounter complex issues, such as motor failure, electrical problems, or significant damage to the fan components, it is best to seek professional help for maintenance and repair to avoid any further damage.