A DIY Guide to Installing Inline Fans in Your Grow Room
Table of Contents
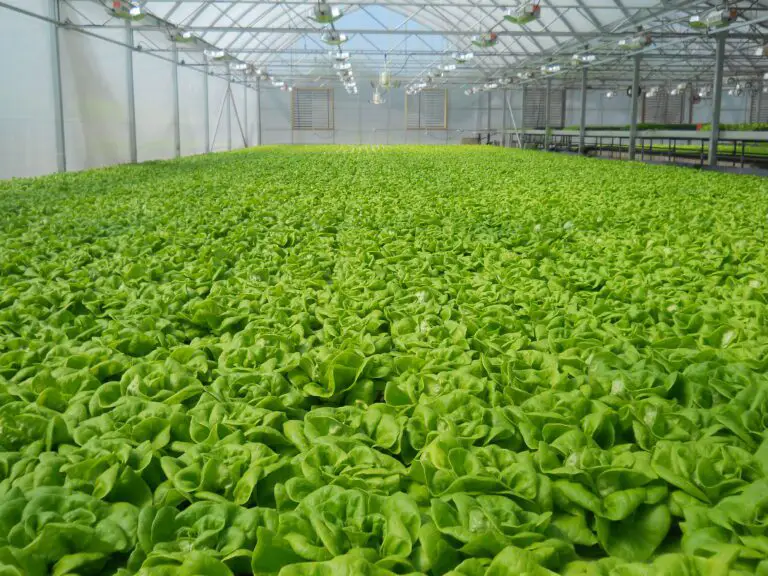
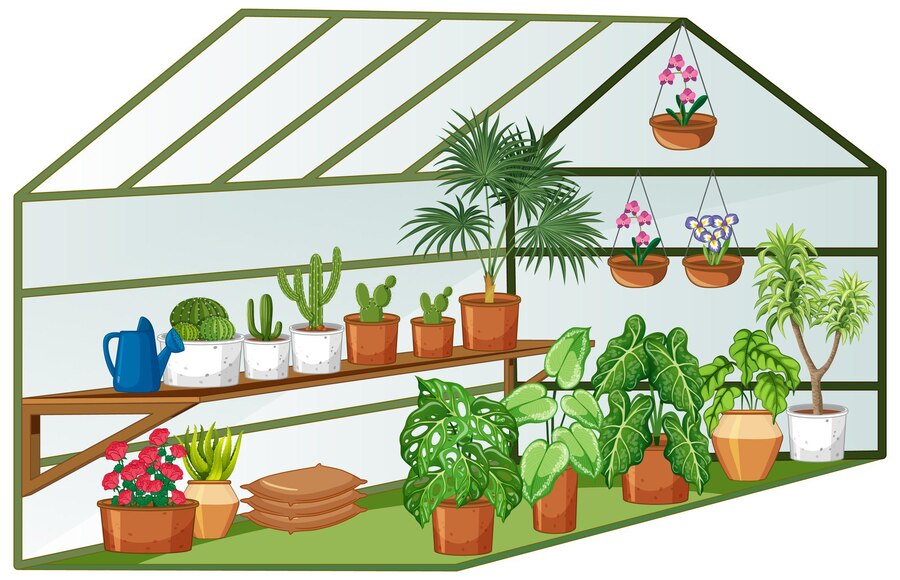
Assessing Your Grow Room’s Ventilation Needs
Assessing Your Grow Room’s Ventilation Needs
Ensuring proper ventilation is essential for maintaining a healthy and thriving grow room. By assessing your grow room’s ventilation needs, you can create an optimal environment for your plants to flourish. There are several factors to consider when evaluating your ventilation requirements.
Firstly, you need to determine the size of your grow room and the number of plants you plan to cultivate. This will dictate the amount of air exchange needed to supply fresh air and expel stale air effectively. It’s recommended to have at least one complete air exchange per minute in a small-to-medium-sized grow room. For larger setups, the air exchange rate may need to be higher.
Additionally, consider the heat generated by your lighting system and other equipment. High-intensity lights can significantly increase the temperature inside the grow room. Adequate ventilation is crucial for dissipating heat and preventing heat stress, which can hinder plant growth. Calculate the total heat output of your equipment to determine the ventilation capacity required to maintain optimal temperature levels.
Furthermore, take into account the humidity levels within your grow room. Plants transpire moisture into the air, leading to increased humidity. If humidity levels are too high, it can create a favorable environment for mold and mildew growth. A well-ventilated room will help regulate humidity levels, preventing excess moisture buildup and potential crop damage.
Properly assessing your grow room’s ventilation needs is vital to create an environment that promotes healthy plant growth. By considering factors such as room size, equipment heat output, and humidity levels, you can determine the appropriate ventilation capacity required for your specific setup.
• Determine the size of your grow room and the number of plants you plan to cultivate
• Calculate the amount of air exchange needed for fresh air supply and expelling stale air
• Aim for at least one complete air exchange per minute in a small-to-medium-sized grow room
• Consider increasing the air exchange rate for larger setups
• Take into account the heat generated by lighting systems and other equipment
• High-intensity lights can significantly increase temperature, so proper ventilation is crucial
• Calculate total heat output to determine ventilation capacity required
• Monitor humidity levels within your grow room
• Plants transpire moisture, leading to increased humidity
• Excess humidity can create a favorable environment for mold and mildew growth
• Well-ventilated rooms help regulate humidity levels and prevent crop damage
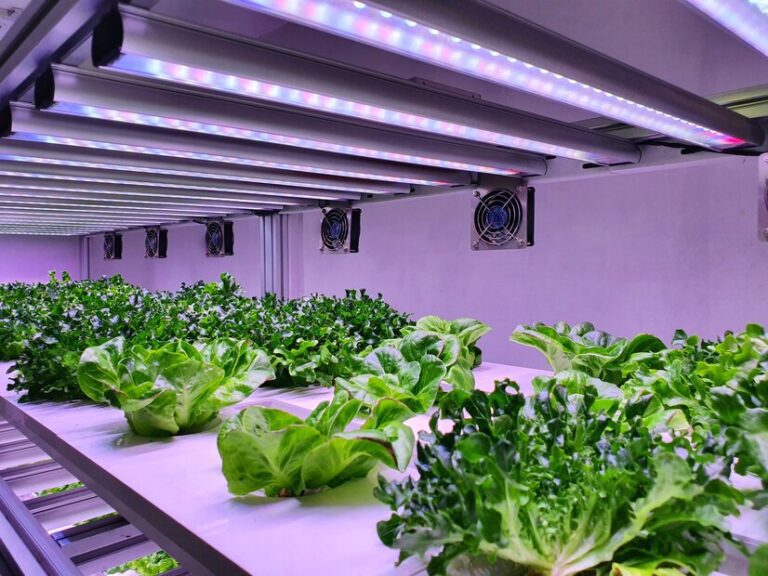
Selecting the Right Inline Fan for Your Grow Room
When selecting the right inline fan for your grow room, there are several important factors to consider. First and foremost, you need to determine the size of your grow room and the specific ventilation requirements. This will help you determine the appropriate airflow capacity needed for your inline fan. It is recommended to choose a fan that can provide at least four air exchanges per hour to ensure adequate ventilation.
Another crucial aspect to consider is the noise level of the fan. Inline fans can produce varying levels of noise, and it is important to select one that operates quietly to prevent any disturbances. Look for fans that are specifically designed to be quiet or have noise-reducing features.
Additionally, the energy efficiency of the inline fan should not be overlooked. Choosing an energy-efficient fan can help you save on electricity costs in the long run. Look for fans with high efficiency ratings and consider models that are Energy Star certified.
Lastly, it is essential to consider the durability and reliability of the inline fan. Look for fans that are made from high-quality materials and have a reputation for long-lasting performance. Reading customer reviews and seeking recommendations from fellow growers can provide valuable insights into the reliability of different fan brands.
Overall, it is important to carefully assess your grow room’s ventilation needs and consider factors such as airflow capacity, noise level, energy efficiency, and durability when selecting the right inline fan. Taking these factors into account will help ensure that your grow room maintains optimal conditions for healthy plant growth.
• Determine the size of your grow room and specific ventilation requirements
• Choose a fan with adequate airflow capacity (at least four air exchanges per hour)
• Consider the noise level of the fan and select one that operates quietly
• Look for fans designed to be quiet or have noise-reducing features
• Don’t overlook the energy efficiency of the inline fan
• Choose an energy-efficient fan to save on electricity costs in the long run
• Look for fans with high efficiency ratings and consider Energy Star certified models
• Consider the durability and reliability of the inline fan
• Look for fans made from high-quality materials known for long-lasting performance
• Read customer reviews and seek recommendations from fellow growers
Gathering the Necessary Tools and Materials
To ensure the successful installation of your inline fan, it is essential to gather all the necessary tools and materials beforehand. Having everything you need at your fingertips will save you time and prevent any unnecessary delays during the installation process. Here is a comprehensive list of items you should have:
1. Inline fan: Select a high-quality inline fan that is suitable for the size of your grow room. Consider factors such as airflow capacity and noise level when making your decision.
2. Ductwork: Purchase flexible ducting that matches the diameter of the fan’s intake and exhaust ports. Make sure to measure the required length to ensure seamless installation.
3. Clamps or tape: Use clamps or specialized HVAC tape to secure the ducting firmly to the fan connectors and vents. This will prevent any air leaks, ensuring maximum efficiency.
4. Screwdriver or drill: Depending on the type of fan and mounting options, you may need either a screwdriver or drill to attach the fan to the chosen location securely.
5. Wire strippers: These tools will be necessary if you need to connect the fan directly to a power source. Remember to follow proper electrical safety protocols if handling wiring tasks.
6. Safety goggles and gloves: Protect yourself during the installation process by wearing goggles to shield your eyes and gloves to protect your hands.
7. Ladder or step stool: If your chosen installation location is at a height, having a ladder or step stool will make the process easier and safer.
Remember, gathering all the necessary tools and materials before you start your inline fan installation will streamline the process and ensure that you have everything you need within reach. Once you have everything prepared, you can move on to the next steps with confidence and efficiency.
To ensure a successful installation of your inline fan, it is crucial to gather all the necessary tools and materials beforehand. Having everything you need at your fingertips will save time and prevent any unnecessary delays during the installation process. Here is a comprehensive list of items you should have:
• Inline fan: Select a high-quality inline fan that is suitable for the size of your grow room. Consider factors such as airflow capacity and noise level when making your decision.
• Ductwork: Purchase flexible ducting that matches the diameter of the fan’s intake and exhaust ports. Make sure to measure the required length to ensure seamless installation.
• Clamps or tape: Use clamps or specialized HVAC tape to secure the ducting firmly to the fan connectors and vents. This will prevent any air leaks, ensuring maximum efficiency.
• Screwdriver or drill: Depending on the type of fan and mounting options, you may need either a screwdriver or drill to attach the fan securely to the chosen location.
• Wire strippers: These tools will be necessary if you need to connect the fan directly to a power source. Remember to follow proper electrical safety protocols when handling wiring tasks.
• Safety goggles and gloves: Protect yourself during the installation process by wearing goggles to shield your eyes and gloves to protect your hands.
• Ladder or step stool: If your chosen installation location is at a height, having a ladder or step stool will make the process easier and safer.
Remember, gathering all these necessary tools and materials before starting your inline fan installation will streamline the process and ensure that you have everything within reach. Once everything is prepared, you can move on confidently with efficient steps towards completing your installation successfully.
Here’s a table listing the necessary tools and materials for installing an inline fan in your grow room:
| Tools | Materials |
|---|---|
| Screwdriver | Wooden boards |
| Hammer | Nails |
| Tape measure | Screws |
| Level | Sandpaper |
| Pliers | Paint or stain |
| Saw (hand saw or power) | Paintbrushes |
| Drill | Safety goggles |
| Wrench | Work gloves |
Remember to choose the right location for your inline fan—ideally in the middle of the room, near the ceiling—to ensure proper ventilation without drying out your plants. Cut a hole in the wall for the fan, attach ducting, and connect it to an electrical outlet. Once installed, turn on the fan and enjoy improved air circulation in your grow room! 🌱🛠️🪚
If noise reduction is a concern, consider adding insulation media, such as quilt or fiberglass, around the fan to dampen sound.
Ensuring Proper Safety Measures Before Installation
With any installation project, it is essential to prioritize safety measures to ensure the well-being of yourself and others. When it comes to installing an inline fan in your grow room, there are several precautions that should be taken into consideration. First and foremost, before beginning the installation process, it is crucial to make sure that all power sources in the area are turned off to prevent any potential electrical accidents. This includes both the main power supply and any other electrical devices in the vicinity.
Additionally, it is advisable to wear appropriate protective gear, such as gloves, safety glasses, and a dust mask, to safeguard yourself from potential hazards. The installation process may involve handling sharp objects and working in tight spaces, so protective gear can minimize the risk of injuries. Furthermore, it is crucial to be cautious of your surroundings and the layout of the grow room. Ensure that the area is free from clutter, obstacles, or slippery surfaces that may impair your movement or cause accidents. By adhering to these safety guidelines, you can create a secure environment for both yourself and your plants during the inline fan installation process.
• Turn off all power sources, including the main power supply and other electrical devices in the area.
• Wear appropriate protective gear, such as gloves, safety glasses, and a dust mask.
• Be cautious of your surroundings and ensure that the grow room is free from clutter, obstacles, or slippery surfaces.
• Handle sharp objects with care during the installation process.
• Work in well-ventilated areas to minimize exposure to fumes or dust particles.
Here’s a table outlining the proper safety measures to consider before installing an inline fan in your grow room:
| Safety Measures | Description |
|---|---|
| Secure Mounting | Ensure that the inline fan is mounted securely to prevent vibration and noise. |
| Electrical Safety | Plug the inline fan into an outlet protected by a ground fault circuit interrupter (GFCI). |
| Regular Cleaning | Clean the inline fan regularly to prevent dust build-up, which can affect its performance. |
Remember to follow these safety guidelines to ensure a successful installation and safe operation of your inline fan in the grow room.
Mapping Out the Ideal Location for Your Inline Fan
Once you have determined the size and layout of your grow room, it is crucial to map out the ideal location for your inline fan. The placement of the fan plays a vital role in ensuring proper air circulation and ventilation within your grow room.
First and foremost, you need to consider the size and capacity of your inline fan. This will determine the amount of air it can move, which in turn affects how effectively it can regulate the temperature and humidity levels in your grow room. You want to position the fan in a way that allows for maximum air movement throughout the entire space. Ideally, the fan should be mounted near the top of the room to effectively exhaust the hot, stale air and create a vacuum effect that pulls in fresh air from the bottom. In some cases, depending on the size of your grow room, multiple fans may be necessary to achieve optimal air circulation.
Additionally, you should take into account any potential obstacles or obstructions that may affect the fan’s performance. Make sure there is enough clearance around the fan to allow for proper airflow. Avoid placing the fan too close to walls, ceilings, or any items that could impede the intake or discharge of air. Furthermore, consider the noise level generated by the fan. If noise is a concern, you may want to position the fan in an area where it won’t disturb you or others nearby.
By carefully mapping out the ideal location for your inline fan, you can ensure that your grow room has the necessary ventilation to support healthy plant growth and optimize their overall yield.
• Consider the size and capacity of your inline fan to determine its ability to move air effectively.
• Position the fan near the top of the room to exhaust hot air and create a vacuum effect for fresh air intake from the bottom.
• In larger grow rooms, multiple fans may be necessary for optimal air circulation.
• Ensure there is enough clearance around the fan for proper airflow and avoid obstructions that could impede intake or discharge of air.
• Take into account noise levels generated by the fan and position it in an area where it won’t disturb you or others nearby.

Measuring and Cutting the Ductwork for Installation
When it comes to installing an inline fan in your grow room, measuring and cutting the ductwork is a crucial step in ensuring proper airflow and ventilation. Accurate measurements will help you determine the length and diameter of the ductwork needed for your installation. Begin by using a measuring tape to measure the distance between the fan and the desired vent or outlet. This will give you the length of ductwork required. Additionally, consider the diameter of the fan’s inlet and outlet when selecting the appropriate ductwork.
Once you have determined the measurements, it’s time to cut the ductwork to the correct size. Using a sharp utility knife, carefully score the outer layer of the ductwork along the measured length. Then, gently bend the ductwork back and forth until it snaps along the scored line. Make sure to avoid cutting through the inner layer of the ductwork. Smooth out any ragged edges to ensure a seamless connection. Remember, precise measurements and clean cuts are key to a successful installation and optimal airflow in your grow room.
• Accurate measurements are crucial for proper airflow and ventilation in your grow room.
• Measure the distance between the fan and desired vent or outlet using a measuring tape.
• Consider the diameter of the fan’s inlet and outlet when selecting ductwork.
• Use a sharp utility knife to score the outer layer of the ductwork along the measured length.
• Gently bend the ductwork back and forth until it snaps along the scored line, being careful not to cut through the inner layer.
• Smooth out any ragged edges for a seamless connection.
• Precise measurements and clean cuts ensure optimal airflow in your grow room.
Preparing the Grow Room for Inline Fan Installation
Preparing the grow room for inline fan installation is a crucial step to ensure optimal performance and efficiency of your ventilation system. Before proceeding with the installation process, it is essential to create a clean and organized environment that promotes healthy plant growth. Start by removing any clutter or obstacles that may obstruct the airflow or hinder the installation process.
Next, thoroughly clean the grow room, including the walls, ceilings, and floors, to eliminate any dust or contaminants that could potentially affect the air quality. Pay special attention to corners, crevices, and hard-to-reach areas where dust tends to accumulate. Additionally, sanitize any tools or equipment that will be used during the installation to maintain a sterile environment.
To further enhance the growing conditions, inspect the electrical wiring in the the grow room to ensure it is in good condition and can handle the additional power requirements of the inline fan. This step is vital for proper functionality and safety. If any issues are detected, it is crucial to address them promptly by consulting a professional electrician.
By adequately preparing the grow room for inline fan installation, you are laying the foundation for a successful and efficient ventilation system. Your attention to detail and commitment to a clean and organized environment will greatly contribute to the success of your indoor garden.
• Remove any clutter or obstacles that may obstruct airflow or hinder installation process
• Thoroughly clean the grow room, including walls, ceilings, and floors, to eliminate dust and contaminants
• Pay special attention to corners, crevices, and hard-to-reach areas where dust tends to accumulate
• Sanitize tools and equipment used during installation for a sterile environment
• Inspect electrical wiring in the grow room to ensure it can handle additional power requirements of inline fan
• Address any issues with electrical wiring promptly by consulting a professional electrician
Mounting the Inline Fan in the Designated Location
Once you have determined the ideal location for your inline fan, it is time to mount it securely. This step is crucial as it ensures the fan stays in place and operates efficiently. Begin by assembling the necessary tools for the installation, including screws, screwdriver, and a level.
Carefully position the inline fan in the designated location, ensuring it is level and aligned properly. Use the appropriate screws to secure the fan to the wall or ceiling, making sure they are tightened firmly. Take extra care to avoid damaging the fan or surrounding structures during the mounting process.
Remember, the stability of the mounted inline fan is essential for long-term functionality and optimal performance. If needed, refer to the manufacturer’s instructions for specific mounting guidelines. By following these steps, you can ensure that your inline fan is securely mounted and ready to provide the necessary ventilation for your grow room.
• Assemble the necessary tools for installation, including screws, screwdriver, and a level.
• Position the inline fan carefully in the designated location, ensuring it is level and aligned properly.
• Use appropriate screws to secure the fan to the wall or ceiling, tightening them firmly.
• Take extra care to avoid damaging the fan or surrounding structures during mounting process.
• Refer to manufacturer’s instructions for specific mounting guidelines if needed.
Connecting the Ductwork to the Inline Fan
When it comes to connecting the ductwork to the inline fan in your grow room, there are a few key steps to ensure a proper installation. First, gather all the necessary materials, including aluminum ducting, clamps, and foil tape. It’s important to use aluminum ducting as it is resistant to moisture and will not promote the growth of any mold or bacteria. Cut the ducting to the appropriate length, making sure to measure accurately to avoid any unnecessary gaps or leaks.
Next, attach one end of the ducting to the intake or outlet port of the inline fan. Depending on the design of the fan, this may involve sliding the ducting onto the port and using clamps to secure it in place, or it may require attaching the ducting with the help of an adapter. Ensure a tight seal by tightening the clamps properly or using foil tape to cover any gaps.
After connecting one end of the ducting, carefully guide the other end to the desired location in your grow room where you want to exhaust or distribute air. Again, use clamps or foil tape to secure the ducting in place, paying attention to any bends or corners that may require additional support. Properly securing the ducting will help maintain optimal airflow and prevent any air leaks that could reduce the efficiency of your ventilation system.
Remember, ensuring a tight and secure connection is vital for an effective and efficient ventilation system. By carefully connecting the ductwork to the inline fan, you can ensure proper air circulation and maintain a healthy environment for your plants to thrive.
• Gather all necessary materials: aluminum ducting, clamps, and foil tape
• Use aluminum ducting for resistance to moisture and prevention of mold or bacteria growth
• Cut the ducting to the appropriate length with accurate measurements to avoid gaps or leaks
• Attach one end of the ducting to the intake or outlet port of the inline fan using clamps or an adapter
• Ensure a tight seal by tightening clamps properly or using foil tape to cover any gaps
• Guide the other end of the ducting to the desired location in your grow room for exhaust or air distribution
• Secure the ducting in place with clamps or foil tape, paying attention to bends and corners that may need additional support
• Properly securing the ductwork will maintain optimal airflow and prevent air leaks that could reduce ventilation system efficiency.
Securing the Ductwork in Place with Clamps or Tape
When securing the ductwork in your grow room with clamps or tape, it is crucial to ensure a tight and secure fit to maximize the efficiency of your inline fan. Clamps provide a reliable solution for holding the ductwork in place, preventing air leaks and maintaining proper airflow within your grow room.
To secure the ductwork with clamps, start by positioning the clamp around the ductwork joint or connection point. Tighten the clamp using a screwdriver or an appropriate tool, making sure it is snug but not overly tight to avoid damaging the ductwork. Inspect the connection to ensure there are no gaps or loose sections.
Tape can also be used to secure the ductwork, particularly for smaller sections or areas that are more challenging to reach with clamps. Aluminum foil tape or specialized duct tape are recommended options for this purpose. When using tape, wrap it tightly around the joint or connection, ensuring it is firmly attached to prevent air leakage.
By securely fastening the ductwork with clamps or tape, you can maintain an airtight system, minimizing any potential loss of airflow and maximizing the effectiveness of your inline fan in creating the ideal ventilation for your grow room.
• Clamps provide a reliable solution for securing ductwork in place
• Position the clamp around the joint or connection point of the ductwork
• Tighten the clamp using a screwdriver or appropriate tool, ensuring it is snug but not overly tight
• Inspect the connection to ensure there are no gaps or loose sections
• Tape can be used for smaller sections or hard-to-reach areas
• Aluminum foil tape or specialized duct tape are recommended options for securing ductwork with tape
• Wrap the tape tightly around the joint or connection to prevent air leakage
By following these steps and securely fastening your ductwork with clamps or tape, you can maintain an airtight system that maximizes airflow efficiency and enhances the performance of your inline fan in providing optimal ventilation for your grow room.
Wiring the Inline Fan to a Power Source
Once you have chosen the ideal location for your inline fan, the next step in the installation process is wiring it to a power source. This step is crucial to ensure that the fan operates efficiently and effectively in your grow room. Before you begin wiring, make sure to turn off the power supply to avoid any electrical mishaps.
To wire the inline fan, start by gathering the necessary tools and materials, including wire cutters, wire strippers, electrical tape, and wire nuts. Begin by attaching the fan’s power cord to the power source, ensuring that the cord is long enough to reach without any strain. Strip a small section of the power cord’s insulation using the wire strippers, being careful not to damage the wires. Twist the exposed wires together securely, ensuring that the positive and negative wires are properly matched. Cover the exposed wires with wire nuts and wrap them with electrical tape for added protection. Finally, plug the inline fan into a working electrical outlet and test it to ensure proper functionality.
Remember, when working with electricity, safety should always be a top priority. If you are unsure about wiring your inline fan, it is recommended to seek the assistance of a professional electrician to ensure a safe and reliable installation.
• Gather the necessary tools and materials: wire cutters, wire strippers, electrical tape, and wire nuts.
• Turn off the power supply before beginning the wiring process to avoid any electrical mishaps.
• Attach the fan’s power cord to the power source, ensuring it is long enough without strain.
• Use wire strippers to strip a small section of insulation from the power cord, being careful not to damage the wires.
• Twist together securely the exposed wires, making sure that positive and negative wires are properly matched.
• Cover the exposed wires with wire nuts for added protection.
• Wrap the wire nuts with electrical tape for further insulation and safety precautions.
• Plug in your inline fan into a working electrical outlet and test its functionality.
• Prioritize safety when working with electricity; if unsure about wiring your inline fan, seek professional assistance from an electrician.
Testing the Inline Fan for Proper Functionality
Once you have installed your inline fan, it is crucial to test it for proper functionality before fully relying on it for your grow room’s ventilation needs. Testing the inline fan ensures that it is functioning correctly, providing adequate airflow, and effectively removing stale air and odors.
To test the inline fan, begin by turning it on and observing the airflow. You should feel a steady stream of air being expelled from the exhaust vent. Additionally, listen for any unusual noises or vibrations that may indicate a potential issue with the fan’s motor or bearings. If the airflow seems weak or inconsistent, or if you notice any concerning sounds or vibrations, it is important to address these issues before continuing with the installation process.
Once you are satisfied with the initial airflow test, it is advisable to perform a more comprehensive test to ensure the fan can handle the anticipated ventilation requirements of your grow room. This can be done by measuring the air exchange rate, commonly expressed in cubic feet per minute (CFM). Proper ventilation in a grow room generally requires an air exchange rate of at least four to six times per minute. By calculating the volume of your grow room and comparing it to the CFM rating of your inline fan, you can determine if the fan has the capacity to adequately ventilate the space. This will help ensure that your plants receive sufficient fresh air and that environmental conditions within the grow room remain optimal for growth.
• Turn on the inline fan and observe the airflow
• Check for a steady stream of air being expelled from the exhaust vent
• Listen for any unusual noises or vibrations
• Address any weak airflow, inconsistent performance, or concerning sounds/vibrations before continuing with installation
• Measure the air exchange rate in cubic feet per minute (CFM) to determine if the fan can handle ventilation requirements
• Calculate the volume of your grow room and compare it to the CFM rating of your inline fan
• Ensure that the fan has enough capacity to adequately ventilate the space
• Provide sufficient fresh air for plant growth and maintain optimal environmental conditions within the grow room.
Troubleshooting Common Installation Issues
One common issue that can arise during the installation of an inline fan is improper ductwork alignment. This can lead to restricted airflow and reduced efficiency of the ventilation system. To troubleshoot this problem, carefully inspect the ductwork, ensuring that all connections are properly secured and aligned. Any gaps or leaks should be sealed with duct tape or appropriate adhesive. Additionally, check for any obstructions or blockages within the ducts that may be impeding the airflow. Clearing any debris or adjusting the ducts as needed can help restore proper functionality to your inline fan.
Another potential issue that may occur is excessive noise coming from the inline fan. This can be disruptive and could indicate a problem with the fan motor or the fan blades. To address this, first, ensure that the fan is securely mounted in its designated location, as loose mounting can lead to vibrations and increased noise. If the noise persists, inspect the fan blades for any damage or debris. Clean the blades if necessary and check for proper balance. If the noise continues, it may be necessary to replace the fan or seek professional assistance to diagnose and resolve the issue. Remember, addressing noise issues promptly can help maintain a more enjoyable and peaceful growing environment.
• Improper ductwork alignment can lead to restricted airflow and reduced efficiency of the ventilation system.
• Carefully inspect the ductwork for any gaps or leaks and seal them with duct tape or appropriate adhesive.
• Check for obstructions or blockages within the ducts that may be impeding airflow and clear any debris as needed.
• Excessive noise coming from the inline fan could indicate a problem with the fan motor or blades.
• Ensure that the fan is securely mounted to prevent vibrations and increased noise.
• Inspect the fan blades for damage or debris, clean if necessary, and check for proper balance.
• If noise persists, consider replacing the fan or seeking professional assistance to diagnose and resolve the issue.
Maintaining and Cleaning Your Inline Fan Regularly
Regular maintenance and cleaning of your inline fan is crucial for ensuring optimal performance and longevity. By regularly inspecting and cleaning your fan, you can prevent dust, debris, and other contaminants from accumulating, which can lead to reduced airflow and potentially damage the fan motor. Here are some key steps to follow when maintaining and cleaning your inline fan:
1. Inspect and Clean the Fan Blades: Begin by turning off the fan and disconnecting the power source. Carefully remove the fan blades, taking note of their orientation for reassembly. Gently clean the blades using a soft brush or cloth to remove any dust or dirt build-up. Ensure that all surfaces are thoroughly cleaned before reassembling the fan.
2. Check and Clean the Fan Housing: While the fan blades are removed, inspect the fan housing for any signs of debris, such as leaves, dirt, or cobwebs. Use a vacuum cleaner or a damp cloth to clean the housing, ensuring that no obstructions are present that could hinder airflow.
3. Clean the Ductwork: In addition to cleaning the fan itself, it is essential to clean the ductwork connected to the fan. Dust and dirt can accumulate inside the ducts over time, reducing the effectiveness of the ventilation system. Use a brush or vacuum to remove any debris from the ductwork and ensure optimal airflow.
Remember to refer to the manufacturer’s guidelines for specific instructions and recommendations on maintaining and cleaning your inline fan. By incorporating regular maintenance into your routine, you can maximize the efficiency and lifespan of your inline fan, ultimately benefiting your grow room’s ventilation system and the health of your plants.
• Inspect and Clean the Fan Blades:
– Turn off the fan and disconnect the power source.
– Carefully remove the fan blades, noting their orientation for reassembly.
– Use a soft brush or cloth to gently clean the blades, removing any dust or dirt build-up.
– Ensure all surfaces are thoroughly cleaned before reassembling.
• Check and Clean the Fan Housing:
– While the fan blades are removed, inspect the housing for debris like leaves, dirt, or cobwebs.
– Use a vacuum cleaner or damp cloth to clean the housing.
– Ensure there are no obstructions that could hinder airflow.
• Clean the Ductwork:
– It’s important to clean the ductwork connected to your inline fan as well.
– Over time, dust and dirt can accumulate inside, reducing ventilation effectiveness.
– Use a brush or vacuum to remove any debris from the ductwork.
• Follow Manufacturer’s Guidelines:
– Refer to specific instructions and recommendations provided by your inline fan’s manufacturer.
-Maintain regular maintenance routine based on these guidelines.
By following these steps regularly as part of your maintenance routine, you can ensure optimal performance and longevity of your inline fan. This will maximize efficiency in your grow room’s ventilation system while promoting healthy plant growth.
Enhancing the Efficiency of Your Inline Fan with Accessories
Accessories can play a crucial role in enhancing the efficiency of your inline fan, ensuring optimal performance and improving the overall ventilation system in your grow room. One accessory that can greatly benefit your inline fan setup is a fan speed controller. This device allows you to adjust the speed of your inline fan, providing greater control over the airflow and helping to maintain the ideal temperature and humidity levels for your plants.
By utilizing a fan speed controller, you can fine-tune the airflow in your grow room, ensuring that your plants receive the perfect amount of ventilation. This can be especially beneficial during different stages of plant growth, as you can increase or decrease the fan speed to meet the specific needs of your plants. Moreover, using a fan speed controller can help reduce noise levels, as you can lower the fan speed when maximum ventilation is not required, creating a more peaceful growing environment.
Another accessory that can enhance the efficiency of your inline fan is a carbon filter. Carbon filters help remove odors and contaminants from the air, ensuring that the air circulated by the inline fan is clean and fresh. This is especially important in indoor growing environments, where odors from plants and organic matter can become strong and unpleasant. By incorporating a carbon filter into your ventilation system, you can maintain a odor-free and healthy grow room, improving the overall quality of your plants and providing a more enjoyable gardening experience.
With these accessories, you can maximize the efficiency and effectiveness of your inline fan, creating an optimal environment for your plants to thrive. By controlling fan speed and using a carbon filter, you can fine-tune the airflow and ensure the air in your grow room is clean and odor-free. Incorporating these accessories into your ventilation setup will not only benefit your plants but also contribute to a successful and satisfying gardening experience.
• A fan speed controller allows you to adjust the speed of your inline fan, providing greater control over airflow.
• Adjusting the fan speed can help maintain ideal temperature and humidity levels for your plants.
• Fan speed controllers allow for fine-tuning of airflow during different stages of plant growth.
• Lowering the fan speed when maximum ventilation is not required can reduce noise levels in the grow room.
• Carbon filters help remove odors and contaminants from the air circulated by the inline fan.
• Using a carbon filter ensures that the air in your grow room is clean and fresh, improving overall air quality.
• Odor removal is especially important in indoor growing environments where strong odors can develop from plants and organic matter.
• Incorporating a carbon filter into your ventilation system creates an odor-free and healthy environment for your plants.
Monitoring and Adjusting Your Grow Room’s Ventilation System
Monitoring and adjusting your grow room’s ventilation system is crucial for maintaining optimal growing conditions and maximizing plant health and productivity. By regularly assessing and fine-tuning your ventilation system, you can ensure proper airflow, temperature, and humidity levels, which are vital for creating an environment conducive to healthy plant growth.
One important aspect of monitoring your grow room’s ventilation system is tracking temperature and humidity. These two factors play a significant role in plant growth and can greatly impact the overall success of your garden. Using a digital thermometer and hygrometer, regularly measure and record the temperature and humidity levels in different areas of your grow room. This data will help you identify any fluctuations or imbalances and allow you to make informed adjustments to your ventilation system as needed.
In addition to temperature and humidity, monitoring air circulation within your grow room is equally important. Poor air circulation can negatively affect plant transpiration, nutrient uptake, and overall plant vigor. Regularly inspect the placement and functionality of your inline fan to ensure that air is being properly circulated throughout the space. Pay attention to any areas that may have poor airflow, such as corners or lower levels, and consider using oscillating fans to improve circulation in these areas.
By regularly monitoring and adjusting your grow room’s ventilation system, you can proactively address any potential issues and create an environment that promotes healthy and thriving plants. Through careful observation and data analysis, you can fine-tune your ventilation system to meet the specific needs of your plants, leading to improved yields and overall success in your garden.
• Regularly measure and record temperature and humidity levels in different areas of the grow room using a digital thermometer and hygrometer.
• Use this data to identify any fluctuations or imbalances in temperature and humidity.
• Make informed adjustments to the ventilation system as needed based on the recorded data.
• Inspect the placement and functionality of your inline fan to ensure proper air circulation throughout the grow room.
• Pay attention to areas with poor airflow, such as corners or lower levels, and consider using oscillating fans to improve circulation in these areas.
• Proactively address potential issues by regularly monitoring and adjusting your ventilation system.
• Create an environment that promotes healthy plant growth by fine-tuning your ventilation system based on careful observation and data analysis.
Seeking Professional Help When Needed
When it comes to installing and maintaining your inline fan, it’s important to recognize that there may be times when seeking professional help is the best course of action. While many aspects of installation can be done by a knowledgeable gardener, certain situations may require the expertise of a professional. This is especially true if you are facing complex wiring issues, dealing with unique structural considerations, or if you simply lack the necessary experience and knowledge to confidently tackle the project on your own.
Professional help can ensure that your inline fan is installed correctly and safely, minimizing the risk of any potential problems down the line. Furthermore, seeking professional assistance can save you time and frustration by having a trained and experienced individual handle the installation process efficiently. Remember, it’s better to invest in professional help upfront than to risk making costly mistakes that could potentially harm your grow room or compromise the performance of your inline fan. By enlisting the expertise of professionals when needed, you can ensure that your ventilation system operates optimally and creates the ideal environment for your plants to thrive.
• Seeking professional help is the best course of action in certain situations
• Complex wiring issues may require the expertise of a professional
• Unique structural considerations may also necessitate professional assistance
• Lack of experience and knowledge can make it necessary to seek professional help
• Professional installation ensures correct and safe installation of your inline fan
• Minimizes the risk of potential problems in the future
• Saves time and frustration by having an experienced individual handle the process efficiently
• Investing in professional help upfront prevents costly mistakes
• Protects your grow room and maintains optimal performance of your inline fan
• Creates an ideal environment for your plants to thrive
Please watch video.
Can I install an inline fan myself or should I hire a professional?
While it is possible to install an inline fan yourself, it is recommended to hire a professional for proper installation and to ensure optimal functionality.
What are the common issues that can occur during inline fan installation?
Common issues during installation include incorrect wiring, improper ductwork connection, and inadequate ventilation design. Seeking professional help can prevent these issues.
Are there any specific safety measures to consider before installing an inline fan?
Yes, it is important to ensure power is turned off before installation, wear protective gear such as gloves and goggles, and follow all safety guidelines provided by the manufacturer.
How often should I clean and maintain my inline fan?
It is recommended to clean and maintain your inline fan regularly, at least once every three months, to ensure optimal performance and prevent dust buildup.
Can I enhance the efficiency of my inline fan with accessories?
Yes, there are various accessories available such as speed controllers and carbon filters that can enhance the efficiency and functionality of your inline fan.
How do I monitor and adjust my grow room’s ventilation system?
Monitoring and adjusting your grow room’s ventilation system involves regularly checking temperature and humidity levels, adjusting fan speed if necessary, and making any necessary modifications to ensure proper airflow.
When should I seek professional help for my grow room’s ventilation system?
It is recommended to seek professional help if you are unsure about the installation process, experience persistent issues with your ventilation system, or if you require a more complex ventilation setup.

Nicole Burke is a dynamic writer at SouthElMonteHydroponics, fueled by her passion for horticulture and environmental sustainability. Armed with a degree in Environmental Science from a renowned institution, Nicole’s expertise lies in hydroponic gardening, organic farming, and biodiversity conservation. Her insatiable curiosity and love for nature drive her to explore innovative techniques in hydroponics, seeking to revolutionize the way we grow crops in urban environments. Nicole’s writing reflects her deep commitment to promoting eco-conscious practices and fostering a deeper connection between humans and the natural world. Through her engaging storytelling, she inspires others to embrace sustainable living and harness the power of hydroponics for a greener future.