Elephant Ear Planting: A Comprehensive Guide
How to Choose the Right Location for Your Elephant Ear Plant
When choosing the right location for your elephant ear plant, it’s essential to consider its preference for warmth and humidity. These tropical plants thrive in bright, indirect sunlight, so look for a spot in your garden that receives partial shade throughout the day. Avoid placing them in direct sunlight, as this can scorch their large, lush leaves. Additionally, make sure the area is sheltered from strong winds to prevent damage to the plant.
Elephant ear plants also require well-draining soil that is rich in organic matter. Prioritize areas in your garden with soil that is loose, fertile, and retains moisture without becoming waterlogged. Keep in mind that these plants have a high water requirement, so selecting a location with consistent access to water will help them flourish. Overall, choosing a warm, humid, partially shaded spot with nutrient-rich, well-draining soil will provide the optimal conditions for your elephant ear plant to thrive.
Understanding the Different Varieties of Elephant Ear Plants
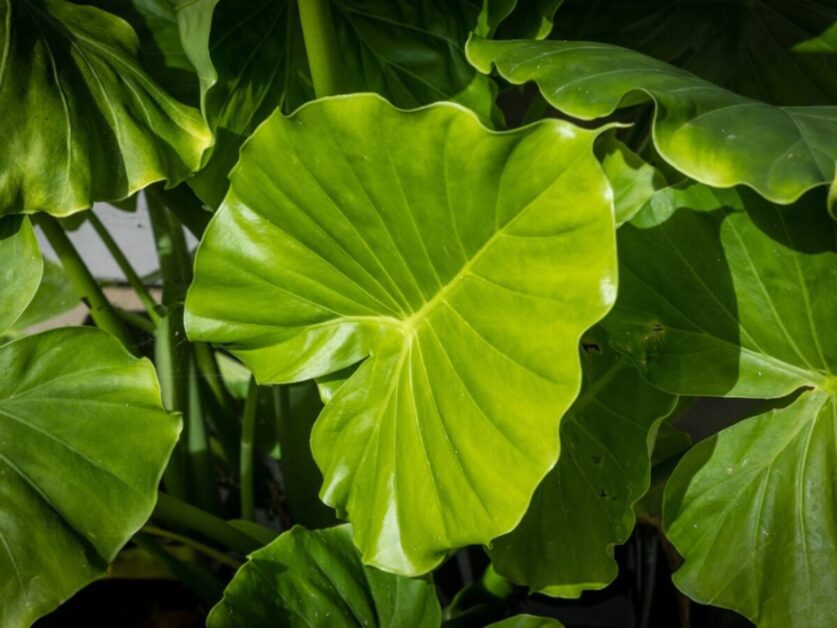
Elephant ear plants belong to the genus Colocasia and Alocasia, offering a wide range of varieties to choose from. These plants are known for their large, heart-shaped leaves and impressive size, making them a popular choice for creating a tropical look in gardens.
Some common varieties of elephant ear plants include the Colocasia Esculenta, known for its edible tubers and large, lush leaves. Another popular variety is the Alocasia Amazonica, with its striking dark green leaves and contrasting white veins. The Alocasia Polly, commonly referred to as the African mask plant, features unique arrow-shaped leaves with a glossy sheen. Each variety of elephant ear plant brings its own charm and characteristics to the garden, allowing for diverse possibilities in landscaping and design.
Preparing the Soil for Planting Elephant Ear
When preparing the soil for planting elephant ear plants, it is essential to create a well-draining environment that is rich in nutrients to support their growth. Elephant ears thrive in moist, fertile soil with good aeration, so a mixture of organic matter such as compost or well-rotted manure can be beneficial. Additionally, incorporating perlite or sand into the soil can help improve drainage, preventing waterlogged conditions that can lead to root rot. Conduct a soil test to determine the pH level and nutrient content of the soil, and adjust it as needed to meet the specific requirements of elephant ear plants.
Incorporating a balanced fertilizer into the soil before planting can provide the necessary nutrients for healthy growth. A slow-release fertilizer high in nitrogen can promote lush foliage development, while phosphorus and potassium are essential for root development and overall plant health. Avoid over-fertilizing, as this can lead to excessive leaf growth at the expense of rhizome development. Remember to water the soil thoroughly after fertilizing to ensure the nutrients are readily available to the plant roots. By taking the time to properly prepare the soil for planting elephant ear plants, you can create an optimal growing environment that will support their vigorous growth and vibrant foliage.
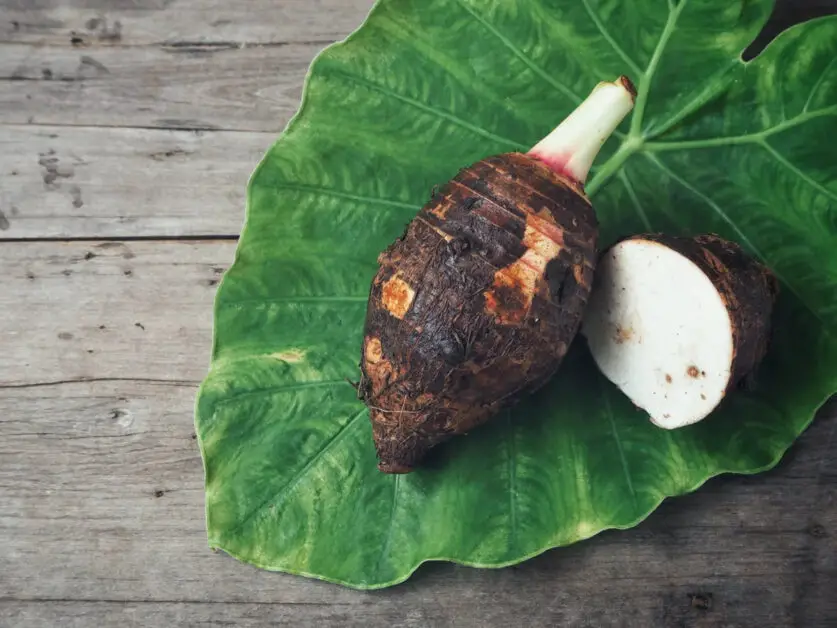
Selecting the Best Elephant Ear Bulbs or Rhizomes
When selecting elephant ear bulbs or rhizomes for your garden, it is crucial to choose healthy and robust specimens to ensure successful growth. Look for bulbs or rhizomes that are firm to the touch, free from soft spots or mold, and without any signs of damage or disease. Larger bulbs or rhizomes are generally better equipped to produce larger and more vigorous plants, so opt for those whenever possible.
Additionally, consider the specific variety of elephant ear plant you are looking to grow, as different varieties may have varying preferences in terms of size, color, and foliage shape. Research the specific requirements of the variety you have in mind and select bulbs or rhizomes accordingly to best suit your desired aesthetic and environment. By carefully choosing high-quality elephant ear bulbs or rhizomes, you can set the stage for a thriving and beautiful garden display.
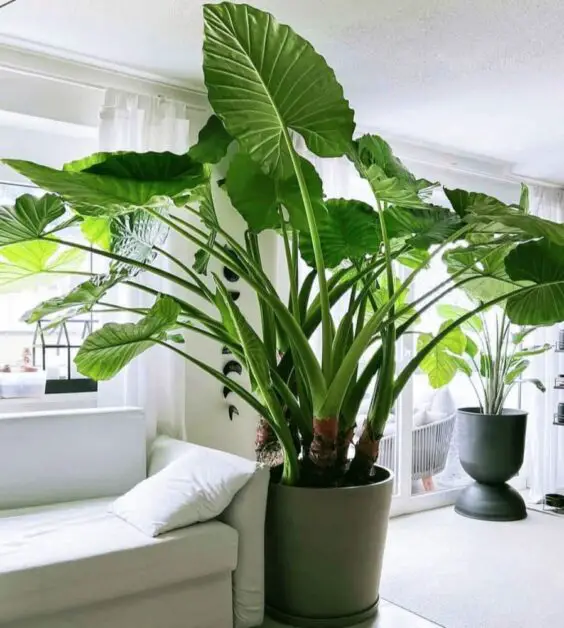
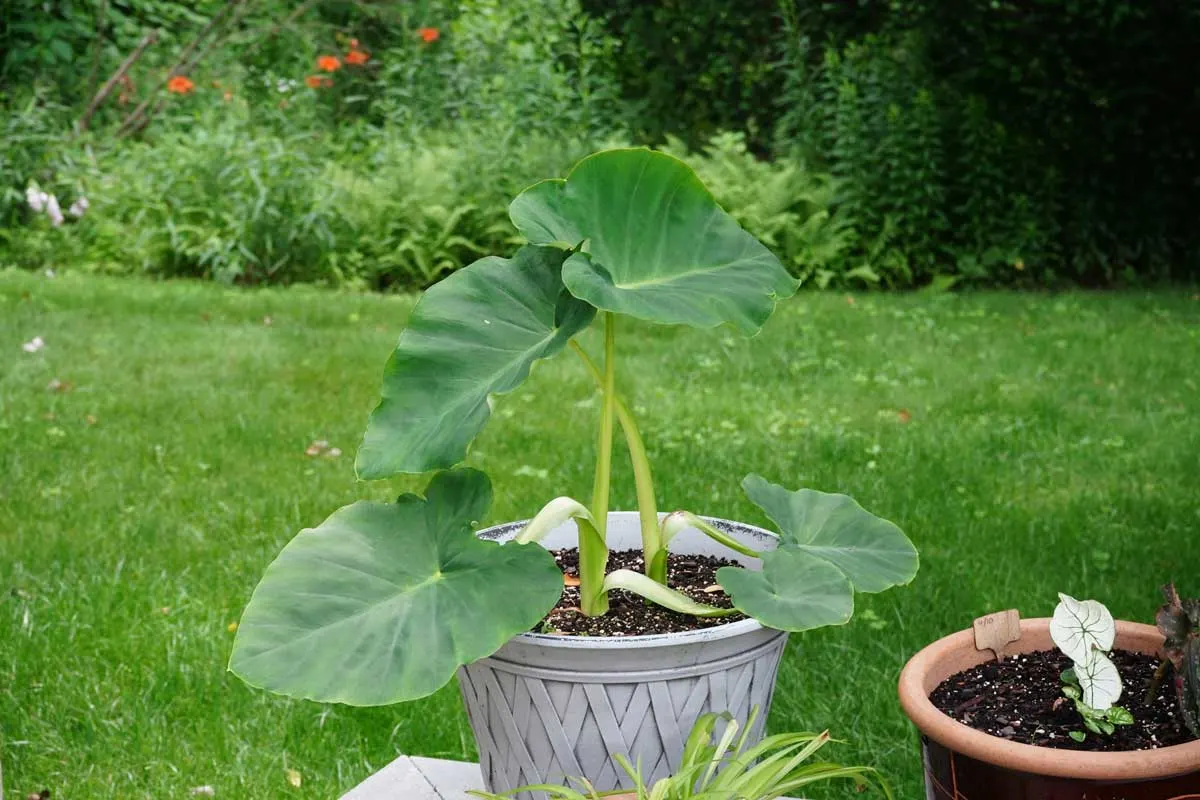
Planting Elephant Ear Bulbs or Rhizomes in Containers
When planting elephant ear bulbs or rhizomes in containers, it is essential to choose a container that is large enough to accommodate the size of the plant. Provide ample space for the bulb or rhizome, ensuring that it has room to grow without restrictions. Select a well-draining potting mix to prevent waterlogging, as elephant ears prefer moist but not waterlogged conditions. Place the bulb or rhizome in the container at a depth that allows for good root development and stability.
Water the newly planted elephant ear bulb or rhizome thoroughly after planting to help settle the soil and promote initial growth. Keep the soil evenly moist but not soggy, as overly wet conditions can lead to root rot. Place the container in a location with bright, indirect light to encourage healthy growth. Monitor the plant regularly for signs of dehydration or overwatering, adjusting your watering schedule as needed to maintain optimal soil moisture levels.
Planting Elephant Ear Bulbs or Rhizomes in the Ground
When planting elephant ear bulbs or rhizomes in the ground, it is essential to choose a location that provides the right conditions for these tropical plants to thrive. Elephant ear plants prefer moist, well-draining soil and partial shade, although they can tolerate full sun in cooler climates. Select a spot in your garden that receives filtered sunlight or morning sun and afternoon shade for optimal growth.
Dig a hole that is about two to three times wider than the size of the bulb or rhizome and plant it with the top slightly exposed above the soil level. This will prevent the bulb from rotting and promote healthy growth. Gently backfill the hole with soil, firming it around the bulb to remove any air pockets. Water the newly planted elephant ear thoroughly to settle the soil and provide the plant with the moisture it needs to establish its roots in its new environment.
Watering Requirements for Elephant Ear Plants
When it comes to watering your elephant ear plants, it’s important to strike a balance between keeping the soil consistently moist without allowing it to become waterlogged. Elephant ears thrive in soil that is well-draining but retains moisture. A good rule of thumb is to water your elephant ear plants when the top inch of soil feels dry to the touch. In hotter climates or during peak growing seasons, you may need to water more frequently to prevent the soil from drying out completely.
Overwatering can be just as harmful as underwatering for elephant ear plants, leading to root rot and other diseases. To prevent overwatering, ensure that your plant is in a well-draining soil mix and that the pot has drainage holes. When watering, aim to moisten the entire root ball thoroughly without leaving the soil soggy. Adjust your watering schedule based on the environmental conditions and the specific needs of your elephant ear plant to promote healthy growth and vibrant foliage.
Fertilizing Your Elephant Ear Plants
When it comes to fertilizing your elephant ear plants, it’s essential to provide them with the nutrients they need to thrive. Ideally, you should fertilize your elephant ear plants every 4-6 weeks during the growing season, which typically spans from spring to summer. A well-balanced, water-soluble fertilizer with equal parts nitrogen, phosphorus, and potassium, such as a 10-10-10 formula, can support healthy growth and vibrant foliage. Avoid over-fertilizing, as this can lead to excessive leaf production at the expense of root development.
In addition to regular fertilization, consider supplementing your elephant ear plants with micronutrients like iron, magnesium, and calcium to prevent deficiencies and enhance overall plant health. These micronutrients can be applied through foliar sprays or incorporated into the soil during planting or transplanting. Conducting a soil test before fertilizing can help you determine any specific nutrient deficiencies and adjust your fertilization plan accordingly. Remember to water your plants thoroughly after fertilizing to help distribute the nutrients evenly and encourage proper absorption.
Mulching Around Elephant Ear Plants
When it comes to mulching around your elephant ear plants, it is important to choose the right type of mulch and apply it properly to ensure the health and growth of your plants. Mulching helps in retaining soil moisture, suppressing weed growth, and maintaining a consistent soil temperature. Organic mulches like shredded leaves, bark chips, or straw are ideal for elephant ear plants as they decompose over time, adding nutrients to the soil. Apply a layer of mulch around the base of the plants, leaving some space around the stems to prevent rotting and allow for air circulation.
Avoid using heavy or compacted mulch that can suffocate the roots of your elephant ear plants. Lightly cultivate the soil before mulching to ensure proper aeration and drainage. Mulch depth should be around 2-3 inches to provide adequate coverage without smothering the plants. Regularly check the mulch layer and replenish it as needed to maintain its effectiveness in conserving moisture and suppressing weeds. Remember to keep the mulch from directly touching the plant stems to prevent moisture-related diseases and pests from infesting your elephant ear plants.
Supporting and Staking Elephant Ear Plants
When supporting and staking elephant ear plants, it is crucial to consider the size and weight of the leaves. These plants can grow quite large, with some varieties producing leaves over 3 feet long. To prevent bending or breaking of the stems, especially during strong winds or heavy rains, providing proper support is essential. Sturdy stakes or bamboo poles can be gently placed near the plant and tied with soft, non-abrasive ties to avoid damaging the stems. Regularly check the ties to ensure they are not constricting the stems as the plant grows, adjusting them as needed to maintain support without causing harm.
Additionally, for larger elephant ear varieties that may lean or droop, creating a ring of stakes around the plant can offer more comprehensive support. By evenly spacing the stakes around the plant and securing them at various heights, a natural scaffold is formed to support the leaves in all directions. This method not only prevents bending or snapping of the stems but also promotes better airflow around the plant, reducing the risk of fungal diseases. Taking the time to properly support and stake your elephant ear plants will not only protect them from damage but also enhance the overall aesthetic appeal of your garden or landscape.
Pruning and Deadheading Elephant Ear Plants
Pruning and deadheading Elephant Ear plants are essential tasks to maintain the health and aesthetics of your garden. When it comes to pruning, focus on removing any damaged, discolored, or dead leaves. This not only improves the plant’s appearance but also prevents potential diseases from spreading. Additionally, thinning out crowded areas can enhance air circulation, which is crucial for the plant’s overall well-being.
Deadheading is the process of removing spent blooms or withered flowers from the Elephant Ear plant. This practice not only tidies up the plant but also encourages new growth and flowering. By regularly deadheading your Elephant Ear plant, you stimulate the production of more blooms, promoting a vibrant and attractive display in your garden. Remember to use clean and sharp pruning shears to make precise cuts and reduce the risk of introducing infections.
Dealing with Common Pests and Diseases in Elephant Ear Plants
Elephant ear plants are generally hardy and resilient, but like any other plant, they can fall prey to pests and diseases that may hinder their growth and appearance. One common pest that can affect elephant ear plants is the spider mite. These tiny pests suck the sap from the plants, causing leaves to discolor and yellow. To combat spider mites, regular sprays of insecticidal soap or neem oil can be effective in keeping them at bay.
Another issue that elephant ear plants may face is fungal diseases such as leaf spot. This can manifest as dark spots or lesions on the leaves, eventually leading to leaf yellowing and drop. To prevent fungal diseases, ensure proper air circulation around the plants by spacing them adequately and avoiding overhead watering. Fungal diseases can be managed by applying fungicides according to the manufacturer’s instructions. Regularly inspecting your elephant ear plants for signs of pests or diseases can help catch issues early and prevent them from spreading.
The table below shows some of the pests and diseases of elephant ear plant:
| Pest/Disease | Prevention/Treatment |
|---|---|
| Aphids | Prevent aphids by regularly spraying plants with water to dislodge them, applying insecticidal soap or neem oil to deter them, and introducing natural predators like ladybugs. |
| Spider Mites | Avoid spider mites by increasing humidity around plants, using a spray of water and mild soap to remove them, and applying insecticidal oils or neem oil to suffocate and kill them. |
| Scale Insects | Ward off scale insects by manually removing them, applying horticultural oil to smother them, and introducing natural predators such as ladybugs or predatory beetles. |
| Fungal Leaf Spot | Prevent fungal leaf spot by ensuring foliage stays dry, removing infected leaves promptly, and applying fungicides containing copper or sulfur as directed. |
| Root Rot | Avoid root rot by ensuring soil drains well, avoiding overwatering, and applying fungicides containing thiophanate-methyl to infected plants. |
| Leaf Yellowing | Prevent leaf yellowing by adjusting watering practices, monitoring soil pH and nutrient levels, and promptly treating any pest infestations that may be causing damage. |
| Anthracnose | Prevent anthracnose by promptly removing and destroying infected plant parts, improving air circulation around plants, and applying fungicides containing chlorothalonil as directed. |
Overwintering Elephant Ear Plants
Overwintering elephant ear plants is crucial to ensure their survival during the colder months. As tropical plants, elephant ears are sensitive to frost and cold temperatures. In regions where frost occurs, it’s essential to take precautions to protect these plants from damage. One method is to dig up the rhizomes before the first frost and store them indoors until the following spring.
Another approach is to mulch heavily around the base of the plant to insulate the roots and protect them from freezing temperatures. Additionally, you can consider growing elephant ears in containers that can be moved indoors during the winter months to provide them with a more controlled environment. By taking these steps, you can help your elephant ear plants survive the winter and thrive again in the warmer seasons.
Propagating Elephant Ear Plants
When propagating elephant ear plants, one common method is through division. This involves carefully separating the rhizomes into sections, ensuring that each section has healthy roots and at least one growing point or bud. By dividing the rhizomes, you can create new plants while also rejuvenating the existing ones. It’s best to do this in the spring before active growth begins, using a sharp knife to make clean cuts and then replanting the sections in suitable soil.
Another effective way to propagate elephant ear plants is through stem cuttings. Select a healthy stem with several nodes, remove the lower leaves, and place the cutting in water or a suitable rooting medium. Keep the cutting in a warm, humid environment with indirect sunlight until roots develop, then transplant it into a pot with well-draining soil. This method can be successful in creating new plants quickly, allowing you to expand your elephant ear garden with ease.
Watch the full video to know more about planting elephant ear plant.
Enjoying the Beauty of Your Elephant Ear Garden.
After investing time and effort into caring for your elephant ear plants, it’s immensely rewarding to finally reap the benefits of their stunning beauty in your garden. The large, striking foliage of elephant ear plants adds a tropical and exotic flair to any outdoor space, creating a lush and vibrant atmosphere. Whether you’ve chosen Alocasia, Colocasia, or Xanthosoma varieties, each with its unique leaf shape and coloration, your garden is sure to be a captivating sight for visitors and a source of pride for you as a gardener.
As you enjoy the beauty of your elephant ear garden, take the time to observe how the sunlight plays on the leaves, highlighting their intricate patterns and textures. Consider incorporating complementary plants or decor elements to enhance the visual impact and overall aesthetic of your garden. With proper care and maintenance, your elephant ear plants will continue to thrive and flourish, providing you with endless enjoyment and a touch of tropical paradise in your own backyard.
Can elephant ear plants tolerate full sun?
While elephant ear plants prefer partial shade, they can tolerate full sun if they receive enough water and protection from harsh afternoon rays.
How often should I fertilize my elephant ear plants?
Fertilize your elephant ear plants every 4-6 weeks during the growing season with a balanced fertilizer to promote healthy growth.
Do elephant ear plants attract any particular pests?
Elephant ear plants are susceptible to spider mites, aphids, and caterpillars. Regularly inspecting your plants can help you catch and treat any pest infestations early.
Can I divide my elephant ear plants to propagate them?
Yes, you can divide elephant ear plants by carefully separating the rhizomes and replanting them in different containers or locations in your garden.
How should I prepare my elephant ear plants for overwintering?
Before the first frost, cut back the foliage of your elephant ear plants, dig up the bulbs or rhizomes, and store them in a cool, dry place until the next growing season.