Growing Hydrangeas: The Super Guide from Start to Finish
Table of Contents
Understanding the Different Types of Hydrangeas
Hydrangeas are a beloved and enchanting addition to any garden, with their stunning blooms and diverse range of colors. Understanding the different types of hydrangeas is essential for gardeners looking to cultivate these captivating plants. There are several species and cultivars of hydrangeas, each with their own unique characteristics and requirements.
One popular type of hydrangea is the Hydrangea macrophylla, commonly known as the mophead hydrangea. This cultivar is prized for its large, rounded flower clusters and its ability to change color depending on the soil pH. Another widely recognized hydrangea is the Hydrangea paniculata, or the panicle hydrangea. This variety features elongated, cone-shaped flower clusters that gradually transition from white to pink or even red as they mature. Additionally, the Hydrangea quercifolia, known as the oakleaf hydrangea, stands out with its distinctive oak-shaped leaves and cone-shaped flower clusters.
With such diversity in hydrangea species and cultivars, gardeners have a wealth of options to choose from. By understanding the different types of hydrangeas, they can select the ones that best suit their preferences and gardening conditions. Whether you desire the vibrant colors of the mophead hydrangea, the elegant panicles of the panicle hydrangea, or the unique foliage of the oakleaf hydrangea, there is a hydrangea variety to suit every garden aesthetic. So, let us embark on an exploration of the mesmerizing world of hydrangeas, learning about their characteristics, care requirements, and how to showcase their beauty in our gardens.
Essential Factors to Consider before Planting Hydrangeas
When it comes to planting hydrangeas, there are several essential factors that gardening enthusiasts should consider. These factors will not only contribute to the overall success of your hydrangea planting endeavor but also ensure that your plants thrive and bloom beautifully.
Firstly, it is crucial to select the right location for your hydrangeas. These plants generally prefer areas with partial sunlight, as direct sunlight can scorch their delicate foliage. Additionally, they thrive in well-draining soil that is rich in organic matter. Before planting, it is advisable to test your soil’s pH levels. Hydrangeas exhibit different colors based on the acidity or alkalinity of the soil, so adjusting the pH to suit your desired color can be an exciting aspect of planting these stunning flowers.
Secondly, it is important to consider the climate and hardiness zone of your region. Hydrangeas can vary in their ability to withstand cold temperatures, with some being more tolerant of frost than others. Selecting a variety that is suitable for your zone will ensure that your plants are better equipped to handle the climatic conditions in your area. Additionally, proper mulching around the base of your hydrangeas can provide insulation during colder months, protecting the roots from freezing temperatures.
By taking these essential factors into consideration before planting your hydrangeas, you can create an optimal environment for their growth and ensure a vibrant and thriving display in your garden. With the right location, soil conditions, and knowledge of your climate, you can set the stage for a successful gardening experience with these enchanting blooms.
Preparing the Soil: Creating the Ideal Growing Conditions
Preparing the soil is an essential step in creating the ideal growing conditions for hydrangeas. The quality and composition of the soil play a crucial role in the plant’s overall health and the vibrancy of its blooms. To ensure successful growth, gardeners should focus on a few key factors when preparing the soil.
First and foremost, it is important to choose a well-draining soil for hydrangeas. Soggy or waterlogged soil can lead to root rot and other fungal diseases. A good way to test the soil’s drainage is by digging a small hole and filling it with water. If the water takes more than a few hours to drain, it may be necessary to amend the soil with organic matter such as compost or peat moss to improve drainage.
In addition to drainage, hydrangeas thrive in slightly acidic soil with a pH ranging from 5.5 to 6.5. Before planting, it is advisable to test the soil pH using a home testing kit or by sending a sample to a local agricultural extension office. If the soil pH is too high, meaning it is alkaline, gardeners can lower it by adding sulfur or other acidifiers to the soil. Conversely, if the pH is too low, gardeners can raise it by adding lime or other alkaline amendments.
Lastly, incorporating organic matter into the soil can greatly benefit hydrangeas. Organic matter adds nutrients, improves soil structure, and enhances moisture retention. Compost, well-rotted manure, and leaf mold are all excellent sources of organic matter that can be mixed into the planting area. Aim to incorporate at least 2-3 inches of organic matter into the top 6-8 inches of soil to provide hydrangeas with a rich and fertile environment.
By addressing these key factors and creating optimal growing conditions, gardeners can lay a solid foundation for healthy and flourishing hydrangeas. Proper soil preparation sets the stage for successful growth and ensures that these gorgeous flowering shrubs will thrive in any garden setting.
The Importance of Proper Hydration and Watering Techniques
Proper hydration and watering techniques are crucial for the health and vitality of hydrangeas. These beautiful flowering plants have specific water requirements that must be met in order for them to thrive and produce vibrant blooms. Over or under watering can lead to various problems, including wilting, root rot, and stunted growth. Therefore, it is important for gardeners to understand the optimal watering practices for hydrangeas.
Hydrangeas generally prefer consistently moist soil, but they do not like to sit in standing water. To prevent over watering, it is important to ensure that the soil has good drainage. This can be achieved by adding organic matter, such as compost or peat moss, to the soil to improve its texture and ability to retain moisture. Additionally, watering should be done at the base of the plant, avoiding overhead irrigation which can lead to diseases and fungal issues. Adequate water penetration can be achieved by watering deeply and slowly, allowing the water to reach the root zone. Gardeners should also avoid wetting the leaves to minimize the risk of foliar diseases.
Sunlight Requirements: Ensuring Optimal Light Exposure

Hydrangeas are gorgeous flowering plants that can brighten up any garden with their vibrant blooms. However, in order for these beauties to thrive, it’s crucial to provide them with the right amount of sunlight. Sunlight requirements vary depending on the type of hydrangea, so it’s important to understand the needs of your specific plant.
Most hydrangeas prefer to receive at least four to six hours of direct sunlight each day. This allows them to photosynthesize and produce the energy they need to grow and bloom. However, excessive sunlight can cause their delicate leaves to scorch, especially during the hotter months. If your garden experiences scorching sunlight, it’s a good idea to provide some shade for your hydrangeas during the peak afternoon hours. This can be done by strategically planting them near trees, shrubs, or other structures that can provide a gentle cover.
On the other hand, there are some hydrangea varieties that thrive in partial shade or even full shade. These varieties, such as the oakleaf hydrangea (Hydrangea quercifolia) or the bigleaf hydrangea (Hydrangea macrophylla), are adapted to thrive in woodland areas with dappled sunlight. If you’re planning to grow these types of hydrangeas, make sure to choose a location in your garden that provides them with the right amount of shade throughout the day. Remember that too much shade may result in reduced flowering, so finding the balance is essential.
Understanding the sunlight requirements of your hydrangeas is crucial for their overall health and vitality. By ensuring optimal light exposure, you can create an environment that allows these stunning plants to flourish and produce vibrant blooms. In the next section, we will explore the best techniques for pruning hydrangeas to promote healthy growth. Stay tuned for expert tips and techniques to help your hydrangeas thrive in all their glory.
Pruning Hydrangeas: Tips and Techniques for Healthy Growth
Hydrangeas are stunning flowering plants that can quickly transform any garden into a colorful oasis. However, in order to ensure their healthy growth and abundant blooms, it is crucial to understand the proper techniques for pruning hydrangeas. Pruning plays a vital role in promoting vigorous growth, maintaining the desired shape, and maximizing flower production.
When it comes to pruning hydrangeas, one of the first considerations is determining the type of hydrangea you have. This is important because different types require different pruning methods. For example, mophead and lacecap hydrangeas, which are part of the macrophylla species, bloom on old wood. This means that the flower buds are formed during the previous year, so pruning should be done immediately after the flowers fade, in order to allow ample time for new buds to develop.
On the other hand, paniculata and arborescens hydrangeas bloom on new wood, so pruning can be done in late winter or early spring before the new growth starts, without affecting the flower production. Understanding the specific requirements of your hydrangea variety will ensure that you prune at the correct time and in the appropriate manner, resulting in healthier plants and more abundant blooms.
As a gardener, you must approach pruning hydrangeas with care and precision. Start by removing any dead, damaged, or diseased wood. This not only improves the overall appearance of the plant but also prevents the spread of diseases and pests. Additionally, the removal of dead wood allows more light and airflow to reach the inner part of the plant, reducing the risk of fungal infections.
While pruning, be sure to use clean, sharp tools to make clean cuts and minimize the risk of infection. When cutting back branches, aim to make the cut just above a set of healthy buds, as this will encourage new growth in the desired direction. By following these tips and techniques, you can ensure healthy growth and vibrant blooms for your hydrangeas.
Protecting Hydrangeas from Pests and Diseases
Hydrangeas are beautiful and delicate plants that can be susceptible to various pests and diseases. Protecting your hydrangeas from these threats is essential to ensure their health and vibrant blooms. By implementing preventive measures and taking prompt action when necessary, you can safeguard your plants and enjoy a thriving garden.
One of the most common pests that can wreak havoc on hydrangeas is the aphid. These small insects feed on the sap of the plants, causing damage to the leaves and stems. To control aphids, you can introduce natural predators such as ladybugs or use insecticidal soaps or neem oil. Regularly inspecting your plants and promptly removing any infested leaves or stems can also help prevent the spread of aphids.
Another pest that can pose a threat to hydrangeas is the spider mite. These tiny, eight-legged creatures reproduce rapidly and suck the sap from the plant, leading to discoloration and stunted growth. To combat spider mites, you can use miticidal sprays or insecticidal soaps. Additionally, maintaining a humid environment and regularly spraying the leaves with water can help deter these pests. Remember to focus on the undersides of the leaves where spider mites often hide.
In addition to pests, hydrangeas are also susceptible to diseases such as powdery mildew and leaf spot. Powdery mildew appears as a grayish-white powdery coating on the leaves, while leaf spot manifests as brown or black spots on the foliage. To prevent these diseases, it is crucial to provide adequate air circulation by planting hydrangeas with sufficient spacing between them. Avoiding overhead watering and watering early in the day can also help minimize the chances of disease development. In severe cases, fungicides may be necessary to control the spread of powdery mildew or leaf spot.
Protecting your hydrangeas from pests and diseases requires vigilance and proactive care. By implementing preventive measures and promptly addressing any issues that arise, you can ensure that your hydrangeas remain healthy and vibrant, gracing your garden with their stunning blooms.
Fertilization: Nourishing Your Hydrangeas for Vibrant Blooms
Fertilization is a critical aspect of nurturing your hydrangeas and ensuring they produce vibrant blooms. By providing your plants with the right nutrients, you can encourage healthy growth, increased flower production, and enhanced color intensity. To properly nourish your hydrangeas, it is essential to understand their specific nutrient requirements and the best fertilization techniques.
Before applying any fertilizers, it is vital to conduct a soil test to determine the nutrient levels in your garden. This will help you identify any deficiencies and determine the appropriate fertilization regimen. Hydrangeas generally require a balanced fertilizer that provides a combination of nitrogen (N), phosphorus (P), and potassium (K). The ratio of these elements is crucial for promoting optimal growth and bloom production.
For freshly planted hydrangeas, it is important to establish a strong root system before focusing on flower production. Therefore, it is recommended to select a fertilizer with a higher ratio of phosphorus (P), such as a 10-20-10 formulation. This will support root development, enabling the plant to absorb water and nutrients more effectively.
During the active growing season, a balanced fertilizer with an equal ratio of nitrogen (N), phosphorus (P), and potassium (K), such as a 20-20-20 formulation, can be used to promote overall plant health and encourage the production of vibrant blooms.
It is essential to monitor the plants’ response to fertilization and adjust the application accordingly. Overfertilization can lead to excessive foliage growth and fewer blooms, while underfertilization may result in weak plants with pale flowers. Following the recommended dosage and fertilization schedule will help maintain the health and beauty of your hydrangeas throughout the growing season.
As an expert gardener, I have witnessed how proper fertilization can transform hydrangeas into stunning focal points in any garden. By providing the necessary nutrients in the right amounts, you can cultivate healthy plants and enjoy an abundance of vibrant blooms. However, it is important to remember that each hydrangea variety may have slight variations in its nutrient requirements. Therefore, it is advisable to consult local gardening experts or reputable sources for specific fertilizer recommendations tailored to your hydrangea variety.
Maintaining the Ideal Temperature for Hydrangea Growth
Hydrangeas are delicate plants that require precise environmental conditions for optimal growth. One of the key factors to consider is maintaining the ideal temperature. Hydrangeas thrive in moderate temperatures, generally ranging from 60 to 70 degrees Fahrenheit (15 to 21 degrees Celsius). However, different varieties may have specific temperature preferences, so it is essential to understand the needs of your specific hydrangea cultivar.
Extreme temperatures can have detrimental effects on hydrangea growth. High temperatures can cause wilting, leaf scorch, and even flower bud drop. On the other hand, low temperatures can lead to bud death and stunt overall plant development. It is crucial to protect hydrangeas from both extreme heat and cold by providing adequate shelter or utilizing appropriate gardening techniques such as mulching or covering with protective materials.
Maintaining a consistent temperature within the ideal range is vital for the overall health and growth of hydrangeas. By carefully monitoring and adjusting the surrounding conditions, gardeners can ensure the optimal temperature for their hydrangea plants, promoting vibrant blooms and robust foliage.
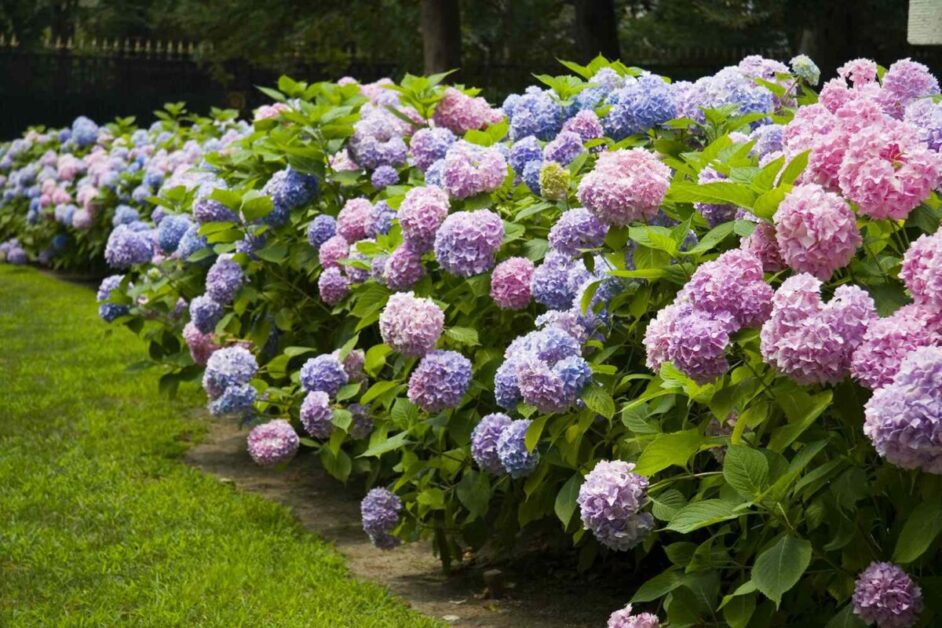
Understanding Hydrangea Color Change and How to Manipulate It
Hydrangeas are known for their stunning flowers, which can change color depending on various factors. Understanding how to manipulate the color change of hydrangeas can give you greater control over the aesthetic appeal of your garden. The color of hydrangea blooms is primarily determined by the pH level of the soil in which they are planted. Acidic soil (pH below 7) produces blue flowers, while alkaline soil (pH above 7) yields pink flowers. To manipulate the color of your hydrangea blooms, you can adjust the pH level of the soil.
One way to lower the pH and encourage blue blooms is by adding aluminum sulfate or sulfur to the soil. Both of these substances acidify the soil, making it more conducive for blue hydrangea flowers. On the other hand, if you prefer pink hydrangea flowers, you can increase the pH level by adding lime or wood ashes. It is important to note that changing the color of hydrangea blooms through soil manipulation is a gradual process and may not yield immediate results. Patience and consistent soil amendments are key to achieving the desired color change.
To ensure the success of this color manipulation technique, it is essential to test the pH level of your soil before making any adjustments. This can be done using a pH testing kit available at garden centers or by sending a soil sample to a reputable laboratory. By understanding and manipulating the pH level of the soil, you can enjoy a vibrant display of hydrangea blooms in your preferred color palette.
Transplanting Hydrangeas: Step-by-Step Instructions for Success
Transplanting Hydrangeas: Step-by-Step Instructions for Success
Transplanting hydrangeas can be a rewarding and exciting endeavor for any gardening enthusiast. Whether you’re moving your beloved hydrangeas to a new spot in your garden or giving them a fresh start in a different environment, proper transplanting techniques are essential for ensuring their successful growth and development. So, let’s dive into the step-by-step instructions to help you achieve thriving hydrangeas in their new location.
Firstly, it is crucial to choose the right time for transplanting your hydrangeas. The ideal time is during the dormant season, which generally falls in late winter or early spring. This period ensures that the plants are less likely to experience stress from extreme heat or cold. When the time comes, start by preparing the new planting hole.
It should be twice as wide as the root ball and as deep as the current container or root system. Carefully remove the hydrangea from its original spot, making sure to retain as much of the root ball as possible. Gently place the plant into the prepared hole, ensuring that the crown is level with the surrounding soil. Fill in the hole with a mix of compost, soil, and organic matter, lightly tamping it down to remove any air pockets. Finally, water the newly transplanted hydrangea thoroughly to settle the soil and provide essential hydration for its roots.
Remember, successful transplanting involves careful planning, proper execution, and continuous care. By following these step-by-step instructions, you can give your hydrangeas the best chance of thriving in their new surroundings. Stay tuned for more expert tips on maintaining and nurturing your hydrangeas to achieve stunning blooms in the future.
Overwintering Hydrangeas: Protecting Your Plants during Cold Seasons
Overwintering hydrangeas is a crucial step in ensuring the survival and health of these beautiful plants during the cold seasons. With their delicate blooms and vulnerable stems, hydrangeas can be susceptible to damage caused by freezing temperatures and harsh weather conditions. Therefore, it is important for gardeners to take proactive measures to protect their hydrangeas and help them thrive year after year.
One of the primary methods of safeguarding your hydrangeas during winter is through insulation. Applying a layer of mulch around the base of the plants can help regulate soil temperature and prevent extreme fluctuations. Additionally, you can consider using protective covers, such as burlap or frost cloth, to shield the plants from frost and wind. These covers act as a barrier, providing an extra layer of insulation and preventing dehydration caused by cold winds. By implementing these protective measures, you can safeguard your hydrangeas and promote healthy growth when the spring season arrives.
Propagation Methods: How to Multiply Your Hydrangea Collection
Hydrangeas are incredibly popular and diverse flowering plants, known for their stunning blooms and ability to thrive in various climates. If you’re a gardening enthusiast looking to expand your hydrangea collection, propagation methods offer a fantastic opportunity to multiply your plants. By understanding and employing these techniques, you can enjoy a broader range of hydrangea varieties in your garden.
One popular propagation method is through stem cuttings. This involves selecting a healthy stem from your existing hydrangea plant and carefully cutting it to encourage root growth. Before taking the cutting, make sure the plant is well-hydrated and has recently been watered. Using a sharp and sterile gardening tool, take a 4-6 inch section of a young stem just above a leaf node.
Remove any leaves from the bottom half of the cutting and dip the cut end into a rooting hormone powder to stimulate root development. Place the cutting in a well-draining potting mix, keeping it moist but not overly saturated. With proper care and attention, you’ll soon find roots developing, signaling the successful propagation of your hydrangea plant.
Arranging Cut Hydrangea Blooms for Stunning Floral Displays
Arranging cut hydrangea blooms for stunning floral displays requires careful selection, preparation, and placement of these delicate flowers. Hydrangeas, known for their vibrant colors and lush blossoms, make captivating additions to any floral arrangement or bouquet. Whether you are a professional florist or simply enjoy creating beautiful displays for your home, following a few expert tips can elevate your arrangements to new heights of elegance and charm.
First, it is essential to select hydrangea blooms at the optimal stage of maturity. Choose flowers that are fully open but not overly mature to ensure longevity and freshness. Look for blooms with evenly colored petals and sturdy stems, as these indicate a healthy and robust flower. Avoid selecting flowers that are wilted or have discolored spots, as they may not hold up well in an arrangement. Additionally, consider mixing hydrangea blooms of various sizes and colors to add depth and visual interest to your arrangement.
Common Hydrangea Problems and How to Solve Them

Hydrangeas are beloved for their beautiful blooms, but like any plant, they can encounter certain problems. Being aware of these common hydrangea problems and their solutions is essential for maintaining healthy and vibrant plants in your garden.
One common issue that many gardeners face is the wilting of hydrangea leaves. This can be caused by a variety of factors, including inadequate watering, excessive heat, or pests. To solve this problem, it is important to ensure that hydrangeas receive sufficient hydration by watering them deeply, but not excessively. Additionally, providing shade during the hottest part of the day can help prevent wilting caused by extreme heat. If pests are the culprit, such as aphids or spider mites, apply an appropriate insecticide to eliminate them and protect the leaves.
Another common problem is the lack of blooms on hydrangea plants. This can be frustrating, especially if you’re eagerly awaiting those beautiful flowers. One possible reason for the absence of blooms is improper pruning. Hydrangeas bloom on old wood, so if you prune them at the wrong time, you may inadvertently remove the flower buds. To solve this problem, it is crucial to understand the specific pruning requirements of your hydrangea variety. Some hydrangeas, such as mopheads (Hydrangea macrophylla), should be pruned immediately after flowering, while others, like panicle hydrangeas (Hydrangea paniculata), can be pruned in late winter or early spring. By pruning at the correct time, you can encourage new growth and ensure a stunning display of blooms.
here’s a basic table outlining some key information about growing hydrangeas:
| Aspect | Information |
|---|---|
| Soil | Well-drained, fertile soil preferred |
| Light | Partial shade to full sun depending on variety |
| Watering | Regular watering, especially during dry periods |
| Fertilizing | Apply balanced fertilizer in spring and early summer |
| Pruning | Prune in late winter or early spring |
| Propagation | Stem cuttings or layering for propagation |
| Bloom Time | Typically summer to fall, varies by variety |
| Frost Tolerance | Some varieties may need protection from frost |
| Pests | Watch for aphids, mites, and fungal diseases |
| Varieties | Endless Summer, Annabelle, Oakleaf, PeeGee, etc. |
This table provides a starting point for understanding the basics of growing hydrangeas, but remember that specific care requirements may vary depending on the variety and your local climate.
Celebrating the Beauty of Hydrangeas: Creative Ways to Showcase Them in Your Garden
Hydrangeas are undeniably beautiful flowers that can add a touch of elegance and charm to any garden. With their large and vibrant blooms, these plants have become a favorite among gardening enthusiasts. But how can you showcase the beauty of hydrangeas in your own garden? Here are a few creative ways to make these stunning flowers the centerpiece of your outdoor space.
One idea is to create a hydrangea hedge, using the plants to line a pathway or define the boundaries of your garden. This not only adds a visual appeal but also acts as a natural privacy screen. By selecting hydrangea varieties that bloom at different times, you can ensure that your hedge is in constant bloom throughout the growing season.
Another way to showcase the beauty of hydrangeas is through container gardening. Planting hydrangeas in pots allows for versatility and mobility, as you can easily move the containers around to different areas of your garden or patio. With their large and showy blooms, hydrangeas make stunning focal points when placed in the center of a flower bed or on a porch. Additionally, you can mix and match different hydrangea colors and varieties in the same container to create a dynamic and visually appealing display.
With these creative ideas, you can celebrate the beauty of hydrangeas and create a garden that is both stunning and unique. Whether you opt for a hydrangea hedge or a collection of potted plants, these flowers are sure to captivate the eyes and hearts of all who visit your garden. So, go ahead and let the beauty of hydrangeas shine in your outdoor space!
How often should I water hydrangeas?
Hydrangeas should be watered deeply once a week, ensuring that the soil is evenly moist. However, the watering frequency may vary depending on the weather and soil conditions.
Can I grow hydrangeas in containers?
Yes, hydrangeas can be grown in containers. Choose a large enough pot with good drainage, use high-quality soil mix, and provide proper water and sunlight for successful container gardening.
Will hydrangeas bloom in full shade?
While hydrangeas prefer partial shade, some varieties can tolerate full shade. However, they may produce fewer blooms and have less vibrant colors compared to those grown in more sunlight.
How do I prevent pests from damaging my hydrangeas?
Regularly inspect your hydrangeas for common pests such as aphids or spider mites. Use organic insecticides or natural pest control methods to deter them, and maintain good garden hygiene to minimize pest infestations.
Can I change the color of my hydrangea blooms?
Yes, you can manipulate the color of hydrangea blooms by adjusting the soil pH. Acidic soil produces blue flowers, while alkaline soil produces pink flowers. Adding certain amendments can help you achieve the desired color.
How do I transplant hydrangeas?
To transplant hydrangeas, dig a wide hole around the plant, ensuring you include as much of the root ball as possible. Carefully lift the plant and its roots out of the ground, and replant it in a new location with well-prepared soil and proper watering.
How do I protect hydrangeas during colder seasons?
To protect hydrangeas during winter, apply a layer of mulch around the base of the plant to insulate the roots. Additionally, consider covering the plant with burlap or a breathable fabric if you live in an area with extremely cold temperatures.
Can I propagate my hydrangeas to create more plants?
Yes, hydrangeas can be propagated through methods such as stem cuttings or layering. These techniques allow you to create new plants from an existing hydrangea, helping you expand your collection.
How can I arrange cut hydrangea blooms for floral displays?
To create stunning floral displays with cut hydrangea blooms, cut the stems at a 45-degree angle, remove any leaves that would be submerged in water, and place them in a vase filled with cool water. Change the water every few days to prolong the blooms’ freshness.
What are some common problems that hydrangeas face and how can I solve them?
Common hydrangea problems include wilting, leaf spots, and powdery mildew. Proper watering, providing adequate air circulation, and applying fungicides or other appropriate treatments can help solve these issues.