Growing Pumpkins for Perfect Pies
Selecting the Right Pumpkin Variety for Your Pie
When it comes to making a delicious pumpkin pie, selecting the right pumpkin variety is key. The type of pumpkin you choose will greatly impact the flavor, texture, and overall success of your pie. While many people may reach for the ubiquitous jack-o’-lantern pumpkin, it may not be the best choice for baking purposes.
Instead, I recommend opting for a pie pumpkin variety, also known as sugar pumpkins or baking pumpkins. These are smaller in size, typically ranging from 4 to 8 pounds, with a sweet and dense flesh that is perfect for pie-making. Some popular varieties include the Sugar Pie, Baby Pam, Cinderella, and Long Island Cheese pumpkins.

Not only do these pie pumpkin varieties offer a more pronounced flavor and smoother texture, but their higher sugar content contributes to a tastier end result. These pumpkins also tend to have fewer strings and a thicker flesh, which makes them easier to work with in the kitchen. So, if you’re aiming for a truly delectable pumpkin pie, consider selecting one of these specialized pumpkin varieties.
Understanding the Ideal Growing Conditions for Pumpkins
When it comes to growing pumpkins, understanding the ideal growing conditions is essential for a successful harvest. Pumpkins are warm-season crops that require ample sunlight, rich soil, and proper watering to thrive. Additionally, the right temperature and spacing are crucial factors to consider for optimal pumpkin growth.
Sunlight is one of the most critical elements in pumpkin cultivation. These plants need full sun exposure to develop strong and healthy vines. Aim for at least six to eight hours of direct sunlight per day to ensure robust growth. If your garden has partial shade, select a location that receives the maximum amount of sunlight possible. Remember, the more sunlight your pumpkin plants receive, the better their chances of producing large, flavorful fruits.
Another key aspect to consider is the soil composition. Pumpkins prefer well-draining soil that is rich in organic matter. Prior to planting, prepare the soil by incorporating compost or well-rotted manure to improve its fertility and moisture retention. Conduct a soil test to determine if any amendments, such as lime or sulfur, are required to achieve the optimal pH level, which typically ranges between 6.0 and 7.5 for pumpkin cultivation.
Maintaining adequate moisture levels is critical in pumpkin production. These plants require consistent watering, especially during the flowering and fruiting stages. Aim to keep the soil consistently moist but not overly saturated. Providing regular watering sessions when the top inch of soil feels dry to the touch will ensure proper hydration for the plants. However, be cautious not to overwater, as it can lead to root rot and other issues.
Temperature and spacing also play vital roles in pumpkin growth. These warm-season crops thrive in temperatures between 70°F and 85°F during the day, with nighttime temperatures above 60°F. Avoid planting pumpkins outdoors until all chance of frost has passed and the soil temperature reaches a minimum of 60°F. Additionally, proper spacing is essential to avoid overcrowding, which can hinder the growth of pumpkins and promote disease. Provide each plant with ample space, typically recommended at around 6 to 8 feet apart in rows with 8 to 12 feet between rows.
By understanding and implementing the ideal growing conditions for pumpkins, you can maximize your harvest and enjoy the fruits of your labor. From sunlight to soil composition, temperature, and spacing, each factor plays a crucial role in ensuring robust growth and bountiful pumpkins. Stay tuned as we delve deeper into the intriguing world of pumpkin cultivation and explore other essential aspects of growing these versatile and beloved vegetables.
Preparing the Soil for Pumpkin Planting
When it comes to preparing the soil for pumpkin planting, there are a few key factors that gardeners need to keep in mind. Firstly, it is crucial to ensure that the soil is well-drained and has a pH level between 6.0 and 7.5, which is considered optimal for pumpkin growth. To determine the pH level of the soil, a simple soil testing kit can be used. This will help the gardener adjust the pH if needed by adding amendments such as sulfur to lower the pH or lime to raise it.
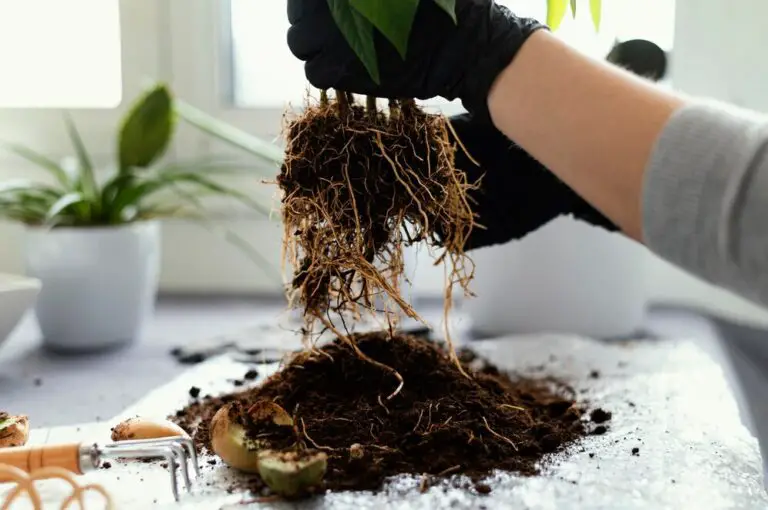
Additionally, incorporating organic matter into the soil is essential for providing the necessary nutrients and improving its structure. The addition of compost, well-rotted manure, or other organic materials will not only enrich the soil but also enhance its ability to retain moisture, which is crucial for healthy pumpkin growth. It is recommended to mix these organic materials into the soil at least a few weeks before planting to allow enough time for decomposition and nutrient release.
By ensuring good drainage and enriching the soil with organic matter, gardeners can provide an optimal environment for their pumpkin plants to thrive. This will set a solid foundation for the rest of the growing process, enabling the plants to absorb essential nutrients and water efficiently. With proper soil preparation, gardeners can enhance the overall health and productivity of their pumpkin patch.
Sowing Pumpkin Seeds: Step-by-Step Instructions
The process of sowing pumpkin seeds is an essential step in growing your own pumpkins. To ensure optimal germination and growth, it is important to follow a few simple step-by-step instructions.
First, select a suitable site for your pumpkin patch. Choose an area that receives full sunlight and has well-draining soil. Ideally, the soil should be loamy and rich in organic matter. Adequate air circulation is also important to prevent the spread of diseases.
Next, prepare the soil by removing any weeds, rocks, or large clumps. Loosen the soil with a garden fork or tiller, ensuring it is crumbly and friable. This will provide a loose and fertile bed for the pumpkin seeds to root and grow.
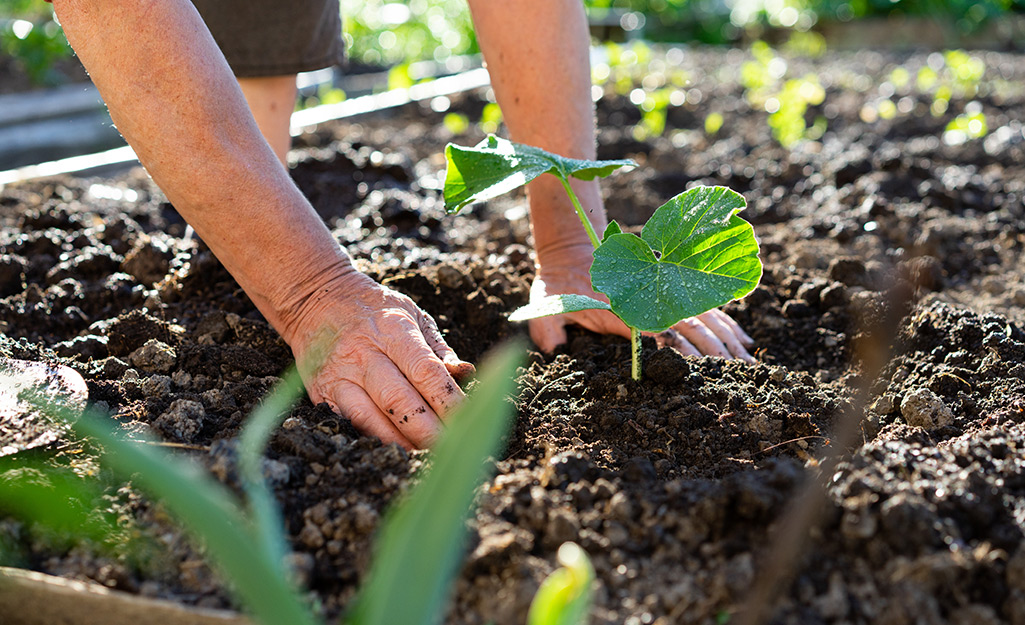
Once the soil is prepared, it’s time to sow the pumpkin seeds. Dig small holes, about 1 inch deep and 2 to 3 feet apart, in rows or hills, depending on your preferred planting method. Place 2 to 3 seeds in each hole, spacing them evenly.
Cover the seeds with soil and gently firm it down to ensure good seed-to-soil contact. Water the area thoroughly to settle the soil and provide moisture for germination. It is important to keep the soil consistently moist during the germination period, which usually takes about 7 to 10 days.
With these step-by-step instructions, you are now equipped to sow pumpkin seeds successfully. By choosing the right site, preparing the soil, and following proper planting techniques, you will lay the foundation for healthy and productive pumpkin plants. Remember to water regularly and monitor the growth of your seedlings as they emerge from the soil. Happy pumpkin growing!
Providing Adequate Watering and Drainage for Pumpkin Plants
Proper watering and drainage are essential for the healthy growth of pumpkin plants. Pumpkins require consistent moisture to thrive, but overwatering can lead to root rot and other problems. A well-draining soil is crucial to prevent excess water from accumulating around the roots.
To ensure adequate watering, it is important to monitor the soil moisture levels regularly. Stick your finger about an inch into the soil near the base of the plant. If the soil feels dry at this depth, it is time to water. Deep watering is preferable, as it encourages the roots to grow deeper into the soil. Apply water at the base of the plant, avoiding wetting the leaves to minimize the risk of diseases.
In addition to proper watering, providing good drainage is equally important. Poorly drained soil can cause water to stagnate around the roots, leading to root rot. To improve drainage, you can amend the soil with organic matter, such as compost, to create a looser and more porous texture. This allows excess water to flow through the soil more easily.
Consider using raised beds or mounds to further enhance drainage. The elevated position helps water to drain away more efficiently from the root zone. Adding a layer of mulch around the base of the plants can also help retain moisture in the soil while allowing excess water to evaporate.
By providing adequate watering and ensuring proper drainage, you can create the optimal conditions for your pumpkin plants to thrive and produce delicious, healthy fruits.
Maintaining Proper Sunlight Exposure for Optimal Growth
To ensure optimal growth and development of your pumpkin plants, maintaining proper sunlight exposure is crucial. Pumpkins are sun-loving plants that require at least 6-8 hours of direct sunlight daily. This is because sunlight plays a vital role in the process of photosynthesis, where plants convert light energy into food.
When selecting a location for your pumpkin patch, choose an area that receives maximum sunlight throughout the day. Avoid shady spots, as insufficient sunlight can lead to weak and thin vines, resulting in reduced fruit production. Additionally, insufficient sunlight can also make pumpkins more prone to diseases and pests.
To maximize sunlight exposure, consider factors such as nearby structures or trees that might cast shadows on your pumpkin plants. Trim any overhanging branches or vegetation that can obstruct sunlight. If your garden doesn’t have a naturally sunny location, consider using reflective materials, such as aluminum foil or white fabric, to redirect sunlight onto your plants.
Remember, maintaining proper sunlight exposure is crucial for the overall health and productivity of your pumpkin plants. By ensuring they receive ample sunlight, you’ll be setting the stage for an abundant harvest of plump, vibrant pumpkins.
Implementing Effective Weed Control Methods in Your Pumpkin Patch
Weeds can quickly take over a pumpkin patch and compete with the plants for nutrients, water, and sunlight. Therefore, implementing effective weed control methods is crucial to ensure the healthy growth and development of your pumpkin plants. There are several strategies you can employ to keep weeds at bay and maintain a weed-free pumpkin patch.
One effective method is mulching. Applying a layer of organic mulch, such as straw or wood chips, around the base of your pumpkin plants can help suppress weed growth by blocking sunlight and preventing weed seeds from germinating. Additionally, mulch helps retain moisture in the soil, reducing the need for frequent watering. It also acts as an insulator, keeping the soil temperature stable and creating a favorable environment for pumpkin growth.
Another useful weed control method is hand weeding. Regularly inspecting your pumpkin patch and manually removing any weeds that manage to emerge can significantly reduce their numbers and prevent them from spreading. Be sure to pull the entire weed, including the roots, to prevent regrowth. While hand weeding can be time-consuming, it allows for precise control and is an effective approach for smaller pumpkin patches or areas with stubborn weeds.
By implementing these weed control methods, you can ensure the health and vitality of your pumpkin plants, giving them the best chance to produce robust and bountiful harvests. In the next section of this article, we will explore the common pests and diseases that can affect pumpkin plants and discuss strategies for prevention and management.
Here is a table that shows some of the methods to control the weeds in pumpkin:
| Weed Control Method | Description |
|---|---|
| Mulching | Applying organic mulch (straw or wood chips) around pumpkin plants to suppress weed growth by blocking sunlight, preventing weed seed germination. Mulch also retains soil moisture and stabilizes soil temperature. |
| Hand Weeding | Regular inspection and manual removal of emerging weeds to reduce their numbers and prevent spreading. Pull entire weeds, including roots, for effective control. Suitable for smaller pumpkin patches or areas with stubborn weeds. |
| Cultivation | Use mechanical cultivation tools, such as hoes or cultivators, to disturb the soil surface and uproot weeds. Cultivate when weeds are small to prevent seed dispersal. |
| Herbicides | Selective herbicides can be used to control specific weed species without harming pumpkin plants. Pre-emergent and post-emergent herbicides are available. Always follow recommended guidelines and regulations. |
| Cover Crops | Plant cover crops in between pumpkin rows to provide ground cover, outcompete weeds, and improve soil structure. This method helps create a more challenging environment for weed growth. |
Recognizing Common Pests and Diseases Affecting Pumpkin Plants
Pumpkins are susceptible to various pests and diseases that can significantly affect their growth and yield. It is crucial for pumpkin growers to familiarize themselves with the common pests and diseases that can affect their plants, allowing for early detection and effective management strategies.
One of the most common pests that attack pumpkin plants is the squash vine borer (Melitta curcurbitae). These destructive pests tunnel into the stems of pumpkin plants, causing wilting and eventually killing the entire plant. Adult squash vine borers are moth-like insects with orange abdomens and black and white wings. Regularly inspecting the base of the stems for small holes, sawdust-like frass, or wilting can help in the early detection of these pests. Applying floating row covers early in the season or using insecticides labeled for squash vine borers can help prevent infestations.
Another major threat to pumpkin plants is powdery mildew (Podosphaera xanthii). This fungal disease appears as white or gray powdery patches on the leaves, stems, and even the fruits of the plant. These patches reduce the overall photosynthetic surface area, leading to poor plant growth and reduced pumpkin quality. Proper spacing between plants to ensure good air circulation, regular removal of infected plant parts, and applying fungicides labeled for powdery mildew control can help manage this disease effectively.
Applying Organic Fertilizers for Nutrient-Rich Pumpkins
Maintaining healthy and nutrient-rich pumpkins is crucial for a successful harvest. One effective method to achieve this is by applying organic fertilizers. Organic fertilizers provide essential nutrients to the soil, promoting robust plant growth and enhancing pumpkin productivity.
Organic fertilizers are derived from natural sources such as compost, manure, bone meal, and seaweed. They are rich in micronutrients, trace minerals, and beneficial microorganisms, which are vital for the overall health and vitality of pumpkin plants. These fertilizers work in harmony with the soil ecosystem, enriching it with organic matter and improving nutrient availability.
When applying organic fertilizers to your pumpkin patch, it is important to consider the specific nutrient requirements of these plants. Pumpkin plants require a balanced combination of macronutrients, including nitrogen (N), phosphorus (P), and potassium (K), as well as micronutrients such as calcium (Ca), magnesium (Mg), and iron (Fe). By conducting a soil test, you can determine the nutrient levels present in your soil and select an organic fertilizer that will supplement any deficiencies.
In addition to providing essential nutrients, organic fertilizers also contribute to the overall soil health and structure. They improve the soil’s ability to retain moisture, enhance microbial activity, and promote nutrient cycling. This leads to healthier and more vigorous pumpkin plants, which are more resistant to pests and diseases.
It is important to note that organic fertilizers release nutrients slowly over time, ensuring a steady and continuous supply to the pumpkin plants. This reduces the risk of nutrient burn or leaching, which can occur with synthetic fertilizers. By opting for organic fertilizers, you are not only nourishing your pumpkin plants but also fostering long-term sustainability and environmental stewardship.
In the next section, we will explore the process of pruning and training pumpkin vines for maximum yield. Understanding the importance of proper vine management techniques will help optimize your pumpkin harvest and ensure healthy plant growth.
Pruning and Training Pumpkin Vines for Maximum Yield
When it comes to growing pumpkins for maximum yield, pruning and training the vines is an essential step. Pruning helps to maintain a healthy plant by removing any diseased or damaged parts, as well as encouraging the growth of new, productive branches. Training the vines allows for better air circulation and sunlight penetration, which are crucial for optimal pumpkin growth.
To start, it is important to prune the pumpkin vines selectively. Remove any suckers or lateral shoots that emerge from the main stem of the plant. These side shoots tend to divert energy away from the main vine, resulting in smaller fruits. By removing them, the plant can focus its resources on the development of larger pumpkins.
Additionally, keep an eye out for any yellow or wilted leaves, as they can indicate disease or pests. Promptly removing these affected leaves not only improves the overall health of the plant but also helps prevent the spread of any potential pathogens.
When it comes to training pumpkin vines, there are a few methods you can employ. One popular technique is to gently redirect the vines to grow in a specific direction. This can be achieved by using stakes or trellises to guide the vines upwards rather than allowing them to trail on the ground.
Another method is known as “pinching.” This involves gently bending the vines into a zigzag pattern, allowing more buds to turn into pumpkins. By doing so, you encourage the formation of additional fruits along the vine, ultimately increasing your overall yield.
Keep in mind that each pumpkin variety may have slightly different pruning and training requirements, so it’s advisable to consult specific guidelines for the variety you are growing. By implementing proper pruning and training techniques, you can maximize your pumpkin yield and enjoy a bountiful harvest.
Ensuring Proper Pollination for Healthy Pumpkin Development
Proper pollination is crucial for the healthy development of pumpkins. Despite being self-pollinating plants, pumpkins still benefit from cross-pollination to ensure optimal fertility and fruit set. Cross-pollination occurs when bees, insects, or wind transfer pollen from the male flowers to the female flowers of different pumpkin plants.
To promote successful pollination, it is essential to create a welcoming environment for pollinators in your pumpkin patch. Planting a variety of nectar-rich flowers nearby will attract bees and other pollinators, increasing the chances of successful pollen transfer. Native plants like lavender, sunflowers, and coneflowers are excellent choices. Additionally, avoiding the use of chemical pesticides and insecticides will help protect the pollinators that visit your garden.
When identifying male and female flowers for pollination, keep in mind that male flowers generally appear before female flowers. Male flowers have long, slender stems and lack a swelling at their base, while female flowers have a small fruit or pumpkin-shaped bulge at the base of their stems. To facilitate cross-pollination, gently transfer pollen from the stamen of a male flower to the stigma of a female flower using a small brush or cotton swab. Repeat this process with multiple flowers to ensure adequate pollination and maximize your pumpkin yield.
Remember that pumpkins have a gestation period of approximately 55 to 90 days, depending on the variety. Throughout this period, it is crucial to continue providing a friendly environment for pollinators to visit your pumpkin patch. With proper pollination, you are on your way to cultivating healthy, robust pumpkins that will be a delight to harvest and enjoy.
Monitoring and Managing Pumpkin Growth for Ideal Size and Shape
Understanding how to monitor and manage the growth of your pumpkins is crucial in order to achieve the ideal size and shape. By implementing proper techniques and making careful observations, you can ensure that your pumpkins reach their full potential.
One key aspect of monitoring pumpkin growth is regularly measuring their size. This can be done by using a measuring tape or ruler to track the circumference of the pumpkins as they develop. By doing this regularly, you can monitor their growth rate and determine if any adjustments need to be made to their care or environment. Additionally, keeping a record of the measurements can help you track the progress of each pumpkin over time and compare their growth patterns.
Aside from measuring size, it is also important to observe the shape of your pumpkins. Ideally, pumpkins should have a uniformly round or oval shape, with a smooth outer surface. Any irregularities or deformities in shape can be an indication of underlying issues, such as poor pollination, nutrient deficiencies, or pest damage. By carefully examining the shape of your pumpkins, you can identify these problems early on and take appropriate action to address them.
Overall, monitoring and managing pumpkin growth for ideal size and shape requires continuous observation and proactive care. Through regular measurements and careful examination, you can ensure that your pumpkins develop into healthy and visually appealing specimens. In the upcoming sections, we will delve further into specific practices and techniques that can help you achieve optimal results in your pumpkin patch.
Harvesting Pumpkins: Signs of Ripeness and Harvesting Techniques
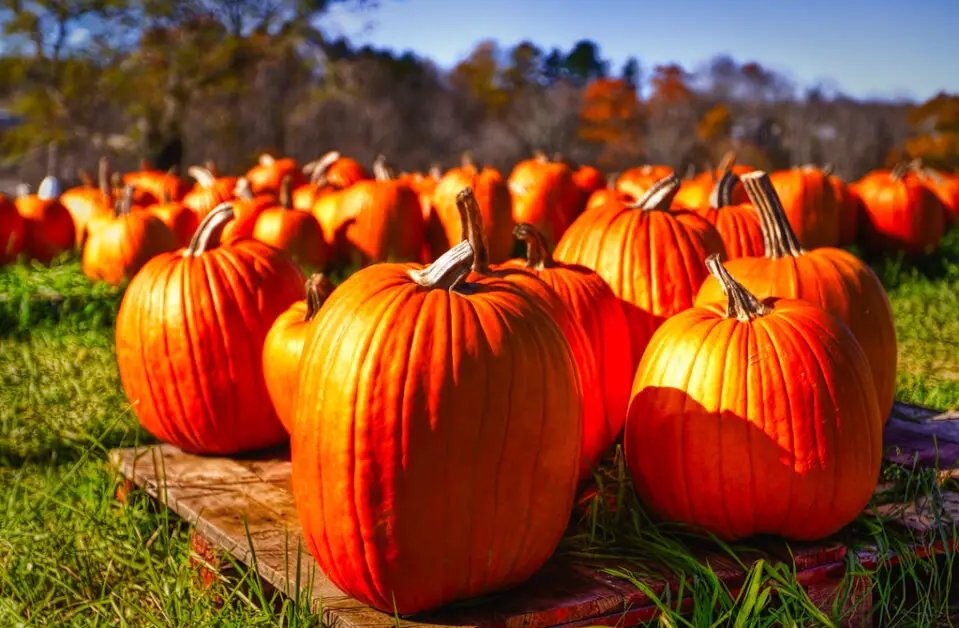
Pumpkins are a popular crop amongst gardeners, and harvesting them at the right time is crucial to ensure optimal flavor and texture for your pumpkin pies. One sign of ripeness to look for is a dull skin color. When the pumpkin is mature, the skin will transition from a shiny appearance to a matte finish. Additionally, check the color of the stem. If it has turned brown and dried out, it indicates that the pumpkin is ready for harvest.
To further confirm the ripeness of your pumpkins, another technique involves gently pressing the skin with your fingernail. If the skin is hard and resists indentation, it suggests that the pumpkin is mature and ready to be harvested. However, if the skin is easily penetrated or feels soft, it may indicate that the pumpkin is still immature and needs more time on the vine.
When it comes to harvesting your pumpkins, it’s important to use proper techniques to avoid damaging the fruit. Begin by cutting the stem, leaving a few inches attached to the pumpkin. A sharp knife or pruning shears can be used for this task. Avoid twisting or pulling the pumpkins off the vine as this can cause the stem to break, increasing the risk of rot and spoilage. Gently lift the pumpkins, supporting them from underneath to prevent any potential harm. Lastly, handle the pumpkins with care to avoid any bruising or scratches, as these can lead to faster deterioration during storage.
Here is a table about the signs of ripening and harvesting pumpkin just in the right time:
| Harvesting Aspect | Description |
|---|---|
| Signs of Ripeness | |
| Skin Color | Look for a dull skin color. When mature, the skin transitions from shiny to matte, indicating ripeness. |
| Stem Color | Check the stem color; a brown, dried-out stem suggests the pumpkin is ready for harvest. |
| Skin Hardness | Gently press the skin with your fingernail. A mature pumpkin should have a hard skin that resists indentation. |
| Harvesting Techniques | |
| Cutting the Stem | Use a sharp knife or pruning shears to cut the stem, leaving a few inches attached to the pumpkin. Avoid twisting or pulling, as it can lead to stem breakage and spoilage. |
| Lifting | Lift pumpkins gently, supporting from underneath to prevent damage. Handle with care to avoid bruising or scratches, which can accelerate deterioration during storage. |
| Additional Tips | |
| Timing | Harvest pumpkins at the right time, before the first hard frost, for optimal flavor and texture. |
| Stem Integrity | Preserve stem integrity during harvesting to reduce the risk of rot and spoilage. Avoid twisting or pulling pumpkins off the vine. |
| Post-Harvest Handling | Store harvested pumpkins in a cool, dry place. Check regularly for signs of decay and damage, and use promptly for pies or other culinary delights. |
By paying attention to these signs of ripeness and following the correct harvesting techniques, you can ensure that your pumpkins are of the highest quality and ready to be transformed into delicious homemade pies for you and your loved ones to enjoy.
Post-Harvest Handling: How to Store and Preserve Pumpkins
Storing and preserving pumpkins properly is essential to maintain their quality and extend their shelf life. After harvesting your pumpkins, it is crucial to handle them with care to avoid any damage that may lead to decay. As a gardener, you know that storing pumpkins in the right conditions will ensure that they remain fresh and delicious for months to come.
Firstly, clean the pumpkins by gently brushing off any dirt or debris. Avoid using water, as excessive moisture can promote rotting. Next, carefully examine the pumpkins for any signs of damage or rot. Remember, one rotten pumpkin can quickly spoil the others in storage, so it’s important to remove any damaged ones.
For short-term storage, place the pumpkins in a cool, dry, and well-ventilated area. Ideal temperatures range from 50°F to 55°F (10°C to 13°C) with a humidity level between 50% and 70%. Avoid direct sunlight as it can cause the pumpkin to rot or discolor. Additionally, make sure to provide enough space between the pumpkins to allow air circulation, preventing moisture buildup.
If you intend to store your pumpkins for a longer period, consider curing them first. Curing involves exposing the pumpkins to slightly warmer temperatures, around 80°F (27°C), and higher humidity levels for about two weeks. This process helps harden the skin, which increases their storage life.
In order to preserve your pumpkins for even longer, you can opt for canning or freezing. Canned pumpkin puree is a versatile ingredient that can be used in various recipes beyond just pie. Freezing sliced or pureed pumpkin is another viable option, as it can retain its quality for up to a year.
By following these post-harvest handling techniques, you can ensure that your pumpkin harvest lasts well beyond the autumn season. Whether you choose to store them short-term or preserve them for later use, proper storage and preservation methods will help maintain the freshness and flavor of your pumpkins year-round. So why not enjoy the taste of pumpkin pie or other delicious treats anytime you desire?
Watch the video to know more about growing the best pumpkin for your pumpkin pie.
Preparing Pumpkins for Pie: Cleaning, Cutting, and Cooking
To create a delectable pumpkin pie, it is important to start with properly prepared pumpkins. Cleaning, cutting, and cooking the pumpkins with care will ensure that the flavors are enhanced and the pie turns out irresistibly delicious.
Before beginning the preparation process, ensure that you have selected the right variety of pumpkin for your pie. Sugar pumpkins, also known as pie pumpkins, are the ideal choice due to their sweet and smooth flesh. These pumpkins have a deep orange color and a rich flavor, perfect for creating a luscious pie.
Clean your chosen pumpkins by gently washing them under cool running water. Use a soft brush to remove any dirt or debris that may be present. Once clean, carefully cut off the stem of each pumpkin using a sharp knife. Next, slice the pumpkins in half vertically, from top to bottom. Take a spoon and scoop out the stringy pulp and seeds from the center, ensuring to remove all the fibrous material. Set the cleaned pumpkin halves aside, as they are now ready for cooking.
When it comes to cooking the pumpkins, there are a few methods you can choose from depending on your preference and available resources. One popular method is roasting, which helps to develop a rich and caramelized flavor. To roast the pumpkin, place the halves, cut side down, on a baking sheet lined with parchment paper. Bake them in a preheated oven at 375°F (190°C) for approximately 45-60 minutes, or until the flesh is tender when pierced with a fork. Another option is steaming, which is a quicker cooking method that helps to retain the natural flavors. Simply place the pumpkin halves in a steamer basket over boiling water and steam for about 20-30 minutes, or until the flesh is easily mashed. Once the pumpkins are cooked and cooled slightly, use a spoon to scrape out the flesh from the skin, discarding the skin. At this point, the cooked pumpkin is ready to be pureed or mashed for your pie filling.
Preparing pumpkins for pie is an essential step in creating a homemade dessert that will impress your family and friends. By following these simple cleaning, cutting, and cooking techniques, you can ensure that your pumpkin pie will be bursting with flavor and have a velvety texture that will have everyone asking for seconds. Get ready to savor the fruits of your labor with a slice of delicious homemade pumpkin pie!
Delicious Pumpkin Pie Recipes to Savor the Fruits of Your Labor
Are you ready to indulge in the rich, creamy, and flavorful world of pumpkin pie? With the fruits of your labor harvested and ready to be transformed into a mouthwatering dessert, it’s time to explore some delicious pumpkin pie recipes. Whether you prefer a classic recipe with simple and traditional flavors or want to experiment with unique twists, there’s a recipe out there to satisfy your taste buds.
One popular variation is the classic pumpkin pie. With a velvety pumpkin filling infused with warm spices like cinnamon, nutmeg, and cloves, this recipe brings a comforting and familiar taste to your palate. The buttery and flaky pie crust perfectly complements the creamy filling, creating a delectable medley of textures. Serve it warm with a dollop of whipped cream, and you have a dessert that is sure to please.
If you’re feeling adventurous, you might want to try a spiced pumpkin custard pie. This recipe takes the traditional pumpkin pie to the next level by adding a luxurious custard layer. The custard is infused with a delightful blend of spices, enhancing the flavors of the pumpkin. The result is a pie that is smooth, creamy, and bursting with aromatic notes. Top it off with a sprinkle of cinnamon or a drizzle of caramel sauce, and you have a show-stopping dessert that will impress your guests.
Now that you have some tantalizing options, go ahead and choose the perfect pumpkin pie recipe that suits your preferences. Whether you decide to stick with the classic or venture into the realm of innovative flavors, one thing is for certain – your taste buds are in for a delightful treat. So, roll up your sleeves, gather your ingredients, and get ready to savor the fruits of your labor in the form of delicious pumpkin pie.
Can I use any type of pumpkin to make pumpkin pie?
No, it is recommended to use a variety of pumpkin specifically meant for baking, such as the Sugar Pie pumpkin or the Cinderella pumpkin.
What are the ideal growing conditions for pumpkins?
Pumpkins thrive in full sun, well-drained soil with a pH level between 6.0 and 7.0, and temperatures between 70°F and 85°F.
How do I prepare the soil for pumpkin planting?
Start by removing any weeds or grass from the area, then loosen the soil with a garden fork or tiller. Mix in compost or well-rotted manure to enrich the soil.
How do I sow pumpkin seeds?
Plant the pumpkin seeds directly into the prepared soil, placing them about 1 inch deep and 2-3 feet apart. Water thoroughly after planting.
How often should I water my pumpkin plants?
Pumpkin plants need regular watering, especially during dry spells. Aim to keep the soil consistently moist but not waterlogged.
How can I control weeds in my pumpkin patch?
Mulching around the pumpkin plants can help suppress weeds. Hand-pulling weeds and using organic weed control methods, such as vinegar or corn gluten meal, can also be effective.
What are some common pests and diseases that affect pumpkin plants?
Common pests include squash bugs, cucumber beetles, and powdery mildew. Diseases like powdery mildew, downy mildew, and bacterial spot can also affect pumpkin plants.
How do I fertilize my pumpkin plants?
Use organic fertilizers, such as compost or well-rotted manure, to provide nutrient-rich soil for your pumpkin plants. Apply the fertilizer according to package instructions.
Do I need to prune and train my pumpkin vines?
Pruning and training pumpkin vines can help maximize yield and promote better airflow and sunlight exposure. Remove any excess vines and train the remaining ones along a trellis or support structure.
How do I ensure proper pollination for healthy pumpkin development?
To ensure proper pollination, you can hand-pollinate the pumpkin flowers using a small brush or simply encourage pollinators, such as bees, to visit your garden by planting flowers nearby.
When should I harvest my pumpkins?
Pumpkins are ready for harvest when the rind is hard and cannot be easily pierced with a fingernail. The vine should also start to dry up. Harvest before the first frost.
How do I store and preserve pumpkins after harvest?
Store pumpkins in a cool, dry place with good ventilation. Avoid direct sunlight and keep them away from moisture. Pumpkins can typically be stored for several months.
How do I prepare pumpkins for making pie?
Start by cleaning the pumpkin, removing the stem, cutting it in half, and scooping out the seeds and stringy pulp. Then bake or steam the pumpkin until it is soft, and finally, scoop out the flesh for use in pie recipes.