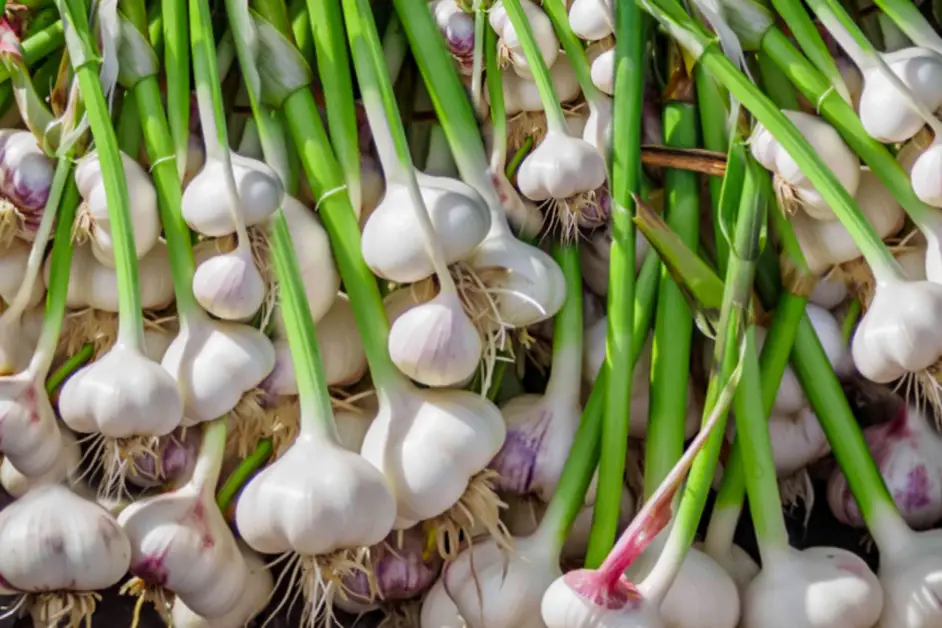
Grow Hardneck Garlic Bulbs at Home
The Benefits of Growing Hardneck Garlic Bulbs in Your Home Garden
Growing hardneck garlic bulbs in your home garden offers numerous benefits that make it a worthwhile endeavor for any gardening enthusiast. First and foremost, hardneck garlic bulbs are known for their superior flavor and aroma compared to softneck varieties. The unique taste and fragrance of hardneck garlic can elevate any dish, from soups and sauces to marinades and roasted vegetables.
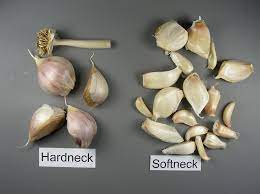
In addition to their culinary appeal, the health benefits of hardneck garlic are well-documented. It is rich in antioxidants, vitamins, and minerals, including vitamin C, vitamin B6, and manganese. Consuming garlic regularly has been associated with numerous health advantages, such as reducing blood pressure, boosting the immune system, and improving heart health. By growing hardneck garlic in your home garden, you can have a readily available supply of fresh, organic garlic that offers both great flavor and potential health benefits.
• Hardneck garlic bulbs have superior flavor and aroma compared to softneck varieties
• The unique taste and fragrance of hardneck garlic can enhance the flavors of various dishes
• Hardneck garlic is rich in antioxidants, vitamins, and minerals including vitamin C, vitamin B6, and manganese
• Regular consumption of garlic has been linked to reducing blood pressure, boosting the immune system, and improving heart health
• Growing hardneck garlic in your home garden provides a readily available supply of fresh organic garlic
• Having your own supply allows you to enjoy great flavor while potentially reaping health benefits
Understanding the Different Varieties of Hardneck Garlic Bulbs
There is a wide variety of hardneck garlic bulbs available to home gardeners, each with its own unique characteristics and flavors. Understanding the different varieties can help you choose the right garlic bulbs to grow in your garden and enhance your culinary creations.
One popular variety of hardneck garlic is the Rocambole. Known for its rich and bold flavor, Rocambole garlic bulbs have a complex taste profile with hints of spiciness. They are often favored by chefs and home cooks for their robust flavor that can bring depth to any dish. Rocambole garlic bulbs are also distinguished by their attractive purple-striped skin, making them a visually appealing addition to your garden.
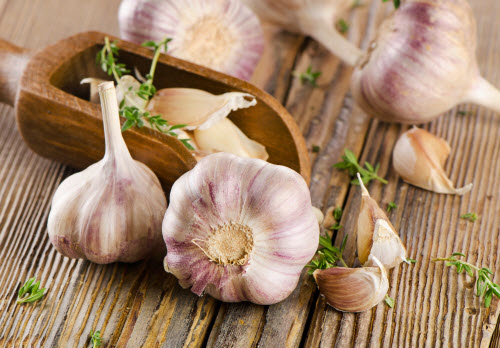
Another sought-after hardneck garlic variety is the Porcelain. Porcelain garlic bulbs are known for their large size and mild yet slightly spicy flavor. These bulbs typically have a white skin and can produce beautifully shaped cloves. With their subtle flavor and versatility in the kitchen, Porcelain garlic bulbs are highly prized by culinary enthusiasts who appreciate their ability to elevate a wide range of dishes.
• Rocambole garlic bulbs have a rich and bold flavor with hints of spiciness
• They are favored by chefs and home cooks for their robust flavor
• Rocambole garlic bulbs have an attractive purple-striped skin
• Porcelain garlic bulbs are known for their large size and mild yet slightly spicy flavor
• They typically have a white skin and produce beautifully shaped cloves
• Porcelain garlic bulbs are versatile in the kitchen, elevating a wide range of dishes
Selecting the Right Location for Growing Hardneck Garlic Bulbs
Selecting the right location for growing hardneck garlic bulbs is crucial to ensure healthy and fruitful growth. Hardneck garlic, unlike its softneck counterpart, requires specific conditions to thrive and produce excellent bulbs. Here are some important factors to consider when choosing a location for your hardneck garlic garden.
First and foremost, hardneck garlic prefers full sun exposure. It needs at least 6 to 8 hours of direct sunlight daily to grow optimally. Therefore, select a spot in your garden that receives ample sunlight throughout the day. This will ensure that the garlic plants receive sufficient energy to photosynthesize and develop strong foliage.
Next, it is essential to choose a site with well-draining soil. Hardneck garlic bulbs are susceptible to rotting if planted in soggy or waterlogged areas. Therefore, avoid low-lying areas or spots where water tends to accumulate. Sandy or loamy soils with good drainage properties are ideal for growing hardneck garlic. If your garden has heavy clay soil, amend it with organic matter such as compost or aged manure to improve drainage.
Additionally, hardneck garlic prefers slightly acidic to neutral soil, with a pH level between 6.0 and 7.0. Conduct a soil test to determine the pH level of your garden soil. If the pH is too low or too high, consider making appropriate adjustments using lime or sulfur. Maintaining the right soil pH will help ensure that the garlic plants can absorb nutrients effectively, resulting in healthy growth.
Lastly, consider the overall space and layout of your garden. Hardneck garlic plants need adequate space to grow and spread their roots. They should not be overcrowded, as this can lead to decreased airflow and increased susceptibility to diseases. Provide enough distance between each garlic plant to promote good air circulation, which helps prevent fungal diseases.
By carefully selecting a location that meets these requirements – full sun, well-draining soil, proper pH level, and sufficient spacing – you can create an optimal environment for growing hardneck garlic bulbs. Taking the time to choose the right spot will contribute to the successful cultivation of flavorful and healthy garlic in your home garden.
• Hardneck garlic prefers full sun exposure, needing at least 6 to 8 hours of direct sunlight daily.
• Choose a spot in your garden that receives ample sunlight throughout the day for optimal growth.
• Select a site with well-draining soil to prevent rotting of the garlic bulbs.
• Avoid low-lying areas or spots where water tends to accumulate.
• Sandy or loamy soils with good drainage properties are ideal for growing hardneck garlic.
• Amend heavy clay soil with organic matter like compost or aged manure to improve drainage.
• Conduct a soil test to determine the pH level of your garden soil.
• Hardneck garlic prefers slightly acidic to neutral soil, with a pH level between 6.0 and 7.0.
• Make appropriate adjustments using lime or sulfur if necessary to maintain the right pH level.
• Adequate spacing is crucial for hardneck garlic plants’ healthy growth and disease prevention.
• Avoid overcrowding by providing enough distance between each garlic plant for good airflow circulation.
Preparing the Soil for Planting Hardneck Garlic Bulbs
Preparing the soil is a crucial step in ensuring the successful growth of hardneck garlic bulbs in your home garden. Before planting, it is essential to test your soil to determine its pH level and nutrient content. Garlic plants thrive in well-draining soil with a pH range of 6.0 to 7.5. If your soil’s pH is too acidic, you can raise it by incorporating lime, while sulfur can be added to lower the pH if it is too alkaline. Performing a soil test will provide you with valuable information on which nutrients your soil may be lacking. Adding organic matter, such as compost or well-rotted manure, can significantly improve soil structure, fertility, and moisture-holding capacity. Work the organic matter into the top 6-8 inches of soil, ensuring it is evenly distributed. This will create a nutrient-rich environment that supports the growth and development of your garlic bulbs.
In addition to improving soil fertility, proper soil preparation also involves removing weeds and creating a suitable planting bed. Weeds compete with young garlic plants for essential nutrients, water, and sunlight. Therefore, it is important to clear the area where you plan to plant your hardneck garlic bulbs. Start by removing any existing vegetation, including weeds and grasses, using a garden hoe or a hand tool. Digging up the soil to a depth of 6-8 inches will not only eliminate weeds but also loosen the soil, promoting root penetration and proper drainage. After removing any debris or large stones, use a rake to level the soil surface and create an even planting bed. Proper soil preparation sets the foundation for healthy garlic growth and maximizes your chances of a bountiful harvest.
• Perform a soil test to determine pH level and nutrient content
• Adjust pH if necessary by incorporating lime or sulfur
• Add organic matter such as compost or well-rotted manure to improve soil structure and fertility
• Work the organic matter into the top 6-8 inches of soil for even distribution
• Clear the planting area of weeds and existing vegetation using a garden hoe or hand tool
• Dig up the soil to a depth of 6-8 inches to eliminate weeds and promote root penetration
• Remove debris and large stones from the planting bed
• Use a rake to level the soil surface for an even planting bed
Properly preparing your soil before planting hardneck garlic bulbs will create an optimal environment for their growth. By testing your soil, adjusting its pH, adding organic matter, clearing weeds, and creating a suitable planting bed, you are setting the foundation for healthy garlic plants that will yield bountiful harvests.
Planting Hardneck Garlic Bulbs: Best Practices and Techniques
To ensure successful growth, planting hardneck garlic bulbs requires careful consideration of the best practices and techniques. The first step is selecting the right time for planting. Hardneck garlic bulbs are best planted in the late fall or early winter, approximately four to six weeks before the ground freezes. This allows the bulbs to establish roots before winter dormancy, resulting in stronger growth in the following spring.
When it comes to the planting location, hardneck garlic prefers a spot that receives full sun for at least six to eight hours a day. Well-drained soil is essential, as garlic bulbs are prone to rot in waterlogged conditions. Prior to planting, it is recommended to amend the soil with organic matter, such as compost or well-rotted manure, to improve fertility and drainage.
Once the location is determined, it’s time to prepare the soil. Remove any weeds or debris, and loosen the soil to a depth of 8-10 inches with a garden fork or tiller. This will create a loose and friable bed for the garlic bulbs to establish their roots. Adding a balanced organic fertilizer can further enrich the soil, promoting healthy growth.
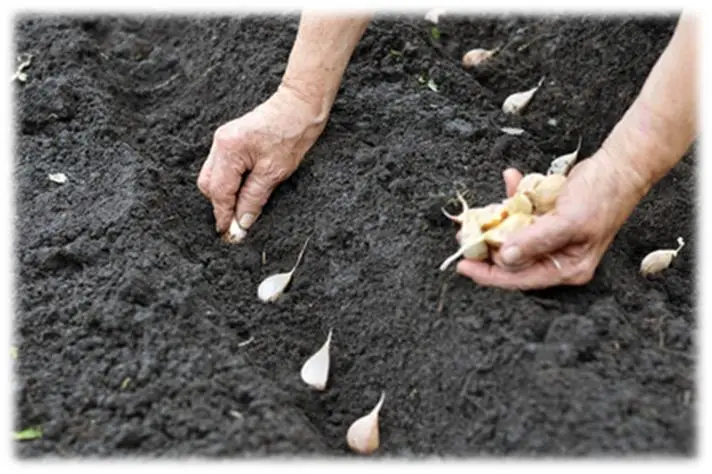
When it comes to the actual planting technique, begin by breaking apart the garlic bulb into individual cloves, being careful not to damage them. Select the largest cloves, as they will produce the biggest bulbs. Plant the cloves pointed side up, approximately 2-3 inches deep and spaced 4-6 inches apart. Cover the cloves with soil, firming it gently to ensure good soil-to-clove contact while avoiding excessive compaction.
In conclusion, proper planting practices and techniques are crucial for the successful cultivation of hardneck garlic bulbs. By carefully selecting the planting time, location, and preparing the soil adequately, gardeners can set the stage for strong and healthy garlic growth. Following these best practices will increase the chances of a bountiful harvest and ensure the satisfaction of home gardeners yearning to grow their own flavorful and aromatic garlic.
• Select the right time for planting, preferably in late fall or early winter before the ground freezes
• Choose a location that receives full sun for at least six to eight hours a day
• Ensure well-drained soil to prevent rotting of garlic bulbs
• Amend the soil with organic matter like compost or well-rotted manure to improve fertility and drainage
• Remove weeds and debris from the planting area and loosen the soil to a depth of 8-10 inches
• Consider adding balanced organic fertilizer to enrich the soil further
• Break apart garlic bulbs into individual cloves, being careful not to damage them
• Plant cloves pointed side up, approximately 2-3 inches deep and spaced 4-6 inches apart
• Cover cloves with soil, gently firming it while avoiding excessive compaction.
Caring for Hardneck Garlic Bulbs: Watering, Mulching, and Fertilizing
Proper care and maintenance are essential for the successful growth of hardneck garlic bulbs. Watering, mulching, and fertilizing are key aspects of caring for these plants, ensuring their robust growth and optimal bulb development.
Watering is crucial to maintain the health and vigor of hardneck garlic bulbs. These plants require consistent moisture, especially during the growing season. Adequate watering helps the bulbs to develop plump and flavorful cloves. It is important to keep the soil evenly moist, but not waterlogged, as excessive moisture can lead to rot and disease. A general rule of thumb is to provide approximately 1 inch of water per week, either through rainfall or irrigation. However, it is essential to monitor the soil moisture levels and adjust the watering frequency accordingly.
Mulching plays a significant role in conserving moisture and suppressing weeds around hardneck garlic bulbs. Applying a layer of organic mulch, such as straw or dried grass clippings, helps to retain soil moisture, regulate soil temperature, and prevent weed growth. Mulch also acts as a natural barrier, reducing competition for nutrients and promoting healthy bulb development. It is recommended to apply mulch around the base of the plants once they have emerged from the soil, making sure to keep it at least an inch away from the actual stem to prevent rotting.
Fertilizing hardneck garlic bulbs is essential to provide them with the necessary nutrients for robust growth. Before planting, it is advisable to amend the soil with organic matter, such as compost or well-rotted manure, to enhance nutrient levels and soil structure. During the growing season, applying a balanced organic fertilizer can help to replenish any nutrient deficiencies in the soil. It is best to follow the recommended application rates provided by the manufacturer or consult with a local agricultural extension office for specific guidance. Applying fertilizers too close to the bulbs can burn the roots, so it’s important to keep a safe distance and gently work the fertilizer into the top layer of soil. Regularly monitoring nutrient levels and adjusting the fertilization regime is crucial to ensure healthy growth and bountiful harvest.
Taking proper care of hardneck garlic bulbs through appropriate watering, mulching, and fertilizing techniques sets the stage for a successful growing season. These practices not only support the plants’ nutritional needs but also create an environment conducive to their overall health and vigor. However, it’s important to remember that each garden is unique, and factors like soil type, climate, and specific garlic variety can influence the exact requirements. Regular observation, adaptation, and fine-tuning of these care practices are key to maximizing the potential of hardneck garlic bulbs in your home garden.
• Adequate watering is crucial for the health and vigor of hardneck garlic bulbs
• Aim to provide approximately 1 inch of water per week, either through rainfall or irrigation
• Monitor soil moisture levels and adjust watering frequency accordingly
• Avoid overwatering, as excessive moisture can lead to rot and disease
• Mulching helps conserve moisture and suppress weeds around hardneck garlic bulbs
• Apply a layer of organic mulch, such as straw or dried grass clippings, around the base of the plants
• Keep mulch at least an inch away from the stem to prevent rotting
• Mulch regulates soil temperature, retains moisture, and reduces competition for nutrients
• Fertilizing with organic matter before planting enhances nutrient levels in the soil
• Use compost or well-rotted manure to amend the soil prior to planting
• During the growing season, apply balanced organic fertilizer according to manufacturer’s recommendations
• Work fertilizers gently into the top layer of soil while keeping a safe distance from bulbs
Taking proper care through appropriate watering, mulching, and fertilizing techniques ensures healthy growth.
Each garden is unique; factors like climate and garlic variety influence specific requirements.
Managing Pests and Diseases in Hardneck Garlic Bulbs
Pests and diseases can pose a significant threat to the health and yield of hardneck garlic bulbs. It is crucial for home gardeners to be proactive in managing these potential problems to ensure a successful harvest. One common pest that affects garlic bulbs is the onion thrips (Thrips tabaci). These tiny insects feed on the plant’s leaves, causing extensive damage and reducing bulb size. To control onion thrips, regular monitoring is essential. If an infestation is detected, introducing predatory insects like ladybugs or lacewings can help keep their population in check. Additionally, ensuring proper spacing between plants and maintaining good airflow can reduce the risk of thrips infestation.
Another common issue in garlic cultivation is fungal diseases, such as white rot (Sclerotium cepivorum) and purple blotch (Alternaria porri). These diseases can lead to rotting bulbs and diminished yield. Rotating crops and avoiding the planting of garlic in the same area for consecutive years can help prevent the buildup of disease-causing pathogens in the soil. Furthermore, adequate watering practices that avoid excessive moisture on the leaves can reduce the likelihood of fungal infections. Should a disease outbreak occur, removing and destroying affected plants can help contain the spread. In severe cases, applying organic fungicides approved for garlic cultivation may be necessary. By staying vigilant and implementing preventive measures, growers can effectively manage pests and diseases, safeguarding the health of their hardneck garlic bulbs.
• Regular monitoring is crucial to detect and control onion thrips infestation
• Introducing predatory insects like ladybugs or lacewings can help keep onion thrips population in check
• Proper spacing between plants and maintaining good airflow reduces the risk of thrips infestation
• Rotating crops and avoiding consecutive planting of garlic in the same area helps prevent fungal diseases
• Adequate watering practices that avoid excessive moisture on leaves reduce the likelihood of fungal infections
• Removing and destroying affected plants can help contain disease spread
• In severe cases, applying organic fungicides approved for garlic cultivation may be necessary
Recognizing When Hardneck Garlic Bulbs are Ready for Harvest
Harvesting hardneck garlic bulbs at the right time ensures that you get the best flavor and storage potential from your crop. Timing is crucial, as harvesting too early can result in small, underdeveloped bulbs with a milder flavor, while harvesting too late may cause the bulbs to split and lose their quality. Luckily, there are a few signs to look out for that indicate when your hardneck garlic bulbs are ready for harvest.
One of the key indicators is the appearance of the garlic plant itself. As the bulbs mature, the leaves start to turn yellow and dry out. Keep an eye on the lower leaves, as they will typically begin to die back first. However, it’s important not to rely solely on visual cues, as the rate of maturity can vary depending on the variety and growing conditions. It is recommended to do a small test harvest to check for readiness. Carefully dig up a bulb, and if the cloves are fully formed and the outer wrapping is intact, it’s a good indication that your garlic crop is ready to be harvested.
• The appearance of yellow and dried out leaves is a key indicator that the garlic bulbs are ready for harvest.
• Lower leaves tend to die back first, so pay close attention to them.
• Visual cues alone may not be enough, as maturity can vary based on variety and growing conditions.
• Conducting a small test harvest by digging up a bulb can help determine readiness.
• If the cloves are fully formed and the outer wrapping is intact, it’s a good sign that the garlic crop is ready for harvesting.
Harvesting Hardneck Garlic Bulbs: Methods and Timing
Once your hardneck garlic bulbs have fully matured and the leaves begin to yellow and dry out, it’s time to harvest them. The timing of the harvest is crucial to ensure optimal flavor and storage life. Generally, hardneck garlic bulbs are ready to be harvested in late spring or early summer, around 3 to 4 weeks after the leaves start to diminish in color. However, it’s important to monitor the plants closely as individual varieties may have different growth patterns and maturity rates.
Here is a table that summarizes the steps for harvesting hardneck garlic bulbs:
| Step | Description |
|---|---|
| 1 | Plant hardneck garlic in the fall, about 1 month before the first hard frost. |
| 2 | Wait for 8 to 10 months until the bottom leaves turn yellow and die back, while there are still green leaves on top. |
| 3 | Harvest garlic scapes when they make their first turn. |
| 4 | Harvest garlic bulbs when the lower leaves start turning yellow and dying back while the top leaves are still green. |
| 5 | Check one of your bulbs before harvesting the rest if you are still feeling uncertain. |
I hope this helps! Let me know if you have any other questions.
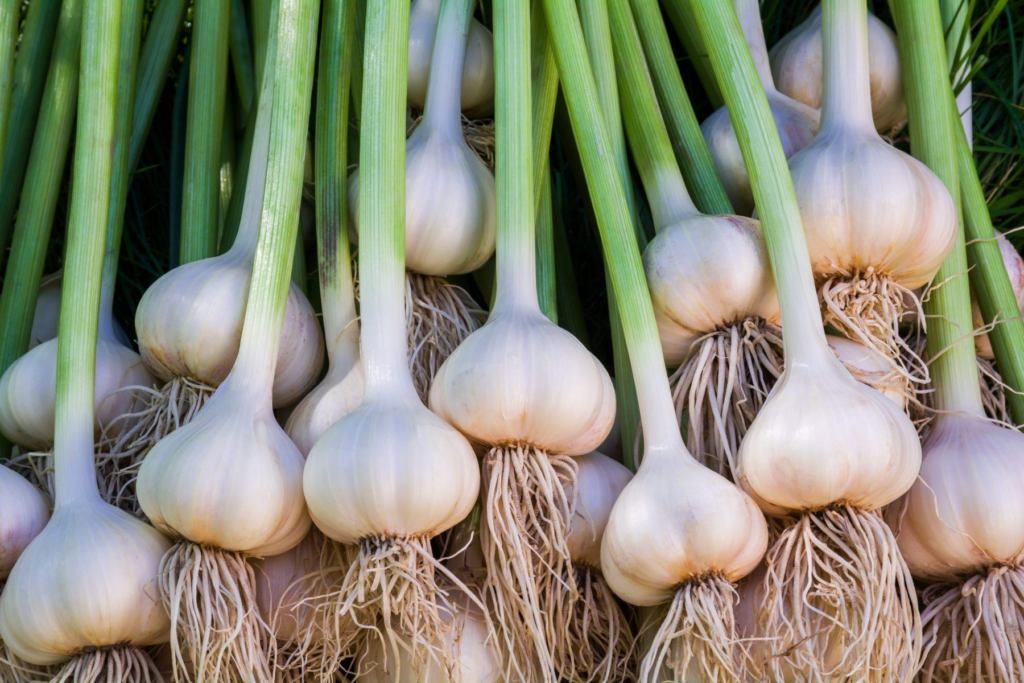
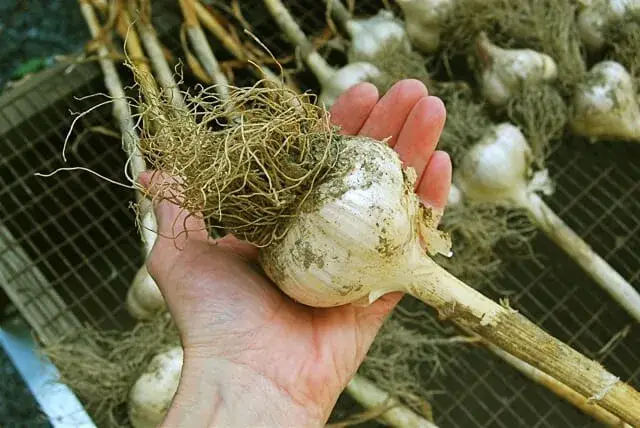
To harvest your hardneck garlic bulbs, gently loosen the soil around the base of the plants using a garden fork or shovel. Be careful not to damage the bulbs or the surrounding garlic cloves during this process. Once the soil is adequately loosened, grasp the plants firmly near the base and carefully lift them out of the ground. Shake off any excess soil and avoid removing the outer wrapper leaves, as they provide protection during the curing process. You can then trim the roots to about an inch in length, but leave the leaves intact to continue the curing process. Proper timing and care during harvesting will greatly contribute to the quality and longevity of your hardneck garlic bulbs.
Remember, harvesting is just the first step towards fully enjoying the fruits of your labor. After the bulbs have been removed from the ground, they need to go through a curing process. Curing is essential for the bulbs to develop their characteristic flavors and to extend their storage life. To cure the hardneck garlic bulbs, you’ll need to hang them in a cool and dry place with good ventilation. Create bundles by tying together a few garlic plants and hang them upside down in a well-ventilated area. This will allow the bulbs to air-dry gradually and evenly, usually taking around 2 to 4 weeks. Once the bulbs are fully cured, the leaves will become papery and dry, and the outer wrapper leaves will tighten around the cloves, providing better protection during storage.
• Harvesting should be done when the garlic bulbs have fully matured and the leaves start to yellow and dry out.
• Timing is crucial for optimal flavor and storage life, usually around 3 to 4 weeks after the leaves diminish in color.
• Monitor individual varieties closely as growth patterns and maturity rates may vary.
• Gently loosen soil around the base of plants using a garden fork or shovel during harvesting.
• Be careful not to damage bulbs or surrounding cloves while loosening soil.
• Grasp plants firmly near the base and lift them out of the ground without removing outer wrapper leaves.
• Shake off excess soil and trim roots to about an inch in length, leaving leaves intact for curing process.
• Curing is essential for developing flavors and extending storage life of hardneck garlic bulbs.
• Hang bundles of garlic plants upside down in a cool, dry place with good ventilation for curing.
• Air-dry gradually for 2 to 4 weeks until bulbs are fully cured.
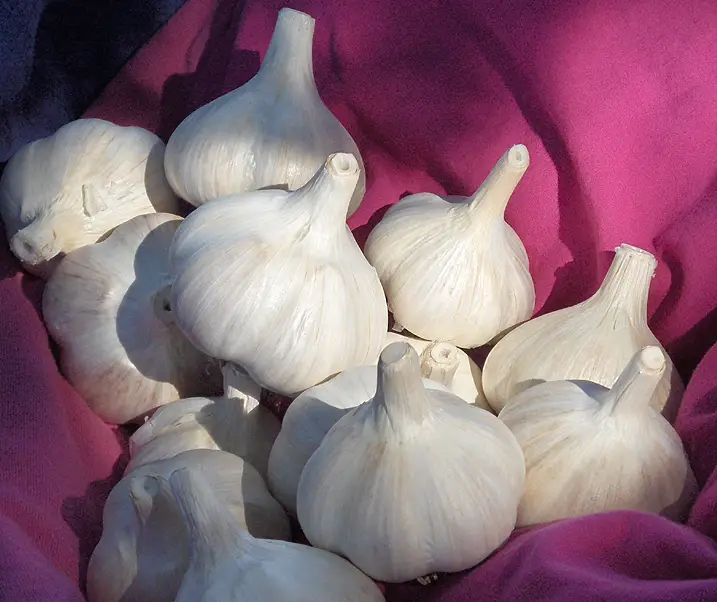
Curing and Storing Hardneck Garlic Bulbs for Longevity
Curing and storing hardneck garlic bulbs properly is crucial for preserving their longevity and flavor. After harvesting, it’s important to cure the bulbs, allowing them to dry out gradually and develop a protective outer layer. This curing process not only extends the shelf life of your garlic but also enhances its flavor profile.
To begin the curing process, gently brush off any excess soil from the bulbs, taking care not to damage the protective outer layers. For best results, avoid washing the bulbs, as moisture can promote mold and rot during the curing process. Instead, leave the roots and stems intact to ensure optimal drying.
Next, find a well-ventilated area with low humidity to cure your garlic. A cool, dry and dark spot, such as a garage or a well-ventilated basement, is ideal. Lay the garlic bulbs in a single layer on a clean, dry surface, such as a wire rack or a mesh screen, ensuring good air circulation around each bulb.
Allow the garlic bulbs to cure for approximately three to four weeks, or until the outer skins become dry and papery to the touch. Properly cured garlic bulbs should have tight outer layers with no signs of moisture or softness. Once cured, trim the roots and cut back the stems to about an inch above the bulb, but be careful not to expose the cloves.
Once the bulbs are cured and trimmed, it’s time to store them for long-term enjoyment. Choose a cool and dry storage location, ideally around 50°F (10°C) with a relative humidity of 60-70%. Ideal storage options include mesh bags, nylon stockings, or wooden crates that provide good air circulation and protection from light.
Avoid storing garlic bulbs in plastic bags or sealed containers, as these can trap moisture and promote the growth of mold. Additionally, keep your garlic away from high-moisture foods such as onions or potatoes, as they can cause the garlic to sprout prematurely.
Here is a table that summarizes the steps for curing and storing hardneck garlic bulbs:
| Step | Description |
|---|---|
| 1 | After harvesting, gently brush off any excess dirt or soil but leave the outer skin intact. |
| 2 | Hang the garlic bulbs in a well-ventilated area, away from direct sunlight, for 2-3 weeks until the outer skin is dry and papery. |
| 3 | Once the garlic bulbs are properly cured, trim off the excess roots and the stem to prepare them for storage. |
| 4 | Store the garlic bulbs in a container with good airflow, such as a mesh bag or a basket lined with paper towels, in a cool, dark place with a temperature between 30 to 32 °F and humidity between 60 to 70%. |
I hope this helps! Let me know if you have any other questions.
By adhering to these simple curing and storing techniques, you can ensure that your hardneck garlic bulbs remain flavorful and preserved for several months, enabling you to elevate your culinary creations with the delightful pungency and complexity of homegrown garlic.
• Gently brush off excess soil from the garlic bulbs, being careful not to damage the protective outer layers.
• Avoid washing the bulbs to prevent moisture that can promote mold and rot during curing.
• Leave the roots and stems intact for optimal drying.
• Find a well-ventilated area with low humidity, such as a cool garage or basement.
• Lay the garlic bulbs in a single layer on a clean, dry surface for good air circulation.
• Allow the bulbs to cure for approximately three to four weeks until the outer skins become dry and papery.
• Trim roots and cut back stems, but do not expose cloves when trimming cured bulbs.
• Choose a cool and dry storage location around 50°F (10°C) with 60-70% relative humidity.
• Use mesh bags, nylon stockings, or wooden crates for storage to provide air circulation and protection from light.
• Avoid storing garlic in plastic bags or sealed containers that trap moisture.
• Keep garlic away from high-moisture foods like onions or potatoes to prevent premature sprouting.
Propagating Hardneck Garlic Bulbs: Saving Seeds or Using Bulbils
When it comes to propagating hardneck garlic bulbs, gardeners have two main options: saving seeds or using bulbils. Both methods offer their own unique advantages and considerations, allowing gardeners to choose the propagation method that best suits their needs and preferences.
Saving seeds is a traditional and cost-effective approach to propagate hardneck garlic bulbs. Once the garlic plants have flowered, they produce seed pods that contain the seeds. The seeds can be harvested and planted in a separate location to grow new garlic plants. This method allows for a more diverse genetic pool and the potential for developing new varieties with desirable traits. However, it is important to note that growing garlic from seeds can be a longer and more unpredictable process, as the resulting plants may not resemble the parent plant in terms of flavor or bulb size.
Alternatively, gardeners can use bulbils to propagate hardneck garlic bulbs. Bulbils are small, round clusters that develop in the scape, or flower stalk, of the garlic plant. These bulbils can be collected and planted directly in the ground, where they will grow into new garlic plants. Unlike seeds, bulbils produce genetically identical plants to the parent plant, ensuring consistency in flavor and bulb characteristics. This method offers a quicker turnaround time, as bulbils tend to mature faster and produce bulbs within a couple of seasons. However, it is worth noting that using bulbils can limit the genetic diversity of the garlic crop.
Whether gardeners choose to save seeds or utilize bulbils, propagating hardneck garlic bulbs allows them to expand their garlic collection, experiment with different flavors, and ensure a sustainable supply for future harvests. Each method brings its own unique advantages and considerations, and it ultimately comes down to personal preference and the specific goals of the gardener.
• Saving seeds is a traditional and cost-effective approach to propagate hardneck garlic bulbs.
• Seeds can be harvested from seed pods after the garlic plants have flowered.
• This method allows for a more diverse genetic pool and the potential for developing new varieties with desirable traits.
• However, growing garlic from seeds can be a longer and more unpredictable process.
• Resulting plants may not resemble the parent plant in terms of flavor or bulb size.
• Alternatively, gardeners can use bulbils to propagate hardneck garlic bulbs.
• Bulbils are small clusters that develop in the scape, or flower stalk, of the garlic plant.
• These bulbils can be collected and planted directly in the ground to grow new garlic plants.
• Bulbils produce genetically identical plants to the parent plant, ensuring consistency in flavor and bulb characteristics.
• Using bulbils offers a quicker turnaround time as they tend to mature faster and produce bulbs within a couple of seasons.
• However, using bulbils can limit the genetic diversity of the garlic crop.
Whether gardeners choose to save seeds or utilize bulbils, propagating hardneck garlic bulbs has several benefits:
– It allows them to expand their collection of different flavors and varieties of garlic.
– It provides an opportunity for experimentation with different flavors and traits.
– It ensures a sustainable supply for future harvests.
Ultimately, choosing between saving seeds or using bulbils comes down to personal preference and specific goals as both methods have their own advantages and considerations.
Tips for Successful Overwintering of Hardneck Garlic Bulbs
Successful overwintering of hardneck garlic bulbs is essential for ensuring a bountiful harvest in the following year. Here are a few tips to help you achieve optimal results:
1. Mulching: One of the most important steps in overwintering garlic bulbs is providing sufficient insulation to protect the plants from extreme temperatures. A thick layer of organic mulch, such as straw or leaves, should be applied around the base of the plants. This will help regulate soil temperature, prevent frost heaving, and maintain moisture levels during the cold winter months.
2. Adequate Drainage: While garlic bulbs require moisture to grow, it’s crucial to ensure proper drainage to prevent waterlogging. Excessive moisture can lead to the development of fungal diseases and rot. Prior to the onset of winter, ensure the planting area has well-draining soil to avoid water accumulation. If necessary, create raised beds or improve the soil structure with organic matter to enhance drainage capabilities.
By implementing these tips, you can significantly increase the chances of your hardneck garlic bulbs surviving the winter and thriving in the following growing season. A little extra care and attention during the colder months will pay off with a healthy and abundant harvest.
• Mulching: Apply a thick layer of organic mulch, such as straw or leaves, around the base of the garlic plants to provide insulation and regulate soil temperature.
• Adequate Drainage: Ensure proper drainage in the planting area to prevent waterlogging and fungal diseases. Improve soil structure with organic matter if needed.
• Regular Monitoring: Check on the garlic bulbs periodically during winter to ensure they are not being damaged by pests or disease. Remove any signs of damage promptly.
• Weed Control: Keep the area around the garlic plants free from weeds, as they can compete for nutrients and moisture. Hand-pull weeds or use a shallow hoe for effective weed control.
• Protection from Extreme Cold: In regions with extremely cold winters, consider using row covers or cloches to provide additional protection for the garlic bulbs against freezing temperatures.
• Proper Harvesting Time: Harvest hardneck garlic bulbs at their optimal maturity stage before overwintering them. This ensures better storage quality and higher chances of successful overwintering.
By following these tips, you can increase your chances of successfully overwintering hardneck garlic bulbs and enjoying a bountiful harvest in the next growing season. Remember that each step plays an important role in protecting your plants from extreme weather conditions and maintaining their health throughout winter.
Culinary Uses and Flavors of Hardneck Garlic Varieties
Hardneck garlic varieties are prized by chefs and food enthusiasts alike for their unique flavors and culinary versatility. These varieties are known for their rich, complex profiles that can range from mild and sweet to bold and spicy. When it comes to cooking with hardneck garlic, the possibilities are endless.
One popular hardneck garlic variety is the Rocambole. With its deep and robust flavor, Rocambole garlic adds a bold punch to any dish. Whether it’s in a savory stir-fry, a hearty stew, or a simple pasta sauce, this variety never fails to elevate the flavors of your favorite recipes.
Another well-loved variety is the Porcelain garlic. Known for its large cloves and creamy texture, Porcelain garlic has a slightly milder flavor compared to Rocambole. This makes it a perfect choice for those who prefer a garlic flavor that is more subtle and balanced. It works wonderfully in dishes such as roasted vegetables, garlic bread, or even as a flavorful addition to homemade aioli.
No matter which hardneck garlic variety you choose, it’s important to remember that the flavor intensity can vary from bulb to bulb and even within the same variety. Factors such as growing conditions, harvest time, and storage methods can all influence the taste of the garlic. So, don’t hesitate to experiment and find your favorite flavors among the diverse world of hardneck garlic varieties.
• Hardneck garlic varieties are known for their unique flavors and culinary versatility.
• Rocambole garlic adds a deep and robust flavor to dishes, perfect for savory stir-fries, hearty stews, or pasta sauces.
• Porcelain garlic has a milder flavor compared to Rocambole, making it ideal for roasted vegetables, garlic bread, or homemade aioli.
• Flavor intensity can vary within the same variety due to factors like growing conditions and storage methods.
• Experimentation is key to finding your favorite flavors among the diverse world of hardneck garlic varieties.
Troubleshooting Common Issues in Growing Hardneck Garlic Bulbs
When growing hardneck garlic bulbs, it is important to be aware of and address common issues that may arise. One common issue is yellowing or browning of the leaves. This can be caused by overwatering, nutrient deficiencies, or pest infestations. To address this issue, it is important to ensure that the garlic plants are receiving adequate but not excessive water, and that the soil is well-drained. A balanced fertilizer can also be applied to provide the necessary nutrients. In addition, regularly inspecting the plants for pests such as aphids or garlic mites and taking prompt action to control their population can help prevent leaf damage and loss.
Another common issue faced by garlic growers is the presence of fungal diseases, such as white rot or downy mildew. These diseases can cause wilting, yellowing, or browning of the leaves, as well as stunted growth or bulb rot. To prevent these diseases, it is important to practice good sanitation by removing and destroying any affected plant material. Avoiding overhead watering, which can create a damp environment conducive to fungal growth, is also recommended. If fungal diseases are prevalent in your area, consider planting resistant varieties or using fungicides as a preventive measure. Regularly monitoring the plants for signs of disease and taking prompt action can help minimize the impact of fungal diseases and ensure the success of your hardneck garlic crop.
• Yellowing or browning of leaves can be caused by overwatering, nutrient deficiencies, or pest infestations.
• Ensure garlic plants receive adequate but not excessive water and that the soil is well-drained.
• Apply a balanced fertilizer to provide necessary nutrients.
• Regularly inspect plants for pests like aphids or garlic mites and take prompt action to control their population.
• Fungal diseases such as white rot or downy mildew can cause wilting, yellowing, or browning of leaves, stunted growth, or bulb rot.
• Practice good sanitation by removing and destroying affected plant material to prevent fungal diseases.
• Avoid overhead watering to prevent creating a damp environment conducive to fungal growth.
• Consider planting resistant varieties or using fungicides as preventive measures in areas with prevalent fungal diseases.
What should I do if my hardneck garlic bulbs are not growing?
If your hardneck garlic bulbs are not growing, it could be due to several reasons. One common issue is planting the cloves too deep. Make sure to plant them at the right depth, usually about 2 inches deep. Additionally, inadequate watering or poor soil quality could be hindering growth. Ensure that the soil is consistently moist but not waterlogged, and consider testing the soil pH and adding organic matter if needed.
How often should I water my hardneck garlic bulbs?
Hardneck garlic bulbs require regular watering, especially during dry periods. It is important to keep the soil consistently moist but not waterlogged. Generally, aim to provide about 1 inch of water per week, either through rainfall or irrigation.
What can I do to prevent pests from damaging my hardneck garlic bulbs?
To prevent pests from damaging your hardneck garlic bulbs, there are several steps you can take. Firstly, practice crop rotation by avoiding planting garlic in the same area for consecutive years, as this can help disrupt the life cycle of pests. Additionally, you can use organic pest control methods such as applying neem oil or introducing beneficial insects like ladybugs to your garden. Regularly inspect your plants for any signs of pest infestation and take appropriate action, such as removing affected leaves or using insecticidal soap if necessary.
How do I know when my hardneck garlic bulbs are ready for harvest?
Hardneck garlic bulbs are typically ready for harvest when the lower leaves turn brown and start to dry out. Another indicator is when the scapes, the curly flower stalks, have fully formed and started to curl. Gently dig up one bulb to check for mature cloves. If the cloves are fully formed and the outer skin is papery, it is likely time to harvest.
Can I store my hardneck garlic bulbs immediately after harvest?
No, it is not recommended to store hardneck garlic bulbs immediately after harvest. Instead, it is important to cure them first. Curing involves allowing the bulbs to dry in a well-ventilated area with low humidity for several weeks. This process helps to develop the flavor and extend the storage life of the garlic bulbs.
Is it possible to save seeds from hardneck garlic bulbs?
No, hardneck garlic bulbs do not produce true seeds. Instead, they produce bulbils, which are small cloves that form in the flower head or scape. While these bulbils can be used for propagation, it is more common to plant the individual cloves from the bulb to grow new garlic plants.
How can I successfully overwinter my hardneck garlic bulbs?
To successfully overwinter hardneck garlic bulbs, ensure they are planted in well-drained soil before the first frost. Mulch the bed with a layer of straw or leaves to provide insulation and protect the bulbs from extreme temperature fluctuations. In colder climates, consider using a row cover or cold frame to provide additional protection. Proper overwintering will promote bulb development and result in healthier plants in the following growing season.

Pallavi Gupta is a burgeoning writer at SouthElMonteHydroponics, blending her passion for data analysis with a keen interest in biotechnology. Currently pursuing a Bachelor’s in Biotechnology at Amity University, Pallavi delves into the intricacies of life sciences while gaining hands-on experience in the exciting world of data analysis. Her unique background provides a fresh perspective on hydroponic farming, as she explores the intersection of biotechnology and sustainable agriculture. Through her writing, Pallavi aims to bridge the gap between data-driven insights and innovative farming practices, inspiring others to harness technology for a greener future.