Growing Potatoes: A Guide to Spectacular Spuds
Table of Contents
Managing Weed Growth: Implement effective strategies to keep weeds at bay and prevent them from competing with your potatoes plants.
Weeds can be a persistent problem in potatoes gardens, competing with your plants for nutrients, water, and sunlight. To prevent the growth of weeds and ensure the health of your potato plants, it is essential to implement effective strategies. One of the first steps is to maintain a clean and weed-free garden bed before planting your potatoes. Remove any existing weeds from the area, ensuring you remove the roots to prevent regrowth.
After planting your potatoes, it is crucial to regularly monitor your garden and promptly remove any emerging weeds. Hand weeding can be an effective method, especially for smaller gardens. Be sure to remove the entire weed, including the roots, to prevent regrowth. Mulching is another useful technique that helps suppress weed growth by blocking sunlight and inhibiting weed seed germination. Organic mulches, such as straw or wood chips, can also improve soil moisture retention and regulate soil temperature, benefiting your potato plants as well.
Hilling Potatoes: Learn how and when to hill your potato plants to encourage more tuber growth.
Hilling potatoes is an essential technique that can significantly improve the growth and yield of your potato plants. By properly hilling your potatoes, you create a mound of soil around the base of the plants, which encourages the development of additional tubers. The process involves adding soil to the potato plants as they grow, covering the lower stems and leaving only a small portion of the plant exposed.
One important aspect of hilling potatoes is knowing when to perform this task. It is best to start hilling when the plants have reached a height of about 6-8 inches. This is usually a few weeks after planting, depending on the variety and growing conditions. By hilling at this stage, you ensure that the plants have established a strong root system and can handle the additional soil. It is also recommended to hill again when the plants have grown another 6-8 inches in height.
Monitoring for Diseases and Pests: Recognize common potato diseases and pests, and take appropriate measures to prevent and control them.
Potatoes are susceptible to a variety of diseases and pests that can cause significant damage to your crops if left unchecked. Recognizing these common issues early on is crucial for implementing effective prevention and control measures. One of the most prevalent diseases in potatoes is late blight, caused by the pathogen Phytophthora infestans. This devastating disease thrives in cool, moist conditions and can quickly spread, leading to widespread crop loss if not managed properly.
Another disease to watch out for is early blight, caused by the fungus Alternaria solani. Early blight typically affects the leaves and stems of potato plants, causing dark lesions with concentric rings. The disease can weaken plants and reduce tuber production if not addressed promptly. In addition to fungal diseases, bacterial diseases like bacterial wilt and blackleg can also pose a threat to your potato plants.
Pests can also wreak havoc on your potato garden. Colorado potato beetles are a common pest that can defoliate plants and significantly reduce yields. These voracious insects can quickly multiply and become resistant to chemical pesticides, making it essential to implement integrated pest management strategies. Other notable pests include aphids, wireworms, and nematodes, all of which can cause considerable damage to potato crops if left uncontrolled. Stay vigilant and monitor your plants regularly for signs of diseases and pests, as early detection is key to effective management strategies.
| Aspect | Description |
|---|---|
| Regular Inspection | Conduct routine inspections of plants to check for signs of diseases and pests. Look for symptoms such as yellowing leaves, wilting, spots, holes, or unusual growth patterns. |
| Pest Traps | Use sticky traps, pheromone traps, or light traps to monitor and capture pests such as aphids, whiteflies, thrips, and fruit flies. Check traps regularly to assess pest populations and identify any emerging issues. |
| Visual Identification | Learn to recognize common pests and diseases that affect your plants. Use field guides, online resources, or consult with local gardening experts to identify symptoms accurately. |
| Disease Sampling | Collect samples of affected plant tissues or soil for laboratory analysis if symptoms are unclear or if you suspect a specific disease. Proper sampling and testing can help confirm the presence of pathogens and guide treatment decisions. |
| Record Keeping | Maintain detailed records of observations, including dates, locations, types of pests or diseases observed, and any control measures implemented. Keeping accurate records helps track trends and assess the effectiveness of management strategies over time. |
By implementing these monitoring strategies, you can effectively detect and manage diseases and pests in your garden, minimizing damage and promoting plant health.
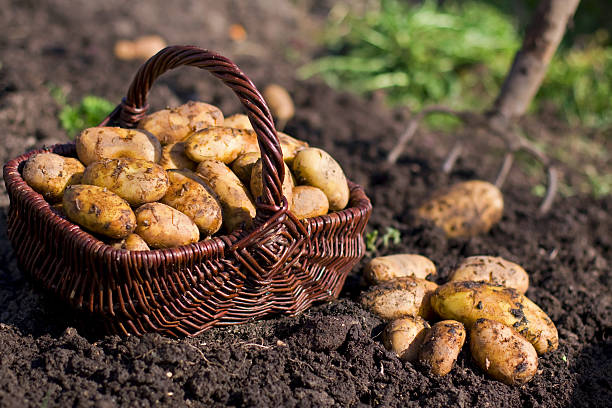
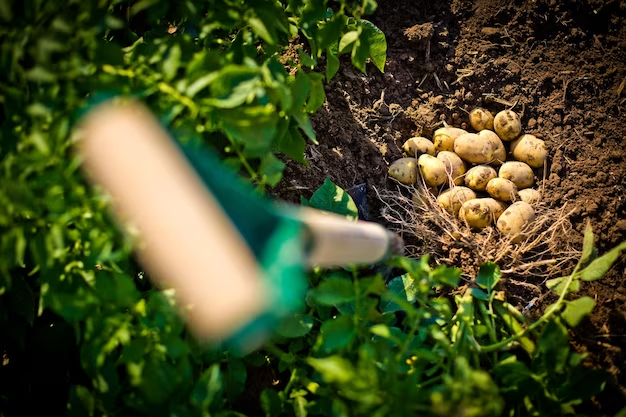
Harvesting Potatoes: Discover the signs that indicate when your potatoes are ready for harvest and the proper techniques to ensure a successful harvest.
Harvesting potatoes is an exciting milestone in the gardening journey, but knowing exactly when your potatoes are ready can be tricky. Luckily, there are some signs to look out for that indicate it’s harvest time. One of these signs is when the foliage above ground starts to die back and turn yellow or brown.
This signifies that the plants have reached maturity and the tubers are fully developed. Another indicator is the appearance of a thicker skin on the potatoes, which can be felt when gently rubbing your fingers over the surface. Additionally, if you gently dig around the base of a plant and find perfectly sized potatoes, it’s a strong indication that the rest of the crop is ready for harvest as well.
Once you’ve determined that your potatoes are indeed ready to be harvested, it’s important to use proper techniques to ensure a successful harvest. Start by gently loosening the soil around the plants using a garden fork or shovel. Be careful not to damage the tubers in the process. Lift the plants out of the ground by grabbing the stems or foliage, avoiding any unnecessary bruising or cuts. Shake off excess soil or gently brush it off with your hands.
It’s essential to handle the potatoes with care and avoid dropping or tossing them, as this can result in bruising and spoilage. Finally, allow your freshly harvested potatoes to air dry in a cool, dry, and well-ventilated area for a few hours before storing them. This will help toughen the skin and reduce the risk of rot during storage.

Curing and Storing Potatoes: Learn how to cure and store your harvested potatoes
Properly curing and storing potatoes is essential to maintain their quality and extend their shelf life. Curing is a process that allows the potatoes to dry and toughen their skins, which helps protect them during storage. To cure your harvested potatoes, begin by washing them gently to remove any dirt or debris. Then, spread them out in a well-ventilated area, such as a shady porch or a cool, dry room.
Allow the potatoes to cure for about two weeks, turning them occasionally to ensure even drying. During this time, the skins will thicken and harden, creating a protective layer. Once the potatoes are adequately cured, store them in a cool, dark, and well-ventilated area. Avoid storing them near fruits or vegetables that release ethylene gas, as this can cause the potatoes to sprout prematurely. By following these steps, you can enjoy fresh, flavorful potatoes for an extended period.
What is the purpose of curing potatoes?
The purpose of curing potatoes is to allow their skins to harden, which helps to extend their shelf life and prevent spoilage.
How long should potatoes be cured for?
Potatoes should be cured for approximately 10 to 14 days.
What is the ideal curing temperature for potatoes?
The ideal curing temperature for potatoes is around 50 to 60 degrees Fahrenheit (10 to 15 degrees Celsius).
Can I store uncured potatoes?
It is not recommended to store uncured potatoes as they are more prone to rotting and spoiling.
How should I cure potatoes?
To cure potatoes, place them in a well-ventilated area with a temperature range of 50 to 60 degrees Fahrenheit (10 to 15 degrees Celsius) for 10 to 14 days. Avoid exposure to direct sunlight.
Can I wash potatoes before curing?
No, it is best to avoid washing potatoes before curing as this can increase the risk of spoilage. Only remove excessive dirt or debris.
How do I know if potatoes are properly cured?
Potatoes are properly cured when their skins have hardened and any minor cuts or bruises have healed.
What is the best way to store cured potatoes?
The best way to store cured potatoes is in a cool, dark, and well-ventilated place. A cellar or basement is often a suitable option. Make sure to keep them away from onions, as the two can cause each other to spoil more quickly.
Can I store potatoes in the refrigerator?
It is not recommended to store potatoes in the refrigerator, as the cold temperature can convert the starches into sugars, resulting in a sweeter and more undesirable taste.
How long can cured potatoes be stored?
Cured potatoes can typically be stored for several months, but it is important to regularly check for any signs of spoilage and remove any affected potatoes to prevent further contamination.
Beck Wakeford is a dedicated writer at SouthElMonteHydroponics, with a fervent enthusiasm for agriculture and technological innovation. Armed with a degree in Agricultural Engineering from a leading university, Beck specializes in hydroponic systems design, automation, and optimization. Their passion for merging traditional farming with cutting-edge technology drives them to explore novel solutions for sustainable food production. Beck’s expertise and keen interest in the intersection of engineering and agriculture make them a valuable asset in the quest for efficient and eco-friendly farming practices. Through their writing, Beck aims to inspire others to embrace the potential of hydroponics in shaping a more sustainable future.