Bottle Brush Tree: How to Grow and Care for These Beautiful Plants
Table of Contents
I. Introduction to This Beautiful Plant
The Bottle Brush tree, scientifically known as Callistemon, is a vibrant and visually striking plant that captures the attention of any garden enthusiast. Named for its distinctive clusters of blossoms that resemble brushes used to clean bottles, this plant boasts an array of exquisite colors, including red, pink, yellow, and even white. Native to Australia, the Bottle Brush tree has gained popularity worldwide due to its hardiness, versatility, and eye-catching aesthetics. Whether used as a focal point in landscapes or as an attractive addition to a container garden, this plant undoubtedly adds a touch of beauty and charm to any outdoor space.
Apart from its visual appeal, the Bottle Brush tree also offers a myriad of benefits. Its nectar-rich flowers are a magnet for hummingbirds, butterflies, and other pollinators, promoting a healthy and thriving ecosystem. Additionally, the dense foliage provides shade, privacy, and windbreak, making it an excellent choice for creating natural barriers or establishing tranquil garden settings. With proper care and attention, this beautiful plant can flourish and grace your garden with its unique charm for many years to come. So let us delve into the details of cultivating and caring for the mesmerizing Bottle Brush tree, uncovering the secrets to its successful growth and vibrant blooms.
2. Selecting the Ideal Location: Providing the Right Growing Conditions
Selecting the ideal location for your bottle brush tree is crucial for providing the right growing conditions and ensuring its long-term health and vibrancy. This beautiful plant thrives in full sun to partial shade, making it important to choose a spot in your garden that receives at least six hours of direct sunlight each day.
When considering the location, it’s also essential to take into account the soil and drainage conditions. The bottle brush tree prefers well-draining soil to avoid waterlogged roots, which can lead to root rot and other detrimental issues. Sandy loam or loamy soil with a pH level between 6.0 and 7.0 is typically ideal for optimum growth.
Additionally, ensure that the location you choose has ample space for the tree to grow. Bottle brush trees can reach a height of up to 15 feet, with a spread of about 10 feet, so providing enough room for its mature size is crucial. By carefully selecting the ideal location and considering these crucial factors, you can create the optimal growing conditions for your bottle brush tree and enjoy its stunning beauty for years to come.
• The ideal location for a bottle brush tree should receive at least six hours of direct sunlight each day.
• Consider the soil and drainage conditions when choosing a location, as the tree prefers well-draining soil to avoid root rot.
• Sandy loam or loamy soil with a pH level between 6.0 and 7.0 is typically best for optimum growth.
• Ensure that the chosen location has ample space for the tree to grow, as it can reach up to 15 feet in height with a spread of about 10 feet.
• By selecting an ideal location and considering these factors, you can provide the right growing conditions for your bottle brush tree’s long-term health and vibrancy.
3. Preparing the Soil: Ensuring Optimal Nutrient Levels for Healthy Growth
Preparing the soil is a vital step in ensuring optimal nutrient levels for healthy growth of the bottle brush tree. The right balance of nutrients is essential for the tree’s overall health and productivity. Before planting, it is crucial to assess the quality and composition of the soil in the chosen location.

One of the first considerations is the pH level of the soil. Bottle brush trees thrive in slightly acidic to neutral soil, with a pH range of 5.5 to 7.0. Testing the soil pH can be done using a simple soil testing kit or by sending a sample to a professional lab for analysis. If the pH is too high or too low, appropriate corrective measures should be taken to bring it within the preferred range.
Additionally, it is important to assess the soil’s nutrient content. Bottle brush trees require adequate levels of nitrogen, phosphorus, and potassium, as well as trace elements such as iron, magnesium, and manganese. Conducting a soil test will provide valuable insights into the nutrient deficiencies or excesses present in the soil. Based on the test results, specific fertilizers or soil amendments can be applied to optimize the nutrient levels for the bottle brush tree’s healthy growth and development.
By carefully preparing the soil and ensuring optimal levels of nutrients, gardeners can provide a solid foundation for the bottle brush tree’s growth. This proactive approach not only benefits the tree but also enhances its overall beauty and vigor, ensuring a thriving and flourishing addition to any garden or landscape.
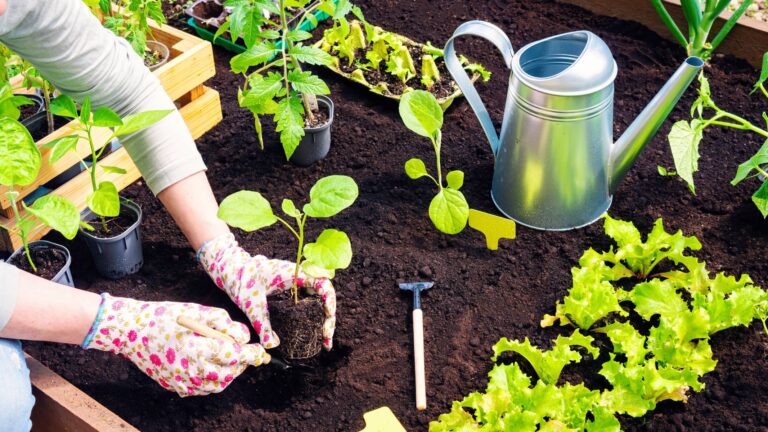
4. Planting Process: Step-by-Step Guide to Successfully Transplanting the Bottle Brush Tree
Planting a bottle brush tree requires careful consideration and proper technique to ensure its successful transplantation. Follow this step-by-step guide to establish a healthy and thriving bottle brush tree in your garden.
1. Choose the Right Location: Select a spot that receives full sunlight to partial shade, as bottle brush trees thrive in bright, sunny environments. Ideally, the area should have well-draining soil to prevent waterlogged conditions. Prioritize a location away from strong winds, as bottle brush trees can be susceptible to wind damage.
2. Prepare the Soil: Before planting, prepare the soil by removing any weeds, rocks, or other debris. Bottle brush trees prefer slightly acidic to neutral soil with a pH range between 6.0 and 7.0. Conduct a soil test to determine its nutrient levels and adjust accordingly. Incorporate organic matter, such as compost or well-rotted manure, to improve soil fertility and drainage.
3. Dig the Planting Hole: Dig a hole that is two to three times wider and the same depth as the tree’s root ball. Gently place the bottle brush tree in the hole, making sure the top of the root ball is level with the surrounding soil. Avoid planting the tree too deep, as this can hinder its growth and development.
4. Backfill and Water: Slowly backfill the hole with the soil, firmly but gently pressing it around the roots to eliminate air pockets. Water the tree thoroughly after planting to provide adequate moisture and help settle the soil. Maintain a regular watering schedule during the tree’s first few months to support root establishment.
5. Apply Mulch and Stake (if necessary): Apply a layer of organic mulch around the base of the tree, ensuring it doesn’t come into direct contact with the trunk. Mulch helps conserve moisture, regulate soil temperature, and suppress weed growth. If your area experiences strong winds, consider staking the tree to provide stability until it becomes established.
By following these steps, you can successfully transplant a bottle brush tree and create a beautiful addition to your garden landscape. Remember to provide the tree with proper care and maintenance to ensure its long-term health and vitality.
5. Watering Techniques: Establishing and Maintaining Proper Moisture Levels
Watering is a crucial element in establishing and maintaining the proper moisture levels for the bottle brush tree. Adequate water supply not only promotes healthy growth but also ensures the tree’s ability to withstand adverse environmental conditions. To achieve optimal moisture levels, it is important to follow a few key watering techniques.
First and foremost, it is essential to water deeply and infrequently. This encourages the development of a deep root system, which enhances the tree’s overall stability and resilience. Shallow watering, on the other hand, promotes shallow root growth, making the tree more susceptible to drought and other stresses.
In addition to deep watering, it is important to observe the moisture content of the soil. A good indicator of when to water is to check the soil moisture level using a moisture meter or simply by feeling the soil with your fingers. If the top inch of the soil feels dry, it’s time to water. It is worth noting that overwatering can be as detrimental as underwatering, so it is essential to strike the right balance by providing adequate moisture without waterlogging the roots.
Another key aspect of watering techniques is timing. Watering in the early morning or late afternoon allows for maximum absorption and minimizes water loss from evaporation. This ensures that the tree receives the necessary moisture to thrive throughout the day. Avoid watering in the evening as it can create a favorable environment for fungal diseases, such as root rot.
By implementing these watering techniques, you can establish and maintain the proper moisture levels for your bottle brush tree, promoting its health and vitality. However, it is important to remember that each tree is unique, and factors such as climate, soil composition, and tree maturity may require adjustments to the watering regimen. Therefore, regular monitoring and observation of the tree’s condition is crucial to ensure its watering needs are being met effectively.
6. Fertilization Methods: Nourishing the Bottle Brush Tree for Vibrant Blooms
Fertilization is a crucial aspect of maintaining the health and vibrancy of the bottle brush tree, ensuring it produces abundant and colorful blooms. When it comes to nourishing this beautiful plant, it is important to use the right fertilization methods to provide the necessary nutrients for optimal growth.
| Fertilization Method | Timing | Frequency | Type of Fertilizer | Application Instructions |
|---|---|---|---|---|
| Slow-Release Granular | Early Spring | Once a Year | Balanced (e.g., 10-10-10) | Sprinkle the granules evenly around the tree’s drip line. |
| Liquid Fertilizer | Late Spring to Early Summer | Every 2-4 Weeks | All-purpose liquid fertilizer | Dilute according to package instructions and water the soil. |
| Organic Fertilizer | Late Fall to Early Spring | Once a Year | Compost or well-rotted manure | Spread a layer of organic matter around the base of the tree. |
| Foliar Feeding | Late Spring to Early Summer | Every 2 Weeks | Water-soluble fertilizer | Spray the diluted solution on the leaves, ensuring coverage. |
| Controlled-Release Pellets | Spring or Early Summer | Once or Twice a Year | Specially formulated slow-release | Bury the pellets in the soil around the tree’s root zone. |
| granules | ||||
| Micronutrient Boost | Mid-Summer | Once a Year | Micronutrient-rich fertilizer | Apply around the tree’s drip line to address specific deficiencies. |
One of the key factors to consider is the timing of fertilization. It is recommended to apply a balanced, slow-release fertilizer in early spring, just as new growth begins. This allows the tree to uptake the nutrients gradually over the growing season, promoting steady and sustained growth. Additionally, it is beneficial to provide a second application in mid-summer to support the tree’s increased nutrient requirements during the flowering stage.
In terms of the fertilizer composition, it is essential to choose a product specifically formulated for flowering plants. Look for a well-balanced fertilizer with equal or slightly higher amounts of nitrogen (N), phosphorous (P), and potassium (K). These three macronutrients play vital roles in the overall development of the tree, with nitrogen promoting leaf and stem growth, phosphorous encouraging strong root development, and potassium aiding in overall plant health and flower production. Additionally, the fertilizer should contain micronutrients such as iron, magnesium, and zinc, which are essential for various physiological processes within the tree. By selecting a fertilizer that meets these criteria, you can provide your bottle brush tree with the necessary nourishment to achieve vibrant blooms and overall vitality.
7. Pruning and Shaping: Maintaining a Desired Form and Promoting Healthy Growth
Pruning and shaping a bottle brush tree is essential for maintaining its desired form and promoting healthy growth. Regular pruning helps to remove dead or diseased branches, improves airflow, and stimulates new growth. When done correctly, pruning can also enhance the tree’s overall appearance and encourage the development of abundant and vibrant blooms.
To start the pruning process, first, gather the necessary tools, such as clean and sharp pruning shears or loppers. Inspect the tree carefully, identifying any dead, damaged, or crossing branches that may need to be removed. Start by cutting these branches back to their point of origin, making clean and precise cuts just above a healthy bud or lateral branch.
Next, consider the desired form and shape of the tree. Take into account factors such as aesthetics, space availability, and the tree’s natural growth habits. Begin by pruning away any excessive or unwanted branches that may be causing the tree to become crowded or disorganized. Gradually shape the tree by selectively removing branches to create a more balanced and visually appealing structure.
Remember to avoid over-pruning, as this could weaken the tree and reduce its overall vitality. Aim to maintain a natural and healthy form, ensuring that each cut is purposeful and necessary. This way, you can help your bottle brush tree to thrive and showcase its beauty in your garden or landscape.
8. Pest and Disease Control: Protecting the Bottle Brush Tree from Common Issues
The Bottle Brush tree is a beautiful and versatile plant that can thrive in a variety of conditions. However, like any plant, it is susceptible to pests and diseases that can hinder its growth and potential. As a responsible gardener, it is important to take proactive measures to protect the Bottle Brush tree from common issues.
One of the most common pests that affect the Bottle Brush tree is the aphid. These tiny insects feed on the sap of the tree, causing damage to its leaves and flowers. To control aphid infestations, regular inspection of the tree is crucial. If aphids are detected, they can be manually removed by gently spraying the tree with water or by using natural insecticidal soaps. Another effective method is to introduce beneficial insects, such as ladybugs or lacewings, which feed on aphids and help keep their population in check.
In addition to pests, the Bottle Brush tree is also susceptible to diseases such as root rot and leaf spot. These diseases can be caused by excessive moisture, poor drainage, or fungal infections. To prevent root rot, it is important to ensure that the tree is planted in well-draining soil and to avoid overwatering. If leaf spot is a concern, regular inspections and prompt removal of infected leaves can help control the spread of the disease. Fungicides may also be used as a preventive measure, but it is important to carefully follow the instructions and choose a product specifically formulated for the Bottle Brush tree. By implementing these pest and disease control measures, you can ensure the health and vitality of your Bottle Brush tree for years to come.
9. Propagation Techniques: Growing New Bottle Brush Trees from Seeds or Cuttings
Propagation is an excellent way to expand your collection of bottle brush trees, whether you’re a gardening enthusiast or a professional horticulturist. There are two common methods for propagating this beautiful plant: growing from seeds or taking cuttings. Starting from seeds is a viable option, but it requires patience and a longer waiting time for the tree to reach maturity. On the other hand, propagating from cuttings allows for faster growth and the production of identical clones of the parent plant.
To propagate bottle brush trees from seeds, begin by collecting ripe seed capsules. These capsules can be easily identified as they turn brown and begin to split open, revealing the seeds inside. Gently remove the seeds and soak them in water for 24 hours to enhance germination. Once soaked, sow the seeds in a well-drained potting mix, lightly covering them with a thin layer of soil. Maintain a consistent moisture level and provide warmth by placing the pot in a sunny location. It typically takes around 3 to 6 weeks for the seeds to germinate, after which you can gradually expose the seedlings to outdoor conditions.
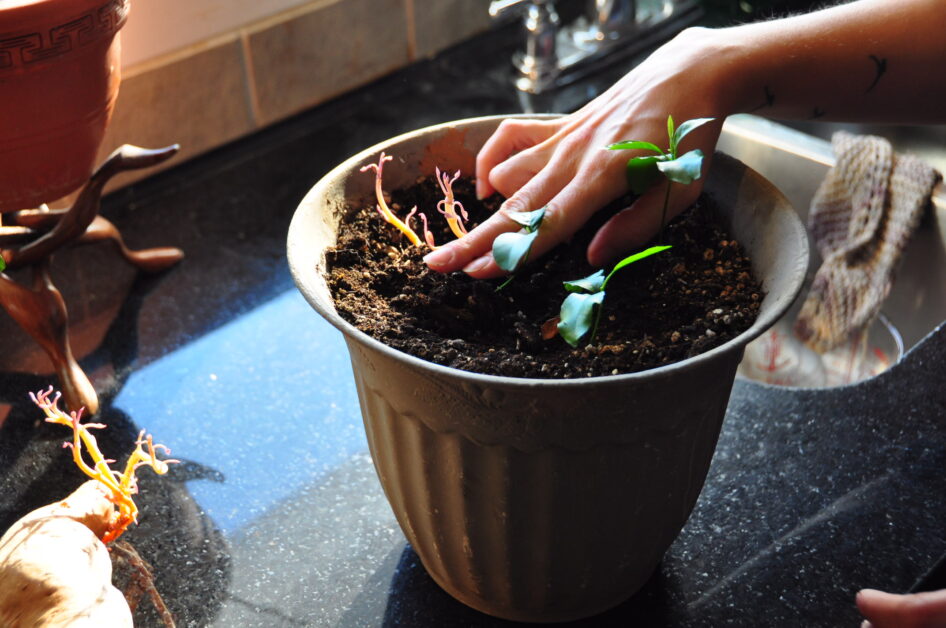
Alternatively, propagating bottle brush trees from cuttings is a more reliable and efficient method. Select a healthy branch from the desired parent plant and cut a 6 to 8-inch section just below a leaf node. Remove the leaves from the lower half of the cutting, leaving a few at the top. Dip the base of the cutting in a rooting hormone powder to promote root development. Insert the cutting into a well-draining potting mix, ensuring that at least two nodes are beneath the soil. Keep the cutting in a warm and humid environment, misting it regularly to maintain moisture. Within a few weeks, roots will begin to form, and you can transplant the cutting into its own container or directly into the ground.
Both methods have their advantages, and the choice ultimately depends on your preference and available resources. Whichever technique you choose, it’s essential to provide the right conditions and care to ensure successful propagation. With patience and dedication, you can enjoy a flourishing collection of bottle brush trees in your garden or landscape.
10. Winter Care: Preparing and Protecting the Bottle Brush Tree during Cold Months
Winter care is crucial for the health and survival of the bottle brush tree (Callistemon spp.) during the cold months. As temperatures drop, it is important to provide proper protection to ensure the tree is well-prepared for the seasonal changes.
One of the key considerations in winter care is selecting the right location for the bottle brush tree. Ideally, it should be planted in a spot that offers some shelter from harsh winds and frost. Placing the tree near a south-facing wall or a structure that provides some insulation can help shield it from the cold. Additionally, it is important to choose a location that receives adequate sunlight, as sunlight is essential for the tree’s growth and overall health. Proper positioning will go a long way in safeguarding the tree from extreme winter conditions.
11. Enhancing Blooms: Tips and Tricks to Encourage Abundant and Colorful Flowers
Enhancing the blooms of your bottle brush tree is an art form that requires a keen understanding of its unique needs and preferences. By implementing a few tips and tricks, you can encourage abundant and colorful flowers that will captivate the eye and bring beauty to your garden or landscape.
First and foremost, it is crucial to provide your bottle brush tree with the ideal growing conditions. This includes choosing a location that receives full sun for at least six to eight hours a day. The tree thrives in well-drained soil with a slightly acidic to neutral pH level. By ensuring these optimal conditions, you are setting the stage for a successful bloom-enhancing journey.
12. Companion Planting: Choosing Suitable Plants to Complement the Bottle Brush Tree
Choosing the right companion plants to complement your bottle brush tree can enhance the overall aesthetics and function of your garden. When selecting suitable plants, it is important to consider their growth habits, water requirements, and compatibility with the bottle brush tree.
One excellent choice is the lantana plant (Lantana camara), which features vibrant clusters of flowers in a variety of colors. Lantana is a sun-loving plant that thrives in well-drained soil, making it a perfect companion for the bottle brush tree. Its dense foliage also serves as a beautiful backdrop for the bottle brush tree’s unique shape and vivid blooms. Additionally, lantana attracts pollinators like butterflies and hummingbirds, which can help in the overall health and pollination of the garden.
Another suitable companion plant is the gardenia shrub (Gardenia jasminoides), renowned for its exquisite fragrance and stunning white blooms. Gardenias prefer partial shade and acidic soil, which can be beneficial in providing a contrasting environment to the bottle brush tree’s preference for full sun and well-drained soil. The combination of the bottle brush tree and gardenia not only adds visual interest to the garden but also creates a sensory experience with their contrasting scents.
When choosing companion plants for your bottle brush tree, it is essential to consider the compatibility of their growth requirements and their ability to complement and enhance each other’s visual appeal. By carefully selecting suitable plants, you can create a harmonious garden setting that showcases the beauty and diversity of nature.
13. Transplanting and Repotting: Guidelines for Successfully Moving or Upsizing the Tree
Transplanting or repotting a bottle brush tree can be a delicate process, but with the right guidelines, you can ensure a successful transition and allow your tree to thrive in its new location. Before beginning the transplanting process, it is important to choose the right time of year. Spring and fall are generally the best seasons for transplanting as the tree is in a dormant phase and will experience less stress.
When selecting a new location for your bottle brush tree, consider the amount of sunlight it will receive. These trees typically thrive in full sun conditions, so choose an area that receives at least six hours of direct sunlight each day. Additionally, ensure that the soil in the new location is well-draining and fertile, as this will promote proper root growth and overall health of the tree.
Before digging up the tree, it is crucial to prepare the new planting hole. The hole should be approximately two times wider and slightly deeper than the root ball of the bottle brush tree. This will provide enough space for the roots to spread and establish themselves once transplanted. It is also recommended to enrich the soil with organic matter such as compost or aged manure to provide essential nutrients for the tree’s growth. Once the new hole is prepared, gently lift the tree by the root ball, taking care not to damage the roots, and place it in the prepared hole. Fill the hole with soil, firmly pressing it around the roots to eliminate air pockets and provide stability.
Transplanting a bottle brush tree is a meticulous task, but by following these guidelines, you can increase the chances of a successful transplant and support the tree’s healthy growth in its new environment.
14.
Transplanting and repotting a bottle brush tree can be a daunting task, but with the right knowledge and techniques, it can be done successfully. When it comes to moving or upsizing the tree, timing is crucial. It is best to transplant or repot the bottle brush tree during the dormant season, typically in late winter or early spring. This allows the tree to establish its roots before the next growing season begins.
Before starting the transplanting process, ensure you have a new pot or planting location ready. The new pot should be larger than the current one to accommodate the growing roots. When removing the tree from its current pot or ground, be careful not to damage the roots. Gently loosen the soil around the root ball and carefully lift the tree out. Place it in the new pot or prepared hole, making sure it is positioned at the same depth as before. Finally, fill in the gaps with fresh soil and water the tree thoroughly to settle the soil around the roots. With proper care and attention, your bottle brush tree will adapt well to its new home and continue to thrive.
For more details check the vedio given below:
Can the bottle brush tree survive in cold climates?
The bottle brush tree is generally hardy in USDA zones 9-11, which are warmer regions. In colder climates, it is best to grow the tree in containers that can be brought indoors during the winter months.
How often should I water my bottle brush tree?
It is important to water the bottle brush tree regularly, especially during hot and dry periods. Aim to keep the soil consistently moist, but not waterlogged. Generally, watering once or twice a week should be sufficient, but adjust based on specific climate conditions.
Can the bottle brush tree tolerate full sun?
Yes, the bottle brush tree thrives in full sun exposure. It requires at least 6-8 hours of direct sunlight daily to ensure optimal growth and abundant blooms.
Is pruning necessary for the bottle brush tree?
Pruning the bottle brush tree is not necessary for its survival, but it can help maintain a desired shape and promote healthy growth. Prune any dead or damaged branches, and shape the tree as desired in early spring before new growth begins.
How can I control pests and diseases affecting my bottle brush tree?
The bottle brush tree is generally resistant to pests and diseases. However, you can prevent common issues by ensuring proper air circulation, avoiding overwatering, and promptly treating any signs of infestation or disease with appropriate organic or chemical treatments.
Can I grow a bottle brush tree from seeds?
Yes, the bottle brush tree can be grown from seeds. Collect mature seeds and plant them in well-draining soil, keeping them consistently moist until germination occurs. It may take several years for the tree to reach maturity and produce flowers.
What are some suitable companion plants for the bottle brush tree?
Some suitable companion plants for the bottle brush tree include lavender, salvia, rosemary, and lantana. These plants not only complement the bottle brush tree aesthetically but also attract beneficial pollinators.
How do I transplant or repot a bottle brush tree?
When transplanting or repotting a bottle brush tree, choose a container or new location that provides enough space for the root system to grow. Carefully remove the tree from its current pot or ground, ensuring you don’t damage the roots, and replant it at the same depth in the new location. Water thoroughly after transplanting to help the tree establish itself.
Can I use the flowers of the bottle brush tree for any purposes?
Yes, the flowers of the bottle brush tree can be used in various ways. They can be dried and used in floral arrangements or crafts. Additionally, the flowers can attract birds, bees, and butterflies to your garden, adding to its biodiversity.
How often should I fertilize my bottle brush tree?
It is recommended to fertilize the bottle brush tree once or twice a year, in spring and early summer. Use a balanced slow-release fertilizer or a specific fertilizer formulated for flowering trees, following the instructions on the package. Avoid over-fertilizing, as it can lead to excessive foliage growth and fewer blooms.