How to grow Wheat in your backyard.
Table of Contents
Selecting the right wheat variety for your backyard
When selecting the right wheat variety for your backyard, there are several factors to consider. First and foremost, it is important to choose a variety that is suitable for your specific climate and growing conditions. Different wheat varieties thrive in different environments, so it is crucial to research and select a variety that will perform well in your region.
Another important consideration is the intended use of your backyard wheat. Some varieties are better suited for bread making, while others are more suitable for animal feed or other purposes. It is advisable to choose a variety that aligns with your specific needs and preferences.
To make an informed decision, consult with local agricultural extension services, experienced farmers, or seed suppliers who can provide valuable insights and recommendations based on your location and desired outcome. Additionally, consider visiting nearby farms or attending agricultural fairs or conferences to gather information and learn from experts in the field. Taking the time to carefully choose the right wheat variety for your backyard will greatly increase the chances of a successful and rewarding harvest.
• Consider the climate and growing conditions of your region
• Research and select a variety that thrives in your specific environment
• Determine the intended use of your backyard wheat (bread making, animal feed, etc.)
• Choose a variety that aligns with your needs and preferences
• Consult with local agricultural extension services, experienced farmers, or seed suppliers for advice
• Visit nearby farms or attend agricultural fairs/conferences to gather information from experts.

Understanding the soil requirements for wheat cultivation
Wheat is a versatile grain that has been cultivated for thousands of years, and ensuring the right soil conditions is essential for successful growth and development. When it comes to understanding the soil requirements for wheat cultivation, there are a few key factors to consider.
Firstly, wheat thrives in well-drained soils with a pH range of 6 to 7.5. It prefers loamy soils that are rich in organic matter, as this allows for better moisture retention while maintaining proper aeration. If your backyard soil is heavy clay or sandy, amending it with organic matter such as compost or well-rotted manure can greatly improve its structure and water-wicking capabilities. Additionally, conducting a soil test to assess nutrient levels and pH will help identify any deficiencies that need to be addressed through targeted fertilization and pH adjustment.
Secondly, wheat is a relatively deep-rooted crop, with roots capable of penetrating up to 3 to 4 feet in the soil. This highlights the importance of adequate soil depth for proper root development. Ideally, the top 6 inches of soil should be loose and friable, allowing the roots to establish and expand easily. It’s worth noting that compacted or poorly drained soils can restrict root growth, leading to stunted plants and reduced yields. To counteract these issues, regular soil aeration and proper drainage should be considered.
By understanding the soil requirements for wheat cultivation, you can create a suitable environment for your backyard wheat crop to thrive and yield bountiful harvests. The integration of organic matter and soil amendments, combined with proper drainage and aeration practices, will lay the groundwork for healthy and robust wheat plants. With these factors in mind, you’ll be well on your way to a successful wheat-growing journey in your own backyard.
• Wheat thrives in well-drained soils with a pH range of 6 to 7.5
• Loamy soils rich in organic matter are preferred for wheat cultivation
• Heavy clay or sandy soils can be improved by adding compost or well-rotted manure
• Conducting a soil test helps identify nutrient deficiencies and pH levels that need adjustment
• Adequate soil depth is important for proper root development in wheat crops
• The top 6 inches of soil should be loose and friable to allow easy root establishment and expansion
• Compacted or poorly drained soils restrict root growth, leading to stunted plants and reduced yields
• Regular soil aeration and proper drainage practices are necessary for optimal wheat growth
• Integrating organic matter, soil amendments, drainage, and aeration will create an ideal environment for healthy wheat plants
• Following these guidelines will help ensure successful wheat cultivation in your backyard
Preparing the soil for planting wheat
To ensure successful cultivation of wheat in your backyard, it is essential to prepare the soil properly before planting. Wheat thrives in well-draining soil that is rich in organic matter and nutrients. Begin by clearing any debris or unwanted vegetation from the planting area. This will help eliminate competition for nutrients and sunlight.
Next, it is advisable to conduct a soil test to determine the pH level and nutrient content of your soil. Wheat prefers a slightly acidic to neutral pH range of 6.0 to 7.5. If the pH is outside this range, you can adjust it by adding materials such as lime or sulfur. Additionally, based on the soil test results, you may need to apply fertilizers to meet the nutrient requirements of the wheat plants. This will contribute to healthier growth and higher yields.
• Clear any debris or unwanted vegetation from the planting area
• Conduct a soil test to determine pH level and nutrient content
• Adjust pH if necessary by adding lime or sulfur
• Apply fertilizers based on soil test results to meet nutrient requirements of wheat plants
| Aspect | Preparation Steps for Wheat Planting |
|---|---|
| Soil Testing | 1. Conduct soil tests to determine pH levels, nutrient content, and soil structure. |
| Soil Amendments | 2. Based on soil test results, amend soil with necessary nutrients such as nitrogen, phosphorus, and potassium. |
| Soil Tillage | 3. Till the soil to a depth of 4-6 inches to break up compacted soil and create a loose seedbed. |
| Weed Control | 4. Remove any existing weeds by hand or using herbicides. |
| Organic Matter Addition | 5. Incorporate organic matter such as compost or well-rotted manure to improve soil structure and fertility. |
| Soil Moisture | 6. Ensure soil moisture is adequate but not waterlogged before planting. |
| Fertilizer Application | 7. Apply fertilizers according to soil test recommendations or general wheat fertilizer guidelines, ensuring even distribution. |
| Soil Compaction | 8. Avoid excessive soil compaction by minimizing heavy machinery traffic on the field, especially when soil is wet. |
| Soil pH Adjustment | 9. Adjust soil pH if necessary to achieve the optimal range for wheat growth, typically between 6.0 and 7.5. |
| Soil Drainage | 10. Ensure proper drainage to prevent waterlogging, which can inhibit root growth and lead to disease issues. |
Sowing wheat seeds in your backyard
After ensuring that your soil is properly prepared and ready for planting, it’s time to sow your wheat seeds in your backyard. Before you begin, it’s important to select the right wheat variety that suits your specific growing conditions and climate. Factors such as temperature, sunlight, and soil composition can greatly influence the success of your crop.
When sowing wheat seeds, it’s crucial to follow the recommended seeding rate for the chosen variety. Generally, a seeding rate of 1.5 to 2.5 bushels per acre is ideal for backyard cultivation. For smaller areas, you can adjust the seeding rate accordingly.
To sow the seeds, you have a few options. You can use a handheld broadcast spreader or a mechanical seeder for larger areas. Ensure that the seeds are distributed evenly and at the right depth, which is generally about 1 inch below the soil surface. Consider dividing your backyard into sections for easier management and to keep track of the wheat growth in different areas.
Keep in mind that wheat seeds require adequate moisture for germination. After sowing, lightly water the area to help the seeds settle into the soil. Be cautious not to overwater, as excessive moisture can lead to fungal diseases.
Sowing wheat seeds is just the beginning of your backyard wheat cultivation journey. With proper care and attention, your seeds will sprout, leading to the growth of healthy wheat plants. In the next sections, we will explore the crucial steps to take in order to ensure the success of your wheat crop, from providing sufficient water and irrigation, to fertilizing and protecting your plants from pests and diseases.
• Select the right wheat variety that suits your growing conditions and climate
• Consider factors such as temperature, sunlight, and soil composition
• Follow the recommended seeding rate for the chosen variety
• Generally, a seeding rate of 1.5 to 2.5 bushels per acre is ideal for backyard cultivation
• Adjust seeding rate accordingly for smaller areas
• Use a handheld broadcast spreader or mechanical seeder to sow the seeds
• Ensure even distribution and plant at a depth of about 1 inch below the soil surface
• Divide your backyard into sections for easier management and tracking of wheat growth
• Provide adequate moisture after sowing to help with seed germination
• Lightly water the area without overwatering to prevent fungal diseases

Providing adequate water and irrigation for your wheat crop
To ensure the optimal growth and development of your backyard wheat crop, providing adequate water and irrigation is essential. Wheat plants require a consistent supply of moisture throughout their lifecycle, particularly during the critical stages of germination, tillering, heading, and grain filling. Insufficient water can lead to reduced grain yield and poor quality of the harvested wheat.
The amount and frequency of watering will depend on various factors, including the climate, soil type, and stage of plant growth. As a general guideline, aim to keep the soil consistently moist, but not waterlogged, throughout the growth cycle. This can be achieved through regular irrigation, taking care to avoid over-watering, which can lead to waterlogging and increased risk of disease.
One popular irrigation method for wheat cultivation is overhead sprinklers, which evenly distribute water over the crop. However, be cautious of potential fungal diseases that can be exacerbated by overhead watering. Alternatively, drip irrigation can be a more water-efficient option, delivering water directly to the root zone while minimizing water loss through evaporation. Monitoring the moisture level in the soil is crucial, as it allows you to adjust your watering schedule accordingly. Always remember to water your wheat plants during the cooler parts of the day, such as early morning or late afternoon, to minimize water evaporation.
By providing adequate water and irrigation, you are giving your backyard wheat crop the best chance to thrive and produce a bountiful harvest. Keep in mind the specific water needs of your wheat variety and adapt your watering practices accordingly. A well-hydrated wheat crop will not only result in healthier plants but also ensure the development of plump, high-quality grains that can be enjoyed in various culinary applications.
• Wheat plants require consistent moisture throughout their lifecycle
• Insufficient water can lead to reduced grain yield and poor quality wheat
• The amount and frequency of watering depend on climate, soil type, and plant growth stage
• Aim to keep the soil consistently moist but not waterlogged
• Regular irrigation is important, but avoid over-watering
• Overhead sprinklers evenly distribute water but can increase risk of fungal diseases
• Drip irrigation is a more water-efficient option that delivers water directly to the root zone
• Monitor soil moisture levels and adjust watering schedule accordingly
• Water your wheat plants during cooler parts of the day to minimize evaporation
• Providing adequate water and irrigation gives your crop the best chance to thrive
Fertilizing your backyard wheat plants
To ensure optimal growth and yield of your backyard wheat plants, proper fertilization is essential. Wheat plants have specific nutrient requirements that differ at different growth stages. Understanding these requirements and providing the right nutrients at the right time will help you achieve a thriving wheat crop.
Before planting your wheat seeds, it is important to prepare the soil by incorporating organic matter such as compost or well-rotted manure. This will not only improve soil structure but also provide essential nutrients to the plants. Once the wheat plants start to grow, it is recommended to apply a balanced fertilizer that contains nitrogen, phosphorus, and potassium. Nitrogen is crucial for promoting leaf and stem growth, while phosphorus supports root development and overall plant vigor. Potassium aids in enhancing disease resistance and ensuring proper water regulation within the plants. Applying the fertilizer at the appropriate rate according to the manufacturer’s instructions will help avoid nutrient deficiencies or excesses that can adversely affect the growth of your wheat plants.
• Incorporate organic matter such as compost or well-rotted manure into the soil before planting wheat seeds
• Use a balanced fertilizer containing nitrogen, phosphorus, and potassium for optimal growth
• Nitrogen promotes leaf and stem growth
• Phosphorus supports root development and overall plant vigor
• Potassium enhances disease resistance and water regulation within plants
• Apply fertilizer at the recommended rate according to manufacturer’s instructions
Protecting your wheat crop from pests and diseases
Pests and diseases can pose a significant threat to your backyard wheat crop, potentially causing yield loss and overall plant health deterioration. To protect your wheat plants from these risks, it is essential to employ effective pest management strategies and disease prevention measures.
Pest management begins with regular inspections of your wheat plants, where you should be vigilant for any signs of insect infestation. Some common pests that target wheat include aphids, wheat stem sawflies, and Hessian flies. If you detect these pests early on, you can take immediate action by physically removing them from the plants or using organic insecticides specifically formulated for wheat crops.
Additionally, practicing crop rotation can help minimize the occurrence of pests. By alternating wheat cultivation with other crops, you disrupt the life cycles of pests, reducing their population and potential damage to wheat plants. Furthermore, ensuring that your backyard is clean and free from weed hosts and residue can discourage pests and minimize the risk of infestation.
When it comes to diseases, prevention is key. With proper care and attention, you can reduce the likelihood of diseases affecting your wheat crop. Start by selecting disease-resistant wheat varieties that are suited to the local climate and prevailing diseases in your area. These varieties are bred specifically to withstand common diseases and can significantly reduce the need for chemical treatments.
Maintaining good hygiene in your wheat field is crucial in disease prevention. Remove and destroy any diseased plants immediately to prevent the spread of spores and minimize the chances of infection in nearby plants. Additionally, avoid overwatering, as excessive moisture can create a favorable environment for diseases such as fungal infections.
By implementing these pest management and disease prevention strategies, you can safeguard your backyard wheat crop and promote its healthy growth. Stay vigilant, and regularly monitor your plants to address any pest or disease issues promptly, allowing your wheat crop to thrive and produce a bountiful harvest.
• Regularly inspect your wheat plants for signs of insect infestation
• Look out for common pests such as aphids, wheat stem sawflies, and Hessian flies
• Take immediate action by physically removing pests or using organic insecticides formulated for wheat crops
• Practice crop rotation to disrupt pest life cycles and reduce their population
• Keep your backyard clean and free from weed hosts and residue to discourage pests
• Select disease-resistant wheat varieties suited to the local climate and prevailing diseases in your area
• Maintain good hygiene in your wheat field by removing and destroying diseased plants promptly
• Avoid overwatering to prevent favorable conditions for fungal infections.

Implementing effective weed control measures in your backyard wheat field
Effective weed control is crucial for maintaining a healthy and productive backyard wheat field. Weeds compete with wheat plants for resources such as sunlight, water, and nutrients, which can significantly reduce yield and quality. Therefore, implementing proper weed control measures is essential to ensure the success of your crop.
One of the most effective methods of weed control in a backyard wheat field is thorough and timely cultivation. Before planting your wheat seeds, ensure that the soil is well-prepared by removing any existing weeds and their roots. This can be done through hand pulling or using a garden hoe to carefully uproot the weeds without disturbing the surrounding wheat plants. Additionally, regular cultivation throughout the growing season can help prevent weed growth by disrupting their life cycle and preventing them from producing seeds. Remember to be cautious while cultivating to avoid damaging the wheat plants.
• Thoroughly remove existing weeds and their roots before planting wheat seeds
• Use a garden hoe or hand pulling to uproot weeds without disturbing wheat plants
• Regular cultivation throughout the growing season disrupts weed life cycle and prevents seed production
• Be cautious while cultivating to avoid damaging wheat plants
Monitoring and managing the growth of wheat plants
To ensure the healthy growth of your backyard wheat plants, it is crucial to monitor and manage their progress throughout the growing season. Regular observation and assessment will help you identify any issues or challenges that may arise and take appropriate measures to address them. One important aspect of monitoring is to keep track of the overall growth and development of the plants. This can be done by noting the height and size of the wheat plants over time, as well as keeping an eye on the formation of tillers and the progression of flowering and grain development.
In addition to monitoring the physical aspects of growth, it is also essential to pay attention to the overall health of the plants. Keep a lookout for any signs of nutrient deficiencies, such as yellowing or browning of the leaves, stunted growth, or poor grain development. Regularly check for common wheat diseases like rust, powdery mildew, or Fusarium head blight, and take quick action if detected. It is also important to monitor pest activity, such as aphids or Hessian flies, and implement appropriate pest control measures as needed. By closely monitoring and managing the growth of your wheat plants, you can ensure optimal health and maximize the yield of your backyard crop.
• Regularly observe and assess the height and size of the wheat plants
• Monitor the formation of tillers, flowering, and grain development
• Pay attention to signs of nutrient deficiencies such as yellowing or browning leaves
• Look out for common wheat diseases like rust, powdery mildew, or Fusarium head blight
• Check for pest activity such as aphids or Hessian flies
• Implement appropriate pest control measures when necessary
Recognizing signs of wheat maturity and readiness for harvest
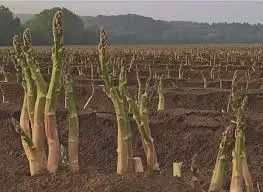
Recognizing the signs of wheat maturity is essential before harvest to ensure maximum yield and quality. One key indicator is the color of the wheat heads. As the wheat matures, the green color of the heads transitions into a golden or amber hue. This color change is a clear sign that the wheat is ready for harvest. However, it is important to note that different wheat varieties may display different hues, so it is essential to know the specific color characteristics of the variety you are cultivating.
Another sign of wheat maturity is the firmness of the wheat heads. When the heads are fully mature, they become firm to the touch and easily detach from the rest of the plant. This is particularly evident when lightly rubbing the heads between your fingers, causing the grains to separate from the stem with minimal effort. Additionally, the grains themselves become hard and difficult to dent, indicating their readiness for harvest. By monitoring these physical characteristics, you can determine the optimal time to harvest your backyard wheat crop and ensure the highest yield and quality of your harvest.
• The color of the wheat heads transitions from green to golden or amber
• Different wheat varieties may display different hues, so it is important to know the specific color characteristics of your variety
• Fully mature wheat heads are firm to the touch and easily detach from the rest of the plant
• Rubbing the heads between your fingers causes grains to separate with minimal effort
• The grains become hard and difficult to dent when fully mature
| Aspect | Signs of Wheat Maturity | Signs of Readiness for Harvest |
|---|---|---|
| Color of Wheat Heads | Yellowing or browning of the wheat heads | Wheat heads turn golden brown or amber |
| Stem and Leaves | Stems start to dry and turn from green to yellow | Lower leaves begin to dry out and turn brown |
| Kernel Hardness | Kernels harden and become difficult to dent | Kernels become firm and hard, difficult to press with thumbnail |
| Moisture Content | Decreases as wheat matures | Optimal moisture content for harvesting (usually around 12-15%) |
| Head Emergence | All wheat heads emerged and filled | Wheat heads fully emerged and kernels plump and filled out |
| Threshability | Kernels become firm and resist being squeezed | Kernels detach easily from the head with minimal pressure |
| Days After Flowering | Typically about 20-40 days after flowering | Usually around 110-130 days after planting for most wheat varieties |
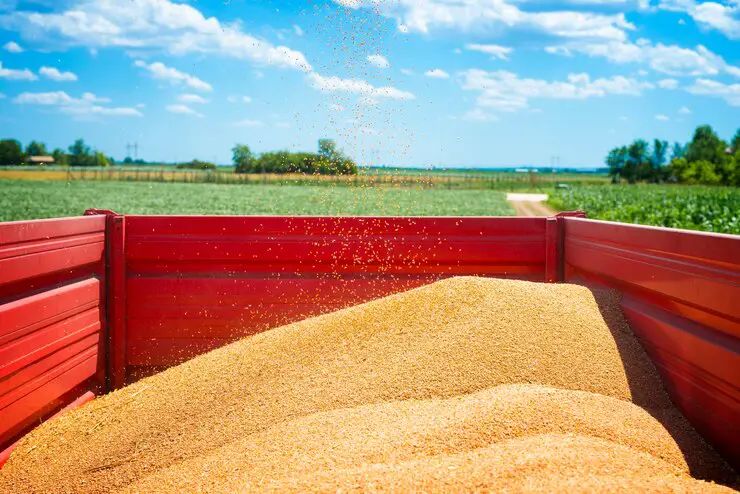
Harvesting your backyard wheat crop
After months of carefully tending to your backyard wheat crop, the time has finally come to harvest and reap the rewards of your hard work. Harvesting is a crucial step in the wheat cultivation process, as it determines the quality and quantity of your yield. To ensure a successful harvest, it is important to understand the signs of wheat maturity and readiness. Look for visual cues such as fully formed heads with kernels that have turned golden brown, indicating that they are fully developed and ready for harvest. Additionally, test the moisture content of the wheat by squeezing a few kernels between your fingers. If they crumble easily, the moisture level is optimal for harvest.
• Look for fully formed heads with golden brown kernels
• Test the moisture content by squeezing a few kernels between your fingers
Threshing and winnowing techniques for separating wheat grains
Threshing and winnowing are two essential steps in the process of separating wheat grains from the chaff, allowing for further processing and utilization of the valuable seeds. Threshing is the act of separating the grain from the plant by beating or striking the stalks. Traditionally, this was done by manually flailing the wheat bundles against a hard surface. However, modern techniques have introduced more efficient methods such as using mechanical threshers or even specialized combines.
After the threshing process is complete, winnowing is used to separate the loosened grains from the remaining plant debris. This can be accomplished by gently tossing the mixture into the air, allowing the wind to carry away the lighter chaff while the heavier grains fall back down. Alternatively, mechanical centrifugal fans or air currents can also be employed to achieve the same result.
Threshing and winnowing techniques are vital for achieving clean and high-quality wheat grains. By correctly implementing these procedures, you can ensure that the seeds are free from unwanted impurities, allowing for better germination rates and a superior end product. Don’t underestimate the significance of properly separating wheat grains, as it plays a crucial role in the overall success of your backyard wheat cultivation endeavor. Implementing these techniques effectively will reward you with a bountiful harvest and a sense of satisfaction in growing your own homegrown wheat.
• Threshing is the process of separating wheat grains from the plant by beating or striking the stalks.
• Traditional methods include manually flailing wheat bundles against a hard surface.
• Modern techniques utilize mechanical threshers or specialized combines for more efficient results.
• Winnowing is used to separate loosened grains from remaining plant debris after threshing.
• The process involves gently tossing the mixture into the air, allowing wind to carry away lighter chaff while heavier grains fall back down.
• Mechanical centrifugal fans or air currents can also be used for winnowing.
• Threshing and winnowing techniques are crucial for achieving clean and high-quality wheat grains.
• Proper implementation ensures seeds are free from impurities, leading to better germination rates and superior end products.
• Separating wheat grains plays a vital role in the success of backyard wheat cultivation endeavors.
• Effective implementation of these techniques leads to bountiful harvests and satisfaction in growing homegrown wheat.
| Aspect | Threshing | Winnowing |
|---|---|---|
| Purpose | Separating wheat grains from the stalks or husks | Separating wheat grains from the chaff or debris |
| Technique | Mechanical or manual beating, rubbing, or trampling | Tossing the mixture of wheat grains and chaff in the air to separate based on weight and wind currents |
| Equipment | Threshing machines, flails, or animals | Winnowing baskets, sieves, or fans |
| Process | Agitating the harvested wheat to loosen the grains | Using wind or airflow to blow away lighter chaff particles while heavier wheat grains fall back down |
| Result | Wheat grains separated from stalks or husks | Separation of wheat grains from chaff or debris |
| Efficiency | Can be labor-intensive, but effective | Relies on wind or airflow, effectiveness varies with environmental conditions |
| Automation | Can be mechanized with threshing machines | Generally a manual or semi-manual process |
| Environmental Impact | Depends on the method used; may produce waste | Relatively low environmental impact |
Storing and preserving your homegrown wheat
After successfully growing and harvesting your backyard wheat crop, it is crucial to store and preserve the grains properly to ensure their longevity and quality. Proper storage will not only protect the wheat from pests and diseases but also maintain its nutritional value and flavor. The following guidelines will help you store and preserve your homegrown wheat effectively.
First, it is important to clean the harvested grains thoroughly to remove any foreign matter such as dirt, chaff, or broken kernels. To do this, you can gently winnow the wheat by pouring it from one container to another on a windy day, allowing the lighter chaff to blow away. Alternatively, you can use a sieve or screen with appropriate mesh size to separate the grains from the chaff.
Once cleaned, store the wheat in airtight containers to protect it from moisture, pests, and fungal growth. Opt for food-grade containers that are made of materials such as glass or metal, which are less likely to absorb moisture or allow pests to penetrate. Additionally, ensure that the containers are tightly sealed to prevent any air or moisture from entering.
A cool and dry storage area is essential for maintaining the quality of the wheat grains. Ideally, the temperature should be below 15 degrees Celsius (59 degrees Fahrenheit) and the humidity should be less than 65%. Avoid storing the wheat near any heat sources or in areas prone to high humidity, such as basements or garages.
By following these storage and preservation practices, you can ensure that your homegrown wheat retains its freshness and nutritional value for an extended period of time. In the next section, we will explore alternative uses for your harvested wheat, offering you a range of creative options to make the most of your bountiful harvest.
• Clean the harvested grains thoroughly to remove any foreign matter such as dirt, chaff, or broken kernels.
• Gently winnow the wheat by pouring it from one container to another on a windy day or use a sieve or screen with appropriate mesh size to separate the grains from the chaff.
• Store the wheat in airtight containers made of food-grade materials like glass or metal.
• Ensure that the containers are tightly sealed to prevent air and moisture from entering.
• Choose a cool and dry storage area with temperature below 15 degrees Celsius (59 degrees Fahrenheit) and humidity less than 65%.
• Avoid storing the wheat near heat sources or in areas prone to high humidity, such as basements or garages.
Exploring alternative uses of harvested wheat in your backyard
When it comes to backyard wheat cultivation, the possibilities for its use extend beyond traditional baking and cooking purposes. Harvested wheat can be utilized in various alternative ways, showcasing its versatility and value. One such use is the production of homemade wheat flour, which allows you to have complete control over the quality and nutritional content of your flour. Whether you prefer a coarser texture for bread baking or a finer consistency for delicate pastries, grinding your own wheat grains provides the flexibility to cater to your specific needs.
Furthermore, wheat straw can serve as a valuable resource for your backyard projects. The sturdy and fibrous nature of wheat straw makes it ideal for composting, mulching, or even as a natural building material. Its decomposable nature enriches the soil by adding organic matter and nutrients, promoting healthier growth for future crops. Additionally, wheat straw can be ingeniously used as animal bedding, providing a comfortable and absorbent environment for small livestock or poultry. With these alternative uses, you not only maximize the benefits of your backyard wheat crop but also reduce waste and contribute to the overall sustainability of your gardening practices.
• Homemade wheat flour: Grinding your own wheat grains allows you to have complete control over the quality and nutritional content of your flour.
• Versatility in baking: You can achieve a coarser texture for bread baking or a finer consistency for delicate pastries by grinding your own wheat grains.
• Wheat straw for composting: The sturdy and fibrous nature of wheat straw makes it ideal for composting, enriching the soil with organic matter and nutrients.
• Mulching with wheat straw: Using wheat straw as mulch helps retain moisture in the soil, suppresses weed growth, and regulates soil temperature.
• Natural building material: Wheat straw can be used as a natural building material, providing insulation and reducing environmental impact compared to traditional construction materials.
• Animal bedding option: Utilizing wheat straw as animal bedding creates a comfortable and absorbent environment for small livestock or poultry.
Can I grow any variety of wheat in my backyard?
No, it is important to select the right wheat variety that is suitable for backyard cultivation.
What are the soil requirements for growing wheat in my backyard?
Wheat requires well-drained soil with a pH level between 6.0 and 7.5. It prefers loamy soil with good organic matter content.
How should I prepare the soil before planting wheat in my backyard?
To prepare the soil, remove any weeds or rocks, and loosen the soil using a garden fork or tiller. Incorporate organic matter or compost to improve soil fertility.
How do I sow wheat seeds in my backyard?
Sow the wheat seeds evenly by scattering them on the prepared soil. Then, lightly rake the soil to cover the seeds with a thin layer of soil.
How often should I water my backyard wheat crop?
It is important to provide regular and adequate water to your wheat crop. Water the plants whenever the top inch of soil becomes dry.
How can I protect my wheat crop from pests and diseases?
Implement integrated pest management practices, such as using organic pest control methods or introducing beneficial insects. Monitor the plants regularly for any signs of pests or diseases and take necessary actions promptly.
What should I do to control weeds in my backyard wheat field?
Implement weed control measures such as mulching, hand weeding, or using organic herbicides. Ensure that weeds are removed before they compete with the wheat plants for nutrients and space.
How can I monitor the growth of my wheat plants?
Regularly observe the growth and appearance of the plants. Look for signs of nutrient deficiency, disease, or any other abnormalities. Take necessary actions if any issues arise.
How do I know when my backyard wheat is ready for harvest?
Watch for signs of maturity such as the color of the wheat turning golden brown and the heads drooping. Rub a few grains between your fingers; if they are hard and difficult to dent, the wheat is ready for harvest.
What is the best method to harvest my backyard wheat crop?
Harvest the wheat by cutting the plants close to the ground using a sickle or scythe. Bundle the harvested wheat stalks and hang them upside down in a well-ventilated area to dry.
How do I separate the wheat grains from the harvested crop?
Threshing is the process of separating the wheat grains from the stalks. You can do this by beating the dried stalks with a flail or by stepping on them. Winnowing, on the other hand, involves tossing the threshed wheat in the air to allow the wind to carry away the chaff.
How should I store my homegrown wheat?
Store the harvested wheat in a clean, dry, and airtight container to prevent moisture and pests from damaging the grains. Keep the container in a cool and dark place.
What are some alternative uses for harvested wheat in my backyard?
Apart from using the wheat for baking bread or making flour, you can use the straw for animal bedding, composting, or mulching. Wheat grains can also be sprouted for nutritious wheatgrass or used in brewing beer.

Ankit Garg is a seasoned writer at South El Monte Hydroponics, blending his passion for agriculture with a penchant for storytelling. With a degree in Agricultural Sciences from a prestigious institution, Ankit’s expertise lies in hydroponics, sustainable farming, and innovative cultivation techniques. His keen interest in exploring the intersection of technology and agriculture has led him to delve deep into the realm of hydroponic farming, where he thrives in uncovering the latest advancements and sharing insights through his engaging prose. Ankit’s dedication to promoting eco-friendly and efficient farming practices through his writing has earned him recognition within the agricultural community and beyond.