How to Grow Hollyhocks: A Guide to Growing These Charming and Cottage-Style Flowers
Table of Contents
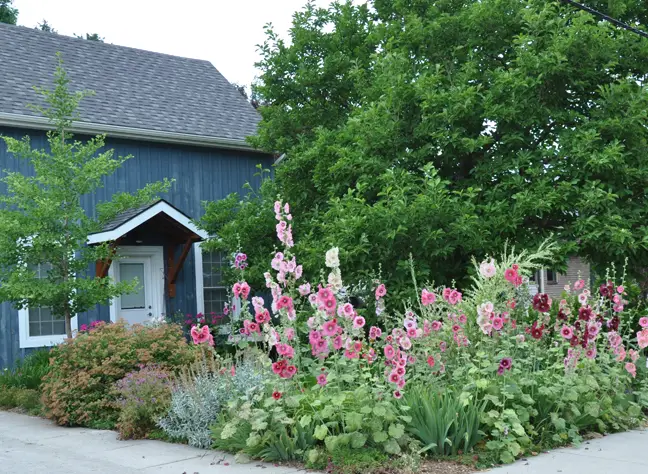
Choosing the Right Location for Your Hollyhock Garden
Choosing the right location for your hollyhock garden is crucial for ensuring their successful growth and development. Hollyhocks thrive in areas that receive full sunlight for at least 6 to 8 hours a day. Therefore, select a spot in your garden that is not shaded by trees or buildings. This will allow the hollyhocks to bask in the warmth of the sun, promoting optimal photosynthesis and ensuring the production of vibrant blooms.
In addition to sunlight, hollyhocks require well-drained soil for their roots to flourish. Avoid areas with compacted or heavy clay soil, as they can hinder water drainage and lead to root rot. Instead, opt for soil that is rich in organic matter and loamy in texture. This will provide a favorable environment for the hollyhocks to establish strong root systems and absorb essential nutrients. Prior to planting, it may be beneficial to amend the soil with compost or well-rotted manure to improve its fertility and drainage capabilities. By carefully selecting the location based on sunlight and soil conditions, you can create an ideal environment for your hollyhock garden to thrive.
Selecting the Ideal Soil for Hollyhock Growth
To ensure optimal growth and vibrant blooms, selecting the ideal soil for your hollyhocks is crucial. These stunning flowering plants thrive best in well-drained soil that is rich in organic matter. Sandy loam or loamy soil with a pH level between 6.5 and 7.5 is considered ideal for their growth.
One important factor to consider is the soil’s ability to retain moisture. While hollyhocks prefer well-drained soil, it is also important for the soil to hold enough moisture for the plants to access when needed. This can be achieved by incorporating organic matter such as compost or well-rotted manure into the soil. These organic materials not only improve the soil’s structure but also help the soil retain moisture, ensuring a consistent water supply for your hollyhocks.
Furthermore, hollyhocks thrive in soil that is rich in nutrients. Prior to planting, it is recommended to conduct a soil test to assess its nutrient composition. Based on the results, you can amend the soil with appropriate fertilizers to ensure that your hollyhocks receive the necessary nutrients for healthy growth and blooming.
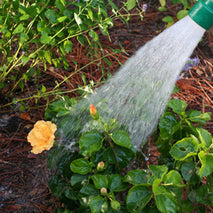
The Importance of Proper Watering Techniques for Hollyhocks
Proper watering techniques are crucial for the healthy growth and development of hollyhocks. These beautiful flowering plants require a sufficient amount of water to thrive, but overwatering can be just as detrimental as underwatering. Finding the right balance is key to promoting their optimal growth and preventing common watering-related issues.
When it comes to watering hollyhocks, the general guideline is to provide them with about 1 to 1.5 inches of water per week. However, this can vary depending on factors such as rainfall, temperature, and soil type. It is essential to monitor the moisture levels of the soil regularly and adjust your watering schedule accordingly. One helpful tip is to stick your finger about an inch into the soil – if it feels dry, it’s time to water.
It’s important to note that hollyhocks prefer a slightly moist soil, but they don’t tolerate waterlogged conditions well. Overwatering can lead to root rot and other fungal diseases that can ultimately harm or kill the plants. To avoid this, ensure that the soil has good drainage and never let the plants sit in standing water. Utilizing organic mulch around the base of hollyhocks can assist in retaining moisture without drowning the roots.
• Proper watering techniques are crucial for the healthy growth and development of hollyhocks.
• Hollyhocks require a sufficient amount of water to thrive, but overwatering can be detrimental.
• Finding the right balance is key to promoting optimal growth and preventing watering-related issues.
• The general guideline for watering hollyhocks is 1 to 1.5 inches of water per week.
• Adjust your watering schedule based on factors such as rainfall, temperature, and soil type.
• Monitor the moisture levels of the soil regularly by sticking your finger about an inch into it.
• If the soil feels dry, it’s time to water the hollyhocks.
• Hollyhocks prefer slightly moist soil but don’t tolerate waterlogged conditions well.
• Overwatering can lead to root rot and fungal diseases that harm or kill the plants.
• Ensure that the soil has good drainage and never let the plants sit in standing water.
• Utilize organic mulch around the base of hollyhocks to retain moisture without drowning roots.
Understanding the Sunlight Requirements for Hollyhocks
Hollyhocks, with their tall stalks and vibrant blooms, are a popular choice among gardeners looking to add height and color to their outdoor spaces. However, to ensure the optimal growth and development of these beautiful flowers, it is crucial to understand their sunlight requirements. Hollyhocks thrive in full sunlight, requiring at least 6-8 hours of direct sunlight each day.
The sunlight requirements of hollyhocks are not mere whims, but rather a necessity for their photosynthetic process and overall health. Through photosynthesis, plants convert sunlight into energy, allowing them to produce food and grow. Insufficient sunlight can lead to weak and spindly growth, with fewer flowers and diminished vigor. Therefore, when choosing the perfect spot for your hollyhock garden, it is essential to select an area that receives ample sunlight throughout the day. Consider the positioning of trees, buildings, or other structures that may cast shadows and potentially reduce the amount of sunlight reaching your hollyhocks. By ensuring they receive enough sunlight, you are setting the stage for robust growth and a vibrant display of blooms.
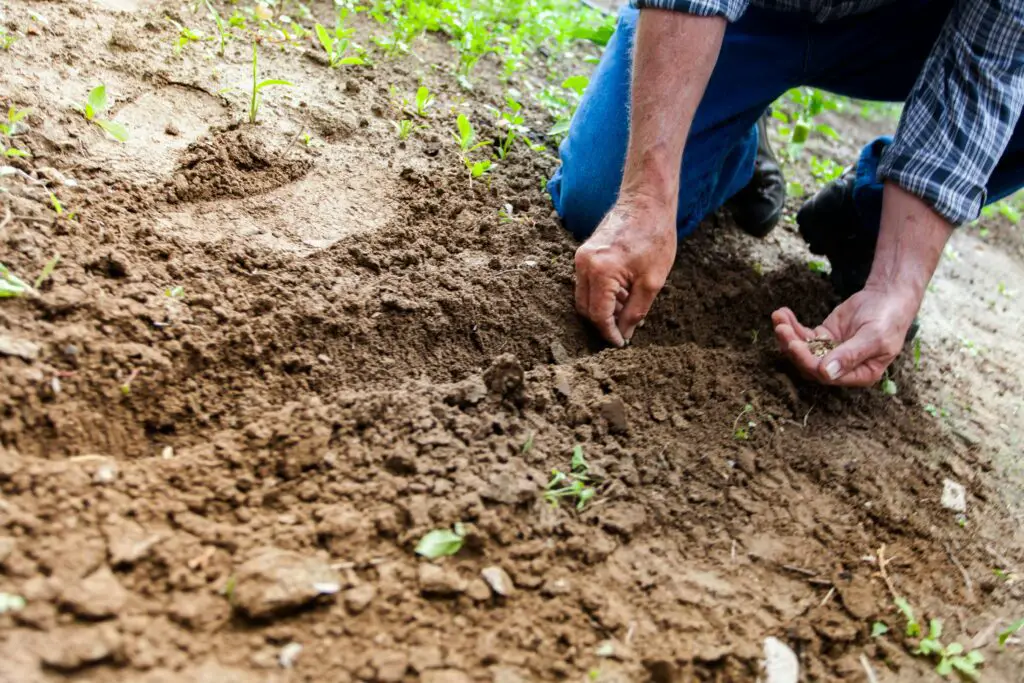
Preparing the Soil for Planting Hollyhock Seeds
To ensure successful growth of hollyhocks, it is crucial to prepare the soil properly before planting the seeds. The right soil conditions will provide the necessary nutrients and moisture for healthy germination and robust growth. Here are some important steps to follow when preparing the soil for planting hollyhock seeds.
First, start by choosing a well-draining location for your hollyhock garden. While hollyhocks can tolerate various soil types, they prefer a slightly acidic to neutral soil pH between 6.0 and 7.5. Conducting a soil test can help determine the pH level and identify the need for any amendments to bring it within the recommended range.
Next, remove any existing vegetation or weeds from the planting area. Use a garden fork or tiller to loosen the soil to a depth of at least 6 to 8 inches. This will help improve the soil’s texture and allow the roots to penetrate easily. Remove any large rocks or debris that may impede root growth.
After loosening the soil, incorporate organic matter such as compost or well-rotted manure. This will enhance soil fertility, improve drainage, and promote nutrient availability. Work the organic matter into the top 4 to 6 inches of soil using a garden rake, ensuring an even distribution throughout the planting area.
| Step | Description |
|---|---|
| 1. Choose a Location | Select a sunny spot with well-drained soil. |
| 2. Soil Preparation | Loosen the soil and amend with organic matter like compost. |
| 3. pH Level | Aim for a slightly acidic to neutral pH (6.0-7.0). |
| 4. Planting Depth | Sow seeds 1/8 to 1/4 inch deep in the soil. |
| 5. Watering | Keep the soil consistently moist, not waterlogged. |
| 6. Mulching | Apply a layer of mulch to retain moisture and suppress weeds. |
To further optimize soil conditions, consider adding a balanced fertilizer with a nitrogen, phosphorus, and potassium (NPK) ratio of 10-10-10 or similar. Follow the manufacturer’s instructions for application rates based on the size of your garden. The added nutrients will support initial seed germination and the subsequent growth of your hollyhocks.
By taking these steps to properly prepare the soil, you will create a favorable environment for the hollyhock seeds to thrive. The amended soil will provide essential nutrients, good drainage, and optimal pH levels necessary for successful hollyhock cultivation. With the groundwork in place, you are now ready to proceed with planting the hollyhock seeds and embarking on a rewarding gardening journey.
Planting Hollyhock Seeds: Step-by-Step Instructions
Planting hollyhock seeds is an exciting venture for any gardener, whether you’re a seasoned expert or just starting out. By following these step-by-step instructions, you’ll ensure the best chance of success in growing these stunning and vibrant flowers.
Step 1: Prepare the Soil
Before planting hollyhock seeds, it’s crucial to prepare the soil properly. Hollyhocks prefer well-drained soil with a pH between 6.0 and 8.0. Begin by removing any rocks, weeds, or debris from the area. Loosen the soil to a depth of at least 12 inches, incorporating organic matter such as compost or well-rotted manure to improve its fertility and drainage.
Step 2: Sowing the Seeds
Now it’s time to sow the hollyhock seeds. Scatter the seeds evenly over the prepared soil, following the recommended spacing mentioned on the seed packet. It’s important not to bury the seeds too deep, as they require light to germinate. Gently press the seeds into the soil, ensuring good seed-to-soil contact. Lightly water the area using a fine mist to avoid dislodging the seeds.
By attentively following these first two steps, you’ll be well on your way to planting hollyhock seeds seamlessly.
Providing Adequate Support for Growing Hollyhocks
Hollyhocks are beautiful and tall flowering plants that can bring a touch of elegance to any garden. However, their towering stalks can sometimes become susceptible to bending or breaking under the weight of their blooms. That’s why providing adequate support for growing hollyhocks is crucial in ensuring their sturdy growth and longevity.
Here are some points on providing adequate support for growing hollyhocks:
- Staking: Install tall stakes near the hollyhock plants to support their height.
- Tying: Secure the hollyhock stems to the stakes using soft ties to prevent them from bending or breaking.
- Wind Protection: Place the stakes on the windward side to shield the plants from strong winds.
- Regular Checking: Periodically check the plants and adjust ties as needed to accommodate growth.
- Pruning: Trim side shoots to encourage a stronger central stem and reduce the risk of flopping.
- Mulching: Apply a layer of mulch around the base to stabilize the soil and provide additional support.
- Watering: Ensure consistent watering to maintain plant health and prevent stress that can lead to bending.
One of the most common methods for supporting hollyhocks is using stakes or bamboo canes. These can be inserted into the ground beside the young plants and tied to them with soft twine or cloth strips. By gently tying the stems to the stakes, you can help them stay upright as they grow taller. It’s important to drive the stakes deep into the ground to provide stable support, especially in areas with strong winds or heavy rainfall. Additionally, if you’re growing a larger number of hollyhocks in a designated area, you may consider using a trellis or grid system to support multiple plants at once. This method not only provides stability but also adds an enchanting vertical element to your garden.
Caring for Hollyhocks: Maintenance Tips for Healthy Growth
To ensure healthy growth and vibrant blooms, proper maintenance is essential for your hollyhocks. Regular care and attention will help these beautiful flowers thrive in your garden. Here are some maintenance tips to keep your hollyhocks healthy and robust.
First and foremost, regular watering is crucial for the well-being of your hollyhocks. These plants prefer moist soil, so it’s important to water them deeply and consistently. Aim to keep the soil evenly moist, but be cautious not to overwater as it can lead to root rot. It’s advisable to water at the base of the plants, avoiding overhead watering, which can promote disease.
Deadheading is another vital maintenance task for hollyhocks. Removing spent flowers not only keeps the plant tidy and beautiful but also encourages additional blooming. As soon as the flowers fade, promptly cut them off at the base of the stem to prevent seed formation. This redirects the plant’s energy back into growth and promotes the formation of new buds. Remember to wear gloves while deadheading, as the plants have tiny hairs that can cause skin irritation for some individuals.
Recognizing and Treating Common Hollyhock Pests and Diseases
Recognizing and treating common pests and diseases is crucial for maintaining the health and vitality of your hollyhock garden. These beautiful flowers are not immune to the challenges posed by pests and diseases, but with timely intervention, you can keep your plants thriving.
One common pest that can wreak havoc on your hollyhocks is the aphid. These tiny insects feed on plant sap, causing stunted growth, yellowing leaves, and distorted flowers. To combat aphids, you can try spraying your hollyhocks with a mixture of water and insecticidal soap. Alternatively, introducing natural predators like ladybugs can help control aphid populations. Regularly inspecting the undersides of leaves for clusters of aphids and taking prompt action is essential to prevent infestations from getting out of hand.
Another troublesome pest that hollyhocks often encounter is the powdery mildew fungus. This fungal disease appears as a white powdery coating on the leaves, stems, and flowers of affected plants. It thrives in humid conditions and can spread rapidly, leading to leaf curling, wilting, and even death of the plant. To prevent powdery mildew, ensure proper air circulation around your hollyhocks by spacing them adequately and avoiding overhead watering. If the disease does appear, prompt treatment with a suitable fungicide can help suppress its progression.
By being vigilant and proactive in recognizing and addressing common pests and diseases, you can safeguard the health and beauty of your hollyhocks. In the next section, we will delve deeper into the art of pruning and deadheading hollyhocks, offering insights and guidance for ensuring their longevity and continued blooming.
Pruning and Deadheading Hollyhocks: Best Practices for Longevity
Pruning and deadheading are essential practices for maintaining the health and longevity of hollyhock plants. By understanding and implementing these best practices, gardeners can ensure that their hollyhocks continue to thrive year after year.
Pruning hollyhocks involves removing any dead or diseased foliage, as well as any crossing or overcrowded stems. This not only improves the overall appearance of the plant but also promotes better air circulation and reduces the risk of fungal diseases. It is recommended to prune hollyhocks in late winter or early spring before new growth begins. Using clean and sharp pruning shears, make clean cuts just above a healthy bud or leaf node. This encourages new growth and prevents any potential damage to the plant.
When it comes to deadheading hollyhocks, the goal is to remove spent blooms to encourage further flower production and prevent the plant from diverting energy into seed production. Deadheading can be done throughout the blooming season by simply cutting off the spent flower stalks just above a healthy leaf node or bud. This promotes the development of new flower buds and helps to prolong the blooming period of the plant. Regular deadheading also prevents self-sowing and can help to maintain a tidy appearance in the garden.
By incorporating regular pruning and deadheading into your hollyhock care routine, you can ensure that your plants remain healthy, vigorous, and aesthetically pleasing. These best practices for longevity will not only enhance the beauty of your garden but also contribute to the overall success of your hollyhock growing endeavors.
Harvesting Hollyhock Seeds for Future Planting
Harvesting hollyhock seeds is a rewarding process that allows you to propagate these beautiful flowering plants for future planting. By properly collecting and storing the seeds, you can ensure a steady supply of hollyhocks year after year.
When it comes to harvesting hollyhock seeds, timing is crucial. Wait until the seed pods have dried and turned brown on the plant. This typically occurs in the late summer or early fall. Gently remove the seed pods from the plant, being careful not to damage them. Place the seed pods in a paper bag or envelope to allow for further drying. Once completely dry, gently break open the seed pods and collect the small, dark seeds inside. It’s important to handle the seeds with care to avoid damaging them during this process.
Proper storage is key to preserving the viability of hollyhock seeds. Store the seeds in a cool, dry place, such as an airtight container or sealed envelope. Adding a small packet of silica gel or a sachet of dried rice to absorb moisture can help prevent mold or mildew formation. Label the container with the variety and date of harvest for easy reference. With proper storage, hollyhock seeds can remain viable for several years, ensuring you have a sufficient supply for future planting endeavors.
Dividing and Transplanting Hollyhocks: When and How to Do It
Dividing and transplanting hollyhocks is a necessary task to maintain the health and longevity of these beautiful flowering plants. When it comes to deciding the right time for division and transplantation, late summer or early fall is the most suitable period. The plant should ideally have finished its blooming cycle and be entering the dormant phase. Dividing and transplanting hollyhocks during this time allows them to establish new roots and prepare for the upcoming spring season.
To divide hollyhocks, start by carefully lifting the plant from the ground, making sure to preserve as much of the root system as possible. Gently shake off any excess soil and inspect the roots for any signs of damage or disease. Next, use a sharp and clean garden knife to separate the clumps into smaller sections. Aim for each divided clump to have at least three to five healthy shoots. Once divided, replant the sections at the desired location, ensuring they are placed at the same depth as they were before. Give the newly transplanted hollyhocks a good watering to facilitate root establishment. It’s important to note that hollyhocks may take some time to recover and start growing vigorously after division, so be patient and continue to provide proper care.
Tips for Overwintering Hollyhocks and Ensuring Their Survival
Hollyhocks, with their tall stalks and vibrant blooms, are a beloved addition to any garden. However, as winter approaches, it becomes crucial to take the necessary steps to ensure the survival of these beautiful plants. Proper overwintering techniques can make all the difference in preventing frost damage and maximizing the chances of a successful regrowth the following year.
One of the first tips for overwintering hollyhocks is to provide a protective layer of mulch around the base of the plants. This layer of organic material helps insulate the roots and retain moisture, safeguarding them from the harsh winter conditions. As a general guideline, apply a 2-3 inch layer of mulch, making sure to keep it a few inches away from the plant stems to prevent dampness and rot. Mulching not only acts as a barrier against freezing temperatures but also helps suppress weed growth, providing an added benefit to your hollyhocks during their dormant period.
Another essential aspect of overwintering hollyhocks is pruning. While hollyhocks should generally be deadheaded throughout their growing season, it is recommended to leave some foliage intact as winter approaches. This retained foliage helps protect the plant from winter winds and provides an additional layer of insulation. However, it is important to remove any dead or diseased leaves and stems to minimize the risk of pest infestations or disease spreading during the colder months. Pruning should be done in late fall, once the plant has gone dormant and before the first frost sets in.
For more details check the vedio give below:
What is overwintering and why is it important for hollyhocks?
Overwintering refers to the process of protecting hollyhocks during the winter months to ensure their survival. It is important because hollyhocks are not frost-tolerant and can be damaged or killed by cold temperatures.
When should I start preparing my hollyhocks for overwintering?
It is recommended to start preparing your hollyhocks for overwintering in late autumn, before the first frost arrives.
What are some ways to protect hollyhocks during winter?
Some ways to protect hollyhocks during winter include mulching around the base of the plants with a thick layer of organic material, covering them with a frost blanket or burlap, and providing a windbreak if necessary.
Can I leave my hollyhocks in containers over winter?
While it is possible to leave hollyhocks in containers over winter, it is generally better to transplant them into the ground. The soil in containers can freeze more easily, which can harm the roots of the plants.
How much water do hollyhocks need during winter?
During winter, hollyhocks require less water compared to the growing season. Water sparingly, only when the soil is dry to the touch, to prevent rotting of the roots.
Should I prune my hollyhocks before overwintering?
It is recommended to prune hollyhocks before overwintering. Cut back the stems to a few inches above the ground, removing any diseased or dead foliage. This helps prevent the spread of diseases and provides a tidy appearance.
Can hollyhocks survive in extremely cold climates?
Hollyhocks are generally hardy in USDA zones 3-9, but their ability to survive in extremely cold climates can vary. It is advisable to take extra precautions and provide better protection in regions with severe winters.
Can hollyhocks be grown as perennials?
Yes, hollyhocks can be grown as perennials, especially in milder climates. With proper care and overwintering techniques, they can regrow and bloom for several years.
Can I divide and transplant hollyhocks during winter?
It is not recommended to divide and transplant hollyhocks during winter. It is best to wait until early spring when the plants are actively growing to ensure their successful establishment.
What should I do if my hollyhocks do not survive the winter?
If your hollyhocks do not survive the winter, you can try replanting new seeds or purchasing new plants in the following growing season. Assess the conditions and adjust your overwintering strategies accordingly to increase their chances of survival.