How to Grow Peas: A Complete Guide to Pea Pods
Did you know that peas are one of the earliest cultivated crops, dating back over 5,000 years? Growing your own peas is not only a nod to history but also a fantastic way to enjoy fresh, delicious produce straight from your garden. This complete guide to growing peas will walk you through everything you need to know, from choosing the right variety to harvesting plump, sweet pea pods. Whether you have a sprawling garden or a small balcony, peas are a versatile crop that can thrive in various settings. Dive in to discover the secrets of successful pea cultivation and enjoy a bountiful harvest in your own backyard. Ready to get started? Let’s grow some peas!
Table of Contents
Selecting the Right Pea Variety: Understanding the Different Types of Peas
As a gardener, selecting the right pea variety is crucial for a successful harvest. Understanding the different types of peas available will help you make an informed decision and ensure that you choose the variety that best suits your needs.

- Garden Peas (Pisum sativum):
- Available in shelling and snap varieties.
- Shelling peas: Harvested when pods are fully developed; peas require shelling.
- Snap peas: Harvested when pods are young and tender; peas are crisp and sweet; can be eaten whole.
- Snow Peas (Pisum sativum var. saccharatum):
- Flat, edible pods with underdeveloped peas inside.
- Harvested when pods are flat; used in stir-fries and salads for their crunch.
- Sugar Snap Peas (Pisum sativum var. macrocarpon):
- Cross between garden peas and snow peas.
- Thicker, sweeter edible pods; plump and tender peas inside.
- Harvested when pods are fully rounded but still crisp; versatile for raw or cooked dishes. 🌱🥗🍽️
Now that you have a better understanding of the different pea varieties available, you can select the one that suits your preferences and culinary needs. Don’t be afraid to experiment and try different types – each variety offers its unique flavors and textures to delight your palate. Happy pea growing!
Preparing the Soil: Tips for Creating the Ideal Growing Environment
Preparing the soil is a crucial step in creating the ideal growing environment for peas. By ensuring that the soil is properly prepared, you can provide your pea plants with the necessary nutrients and support they need to thrive. Here are some tips to help you prepare your soil for successful pea cultivation.
- Select the Location:
- Full Sun to Partial Shade: Choose a spot that receives ample sunlight to ensure your peas thrive.
- Clear the Area: Remove any weeds or debris that could compete with your pea plants for nutrients and water.
- Loosen the Soil:
- Use a Garden Hoe or Rake: Loosen the top layer of soil to a depth of about 6 to 8 inches.
- Improve Drainage: Ensure the soil is well-aerated to allow the roots to penetrate easily and enhance drainage.
- Amend the Soil with Organic Matter:
- Spread Compost or Manure: Apply a 2 to 3-inch layer of compost or well-rotted manure over the soil surface.
- Incorporate into the Soil: Mix the organic matter into the top few inches of soil using a hoe or garden fork.
- Enhance Nutrient Content: This step enriches the soil with essential nutrients, improving its structure and fertility.
- Improve Moisture Retention: Organic matter helps the soil retain moisture, which is crucial for healthy pea growth.
By following these soil preparation tips, you can create an ideal environment for your pea plants. In the next section, we will explore step-by-step instructions for planting peas and setting them up for success in their new soil home.
The following table explain about the preparing the soil for growing peas:
| Step | Task | Details |
|---|---|---|
| 1 | Choose the Right Location | Select a sunny location with well-drained soil. |
| 2 | Soil Testing | Conduct a soil test to determine pH and nutrient levels. |
| 3 | Adjust Soil pH | Aim for a slightly acidic to neutral pH (6.0-7.5). |
| 4 | Clear Debris | Remove weeds, rocks, and other debris from the area. |
| 5 | Loosen Soil | Use a garden fork or tiller to loosen the soil to a depth of 6-8 inches. |
| 6 | Add Organic Matter | Mix in well-rotted compost or aged manure for fertility. |
| 7 | Incorporate Nutrients | Based on soil test results, add necessary nutrients like phosphorus and potassium. |
| 8 | Provide Support | Install trellises or supports for climbing pea varieties. |
| 9 | Create Rows or Mounds | Form rows or mounds for planting, spacing them according to pea variety. |
| 10 | Planting Depth | Plant peas 1 to 2 inches deep, following recommended spacing. |
| 11 | Mulch the Soil | Apply a layer of organic mulch to retain moisture and suppress weeds. |
| 12 | Watering | Keep the soil consistently moist, especially during flowering and pod development. |
| 13 | Fertilize Mid-Season | Side-dress with a balanced fertilizer when plants start flowering. |
| 14 | Monitor Pests and Diseases | Keep an eye out for common pests and diseases, treat as needed. |
| 15 | Harvest Timely | Harvest peas when pods are plump and seeds are tender. |
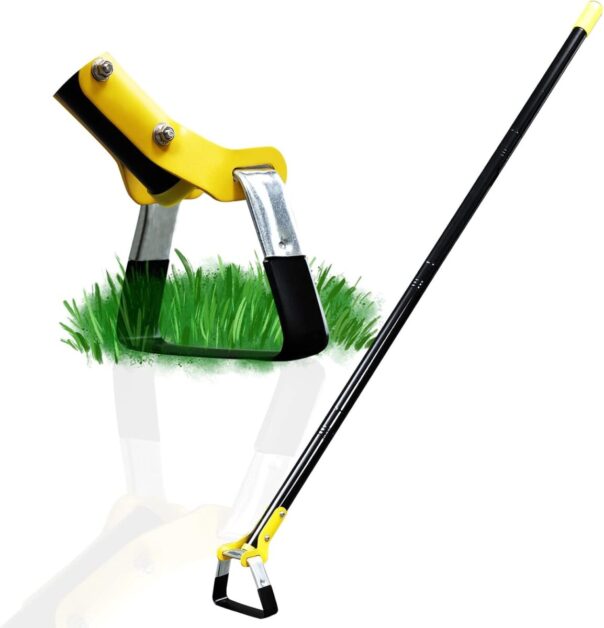
Review: DonSail Hoe Garden Tool – Adjustable – Used in My Garden
I recently purchased the DonSail Adjustable Hoe Garden Tool to assist with various tasks in my garden, and it has proven to be a valuable addition to my gardening toolkit.
One of the standout features of this hoe is its adjustable length. The telescoping handle can be extended to suit different tasks and user heights, significantly reducing strain on my back and knees. This adjustability has made long gardening sessions much more comfortable.
The tool’s sturdy construction is another major plus. It feels durable and capable of handling rigorous gardening activities, from weeding to cultivating and breaking up soil. Despite its robustness, the hoe is lightweight, which makes it easy to maneuver without causing fatigue during extended use.
I also appreciate the comfort grip on the handle. It provides a secure and comfortable hold, even when working for longer periods. The compact size and adjustable handle make it easy to store in my garden shed, which is a bonus given my limited storage space.
However, there are a few minor drawbacks. While the telescoping handle is convenient, I noticed it can sometimes loosen during use, requiring occasional readjustments. The adjustable length might also be insufficient for very tall users or for reaching more distant garden spots. Additionally, the price is higher compared to traditional, non-adjustable hoes, which might be a consideration for budget-conscious gardeners.
Overall, my experience with the DonSail Adjustable Hoe Garden Tool has been positive. Its versatility, sturdy construction, and ergonomic design have made my gardening tasks more efficient and comfortable. Despite a few minor inconveniences, it’s a worthwhile investment for anyone looking to enhance their gardening experience.
✅ Sturdy Construction: Made with durable materials to withstand rigorous gardening tasks.
✅ Versatile Use: Ideal for weeding, cultivating, and breaking up soil in various garden areas.
✅ Lightweight Design: Easy to maneuver, making it suitable for extended use without fatigue.
✅ Comfort Grip: Ergonomic handle provides a secure and comfortable grip during use.
✅ Easy Storage: Compact size and adjustable handle make it easy to store in small spaces.
❌ Limited Reach: Adjustable length might still be insufficient for very tall users or for reaching distant garden spots.
❌ Price: Higher price compared to non-adjustable, traditional hoes.
❌ Assembly Required: Some users may find initial assembly and adjustment process cumbersome.
❌ Weight Balance: Lightweight design may compromise balance when dealing with tougher soil or larger garden areas.
❌ Durability of Moving Parts: Telescoping and adjustable parts may wear out faster than fixed components, impacting long-term durability.
Planting Peas: Step-by-Step Instructions for a Successful Start
Planting peas is a crucial step in establishing a successful pea crop in your garden. By following these step-by-step instructions, you can ensure that your pea plants get off to the right start and thrive throughout the growing season.

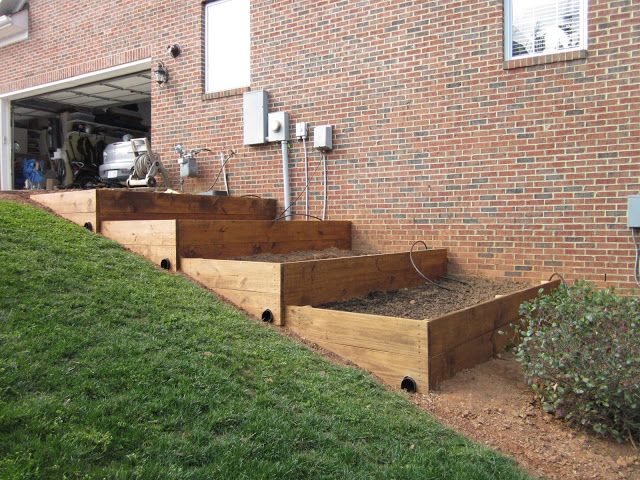
- Choose a Sunny Location:
- Select a spot that receives at least six to eight hours of direct sunlight per day. Peas thrive in sunny conditions.
- Raised beds are also a good option because the soil warms up faster, promoting faster germination.
- Prepare the Soil:
- Ensure good drainage by loosening the soil to a depth of 6-8 inches using a garden fork or tiller.
- Remove any weeds or debris from the planting area.
- Incorporate organic matter, such as compost, to improve soil fertility.
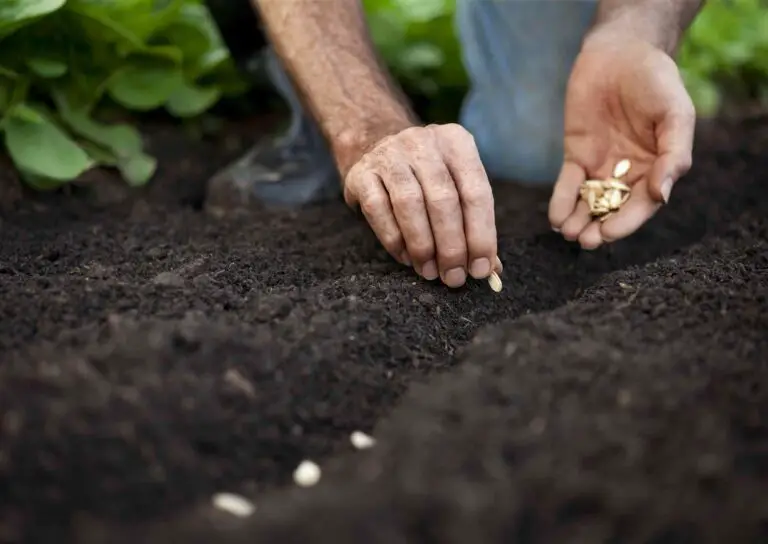
- Sow the Seeds:
- Dig a trench about two inches deep and six inches wide.
- Space the pea seeds about two inches apart along the trench.
- Cover the seeds with soil and gently firm it down.
- Watering:
- Keep the soil consistently moist but avoid waterlogging.
- Regular watering is essential, especially during dry spells, to prevent the plants from drying out.
- Mulching around the pea plants helps retain moisture and suppresses weed growth.
- Provide Support:
- Peas are vining plants. Install a trellis, stakes, or mesh netting near the planted row.
- This support system keeps the foliage off the ground, reduces disease risk, and makes harvesting easier.
Now that you have planted your peas with care and attention, it’s time to monitor their progress and ensure they receive the necessary care throughout the growing season. Stay tuned for our upcoming articles on providing proper watering, ensuring adequate sunlight, fertilizing peas, and managing pests and diseases to achieve a bountiful harvest.
Providing Proper Watering: Essential Tips for Pea Plant Hydration
Proper watering is crucial for the healthy growth and development of pea plants. As peas have shallow roots, it is important to provide them with consistent moisture while avoiding waterlogged soil.
Drip Irrigation System: If available, use a drip irrigation system for efficient watering directly to the base of the plants.
Alternative Methods: If a drip system is not accessible, consider using a soaker hose or a watering can with a fine nozzle.
Assess Water Needs: Pea plants require approximately 1-1.5 inches of water per week, including rainfall.
Check Soil Moisture: Before watering, assess the soil moisture by inserting a finger into the soil up to the first knuckle.
Wait if Moist: If the soil feels moist, delay watering until it becomes drier.
Water if Dry: If the soil feels dry, it’s time to water the plants to maintain adequate moisture levels.
Early Morning Watering: Water your pea plants in the early morning to allow leaves to dry quickly, reducing the risk of fungal diseases.
Avoid Midday Heat: Avoid watering during the hottest part of the day to minimize evaporation and water loss.
By following these essential tips for pea plant hydration, you can ensure optimum water management for your pea plants, leading to healthy growth and a bountiful harvest.
Ensuring Adequate Sunlight: How to Position Your Pea Plants for Optimal Growth
Positioning your pea plants in the right location is crucial to ensure they receive adequate sunlight for optimal growth.
- Sunlight Requirements:
- Peas thrive in full sun, requiring a minimum of 6-8 hours of direct sunlight per day.
- Choose a spot that receives the most sunlight throughout the day.
- Orientation and Arrangement:
- Position your pea rows from east to west.
- Place the tallest plants on the north side to prevent shading of other plants.
- This arrangement ensures that all pea plants receive maximum sunlight without obstruction.
- Avoid Excessive Shade:
- Do not plant peas in areas with excessive shade from trees or structures.
- Shading can hinder pea growth and reduce overall yield.
By strategically placing your pea plants to receive adequate sunlight, you can ensure they have the energy they need to flourish and produce a bountiful harvest.
Fertilizing Peas: Understanding the Nutritional Needs of Pea Pods
Fertilizing pea plants is an essential aspect of ensuring their healthy growth and maximizing the yield of pea pods. Peas, like other plants, require specific nutrients to thrive and produce abundant and flavorful harvests. Understanding the nutritional needs of pea pods is crucial for successful gardening.
- Understand Nutrient Requirements:
- Key Nutrients: Pea plants require nitrogen, phosphorus, and potassium for healthy growth and pea pod production.
- Roles of Nutrients: Nitrogen promotes foliage growth, phosphorus supports flower and fruit development, and potassium enhances overall plant health and disease resistance.
- Perform a Soil Test:
- Before Planting: Conduct a soil test before planting to assess existing nutrients levels in the soil.
- Informed Decisions: Use soil test results to make informed decisions about fertilization needs and adjustments.
- Prepare the Soil:
- Incorporate Organic Matter: Improve soil fertility by incorporating organic matter like compost or well-rotted manure into the soil.
- Enhance Nutrient Balance: Organic matter enriches the soil with essential nutrients and improves its structure.
- Choose the Right Fertilizer:
- Select Balanced Fertilizer: Choose a fertilizer that provides a balanced mix of nitrogen, phosphorus, and potassium.
- Match Plant Needs: Ensure the fertilizer matches the specific nutrient requirements of pea plants.
- Apply Fertilizer Appropriately:
- Timing: Apply fertilizer before planting or during the early stages of growth.
- Follow Instructions: Follow the manufacturer’s instructions regarding application rates and methods.
- Even Distribution: Apply fertilizer evenly around the base of the plants to ensure uniform nutrient uptake.
- Monitor Plant Health:
- Observation: Monitor the health and growth of pea plants throughout the growing season.
- Adjust as Needed: If signs of nutrient deficiency appear, adjust fertilization practices accordingly.
Understanding the essential role of nitrogen, phosphorus, and potassium in pea pod development is key to providing the right nutrients at the right time. By performing a soil test and using appropriate fertilizers, you can create an ideal growing environment that nourishes your pea plants and supports the growth of abundant and delicious pea pods.
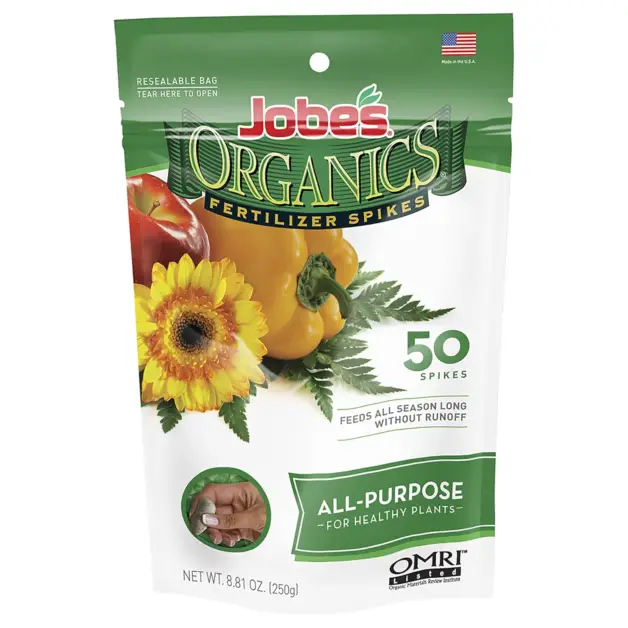
Review: Jobe’s Organics All Purpose Fertilizer Spikes – Used in My Garden for Peas Planting
I recently tried Jobe’s Organics All Purpose Fertilizer Spikes in my garden to give my pea plants a nutrient boost, and here’s how it worked out.
One of the biggest advantages of these fertilizer spikes is their ease of use. The pre-measured spikes make application straightforward and mess-free. I simply inserted them into the soil around my pea plants, and they began to release nutrients gradually. This convenience saved me a lot of time and effort compared to mixing and spreading traditional fertilizers.
The organic formula is another significant plus. I appreciate that these spikes are made with natural ingredients, promoting a healthier, chemical-free environment in my garden. My pea plants have responded well, showing robust growth and vibrant green leaves, which I attribute to the continuous nourishment provided by the spikes.
However, there are a few things to consider. The localized nutrient release means that for larger garden areas, you’ll need multiple spikes to ensure even coverage. This can add up in cost, especially since these organic spikes are pricier than conventional fertilizers. Additionally, while the slow-release formula is beneficial for steady growth, it might not provide the immediate nutrient boost that some plants require during critical growth phases.
Placement is crucial with these spikes. Incorrect placement can lead to uneven nutrient distribution, so make sure to follow the instructions carefully. Also, breaking the spikes apart from the packaging can be a bit tricky and might require some extra effort.
Overall, my experience with Jobe’s Organics All Purpose Fertilizer Spikes has been positive. My pea plants are thriving, and I love the convenience and environmental benefits of using an organic product. If you’re looking for an easy, mess-free fertilizer option and are willing to invest a bit more, these spikes are a great choice for maintaining healthy, vibrant plants in your garden.
- Easy to Use: Pre-measured spikes simplify application, ensuring even distribution of nutrients.
- Organic Formula: Made with organic ingredients, promoting healthy, chemical-free gardening.
- Long-Lasting: Provides continuous nourishment for plants over several weeks.
- Versatile: Suitable for a wide range of plants, including vegetables, flowers, and shrubs
- No Mess: Minimizes the mess and hassle associated with traditional fertilizers.
- Eco-Friendly: Supports sustainable gardening practices by enriching soil health.
- Cost: Higher price compared to conventional fertilizers.
- Limited Reach: Fertilizer release is localized around the spike, requiring multiple spikes for larger areas.
- Slow Release: May not be suitable for plants needing immediate nutrient boost.
- Placement Sensitivity: Incorrect placement can result in uneven nutrient distribution.
- Decomposition Time: Spikes take time to break down, which might not align with all plant growth cycles.
- Packaging: Some users report difficulty in breaking the spikes apart from the packaging.
Managing Pests and Diseases: Effective Strategies for Protecting Your Pea Plants
Pest and disease management is a crucial aspect of maintaining healthy and productive pea plants. By implementing effective strategies, you can protect your pea plants from potential threats and ensure a bountiful harvest. One key strategy is regular monitoring and scouting for signs of pests or diseases. By closely observing your plants, you can quickly identify any issues and take prompt action.
The table explain the effective strategies for managing pests and diseases to protect your pea plants:
| Pest/Disease | Description | Prevention and Control Strategies |
|---|---|---|
| Aphids | Small, sap-sucking insects that cluster on new growth. | – Introduce beneficial insects like ladybugs. – Spray with a strong stream of water to dislodge aphids. – Apply neem oil or insecticidal soap. |
| Powdery Mildew | Fungal disease causing white powdery patches on leaves. | – Provide proper spacing for air circulation. – Water at the base, avoiding overhead irrigation. – Apply fungicides or use neem oil preventively. |
| Pea Moths | Caterpillars that feed on developing pea pods. | – Practice crop rotation to disrupt the moth’s life cycle. – Use row covers during flowering to prevent egg-laying. – Apply Bacillus thuringiensis (Bt) insecticide. |
| Root Rot (Fusarium) | Fungal disease causing wilting and yellowing of plants. | – Ensure well-drained soil. – Rotate crops to reduce disease pressure. – Use fungicide-treated seeds. – Apply compost to promote soil health. |
| Pea Enation Mosaic Virus | Viral disease causing mottled yellowing of leaves. | – Plant resistant pea varieties. – Control aphid populations to prevent viral transmission. – Remove and destroy infected plants. |
| Cutworms | Larvae that cut through seedlings at the base. | – Use collars around young plants. – Handpick cutworms in the evening. – Apply diatomaceous earth as a barrier. – Release predatory insects like parasitic wasps. |
| Spider Mites | Tiny arachnids that suck plant sap, causing stippling. | – Increase humidity to discourage mites. – Spray plants with water to remove mites. – Apply neem oil or insecticidal soap. – Introduce predatory mites. |
Furthermore, introducing beneficial insects such as ladybugs or lacewings can act as natural predators for pests, reducing the need for chemical interventions. By implementing these strategies, you can effectively manage pests and diseases, promoting the overall health and vigor of your pea plants.
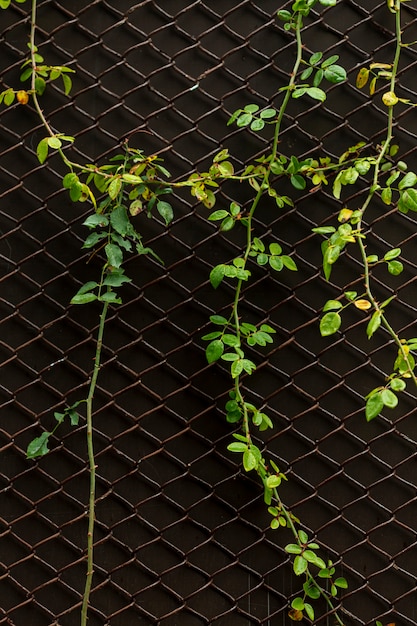
Trellising and Support: Methods to Help Pea Vines Climb and Thrive
To ensure the healthy growth of your pea plants and maximize their productivity, proper trellising and support methods are crucial. Pea vines are known for their climbing nature, and providing them with the necessary support not only helps them climb but also prevents damage and promotes proper airflow, reducing the risk of disease.
- Trellises:
- Construct trellises using wooden or metal posts.
- Stretch wire or string horizontally between the posts.
- As pea vines grow, they naturally cling to the trellis.
- Benefits:
- Prevents vine entanglement.
- Easier monitoring and harvesting of pea pods.
- Creates vertical growing space, ideal for limited garden areas.
- Pea Netting System:
- Use lightweight mesh material (pea netting).
- Stretch it horizontally across a support structure (e.g., wooden stakes).
- Train pea vines to grow along the netting.
- Advantages:
- Flexible and adaptable support.
- Allows vines to spread out for maximum sunlight exposure.
- Reusable for multiple growing seasons.
Both trellising and pea netting methods offer reliable support and encourage proper growth for your pea plants. Experiment with different systems to find the one that suits your gardening style and space best. By focusing on providing the necessary support, you can ensure that your pea vines climb and thrive, resulting in a bountiful harvest of delicious and nutritious pea pods.
Review: CANAGROW Heavy Duty Garden Trellis Netting – Used in My Garden for Peas Planting
I recently used the CANAGROW Heavy Duty Garden Trellis Netting in my garden to support my pea plants, and it has been a game-changer for my vertical gardening setup.
The heavy-duty material of this trellis netting is impressive. It’s strong and durable, providing excellent support for my pea vines, which can get quite heavy as they grow. The large mesh size is perfect for allowing the plants to weave through easily, and it gives them plenty of space to spread out and thrive.
One of the best features is its versatility. While I primarily used it for peas, it’s suitable for a wide range of climbing plants, including tomatoes and cucumbers. Installation was straightforward, although it did take a bit of time to get everything set up properly. Once installed, it has held up well, even under the weight of the fully-grown plants.
The UV-resistant coating is a significant advantage, ensuring that the netting doesn’t degrade under the sun’s rays. This durability means I can leave it up throughout the growing season without worrying about it deteriorating. Additionally, the netting is reusable, which makes it a cost-effective solution for multiple growing seasons.
However, there are a few considerations. The initial setup can be time-consuming, especially if you’re covering a larger area. You’ll also need sturdy stakes or a frame to support the netting and the plants adequately. Storing the netting when not in use can be a bit cumbersome, as it tends to get tangled. Handling the edges requires some care, as they can be slightly sharp.
Overall, my experience with the CANAGROW Heavy Duty Garden Trellis Netting has been very positive. It has provided excellent support for my pea plants, helping them grow vertically and stay healthy. If you’re looking for a durable, versatile trellis solution for your garden, this netting is a great choice.
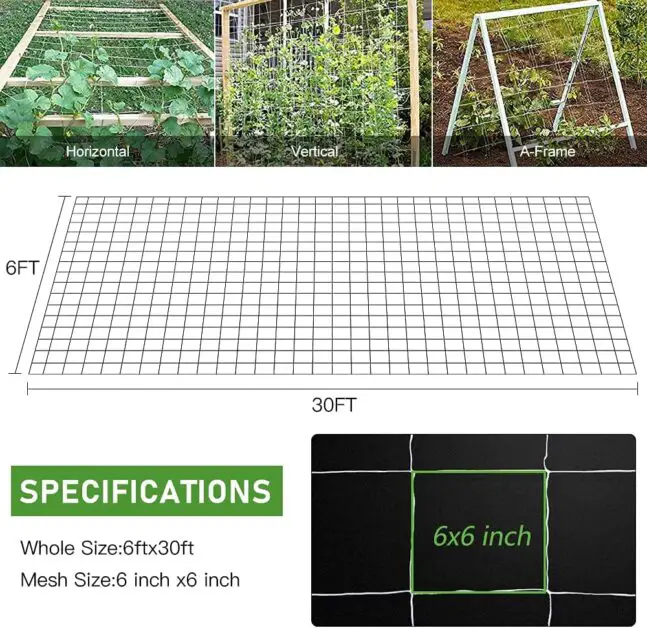
✅ Large Mesh Size: The ample mesh size allows for easy weaving of plants and provides adequate space for growth.
✅ Versatile Use: Suitable for a variety of plants including tomatoes, peas, cucumbers, and more.
✅ Easy Installation: Simple to install with the included instructions and can be customized to fit different garden spaces.
✅ UV-Resistant: The UV-resistant coating ensures the netting withstands sun exposure without degrading.
✅ Reusable: Can be reused for multiple growing seasons, offering good value for money.
❌ Support Needed: Requires sturdy stakes or a frame to support the weight of the netting and the plants.
❌ Storage: Can be cumbersome to store when not in use, as the material can get tangled.
❌ Sharp Edges: Some users might find the edges a bit sharp, requiring careful handling during installation.
❌ Mesh Size Limitation: The mesh size, while generally suitable, might be too large for very small or delicate plants.
❌ Weather Vulnerability: In extreme weather conditions, the netting could potentially tear or become loose if not securely fastened.
Pruning and Thinning: Techniques to Maintain Healthy Pea Plants
To maintain healthy pea plants, pruning and thinning are essential techniques that help promote optimal growth and maximize the yield of your harvest.

- Understand the Purpose:
- Pruning: Trim back damaged or diseased branches, improve air circulation, and redirect the plant’s energy towards fruit production.
- Thinning: Remove excess pea seedlings to provide ample space for remaining plants to grow and access resources.
- Prepare Tools and Materials:
- Sterilize Gardening Tools: Before pruning, sterilize your gardening tools to prevent the spread of diseases between plants.
- Identify Targeted Areas:
- Pruning: Identify damaged or diseased branches, as well as any areas with poor air circulation.
- Thinning: Identify crowded areas where pea seedlings are densely packed.
- Execute Pruning and Thinning:
- Pruning Technique: Carefully trim back damaged or diseased branches, ensuring clean cuts to promote plant healing.
- Thinning Process: Select the weakest or most crowded pea seedlings for removal, leaving behind the healthiest and most vigorous ones.
- Promote Plant Health:
- Air Circulation: Pruning helps improve air circulation around the plants, reducing the risk of fungal diseases.
- Resource Allocation: Thinning ensures that remaining plants have sufficient space, water, and nutrients for healthy growth.
- Monitor and Adjust:
- Regular Inspection: Continuously monitor the growth and health of your pea plants.
- Adjust Spacing: If necessary, further thin or adjust the spacing between plants to maintain optimal growth conditions.
By following these steps and practicing careful pruning and thinning techniques, you can enhance the overall health and productivity of your pea plants, leading to a successful harvest in your garden.
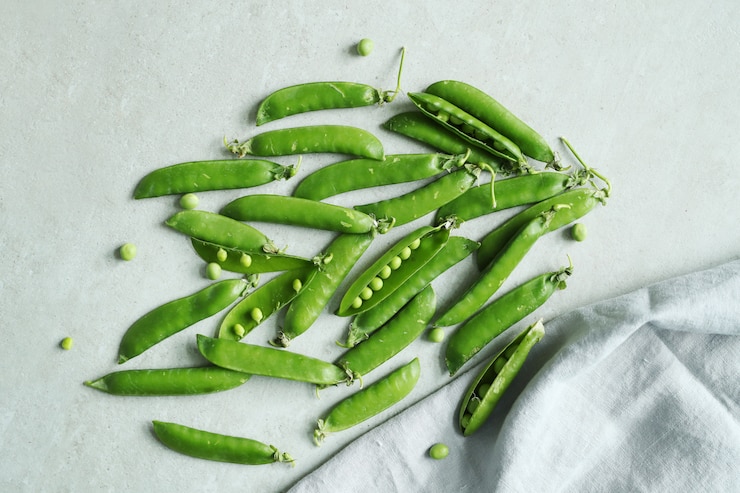
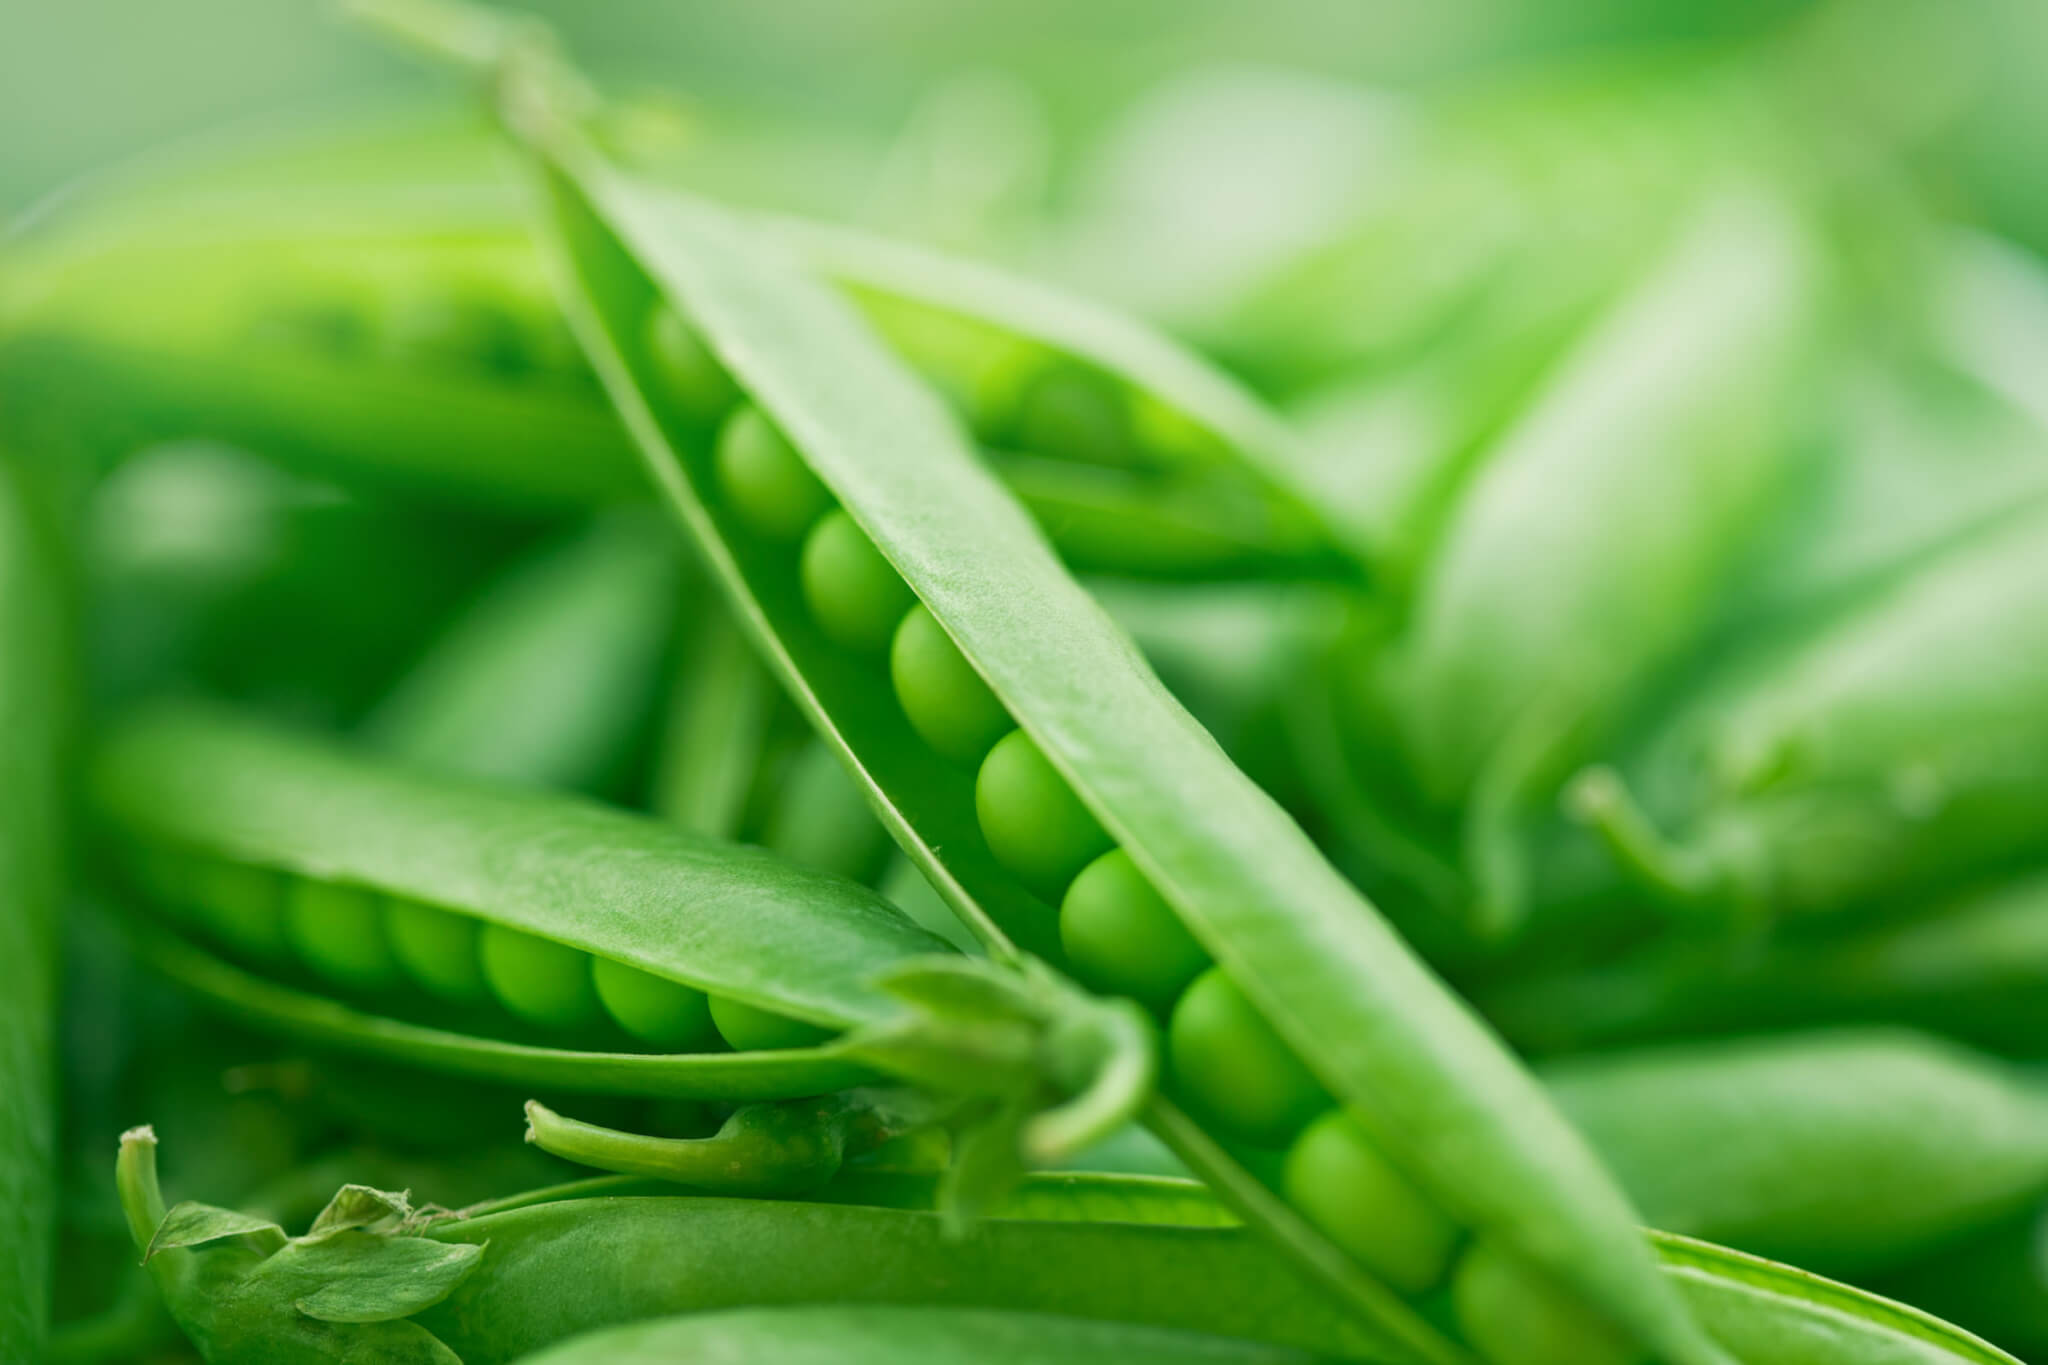
Harvesting Peas: Identifying the Perfect Time to Pick Your Pods
The perfect time to harvest your pea pods can vary depending on the variety you are growing and your personal preference for tenderness and sweetness. However, there are a few key indicators you can look out for to ensure that you are picking your peas at their peak.
- Pod Size:
- Peas are ready to be harvested when the pods have fully filled out and are swollen.
- Gently press the pod with your finger to feel for plumpness.
- If the pod feels firm and full, the peas inside have likely reached maturity.
- If the pod feels flat or empty, wait a little longer before picking.
- Color of Peas:
- Most pea varieties have bright green peas when they are ready to be harvested.
- Dull or yellowish peas may be overripe and less flavorful.
- Note that snow peas and sugar snap peas are exceptions:
- Harvest them when the pods are still flat, and the peas inside are relatively small and undeveloped.
Remember to observe both pod size and pea color to determine the best time for harvesting. Happy gardening! 🌱
Storing Fresh Peas: Tips for Keeping Your Harvest Fresh and Flavorful
Freshly harvested peas are a delightful addition to any meal, with their vibrant color and sweet, crisp flavor. To savor their freshness and maintain their flavor for as long as possible, proper storage is essential. Here are some tips to help you store your harvested peas in a way that keeps them fresh and flavorful.
- Gentle Handling: After harvesting, handle peas with care to avoid bruising or damage. Remove any dirt or debris without squeezing or crushing them.
- Airflow: Place cleaned peas in a perforated plastic bag or container to allow for proper airflow. This prevents excess moisture buildup.
- Refrigeration: Store peas in the refrigerator at a temperature between 32-40°F (0-4°C). This helps slow down their natural aging process and preserves their texture and taste.
Remember these points, and your freshly picked peas will stay delicious for longer! 😊
Saving Seeds: How to Collect and Preserve Pea Seeds for Future Planting
When it comes to saving seeds from your pea plants for future planting, it’s important to choose the healthiest and most mature peas to harvest from.
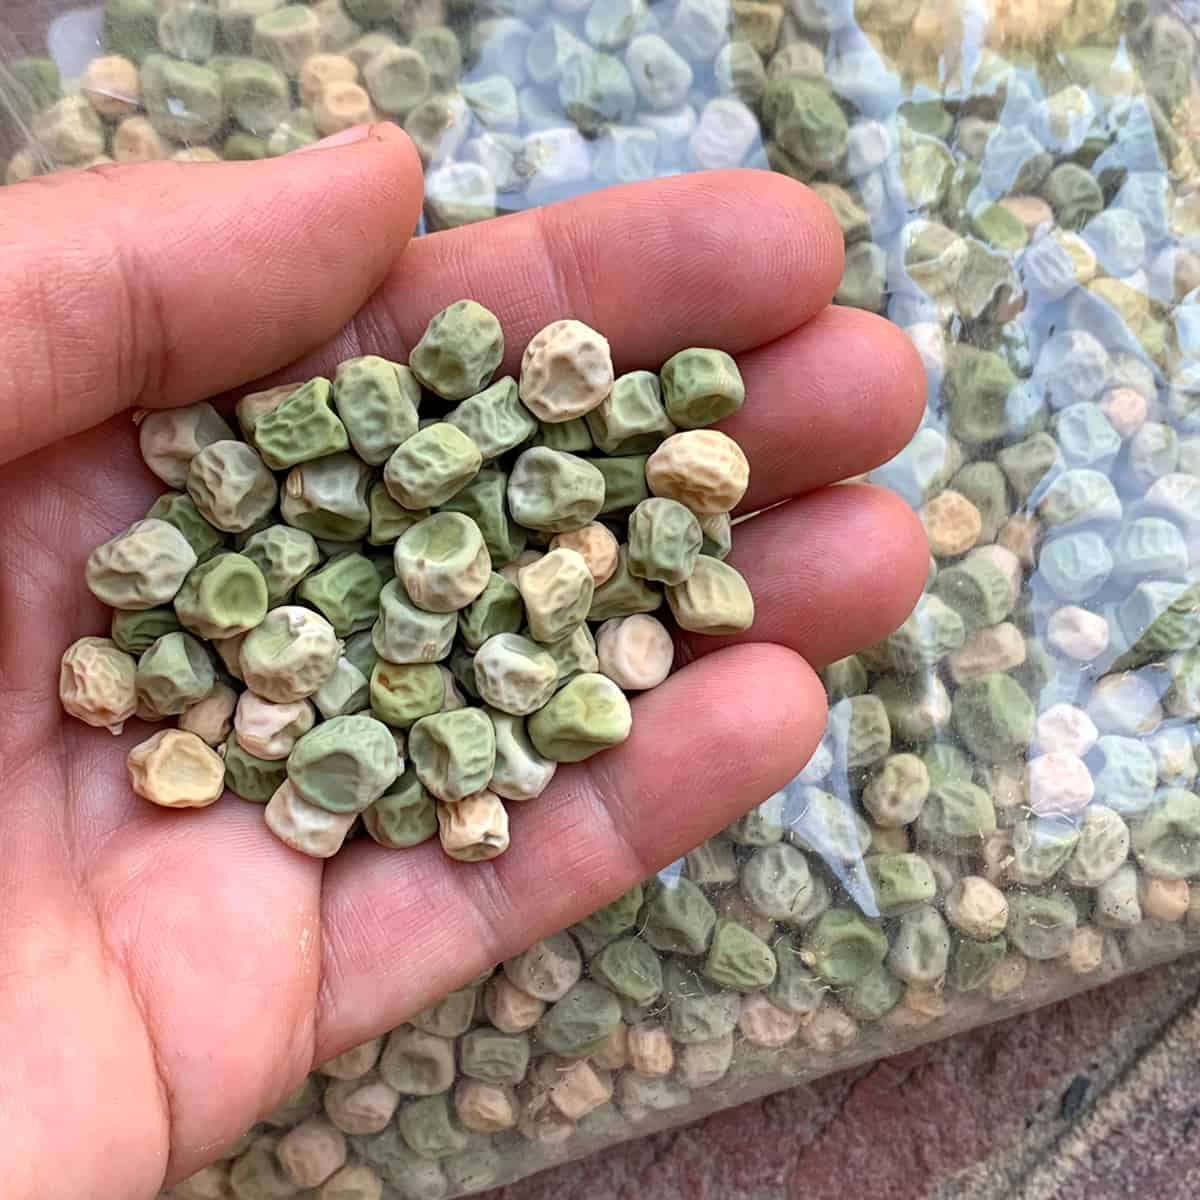
- Select Mature Pea Pods:
- Look for fully developed pea pods that have started to dry out and turn brown.
- Ensure the pods feel firm, and the peas inside are hard and round.
- Avoid harvesting from pods that are still green or soft, as they may not produce viable seeds.
- Prepare for Seed Saving:
- Remove the peas from their pods and spread them out in a single layer on a clean, dry surface.
- Choose a well-ventilated area away from direct sunlight for drying.
- Dry the Peas:
- Allow the peas to air dry for several weeks until they are fully dry.
- Test for dryness by gently squeezing the peas – they should feel hard, not squishy.
- Store the Seeds:
- Transfer the dried seeds to airtight containers such as glass jars or sealed envelopes.
- Label the containers with the seed variety and the date of collection for easy identification.
- Store the containers in a cool, dark place to maintain seed viability.
- Ensure Longevity:
- Properly dried and stored pea seeds can remain viable for several years.
- Regularly check stored seeds for any signs of mold or deterioration and discard any compromised seeds.
By following these steps, you can successfully save and store pea seeds for future plantings, ensuring a constant supply of quality seeds and continued success in your pea cultivation endeavors.
Troubleshooting Common Pea Growing Issues: Solutions to Potential Challenges
Pea plants are generally easy to grow, but like any garden crop, they can face a few challenges along the way. Understanding and addressing these common issues can help ensure a successful pea harvest.
- Addressing Poor Germination:
- Wait for Optimal Conditions: Ensure soil has warmed up and dried out before planting to avoid cold or wet soil conditions.
- Plant at Proper Depth: Plant seeds at the correct depth, typically about 1 inch deep, to facilitate successful germination.
- Use Fresh Seeds: Opt for fresh and high-quality seeds to improve germination rates.
- Consider Seed Treatment: If poor germination persists, consider using a seed treatment or pre-soaking seeds before planting to enhance germination.
- Managing Pest Infestations:
- Regular Monitoring: Regularly inspect pea plants for signs of pest infestation, such as aphids or pea weevils.
- Employ Organic Pest Control: Apply organic pest control methods, such as introducing beneficial insects or spraying neem oil, to manage pest populations.
- Promote Air Circulation: Ensure proper spacing between plants to promote better air circulation, making it more challenging for pests to establish themselves.
Delicious Ways to Enjoy Peas: Recipes and Serving Ideas for Your Homegrown Harvest
Peas are a versatile and nutritious vegetable that can be enjoyed in a variety of delicious ways. Whether you have grown your own peas or purchased them fresh from the market, there are plenty of recipes and serving ideas to explore. From simple preparations that highlight the natural sweetness of peas to more complex dishes that incorporate them into hearty meals, the options are endless.
- Pea Salad:
- Combine blanched peas with crisp lettuce, sliced radishes, and a tangy vinaigrette.
- Add diced avocado or crumbled feta cheese for extra flavor.
- Pasta Salad:
- Toss cooked peas with cooked pasta, cherry tomatoes, and a pesto sauce.
- Quick and satisfying for a light meal.
- Pea Soup:
- Simmer peas with onions, garlic, and vegetable broth until soft and tender.
- Stir in fresh herbs like mint or basil for an extra burst of flavor.
- Pea and Vegetable Stew:
- Pair peas with other vegetables like carrots, potatoes, and leeks.
- Serve with crusty bread for a hearty and nourishing meal.
Watch video for further information:
FAQ
What are the different types of peas?
There are several different types of peas, including garden peas, snow peas, and sugar snap peas. Garden peas are the traditional pea variety with rounded pods, while snow peas have flat, edible pods and are often used in stir-fries. Sugar snap peas have plump pods that are both sweet and crunchy.
How do I prepare the soil for growing peas?
To create the ideal growing environment for peas, start by loosening the soil with a garden fork or tiller. Remove any weeds or debris, and add organic matter such as compost or well-rotted manure to improve soil fertility and drainage. It’s also important to ensure that the soil has a neutral pH level.
When is the best time to plant peas?
Peas are cool-season crops that prefer cooler temperatures for optimal growth. The best time to plant peas is typically in early spring, as soon as the soil can be worked and the danger of frost has passed. However, some varieties can also be planted in late summer or early fall for a fall harvest.
How often should I water my pea plants?
Pea plants require consistent moisture, especially during flowering and pod development. It’s important to provide them with about 1-1.5 inches of water per week, either through rainfall or irrigation. Be careful not to overwater, as this can lead to root rot and other issues.
How much sunlight do pea plants need?
Peas thrive in full sun, which means they require at least 6-8 hours of direct sunlight each day. Position your pea plants in a location that receives ample sunlight to ensure optimal growth and production.
Do pea plants require fertilizer?
Peas are nitrogen-fixing plants, which means they have the ability to convert nitrogen from the air into a usable form for themselves and other plants. In most cases, pea plants do not require additional fertilizer. However, if your soil is lacking in nutrients, you can apply a balanced fertilizer before planting.
How can I protect my pea plants from pests and diseases?
To protect your pea plants from pests, consider using physical barriers such as netting or row covers. Additionally, practicing crop rotation and maintaining proper spacing between plants can help reduce the risk of diseases. If necessary, organic pest control methods like insecticidal soap or neem oil can be used.
Do pea plants need support?
Yes, pea plants are vining plants that require support to climb and thrive. You can provide support by installing trellises, stakes, or a pea fence. This will help keep the plants upright and prevent them from sprawling on the ground.
Is pruning necessary for pea plants?
Pruning is not typically necessary for pea plants. However, you can pinch off the tips of the plants once they reach their desired height to encourage bushier growth. Removing any damaged or diseased foliage can also help maintain the overall health of the plants.
How do I know when to harvest my pea pods?
Pea pods are ready to be harvested when they are plump and filled out, but the peas inside are still tender. The best way to determine if they are ready is by gently squeezing the pods. If they feel firm and the peas inside are well-formed, it’s time to harvest.
How can I store fresh peas to keep them fresh?
To keep fresh peas fresh, it’s best to store them unwashed in a perforated plastic bag or a breathable container in the refrigerator. They can be kept for up to 5-7 days. Before consuming, wash the peas thoroughly to remove any dirt or debris.
Can I save and plant pea seeds from my homegrown harvest?
Yes, you can save and plant pea seeds from your homegrown harvest. Allow the pods to fully mature and dry on the plants before harvesting. Remove the seeds from the pods and store them in a cool, dry place until you are ready to plant them in the next growing season.
What are some common issues when growing peas and how can I troubleshoot them?
Some common issues when growing peas include powdery mildew, aphid infestations, and poor pod development. To troubleshoot powdery mildew, ensure good air circulation and avoid overhead watering. For aphids, use insecticidal soap or introduce beneficial insects. To improve pod development, make sure the plants receive enough sunlight and water consistently.
Can you provide some delicious recipes and serving ideas for homegrown peas?
– Pea and mint soup: Blend cooked peas with fresh mint, vegetable broth, and a touch of cream for a refreshing soup.
– Pea and bacon risotto: Add cooked peas and crispy bacon to a creamy risotto for a flavorful and comforting dish.
– Pea and feta salad: Toss blanched peas with crumbled feta, cherry tomatoes, and a lemon vinaigrette for a light and refreshing salad.
– Pea pesto pasta: Blend cooked peas, garlic, Parmesan cheese, and olive oil to create a vibrant pesto sauce. Toss with your favorite pasta for a quick and tasty meal.
Studied Agricultural Engineering-Plant Protection at University of California, Davis.
Head of Content writing team at Southelmontehydroponics.com