Build Your Own Greenhouse: A Guide to 84 DIY Options
Are you ready to take your gardening game to the next level? Imagine stepping into your backyard oasis, surrounded by vibrant blooms and thriving veggies, all year round. Well, get ready to turn that dream into a reality because we’re diving into the world of DIY greenhouses! Did you know that building your own greenhouse not only boosts your garden’s productivity but also adds value to your property?
From quaint miniatures to spacious wonders, there’s a DIY greenhouse option for every budget and skill level. Join us as we explore 84 ingenious ways to craft your personal plant paradise. Get ready to unleash your inner horticulturist and cultivate a space that’s as beautiful as it is bountiful! Let’s get growing!
Table of Contents
Understanding the Benefits of a DIY Greenhouse
A DIY greenhouse offers a multitude of benefits for gardening enthusiasts.
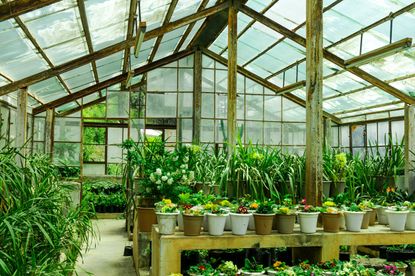
- Extended Growing Season:
- Greenhouses allow plants to thrive beyond their normal limits by providing a controlled environment.
- Protects plants from extreme weather conditions like frost, excessive heat, or heavy rains.
- Enables early seedling starts in spring and extends fresh produce harvesting into colder months.
- Diverse Plant Cultivation:
- DIY greenhouse offer the opportunity to grow a wide variety of plants.
- Ideal for tropical flowers, exotic fruits, delicate herbs, and other species that may not thrive in your local climate.
By controlling factors such as temperature, humidity, and light levels, you can mimic the natural habitat of your desired species, ensuring their healthy growth and abundant yield. Not only does this expand your gardening possibilities, but it also allows you to experiment and unleash your creativity in cultivating a diverse range of plants within a single space.
Selecting the Ideal Location for Your Greenhouse
When it comes to selecting the ideal location for your greenhouse, there are a few key factors to consider. .
- Select a Sunlit Location:
- Choose a spot with ample sunlight exposure, ideally six to eight hours of direct sunlight per day.
- Avoid areas obstructed by trees, buildings, or other structures that may cast shade.
- Consider Orientation:
- Position the greenhouse in an east-west direction to maximize sun exposure on all sides.
- This orientation promotes even growth and minimizes shading issues.
- Ensure Access to Water:
- Place the greenhouse near a water source, such as a hose or irrigation system, for convenient watering.
- Ensure easy access to water to maintain adequate moisture levels for greenhouse plants.
- Account for Climate and Weather:
- Consider the local climate and weather patterns when choosing a greenhouse location.
- Provide protection from harsh conditions, such as strong winds or cold temperatures, if necessary.
- Install a heating system to maintain optimal temperature for plants during colder months, if applicable.
By taking these factors into account, you can select the ideal location for your greenhouse and create an environment that promotes optimal plant growth and productivity.
Review: Bio Green PAL 2.0/USDT Palma Greenhouse Heater
I recently installed the Bio Green PAL 2.0/USDT Palma Heater in my greenhouse, and it’s been a fantastic addition. The heater’s efficiency is impressive, maintaining a consistent temperature that has greatly benefited my plants. The adjustable thermostat allows for precise control, ensuring the optimal environment for different plants.
The compact and durable design fits perfectly in my limited space, and its quiet operation means there’s no disturbance. Safety features like overheat protection and splash-proof housing provide peace of mind.
However, it does consume a fair amount of electricity, which could impact your bills. The power cord is quite short, necessitating an extension cord, and the initial setup took some effort. Despite these minor drawbacks, this heater is a reliable choice for any greenhouse.
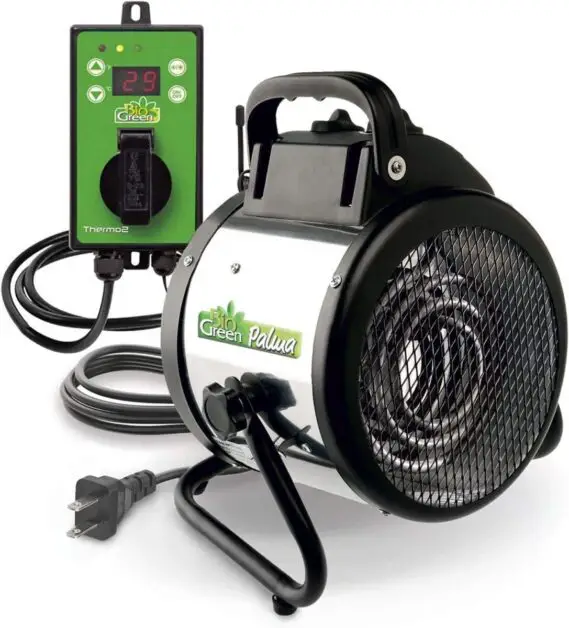
✅ Adjustable Thermostat: Features an adjustable thermostat for precise temperature control.
✅ Compact Design: Space-saving design fits easily in various greenhouse setups.
✅ Durable Construction: Made with robust materials to withstand harsh greenhouse environments.
✅ Safety Features: Includes overheat protection and splash-proof housing for safe operation.
✅ Quiet Operation: Operates quietly, minimizing disturbance in the greenhouse.
❌ Cord Length: Short power cord may require the use of an extension cord.
❌ Initial Cost: Higher upfront cost compared to some other greenhouse heaters.
❌ Manual Adjustment: Requires manual adjustment of the thermostat, which might be inconvenient for some users.
❌ Coverage Area: May not be sufficient for very large greenhouses, needing multiple units.
❌ Setup Complexity: Some users might find initial setup and installation a bit complex.
Assessing the Different Types and Sizes of Greenhouses
When it comes to choosing the right greenhouse for your DIY project, it’s important to assess the different types and sizes available in order to find the best fit for your needs. There are several factors to consider when making this decision, including the space available, your budget, and the specific plants you plan to grow.

- Increased Production and Yield:
- Greenhouses extend the growing season by controlling the climate within the structure.
- They are kept hotter than the surrounding temperature, allowing production and growth even during colder seasons.
- Year-Round Growth:
- Some species can be grown year-round by maintaining a desirable climate.
- Crops and ornamental species that wouldn’t typically thrive in colder regions can be cultivated.
- Conversely, controlled, cool environments can allow growth of plants in warmer or tropical regions.
- Reduced Climate Risks:
- Greenhouses minimize risks associated with climate change.
- Unpredictable seasonal events (such as sudden low temperatures, storms, or dry spells) can damage outdoor crops, but greenhouses provide protection.
- Control Over Growing Conditions:
- Use greenhouses to control pests and diseases.
- Adjust temperature, humidity, and lighting to optimize plant growth.
- Glass greenhouses provide a long-standing structure, while polyethylene (polyhouse) greenhouses are more cost-effective but may reduce lighting and increase humidity.
- Flexible Design and Size:
- Greenhouses offer a spacious environment for many plants.
- Their design won’t limit you in terms of size.
- A-frame roofs prevent rain or snow accumulation.
- However, setting up a greenhouse can be expensive, and it may require its own heating system.
In conclusion, assessing the different types and sizes of greenhouses is an important step in your DIY greenhouse project. By taking the time to consider your specific needs and requirements, you can ensure that you select a greenhouse that will provide the optimal conditions for your plants to thrive. So, take the time to do your research and make an informed decision that will set the foundation for a successful and rewarding gardening experience.
Choosing the Right Materials for Your DIY Greenhouse
When it comes to building your own DIY greenhouse, selecting the right materials is crucial for the success and longevity of your project. The materials you choose will determine the overall durability, insulation, and visual appeal of your greenhouse. Therefore, it is important to consider a few factors before making your final decision.
Evaluate the climate in your area, considering factors such as temperature extremes, humidity levels, and weather fluctuations.
Determine the specific challenges posed by your climate, such as hot summers, cold winters, or high winds.
Choose materials that can withstand the climatic conditions in your area.
Consider using double-layered polycarbonate sheets or tempered glass for excellent insulation and durability in extreme weather conditions.
Opt for materials like treated lumber or aluminum that offer resistance against rot, moisture, and pests.
Prioritize materials that provide good insulation to regulate temperature and protect plants from extreme heat or cold.
Select durable materials that can withstand prolonged exposure to the elements without deteriorating or requiring frequent maintenance.
Aim for materials that offer long-term durability and structural integrity to support the greenhouse’s frame and glazing.
Consider factors such as UV resistance, impact resistance, and overall strength when choosing materials.
Factor in your budget constraints and aesthetic preferences when selecting materials for your greenhouse.
Balance cost-effectiveness with the desired appearance and functionality of the greenhouse structure.
The following table explain about factors to consider when choosing materials for your DIY greenhouse:
| Materials for DIY Greenhouse | Description |
|---|---|
| Frame Material | – Choose from wood, PVC, metal, or aluminum for structural integrity. |
| Covering Material | – Options include polyethylene film, polycarbonate panels, or greenhouse shade cloth. |
| Foundation Material | – Consider treated lumber, concrete, or gravel for stability and durability. |
| Ventilation Material | – Use roof vents, louvers, or exhaust fans for proper air circulation. |
| Insulation Material | – Reflective bubble wrap, double-layered polyethylene, or foam board for temperature control. |
| Flooring Material | – Options include gravel, pavers, or porous tiles for easy cleaning and drainage. |
| Doors and Windows Material | – Choose durable materials like aluminum or polycarbonate for longevity. |
| Shelving Material | – Opt for corrosion-resistant materials such as galvanized steel or aluminum. |
| Fasteners and Connectors | – Select rust-resistant screws, bolts, or connectors for longevity. |
| Sealing and Weather Stripping | – Use silicone caulk or weather stripping to seal gaps and prevent drafts. |
Exploring Various Design Options for Your Greenhouse
When it comes to designing your DIY greenhouse, there are numerous options to consider. The design you choose will depend on various factors, including your specific needs, available space, and budget.

- Lean-To Greenhouse:
- Description: Attached to an existing structure (e.g., house, garage).
- Advantages:
- Cost-effective and space-saving.
- Shares a wall with an existing building.
- Considerations:
- Limited space.
- Relies on the existing structure for support.
- Freestanding Greenhouse:
- Description: Independent structure not attached to any building.
- Advantages:
- Flexibility in location and size.
- Customizable design.
- Considerations:
- Requires its own foundation and heating system.
- Dome-Shaped Greenhouse:
- Description: Unique, aesthetically pleasing design.
- Advantages:
- Excellent air circulation and light distribution.
- Resists snow accumulation.
- Considerations:
- May be more challenging to construct.
- Mini-Greenhouses or Cold Frames:
- Description: Compact and portable structures.
- Advantages:
- Ideal for limited space or temporary use.
- Easily moved to optimize sunlight exposure.
- Considerations:
- Limited capacity for larger plants.
Ultimately, the design you choose should align with your gardening goals, available resources, and desired aesthetic.
Preparing the Ground for Your Greenhouse Foundation
Preparing the ground for your greenhouse foundation is a critical step that sets the stage for the success of your DIY greenhouse project. Before you start construction, it is important to ensure that the ground is properly prepared to provide a stable and level foundation for your greenhouse.
- Clearing the Ground:
- Remove debris, rocks, and large roots from the area where the greenhouse will be constructed.
- Ensure the ground is free from obstacles that may interfere with the construction process.
- Leveling the Ground:
- Level the ground to create a stable and secure foundation for the greenhouse.
- Remove uneven or sloping areas and fill in low spots with suitable materials like sand or gravel.
- Marking the Foundation Location:
- Use stakes and string to outline the dimensions of the greenhouse on the cleared and leveled ground.
- This visual guide will help accurately determine the location and size of the foundation.
- Alignment and Squareness:
- Ensure the marked foundation lines are properly aligned and square to maintain the structural integrity of the greenhouse.
- Double-check measurements and angles to ensure accuracy before proceeding with excavation and foundation laying.
In the next section, we will discuss the construction of the framework for your greenhouse and the different materials you can use to build a sturdy and durable structure. Stay tuned for valuable insights on selecting the right materials and designing your greenhouse to maximize its functionality and efficiency.
The following table explain about the steps for preparing the ground for your greenhouse foundation:
| Ground Preparation for Greenhouse Foundation | Description |
|---|---|
| Site Selection | – Choose a level location with good drainage and ample sunlight. |
| Clear Vegetation | – Remove grass, weeds, or any vegetation from the chosen area. |
| Marking Layout | – Outline the greenhouse dimensions using stakes and strings. |
| Excavation | – Dig a level trench for the foundation, considering the desired depth. |
| Leveling and Grading | – Ensure the site is level and grade away from the greenhouse for proper drainage. |
| Adding Gravel Base | – Lay a gravel base in the excavated area to improve drainage and stability. |
| Compact and Level Gravel | – Compact the gravel using a plate compactor for stability and a level surface. |
| Install Formwork | – Build formwork for concrete foundations, securing it with stakes. |
| Concrete Pouring | – Pour concrete into the formwork, ensuring it is evenly spread and leveled. |
| Curing Period | – Allow the concrete to cure for the recommended period before building on it. |
| Anchor Points Installation | – Install anchor points or brackets for securing the greenhouse frame. |
| Check for Levelness | – Verify that the foundation is level and adjust if necessary before greenhouse assembly. |
| Consider Drainage | – Ensure proper drainage around the foundation to prevent water accumulation. |
.
Constructing the Framework for Your Greenhouse
When it comes to constructing the framework for your greenhouse, there are several key factors to consider.
- Select Durable Materials:
- Choose materials that can withstand outdoor conditions, such as galvanized steel or treated lumber.
- These materials resist rust, decay, and insect damage.
- Prepare the Foundation:
- Measure and level the ground where your greenhouse will stand.
- Use a laser level or string and bubble level to ensure accuracy.
- A solid foundation prevents shifting and instability.
- Assemble the Framework:
- Follow the manufacturer’s instructions or consult with a professional.
- Attach the main supports (beams, posts, or arches) together using screws or bolts.
- Consider adding reinforcement braces or crossbeams for added stability.
- Consider Wind and Snow Load:
- If you live in an area with strong winds or heavy snowfall, reinforce the framework.
- Cross-bracing and additional supports can prevent damage.
Remember to prioritize safety and quality during construction. A well-built framework ensures the longevity and success of your greenhouse. Happy gardening!
Installing the Glazing for Optimal Light Transmission
Installing the right type of glazing is essential for optimizing light transmission in your greenhouse. The glazing material you choose will determine the amount and quality of light that enters your structure, directly impacting the growth and productivity of your plants.
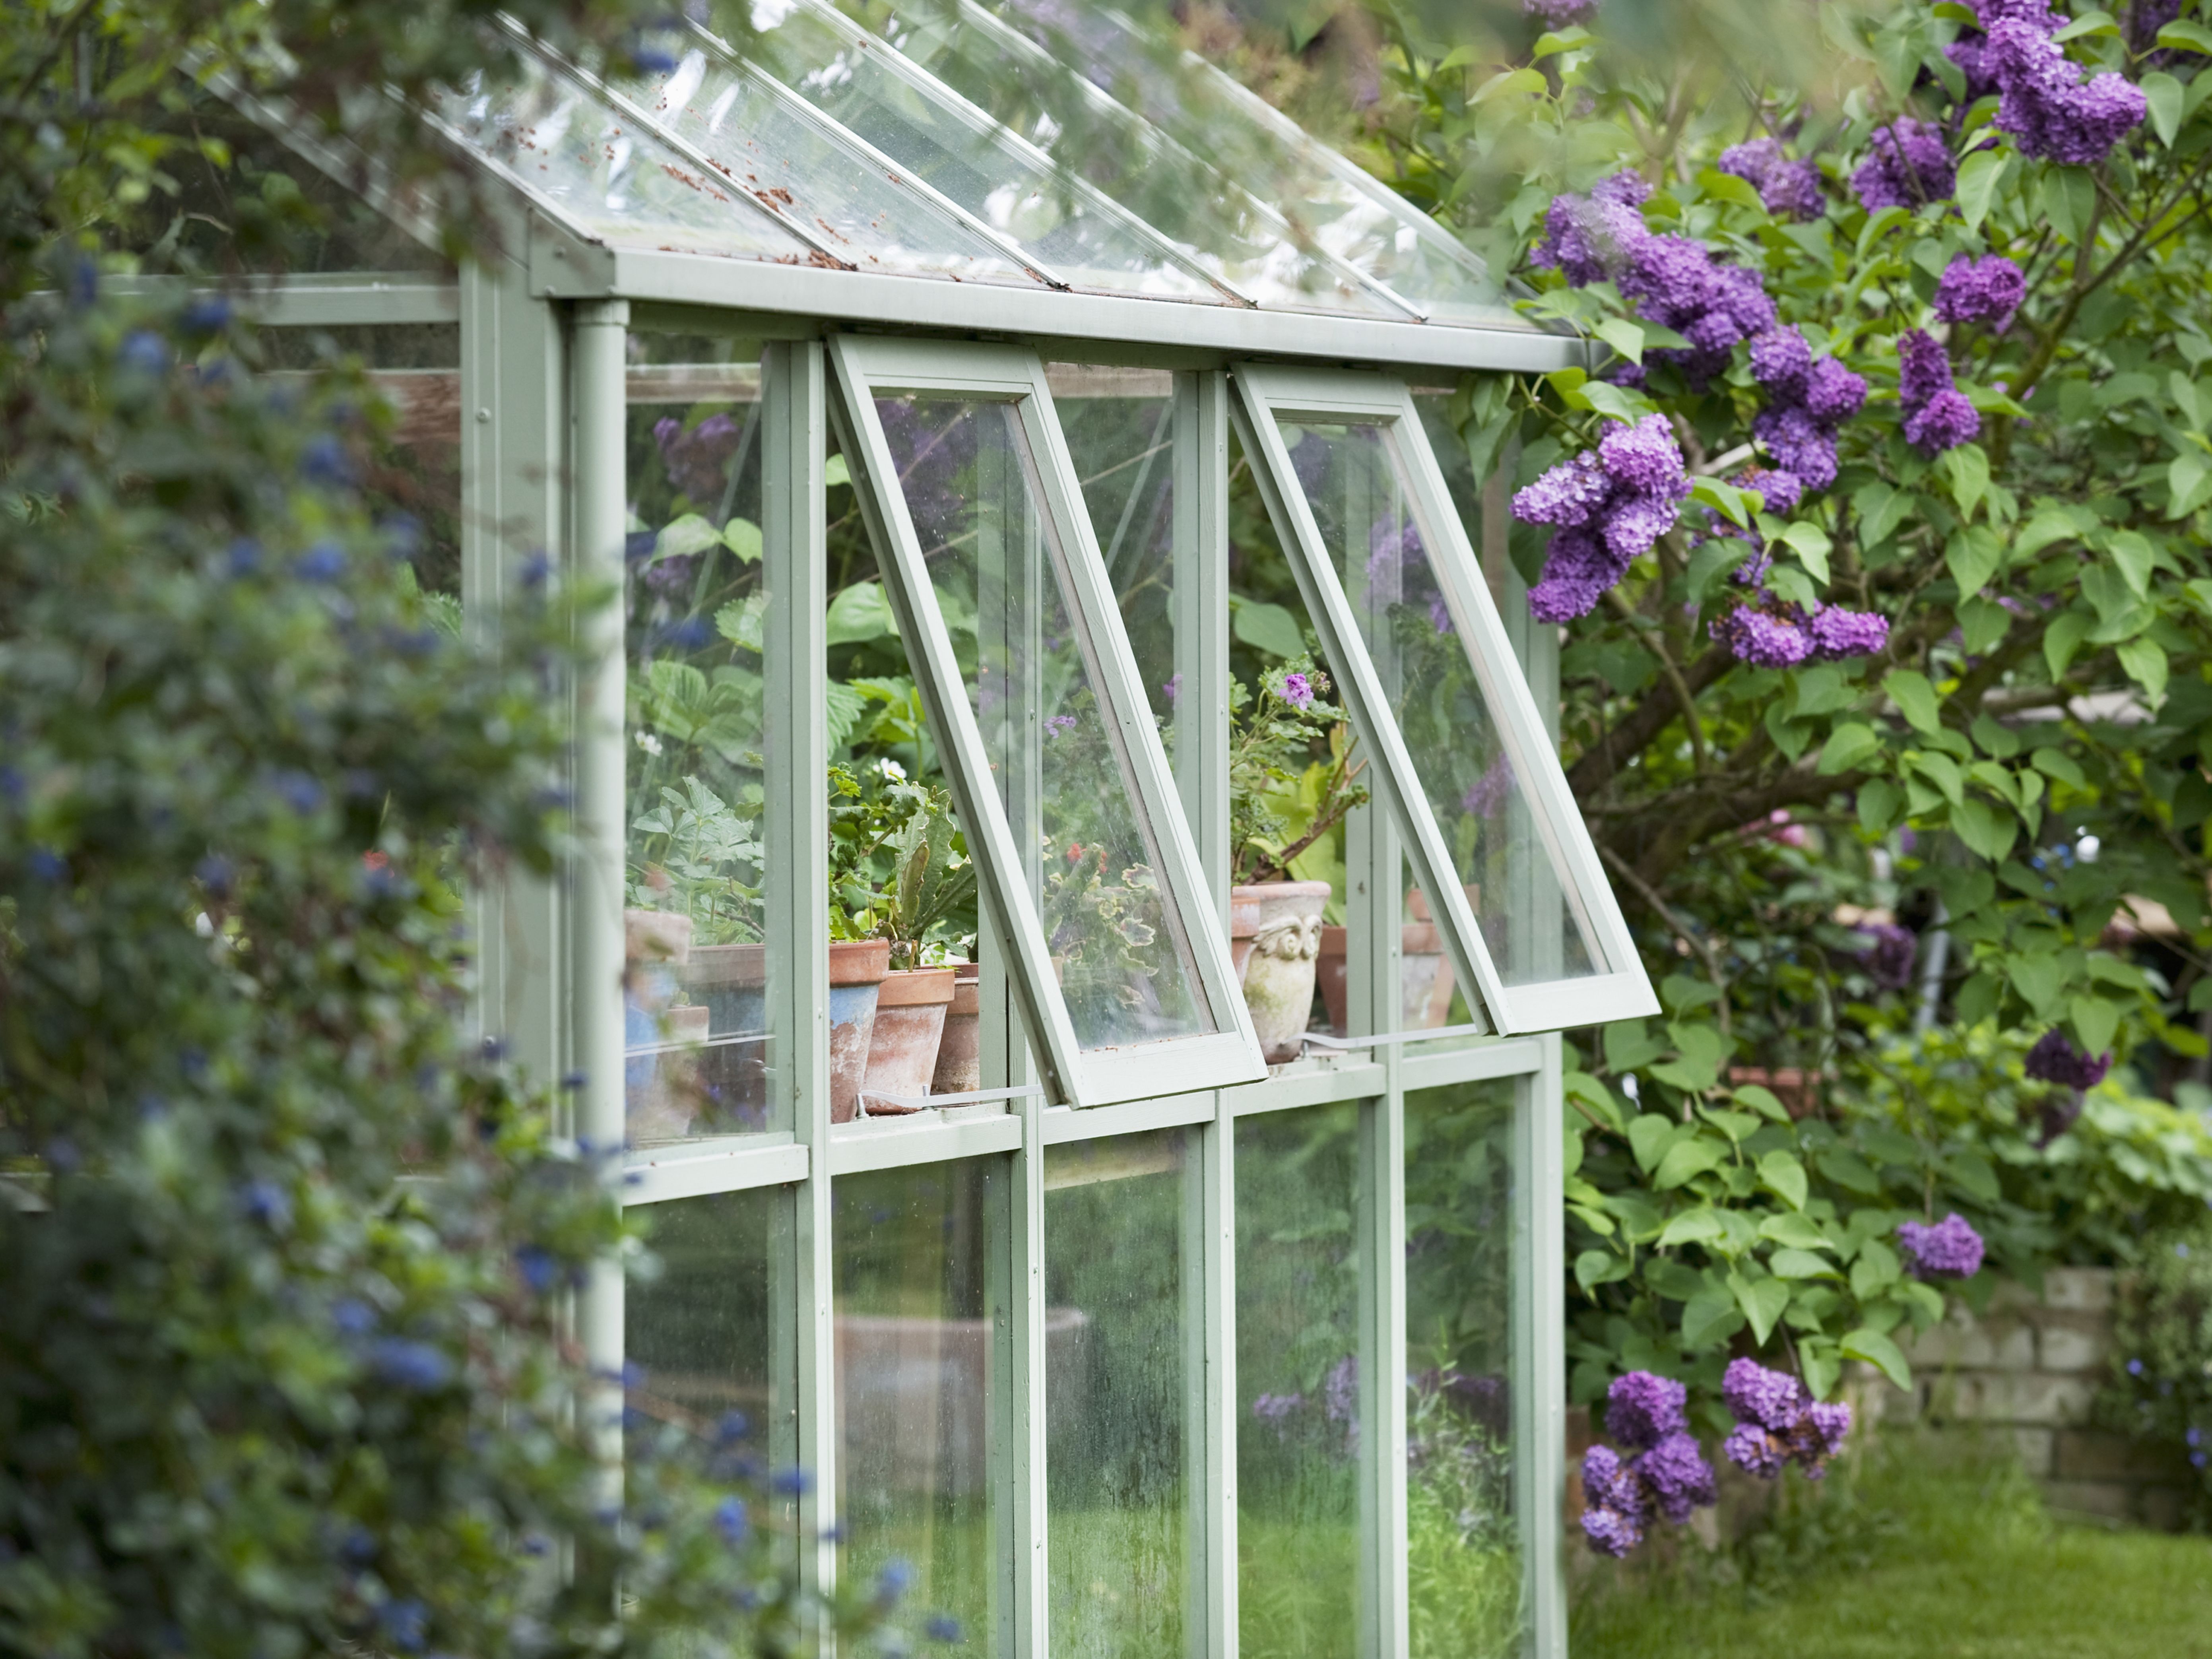
- Glass Glazing:
- Excellent light transmission properties, allowing maximum light to reach plants for healthy growth.
- Classic choice but can be heavy and fragile, requiring careful handling during installation.
- Considered for its clarity and durability but may be more expensive than polycarbonate.
- Polycarbonate Glazing:
- Lightweight, shatterproof, and provides good light transmission.
- Offers better insulation properties, maintaining a more stable internal temperature.
- Considered for its durability, affordability, and ability to withstand harsh weather conditions.
- Considerations for Selection:
- Evaluate factors such as local climate, budget, and specific needs when choosing between glass and polycarbonate.
- Glass may be preferred for its clarity and light transmission, while polycarbonate may be favored for its durability and insulation properties.
- Maintenance and Cleaning:
- Regular cleaning and maintenance are essential to maintain optimal light transmission.
- Remove debris, wash glazing surfaces, and repair any cracks or damages to ensure efficiency and plant health in the greenhouse.
Ventilation Systems: Ensuring Proper Air Circulation
Proper air circulation is vital for maintaining a healthy and productive greenhouse environment. Without adequate ventilation systems, plants can suffer from mold, disease, and poor growth. In this section, we will explore the importance of ensuring proper air circulation in your greenhouse and discuss some effective ventilation solutions.

- Regulates temperature and prevents heat buildup during the day.
- Controls humidity levels and prevents excessive moisture at night.
- Creates a more stable and favorable environment for plant growth.
- Improves air circulation and reduces risk of pests and diseases that thrive in stagnant air.
There are two main types of greenhouse ventilation systems:
- Natural ventilation:
- Uses ridge vents, sidewall vents, and louvers.
- Relies on wind movement and thermal convection to facilitate airflow.
- Cost-effective and energy-efficient.
- Mechanical ventilation:
- Uses exhaust fans and intake shutters.
- Provides controlled air exchange.
- Ideal for larger greenhouses or those in extreme climates.
- Requires electricity and can be more expensive to install and operate.
The choice of ventilation system depends on factors like greenhouse size, location, climate, and plant needs.
3. A combination of natural and mechanical ventilation often works best, with regular monitoring and adjustments to maintain optimal conditions.
Review: KEN BROWN 12 Inch Shutter Exhaust Fan
I recently installed the KEN BROWN 12 Inch Shutter Exhaust Fan in my greenhouse, and it’s been fantastic. It provides excellent airflow, significantly improving air circulation. The automatic shutters are a great feature, opening and closing as needed.
The fan is quiet and didn’t disrupt the greenhouse environment. Installation was easy with the clear instructions, though I had to use an extension cord due to the short power cord. The durable construction gives me confidence it will last a long time.
However, I noticed the shutters don’t always close tightly, and some air leakage occurs. Despite this, it’s a reliable and efficient addition to my greenhouse setup.
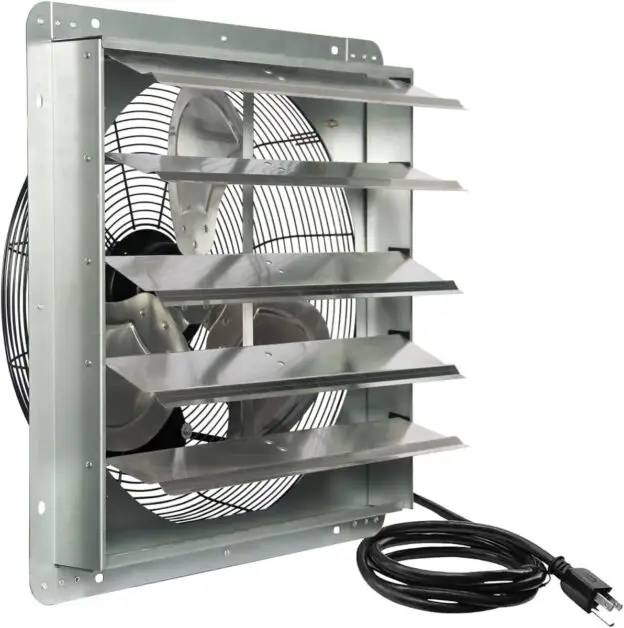
✅ Durable Construction: Made with high-quality materials for long-term use.
✅ Automatic Shutters: Features automatic shutters that open and close as needed.
✅ Quiet Operation: Operates quietly, minimizing noise disturbance.
✅ Easy Installation: Straightforward installation process with clear instructions.
✅ Energy Efficient: Consumes less power, helping to keep energy costs low.
❌ Shutter Function: Shutters may not always close tightly, allowing some air leakage.
❌ Size Limitation: May be too small for very large greenhouses, requiring multiple units.
❌ Cord Length: The power cord is relatively short, often necessitating an extension cord.
❌ Maintenance: Regular maintenance needed to keep the shutters and fan blades clean.
❌ Price: Higher price point compared to some other exhaust fans on the market.
Installing the Plumbing and Irrigation Systems
When it comes to installing the plumbing and irrigation systems in your greenhouse, it is crucial to ensure a reliable and efficient water supply for your plants. Proper irrigation is essential for maintaining optimal moisture levels and promoting healthy growth. There are various considerations to keep in mind during this process to ensure the best results.
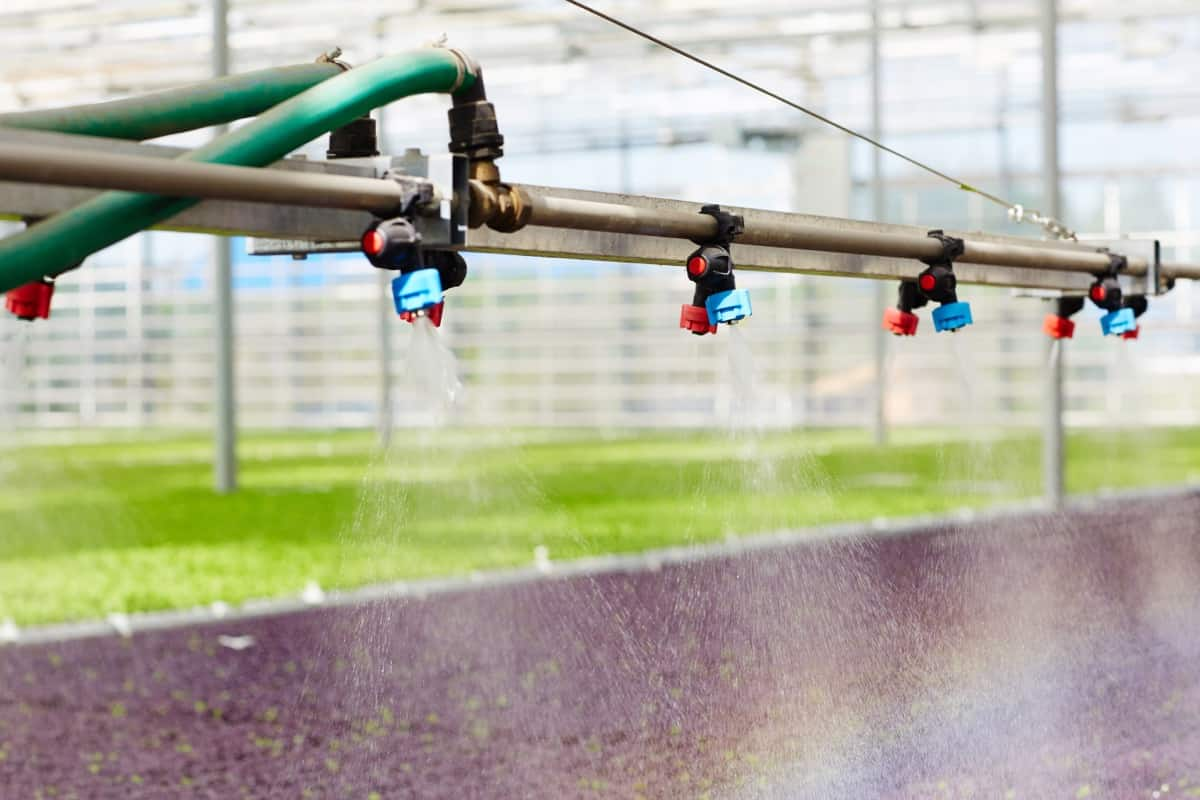
- Select the Right Irrigation System:
- Consider options like drip irrigation, sprinklers, or misting systems based on greenhouse size and plant needs.
- Evaluate the benefits and drawbacks of each system to find one that suits your setup and requirements.
- Ensure Proper Installation:
- Hire a professional plumber or consult with a greenhouse designer for correct installation.
- Determine optimal layout for pipes, valves, and connectors to prevent leaks or water wastage.
- Use recommended materials for durability and longevity of the plumbing system.
- Consider Water Source and Filtration:
- Assess water quality and implement suitable filtration methods to prevent clogging or damage to the irrigation system.
- Choose appropriate filters and screens to remove debris and impurities from the water.
- Incorporate Nutrient Delivery System:
- Implement a nutrient delivery system, such as a fertilizer injector or hydroponic setup, to provide essential nutrients for plant growth.
- Ensure proper calibration and maintenance of nutrient delivery equipment for optimal plant health and productivity.
Overall, installing the plumbing and irrigation systems requires careful planning and attention to detail. By selecting the right system, ensuring proper installation, and considering additional factors like water source and nutrient delivery, you can create a well-functioning irrigation system that supports the growth and productivity of your plants in the greenhouse.
Heating and Cooling Solutions for Your Greenhouse
Introducing effective heating and cooling solutions in your greenhouse is essential for creating the optimal environment for your plants to thrive. A well-regulated temperature ensures that your plants receive the necessary warmth during colder seasons and remain cool when the temperature rises. By implementing the right systems, you can maintain a stable climate and protect your plants from extreme weather conditions, ultimately maximizing their growth potential.
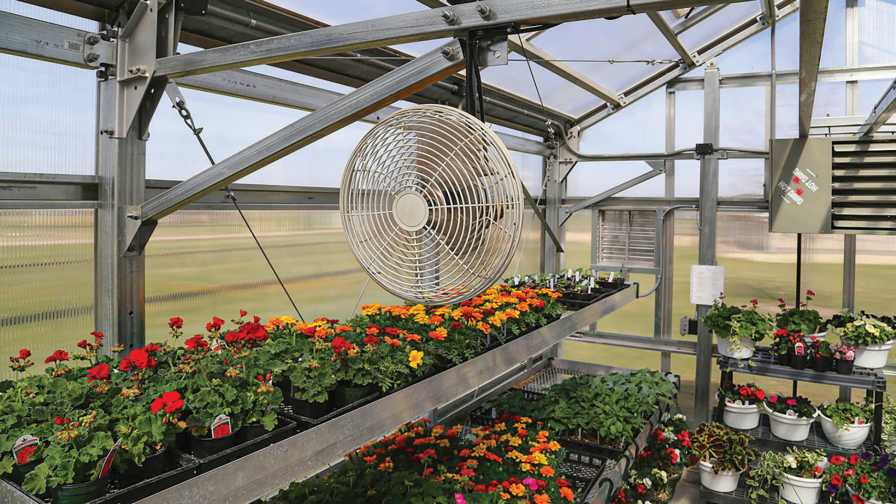
- Forced-air system:
- Radiant heating:
- Factors influencing the choice of heating system:
Selecting the most suitable heating system depends on these factors to ensure optimal plant growth and efficient heating in the greenhouse.
Tips for Maintaining a Healthy and Productive Greenhouse
Maintaining a healthy and productive greenhouse is essential for successful gardening. Here are some tips to help you keep your greenhouse in top shape:

1. Monitor and Control Temperature: Temperature plays a crucial role in plant growth. Regularly monitor the temperature inside your greenhouse to ensure it stays within the ideal range for your plants. Consider investing in a thermostat or automated climate control system to maintain a consistent temperature throughout the day and night.
2. Provide Sufficient Ventilation: Proper air circulation is vital for preventing the buildup of humidity, reducing the risk of fungal diseases, and promoting healthy plant growth. Install vents, fans, or louvers to allow fresh air to enter and hot air to escape. Regularly open doors and windows to encourage natural airflow, especially on warm days.
3. Watering and Irrigation: Efficient watering is key to maintaining plant health. Develop a watering schedule that takes into account the specific needs of your plants. Consider installing an irrigation system with timers or drippers to ensure consistent and appropriate moisture levels. Regularly check for signs of over or under watering and adjust accordingly.
4. Pest and Disease Control: Pests and diseases can quickly spread and damage your plants. Implement a pest management plan that includes regular inspections, physical removal of pests, and the use of organic insecticides or biological control methods when necessary. Maintain good hygiene practices by regularly cleaning tools, pots, and the greenhouse structure to minimize the risk of disease transmission.
By following these tips, you can create an environment that fosters healthy plant growth and maximizes productivity in your greenhouse. Remember to regularly assess and adjust your maintenance practices to ensure the best possible results for your plants.
Maximizing Space and Organizing Your Greenhouse Interior
One of the keys to a successful greenhouse project is maximizing the space and organizing the interior effectively. By doing so, you can create an optimal environment for your plants to thrive and make the most of the available area.
- Utilize Vertical Gardening Techniques:
- Install shelves or hanging baskets to utilize the height of the greenhouse.
- Grow plants vertically to maximize space without sacrificing valuable floor space.
- Use Modular and Adjustable Shelving Units:
- Opt for versatile shelving units that can be customized and rearranged to fit your plant collection.
- Adjust shelves as needed to accommodate different plant heights and growth patterns.
- Install Pegboard for Organization:
- Mount a pegboard on greenhouse walls for hanging tools, pots, and gardening accessories.
- Keep workspace organized and ensure easy accessibility to tools and supplies.
- Utilize hooks and baskets on the pegboard for efficient storage and space-saving solutions.
Additional Considerations for a Successful DIY Greenhouse Project
When embarking on a DIY greenhouse project, there are several additional considerations that can contribute to a successful outcome.
- Careful Planning and Crop Selection:
- Consider the specific requirements of crops for light, temperature, humidity, and space.
- Select appropriate greenhouse design, materials, and equipment based on crop needs for optimal growth and productivity.
- Proper Maintenance and Monitoring:
- Regularly inspect the greenhouse structure for signs of damage, such as leaks or cracks.
- Address any issues promptly to prevent further damage and maintain structural integrity.
- Monitor temperature, humidity, and airflow to provide ideal growing conditions for plants.
- Install automated systems for temperature and humidity control to simplify monitoring and maintenance processes.
In summary, successful DIY greenhouse projects require careful planning and consideration of the specific needs of your chosen plants. Regular maintenance and monitoring are equally important to ensure a healthy and productive growing environment. By addressing these additional considerations, you can set yourself up for a rewarding and bountiful greenhouse experience.
Watch video for more information:
FAQ
What are the benefits of building a DIY greenhouse?
Building a DIY greenhouse allows you to have greater control over the design and materials used, and it can be more cost-effective compared to purchasing a pre-built greenhouse. It also gives you the opportunity to customize the size and layout to fit your specific needs.
How do I select the ideal location for my greenhouse?
When choosing a location for your greenhouse, consider factors such as sunlight exposure, access to water and electricity, and protection from strong winds. It’s important to select a spot that receives at least six hours of direct sunlight per day.
What are the different types and sizes of greenhouses?
Greenhouses come in various types, such as hoop houses, lean-to structures, and freestanding models. The size of your greenhouse will depend on the available space and your gardening needs. Smaller greenhouses are suitable for hobbyists and beginners, while larger ones can accommodate more plants and allow for greater flexibility.
What materials should I choose for my DIY greenhouse?
Common materials for DIY greenhouses include wood, PVC pipes, metal frames, and polycarbonate panels. Your choice of materials may depend on factors such as budget, durability, and the specific climate in your area.
How can I prepare the ground for my greenhouse foundation?
Before constructing your greenhouse, it’s essential to level the ground and remove any weeds or debris. You may also consider adding a layer of gravel or a concrete foundation to provide stability and proper drainage.
What are some heating and cooling solutions for a greenhouse?
Heating options for greenhouses include electric heaters, gas heaters, or geothermal systems. Cooling solutions can include natural ventilation through vents or the use of fans, shade cloth, or evaporative cooling systems.
How can I maximize space and organize the interior of my greenhouse?
Utilize vertical space by adding shelves or hanging baskets. Install a workbench or potting station for convenience. Use labeled containers or trays to keep plants organized and make the most of limited space.
What are some tips for maintaining a healthy and productive greenhouse?
Regularly monitor temperature, humidity levels, and pests. Provide proper ventilation and air circulation. Water plants as needed and maintain a consistent watering schedule. Remove weeds promptly and regularly clean the greenhouse to prevent diseases.
What additional considerations should I keep in mind for a successful DIY greenhouse project?
Consider factors such as local building codes and permits, the need for a reliable water source, and potential electrical requirements. Additionally, don’t forget to plan for future expansion or modifications as your greenhouse needs may change over time.
Studied Agricultural Engineering-Plant Protection at University of California, Davis.
Head of Content writing team at Southelmontehydroponics.com


