DIY Seed Starting Mix: Simple and Effective
Table of Contents
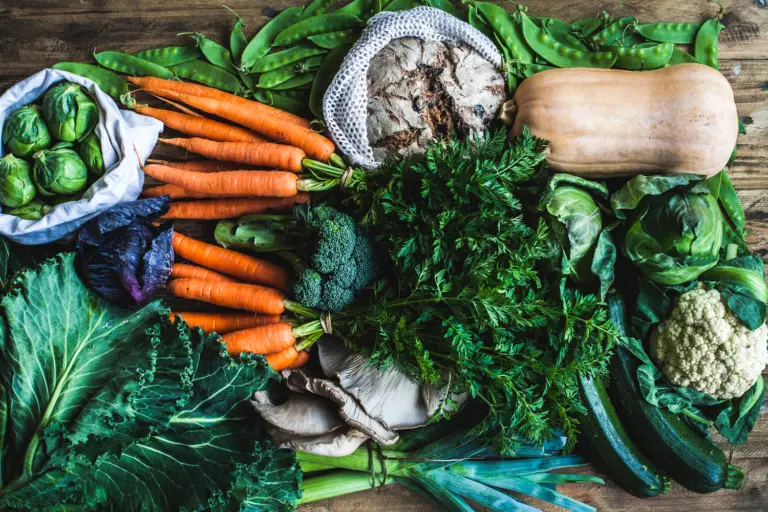
Why Use a Seed Starting Mix
Using a seed starting mix is an essential step in successful gardening. This specialized mix is designed to provide optimum conditions for seeds to germinate and develop into healthy seedlings. Unlike regular soil, seed starting mix is lighter, more porous, and has the ideal balance of nutrients and moisture retention.
One of the main benefits of using a seed starting mix is its ability to provide a disease-free environment for seeds. Commercial mixes undergo sterilization processes, which eliminate harmful pathogens, weeds, and pests that can hinder the growth of young plants. Additionally, seed starting mix is formulated to be well-draining, preventing waterlogged soil that can lead to root rot and other diseases. By creating a clean and well-drained foundation, seed starting mix gives seeds the best chance of germinating and developing into robust seedlings.
The Benefits of Making Your Own Mix
Making your own seed starting mix offers numerous benefits that can greatly enhance your gardening experience. By creating your own mix, you have total control over the ingredients, ensuring that they are of the highest quality and tailored to meet the specific needs of your plants. This level of customization allows you to optimize the growing conditions, leading to healthier and more robust seedlings.
Another advantage of making your own seed starting mix is the cost-effectiveness it provides. Purchasing pre-made mixes can be expensive, especially if you have a large garden or plan to start numerous seeds. By utilizing readily available components and blending them yourself, you can save a significant amount of money while still achieving exceptional results. Furthermore, you have the opportunity to experiment with different ingredient ratios and combinations, allowing you to fine-tune your mix and discover what works best for your specific plant varieties.
Making your own seed starting mix offers several advantages. Let’s organize them in a table format:
| Benefit | Description |
| Cost-Effective | Homemade seed starting mix can be more budget-friendly than store-bought options. You can create it using simple ingredients available at your local garden center. |
| Customization | By making your own mix, you can tailor it to the unique requirements of different seeds. Adjust the blend to be lighter, denser, or quicker-draining based on specific seed needs |
| Eco-Friendly | Homemade mixes empower you to embrace sustainable practices. You can choose locally sourced, sustainable ingredients, reducing your carbon footprint. |
| No Synthetic Additives | When you create your mix, there’s no need for synthetic fertilizers or wetting agents. The organic ingredients provide the perfect balance of fluffiness, drainage, and moisture retention for seed germination. |
| Sterile Mix | Homemade seed starting mixes are free from harmful pathogens, reducing the risk of losing seedlings to fungus or disease early on. |
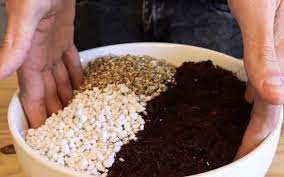
Remember, the best seed starting mix typically consists of three main ingredients: perlite, vermiculite, and sphagnum peat moss.
In summary, making your own seed starting mix grants you the freedom to customize the ingredients to suit your plants’ needs, resulting in healthier seedlings. Additionally, it provides a cost-effective alternative to purchasing pre-made mixes while empowering you to explore and optimize different ingredient combinations. So why not take advantage of this opportunity to enhance your gardening success with a DIY seed starting mix?
Understanding the Ingredients Needed
Understanding the ingredients needed for a seed starting mix is crucial for successful germination and healthy seedlings. The right combination of components can provide the necessary nutrients and support for young plants to thrive. When it comes to seed starting mixes, there are three main ingredients: peat moss, perlite, and vermiculite.
Peat moss, commonly used in horticulture, provides excellent water retention and aeration properties. It helps maintain the soil’s moisture content while still allowing proper drainage, ensuring that the delicate roots have enough access to water without becoming waterlogged. Perlite, on the other hand, is a lightweight volcanic mineral that helps improve soil drainage and aeration. Its porous nature creates air pockets within the mix, preventing compacting and facilitating the healthy development of roots. Lastly, vermiculite acts as a moisture-retaining agent, similar to peat moss. It helps retain moisture around the seeds and seedlings, promoting germination and providing a moist environment for root development.
These three ingredients work together to create an optimal environment for seed starting. Gardeners can adjust the ratios of each ingredient based on their specific needs and plant requirements. It is important to note that some seed starting mixes may also contain additional components, such as compost, lime, or fertilizer, which can further enhance the nutritional value of the mix. By understanding the role of each ingredient and their specific benefits, gardeners can tailor their seed starting mix to ensure the best possible conditions for successful germination and healthy plant growth.
Choosing the Right Container for Seed Starting
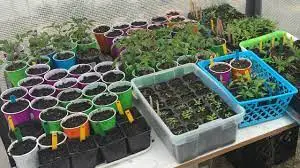
When it comes to seed starting, choosing the right container is crucial for the successful development of your plants. The container you select will play a significant role in providing the ideal environment for your seedlings to thrive. One option is to use plastic trays with individual cells or compartments. These trays offer several advantages, such as promoting better root development and preventing root damage during transplanting. Additionally, the clear plastic covers that come with some trays create a mini greenhouse effect, retaining moisture and heat, which can accelerate germination.
Another option for seed starting containers is biodegradable peat pots. These pots are made from natural materials and can be planted directly into the soil without causing any harm to the roots. They offer the advantage of reducing transplant shock since the seedlings can be planted along with the pots. However, it’s important to note that peat pots tend to dry out faster than plastic containers, so monitoring the moisture level is crucial. Ultimately, the choice between plastic trays and peat pots depends on your preferences and the specific needs of the seeds you’re germinating.
Preparing the Containers for Planting
Preparing the containers for planting is a crucial step in ensuring the success of your seedlings. Before you begin, make sure to choose containers that are suitable for seed starting. Opt for containers with drainage holes to prevent waterlogged soil, as excess moisture can lead to root rot and hinder the growth of your plants. Additionally, consider the size and material of the containers. While small plastic trays are ideal for starting a large number of seeds at once, biodegradable pots can be directly planted into the ground, reducing transplant shock.
Once you have selected the appropriate containers, it is essential to clean and sterilize them before use. Wash the containers with warm soapy water, ensuring that all dirt and debris are removed. Sterilize the containers by soaking them in a diluted bleach solution, following the manufacturer’s instructions. This step helps eliminate harmful bacteria and fungi that can cause diseases in your seedlings. After sterilizing, rinse the containers thoroughly to remove any remaining bleach residue. Properly preparing your containers will create a clean and optimal environment for your seeds to germinate and grow into healthy plants.
Here are the step-by-step instructions for preparing containers and planting seeds using a seed starter mix:
| Step | Action |
| 1 | Gather your seed starting supplies: Collect seeds, seed starting pots or cell trays, plant markers, seed starting mix (homemade or store-bought), and a seed tray with a humidity dome. You can also repurpose household items like egg cartons, Dixie cups, or yogurt cups as containers. Ensure they are clean and have drainage holes. |
| 2 | Fill your pots or trays with seed starting mix: Dump the seed starting mix into a large tub or bucket. Add water generously and stir until the mix absorbs moisture. Fill your containers with this moistened mix. Peat-based seed starting mixes may take several minutes to absorb water. |
| 3 | Plant your seeds: Make small indents in the center of each container using your finger or a tool. Place the seeds in these indents at the recommended depth. Cover with a thin layer of vermiculite if darkness is needed for germination. |
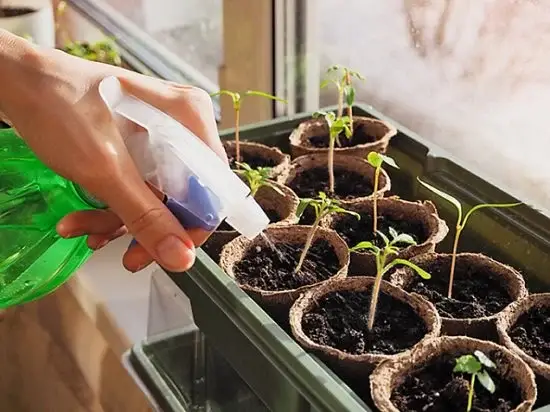
| 4 | Water your seeds: Use a spray bottle or squirt bottle filled with water to dampen the top layer of the seed starter mix. Be gentle to avoid disturbing the seeds. |
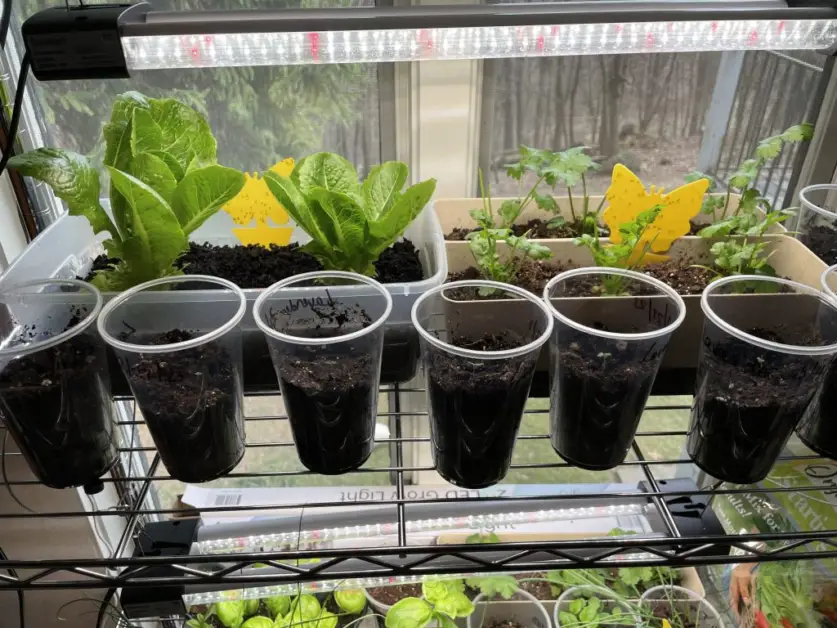
| 5 | Place containers near a sunny windowsill: Position your containers where they receive adequate sunlight. A sunny window is ideal for seed germination. |
Remember, starting seeds indoors allows you to get a head start on the growing season and provides better control over germination conditions.
Measuring and Mixing the Ingredients
When it comes to measuring and mixing the ingredients for your seed starting mix, precision is key. Accurate measurements ensure that you provide the optimal growing conditions for your seeds, increasing their chances of successful germination. Start by gathering all the necessary ingredients, such as peat moss, perlite, vermiculite, and compost. Each ingredient plays a unique role in creating a well-balanced mix that provides the right amount of moisture retention, aeration, and nutrient availability for your seeds.
To achieve the perfect mix, use a clean container or bucket to combine the ingredients. The ideal ratio for a basic seed starting mix is 1 part peat moss to 1 part perlite or vermiculite. Adding 1 part compost to the mix can enhance its nutrient content. Use a trowel or scoop to measure the ingredients accurately, ensuring that you maintain the appropriate proportions. Thoroughly mix the ingredients together until they are well blended, ensuring an even distribution of each component. Avoid compacting the mix while mixing to maintain its light and fluffy texture.
By carefully measuring and blending the ingredients for your seed starting mix, you create an optimal growing environment for your seeds. This attention to detail sets the foundation for successful germination and healthy seedling development.
Adding Nutrients to the Mix
Adding nutrients to the seed starting mix is a crucial step in ensuring the healthy growth of your seedlings. While the mix itself provides a good foundation for germination, it may not contain all the essential nutrients that young plants require to thrive. By supplementing the mix with additional nutrients, you can give your seedlings a head start in their development.
There are various ways to add nutrients to the seed starting mix. One common method is using organic fertilizers, such as compost or well-rotted manure, which provide a rich source of nutrients and also improve the overall structure of the mix. These organic fertilizers release nutrients slowly, ensuring a steady supply for the developing plants. Another option is to use water-soluble fertilizers specifically formulated for seedlings. These fertilizers can be easily mixed with water and applied to the seed starting mix, providing an instant boost of nutrients. It is important to follow the recommended dosage and application instructions for any fertilizer to avoid overfeeding and causing damage to the delicate seedlings.
Adding nutrients to your seed starting mix is essential for healthy seedlings. Here’s a simple table outlining the steps to create a nutrient-rich seed starting mix:
| Ingredients | Purpose | Ratio |
| Sieved Compost | Gradual nutrient release to feed seedlings as they develop | 2 parts |
| Coir (Coconut Fiber) or Leaf Mold | Adds bulk and retains moisture | 2 parts |
- Combine all the ingredients in a clean tub or bucket.
- Saturate the mix with water until it’s thoroughly moistened but not soggy (similar to a wrung-out sponge).
- Fill your seedling pots with the homemade seed starting mix.
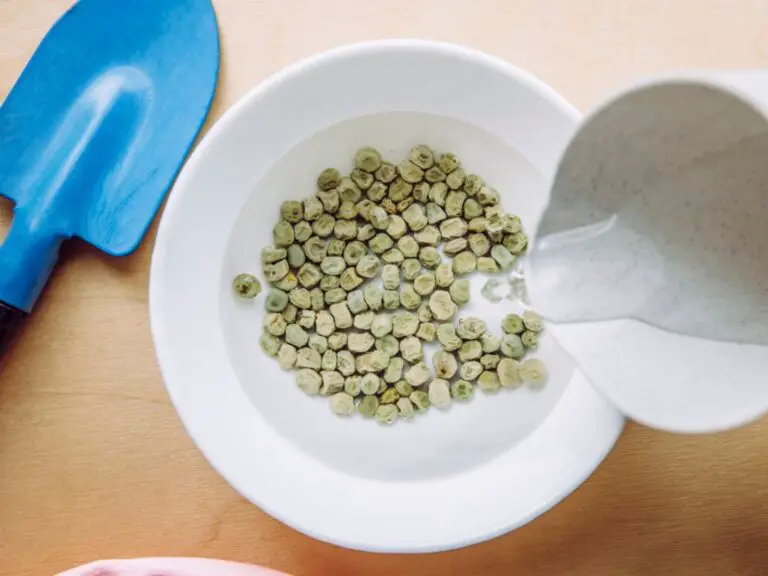
Moistening the Seed Starting Mix Properly
Properly moistening the seed starting mix is a crucial step in ensuring successful germination and healthy seedlings. The goal is to provide the right amount of moisture that promotes root development without causing waterlogged conditions that could lead to damping off or root rot.
To begin, it is important to choose a high-quality seed starting mix that has good water-holding capacity. This will allow the mix to retain moisture while still providing adequate drainage. Once you have your mix, it’s time to moisten it properly.
Start by placing the desired amount of mix in a clean container or tray. Then, gradually add water while stirring the mix with a garden trowel or your hands. The goal is to achieve a consistency that is damp but not soggy. Too much water can lead to compaction and poor oxygen flow to the roots.
A helpful tip is to test the moisture level by squeezing a handful of the mix. It should hold its shape when squeezed lightly and crumble when gently tapped. If the mix is too dry, add a little more water and continue mixing. If it’s too wet, allow it to dry slightly before proceeding.
Properly moistening the seed starting mix lays the foundation for strong and healthy seedlings. By providing the right balance of moisture, you are setting your seeds up for success and ensuring optimal germination rates.
Sowing Seeds in the Mix
Seeds are the starting point for any successful garden. And when it comes to cultivating seeds, using a high-quality seed starting mix is essential. This specially formulated mix provides an ideal environment for seeds to germinate and grow into healthy seedlings.
When sowing seeds in the mix, it’s important to follow some key guidelines. Firstly, ensure that the mix is evenly moistened before planting the seeds. This ensures that the seeds have the necessary moisture for germination. Gently press the seeds into the mix at the recommended depth, as specified on the seed packet or by the plant’s requirements.
Proper spacing is crucial to avoid overcrowding, which can lead to competition for resources and stunted growth. Make sure to leave enough space between seeds to allow for adequate air circulation and room for each seedling to develop properly. Additionally, labeling the rows or sections where different seeds are planted can help you keep track of the varieties and their progress.
Remember, different seeds have different requirements for germination. Some may require light to germinate, while others need darkness. It’s important to research the specific needs of the seeds you’re planting to ensure optimal conditions. Once the seeds are sown, maintain a consistent temperature and humidity level, ensuring a suitable environment for germination.
By following these guidelines and using a high-quality seed starting mix, you can give your seeds the best chance of successfully germinating and growing into healthy plants. The next step in the process is providing adequate light for germination, which we will delve into in the next section.
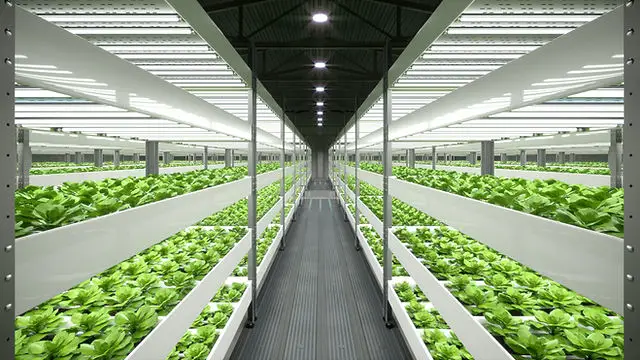
Providing Adequate Light for Germination
Providing Adequate Light for Germination:
Light plays a crucial role in the germination process of seeds. It acts as a source of energy that enables the seedlings to grow and develop into healthy plants. When it comes to providing adequate light for germination, there are a few key factors to consider.
Firstly, it’s important to choose the right type of light. Natural sunlight is often the best option, as it contains a full spectrum of light wavelengths that plants need for optimal growth. However, if natural light is limited or unavailable, you can use artificial lights such as fluorescent or LED grow lights. These lights emit specific wavelengths of light that are necessary for plant photosynthesis and can be adjusted to meet the needs of different plant species.
In addition to the type of light, the intensity and duration of light exposure are also critical. Most seeds require a period of darkness to trigger germination, followed by exposure to light. Once the seeds have sprouted, they need at least 12-16 hours of light per day to continue thriving. Place the light source close to the seedlings, ensuring they receive sufficient light without being scorched or experiencing excessive heat.
Remember that different plant species have varying light requirements, so it’s essential to research the specific needs of the seeds you are germinating. By providing the proper light conditions, you can maximize the chances of successful germination and set the stage for healthy plant growth.
Maintaining Proper Temperature and Humidity Levels
Maintaining proper temperature and humidity levels is crucial for the successful germination and growth of seedlings. Temperature plays a vital role in seed germination, as it affects the enzymatic processes within the seeds. Most seeds germinate best within a specific temperature range, typically between 65 to 75 degrees Fahrenheit (18 to 24 degrees Celsius). A consistent and optimal temperature ensures faster and more uniform germination.
To maintain the desired temperature, consider using a seed starting heat mat or placing your containers near a heat source like a radiator or a heating pad. It is essential to monitor the temperature regularly using a thermometer to ensure it remains within the optimal range. Extreme temperatures, whether too high or too low, can hinder germination or lead to weak and unhealthy seedlings.
Humidity levels also play a critical role during the seedling stage. Higher humidity helps to create a favorable environment for germination by preventing desiccation and promoting the absorption of water by the seeds. Once the seeds have sprouted, it’s important to reduce humidity levels slightly to discourage the growth of mold and fungal diseases. A humidity dome or a plastic wrap covering can be used to maintain the desired moisture levels. However, it’s crucial to ensure proper ventilation to prevent the accumulation of excess moisture, which can lead to damping off or root rot. Regularly monitoring humidity levels and adjusting them accordingly will help create an optimal growing environment for your seedlings.
By maintaining proper temperature and humidity levels, you will provide the ideal conditions for your seedlings to thrive and grow into healthy and robust plants. Remember to regularly monitor and adjust these factors as needed to ensure optimal germination and growth throughout the seedling stage.
Watering the Seedlings
Proper watering is essential for the healthy growth and development of seedlings. Too little water and they will wither and die, while too much water can lead to root rot and other fungal diseases. It is crucial to strike the right balance to ensure their success.
When watering seedlings, it is important to avoid overhead watering as it can lead to damping-off disease, caused by fungal pathogens. Instead, opt for bottom watering by placing the containers in a tray or saucer filled with water. This allows the seedlings to take up water through the drainage holes in their containers, ensuring that the moisture reaches the roots directly. Remember to remove the containers from the water once the soil surface becomes moist, as leaving them soaked can lead to waterlogged conditions. Watering should be done gently and gradually, allowing the soil to absorb the water and preventing any disturbance to the delicate seedlings.
Monitoring the moisture level of the soil is crucial. Stick your finger about an inch deep into the soil to check if it feels slightly damp. If it does, hold off on watering for a little longer. However, if it feels dry, it’s time to provide some moisture. By being attentive to the needs of your seedlings and maintaining a consistent watering routine, you will ensure healthy and robust plants throughout their growth cycle. Remember, different types of plants have varying water requirements, so it’s important to research and understand the specific needs of your seedlings to provide them with optimal conditions.
Transplanting Seedlings to Larger Containers
When your seedlings have grown strong enough and have developed their first true leaves, it’s time to transplant them to larger containers. Transplanting seedlings allows them to continue growing and developing without being overcrowded. This step is crucial for their healthy root development and overall growth.
To begin the process, prepare your larger containers by filling them with a suitable potting mix. Choose a well-draining mix that is rich in nutrients and organic matter. Ensure that the containers have drainage holes to prevent waterlogged roots. It is recommended to use containers that are at least 2-3 inches larger in diameter than the current containers to provide enough space for the roots to spread. Gently lift the seedlings from their current containers, being careful not to damage the delicate roots. Place them in the new containers, ensuring that the soil level remains the same as it was in the previous containers. Firmly press the soil around the seedlings to provide stability and support for their growing stems. Finally, water the newly transplanted seedlings thoroughly to settle the soil and provide them with the necessary moisture for their continued growth.
Transplanting seedlings to larger containers is a crucial step in the seed starting process. By providing adequate space for root development, you are giving your seedlings the best chance at thriving. Remember to handle the seedlings with care to minimize any damage and to ensure their successful transition. With proper transplanting techniques, you’ll be well on your way to growing healthy and robust plants.
Hardening Off the Seedlings
Hardening off the seedlings is a crucial step in the process of transitioning your plants from the controlled environment of indoor growth to the outdoor conditions of your garden. This period of acclimatization helps the seedlings develop stronger stems, tougher leaves, and the ability to withstand fluctuations in temperature, wind, and sunlight. It is a necessary step to ensure the successful establishment and growth of your plants once they are planted in the garden.
To begin hardening off your seedlings, it is important to gradually expose them to the outdoor environment. Start by placing them outside in a sheltered spot for a few hours each day, gradually increasing the time over the course of a week or two. This gradual exposure helps the seedlings adjust to the intensity of sunlight, wind, and temperature variations. It also allows them to develop thicker cuticles and stronger cell walls, which are crucial for their survival in the outdoor conditions. It is important to monitor the weather forecast during this period and protect the seedlings from any extreme weather conditions such as frost or strong winds. Properly hardened seedlings will have a higher chance of survival and are more likely to thrive in your garden.
Tips for Success with Seed Starting Mix
One of the key factors in successfully starting seeds is using the right seed starting mix. This specially formulated mix provides the optimal conditions for seed germination and early seedling growth. Here are some tips to help you achieve success with your seed starting mix.
First and foremost, ensure that your seed starting mix is sterile. This helps prevent the growth of harmful pathogens that can damage or kill your seeds and seedlings. Sterilizing the mix can be done by heating it in the oven or microwave, or by using commercial sterilization methods.
Another important tip is to moisten the seed starting mix before sowing the seeds. This ensures that the seeds have sufficient water for germination without being overly saturated. A good rule of thumb is to aim for a slightly damp, crumbly consistency.
Additionally, it’s crucial to provide adequate light for germination. Place your seed trays or containers near a sunny window or use artificial grow lights to ensure that the seedlings receive enough light. Insufficient light can lead to weak, leggy seedlings that are more prone to disease and pests.
Lastly, maintain proper temperature and humidity levels to promote healthy growth. Most seeds require warm temperatures for germination, so it’s important to provide a consistently warm environment. Utilize a seedling heat mat or place your seed trays in a warm location, such as on top of a refrigerator or near a radiator. In terms of humidity, covering your seed trays with a plastic dome or using a misting bottle can help create a moist environment.
By following these tips, you can give your seeds the best possible start and set your seedlings up for success. With proper care and attention, your seed starting mix will help you grow strong, healthy plants that will thrive throughout the growing season.
Common Mistakes to Avoid when Using Seed Starting Mix
When using a seed starting mix, it is important to avoid common mistakes that can hinder the success of your plants. One mistake to avoid is overcompacting the seed starting mix. While it is important to ensure good contact between the seeds and the mix, excessive compaction can lead to poor root growth and drainage issues. Instead, lightly press down on the mix to provide firm contact without compacting it too much.
Another mistake to avoid is using a seed starting mix that is too wet or too dry. Proper moisture levels are crucial for successful germination. If the mix is too wet, it can lead to fungal diseases and rotting of seeds. On the other hand, if the mix is too dry, the seeds may not be able to absorb the moisture they need to sprout. To ensure the correct moisture level, aim for a mix that is moist but not soggy, and regularly check the moisture levels by gently squeezing a handful of the mix. It should feel slightly damp but not dripping wet.
By avoiding these common mistakes and following the best practices for using seed starting mix, you can increase the chances of successful germination and healthy seedling growth. Remember to provide the optimum moisture and avoid over-compacting the mix, allowing your seeds to thrive and grow into strong, vibrant plants.
To Know More About DIY Seed Starting Mix, Watch This Video.
What is the purpose of using a seed starting mix?
The seed starting mix provides a loose and well-draining medium for germinating seeds, promoting healthy root development.
Why should I make my own seed starting mix?
Making your own seed starting mix gives you control over the ingredients and allows you to customize it based on your plants’ specific needs.
What ingredients are typically needed for a seed starting mix?
Common ingredients for a seed starting mix include peat moss, vermiculite, perlite, and compost.
How do I choose the right container for seed starting?
Choose containers that have good drainage and are deep enough to accommodate the growth of your seedlings.
How do I prepare the containers for planting?
Clean the containers thoroughly and make sure they are sterilized to prevent the spread of diseases.
How do I add nutrients to the seed starting mix?
You can add nutrients by incorporating compost or using a slow-release fertilizer specifically formulated for seedlings.
How do I properly moisten the seed starting mix?
Gradually add water to the mix while stirring until it reaches a moist, but not soggy, consistency.
How should I sow seeds in the seed starting mix?
Follow the instructions on the seed packet for the appropriate depth and spacing of the seeds.
What lighting conditions are necessary for seed germination?
Place the seedlings in a well-lit area or use fluorescent grow lights to provide adequate light for germination.
How do I maintain proper temperature and humidity levels for seedlings?
Use a seedling heat mat and a humidity dome to create a warm and humid environment for optimal seedling growth.
How often should I water the seedlings?
Water the seedlings when the top inch of the seed starting mix feels dry, making sure not to overwater and cause waterlogged conditions.
When should I transplant the seedlings to larger containers?
Transplant the seedlings to larger containers when they have developed a strong root system and have outgrown their current pots.
What does hardening off the seedlings mean?
Hardening off is the process of gradually acclimating the seedlings to outdoor conditions before transplanting them into the garden.
What are some tips for success with seed starting mix?
Keep the seed starting mix consistently moist, provide adequate light and warmth, and practice proper sanitation to prevent disease.
What are some common mistakes to avoid when using seed starting mix?
Some common mistakes to avoid include overwatering, using containers without proper drainage, not providing enough light, and not properly hardening off the seedlings before transplanting.