Seed Starting Indoors: A Perfect Beginner’s Journey
Table of Contents
Why Seed Starting Indoors?
Seed Starting Indoors provides several advantages for gardeners. By starting seeds indoors, you can extend your growing season, giving your plants a head start before transplanting them outdoors. This is particularly beneficial for regions with shorter growing seasons or unpredictable weather patterns. Moreover, starting seeds indoors allows you to have greater control over the growing conditions, such as temperature, light, and moisture, which can lead to healthier and more robust seedlings.
Additionally, starting seeds indoors gives you a wider variety of plant options to choose from. While some plants may be difficult to grow from direct sowing outdoors, starting them indoors can increase their chances of successful germination and growth. This opens up possibilities to grow unique or exotic plant varieties that may not be readily available at local nurseries. Overall, starting seeds indoors can be a rewarding experience that offers greater flexibility and customization in your gardening endeavors.

Selecting the Right Seeds
When selecting seeds for starting indoors, it’s crucial to consider the specific conditions required by each plant variety. Carefully read the information on the seed packets or labels to ensure you are choosing seeds that match your available space, light conditions, and climate. Different plants have distinct requirements for factors such as sunlight exposure, soil type, and temperature range, so selecting the right seeds is the first step towards a successful seed starting venture.
Additionally, think about your gardening goals and preferences when choosing seeds. Are you looking to grow vegetables for a bountiful harvest, or perhaps you want to cultivate colorful flowers for aesthetic appeal? Consider factors like plant size, growth habits, and time to maturity. By carefully selecting seeds that align with your gardening aspirations and the conditions of your indoor growing space, you set yourself up for a rewarding and enjoyable seed starting experience.

Choosing the Right Containers
Containers play a crucial role in the successful growth of seedlings. When choosing containers for your seed starting journey, opt for ones that are at least 2-3 inches deep to allow for proper root development. Additionally, containers with drainage holes are essential to prevent waterlogging, which can lead to root rot and hinder growth.
Consider the material of the container as well. Biodegradable options such as peat or paper pots are convenient for transplanting directly into the soil as they break down over time. Alternatively, plastic or reusable containers provide durability and are easy to sanitize between uses, reducing the risk of fungal or bacterial diseases impacting your seedlings. Select containers that suit the size of the seeds and provide ample space for growth to set a solid foundation for your plants’ development.

Preparing the Soil Mix
When preparing the soil mix for starting seeds indoors, it is essential to choose a high-quality, well-draining medium that provides the necessary nutrients for young seedlings. A popular option is a seed starting mix, which is specially formulated to promote healthy root development and moisture retention. Alternatively, you can create your own soil mix by combining equal parts peat moss, perlite, and vermiculite to ensure proper aeration and moisture balance for your seeds.
It is important to sterilize the soil mix before planting to eliminate any harmful pathogens that could affect the seedlings. This can be done by baking the soil mix in the oven at 180°F (82°C) for 30 minutes or by microwaving it on high for 2-5 minutes per gallon of soil. Sterilizing the soil mix helps prevent damping off, a common fungal disease that can cause seedling death. By taking the time to prepare a clean and nutrient-rich soil mix, you are setting your seeds up for success and ensuring a strong start to your indoor gardening journey.

Planting the Seeds
Once you have selected the seeds you want to grow, it’s time to plant them in the prepared containers. Make sure you read the seed packet instructions carefully to determine the appropriate depth and spacing for planting each type of seed. Using a small tool like a pencil or a chopstick, create small holes in the soil mix according to the seed’s requirements. Gently place the seeds in the holes and cover them lightly with more soil mix. Water the newly planted seeds gently to ensure the soil is moist but not waterlogged, which can inhibit germination.
After planting the seeds, it’s essential to label your containers with the seed variety and the date they were planted. This will help you keep track of the progress of each type of seed and ensure you provide the right care as they grow. Place the containers in a warm and bright location, following the specific light requirements of each type of seed. Maintain consistent moisture levels in the soil by watering gently or misting regularly, making sure not to oversaturate the soil. With proper care and attention, your seeds will soon germinate and begin their journey towards becoming healthy seedlings.
Providing Adequate Light
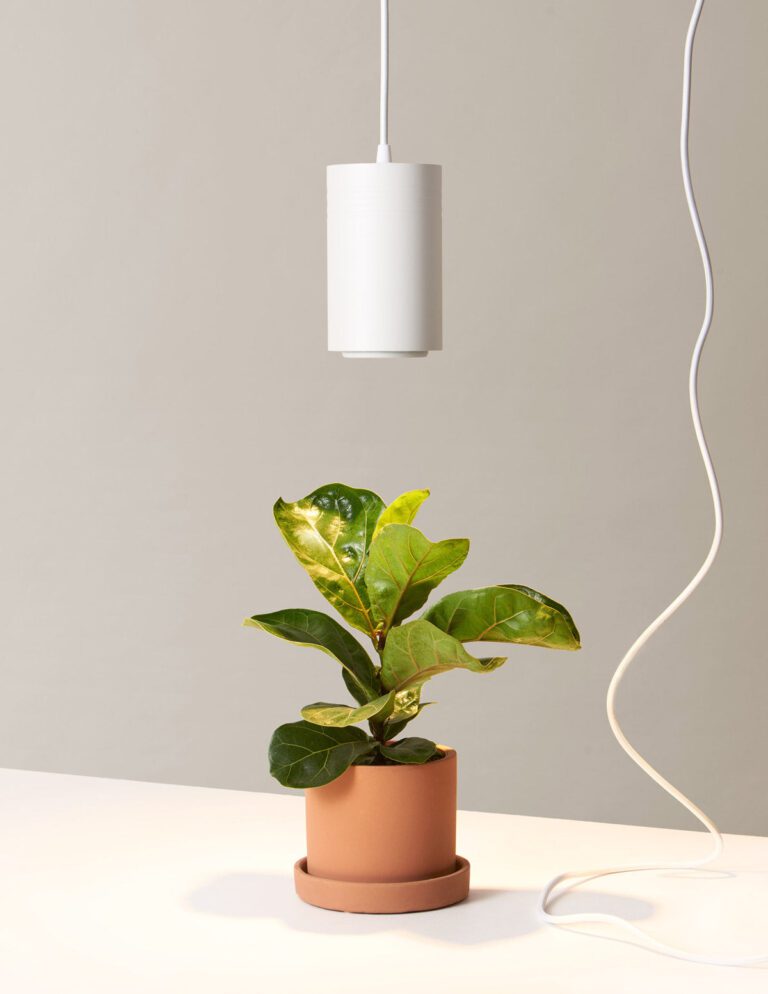
To ensure the healthy growth of your seedlings, providing adequate light is essential. Insufficient light may lead to leggy, weak plants that struggle to flourish. When starting seeds indoors, natural light from a south-facing window may not always be enough, especially during cloudy days or in regions with limited sunlight. Supplemental lighting, such as fluorescent or LED grow lights, can help mimic the intensity and duration of sunlight needed for robust seedling development.

Placing the grow lights a few inches above the seedlings and adjusting the height as the plants grow is crucial to prevent them from becoming spindly. Most seedlings require about 12-16 hours of light per day to thrive. Keep in mind that different plants have varying light requirements, so research the specific needs of the seeds you are starting. Providing a consistent light source not only encourages sturdy growth but also promotes photosynthesis, which is essential for producing strong, healthy seedlings ready for outdoor planting.

Maintaining Proper Temperature
To germinate successfully, most seeds require specific temperature ranges. Maintaining proper temperature is crucial for the healthy development of seedlings. It’s essential to research the optimal temperature requirements for the seeds you are starting indoors. Different plants have varying temperature preferences, so it’s important to provide the right conditions for each type of seed.
Consistent temperature control is key to seed starting success. Fluctuations in temperature can stress seedlings and hinder their growth. Utilizing a heating mat or a heat lamp can help create a stable and warm environment for your seeds. Monitor the temperature regularly with a thermometer to ensure it stays within the ideal range for germination and seedling growth. By paying close attention to the temperature needs of your seeds, you can set them up for a strong start and robust growth.
Watering the Seeds
When watering seeds, it is crucial to maintain a delicate balance. Overwatering can lead to rot and other diseases, while underwatering can cause poor germination. Generally, it is best to keep the soil consistently moist but not waterlogged. One effective way to ensure proper watering is to use a spray bottle or watering can with a fine rose attachment to gently moisten the soil surface without disturbing the seeds.
In addition to regular watering, it is important to consider the moisture needs of different types of seeds. Some seeds may require more frequent watering, while others may prefer a slightly drier environment. It is always recommended to research the specific requirements of the seeds you are planting to provide them with the optimal growing conditions. By paying close attention to the moisture levels and adjusting your watering routine accordingly, you can help promote healthy seed germination and vigorous seedling growth.

Fertilizing Seedlings
Proper fertilization is crucial for the healthy growth of seedlings. Seedlings have specific nutrient needs at different stages of development, and providing them with the right balance of essential nutrients will help them establish strong root systems and vigorous growth. When selecting a fertilizer for your seedlings, opt for a balanced and water-soluble formula that is specifically designed for young plants to ensure they receive the proper nourishment.
It’s important to follow the manufacturer’s instructions for dilution and application when fertilizing seedlings. Over-fertilization can lead to nutrient imbalances and damage the delicate root systems of young plants. As a general guideline, start fertilizing seedlings once they have developed their first set of true leaves, and then continue to fertilize them every 1-2 weeks at half the recommended strength. Monitoring the growth and development of your seedlings will also help you determine if any adjustments are needed in your fertilization routine to promote optimal health and vitality.
Transplanting Seedlings
When your seedlings have developed strong roots and their first set of true leaves, it’s time to transplant them into individual containers. Transplanting seedlings helps to avoid overcrowding, promotes healthier growth, and encourages strong root development. Gently remove the seedlings from their current container, being cautious not to damage the delicate roots, and plant them into their new homes at the same depth they were originally growing.
Remember to water the seedlings thoroughly after transplanting to help them settle into their new containers and reduce any transplant shock. Keep the newly transplanted seedlings in a warm, well-lit area, away from direct sunlight for a few days to allow them to adjust to their new environment. As the seedlings continue to grow, make sure to monitor their progress and adjust watering and lighting conditions as needed to support their healthy development.

Hardening Off Seedlings
When seedlings have reached a suitable stage of growth indoors, it’s essential to gradually introduce them to outdoor conditions. This process, known as hardening off, helps them acclimate to temperature fluctuations, sunlight exposure, and wind movement. Sudden exposure to these external factors can shock seedlings and hinder their growth and development.
Hardening off seedlings typically involves placing them outdoors in a sheltered location for increasing amounts of time each day. Start with just a few hours of exposure to direct sunlight and gentle breezes, gradually extending the duration over the course of a week or two. Monitor the seedlings closely for any signs of stress, such as wilting or discoloration, and adjust their outdoor time accordingly. By properly hardening off your seedlings, you can ensure they are robust and ready to thrive in their new outdoor environment.
Dealing with Common Seedling Problems
Seedling problems can arise during the germination and early growth stages, impacting the overall health and vitality of your plants. One common issue that gardeners face is damping off, a fungal disease that causes young seedlings to rot at the soil line. To prevent damping off, ensure good air circulation around your seedlings, use sterile seed-starting mix, and avoid overwatering. If you notice any affected seedlings, remove them immediately to prevent the spread of the disease to healthy plants.
Another common problem is leggy seedlings, which have long, thin stems and appear weak and spindly. Leggy seedlings are often the result of insufficient light or overly warm temperatures. To combat legginess, provide adequate light sources, such as grow lights, and maintain optimal temperature conditions for the specific plant species you are growing. Additionally, gently brushing your seedlings with your fingers can help strengthen their stems by simulating outdoor breezes. By addressing these common seedling issues promptly and proactively, you can set your plants up for success as they continue to grow and thrive.
The table below summarizes some common seedling problems, along with their causes and solutions:
| Problem | Cause | Solution |
| 1. Seedlings Falling Over & Dying | Caused by bacterial blight (damping off). | Use fresh and sterile quality soil or pellets. Clean and disinfect seeding trays and inserts. Remove plastic dome lids after germination and provide proper ventilation. Avoid overwatering. Water from the bottom. |
| 2. Seedlings Turning Yellow, Brown, Or Have Faded Leaves | Synthetic fertilizer burn. Wrong soil (heavy or nutrient-deficient). Sunburn. Overwatering. Rot (if leaves are stuck to the plastic lid). | Switch to natural, organic fertilizers. Use good-quality soil mix. Move seedlings out of direct sun if sunburned. Ensure proper watering and drainage. Remove plastic lid when seedlings are tall enough. |
Monitoring Growth Progress
As your seedlings continue to grow, it is essential to closely monitor their progress to ensure optimal development. Keep an eye on the height of the seedlings, the color of their leaves, and any signs of wilting or yellowing. Regularly measuring the growth of your seedlings can provide valuable insights into their health and vigor.
In addition to visually assessing your seedlings, consider keeping a growth journal to track their development over time. Record important milestones such as when the first true leaves appear, when roots start to emerge from the drainage holes, and when the seedlings are ready for transplanting. By documenting these observations, you can better understand the growth patterns of your seedlings and make informed decisions about their care.
Preparing for Outdoor Planting
When preparing your seedlings for outdoor planting, it is crucial to gradually acclimate them to the outdoor environment. This process, known as hardening off, helps the delicate seedlings adjust to outdoor conditions like temperature fluctuations, wind, and sunlight. Start by placing your seedlings outdoors in a sheltered spot for a few hours each day, gradually increasing the time over a week or two. This gradual introduction will prevent shock and ensure the seedlings are strong and healthy when finally transplanted into the garden.
Before transplanting your seedlings, it’s important to prepare the planting area by clearing weeds, loosening the soil, and amending it with compost or fertilizer if needed. Make sure to space your seedlings according to the plant’s mature size to allow for proper growth and development. Water the seedlings thoroughly before transplanting to minimize stress during the process. By following these steps and giving your seedlings the care and attention they need, you will set them up for success as they transition from the indoor environment to the great outdoors.
Here’s a tabular summary of how to prepare for outdoor planting:
| Step | Action |
| 1 | Clear out rocks and debris from the planting area: Before planting, remove any rocks, sticks, or other debris from the planting area. If you have grass, use a spade to cut the sod into small squares and pry it out. |
| 2 | Loosen the soil to a depth: If this is your first garden, loosen the soil to a depth of at least 8 inches (12 inches is even better). This allows plant roots to penetrate deeper. Use a garden fork or tiller to break up compacted soil. |
| 3 | Add organic matter (compost or aged manure) to improve soil quality and drainage: Compost and aged manure are excellent choices. They not only provide nutrients but also improve drainage and create a more oxygen-rich environment for plants. Spread 2 to 3 inches of compost or aged manure onto the soil surface (no more than 4 inches). For new gardens, work the compost into the soil. For established gardens, leave it on the surface to avoid disturbing the soil structure. |
Celebrating Your Successful Seed Starting Journey
After months of dedicated care and nurturing, your seedlings have flourished into strong, healthy plants ready for the great outdoors. The time has come to reap the rewards of your hard work and celebrate your successful seed starting journey. Take a moment to bask in the satisfaction of watching tiny seeds transform into thriving greenery under your careful guidance.
As you prepare to transition your seedlings outside, reflect on the lessons learned and the growth witnessed during this process. Your commitment to providing ideal growing conditions has paid off, resulting in robust plants that are poised to thrive in their new environment. Embrace this moment of accomplishment and look forward to the continued growth and beauty that awaits in your garden.
To Know More About Seed Starting Indoors, Watch This Video!
Can I reuse the containers I used for starting seeds indoors?
It is not recommended to reuse containers for starting seeds indoors as they may harbor diseases or pests. It’s best to use new containers each time to ensure the health of your seedlings.
How often should I water my seedlings?
Watering frequency will depend on the type of seeds you are growing and the moisture level of the soil. It’s important to keep the soil consistently moist but not waterlogged. A good rule of thumb is to water when the top inch of soil feels dry to the touch.
When should I transplant my seedlings outdoors?
Seedlings should be transplanted outdoors after they have developed a strong root system and have at least two sets of true leaves. This is typically around 4-6 weeks after germination, but it may vary depending on the specific plant.
How can I prevent damping off in my seedlings?
To prevent damping off, make sure to use sterile containers and soil mix, avoid overwatering, and provide good air circulation around the seedlings. You can also sprinkle cinnamon on the soil surface, as it has antifungal properties.
Can I start seeds outdoors instead of indoors?
While starting seeds indoors gives you more control over the growing conditions, you can certainly start seeds outdoors if the weather is warm and consistent. Just make sure to protect the seeds from pests and extreme weather conditions.

